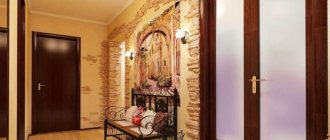
In an effort to make their home beautiful and exclusive, many people decorate the ceiling with their own hands. A boring, smooth, monochromatic ceiling is no longer relevant these days. There are a lot of very interesting ceiling design methods.
Modern methods of decorating the ceiling include:
- ceiling tiles;
- stretch ceiling;
- fabric decoration;
- Styrofoam;
- drywall;
- stucco decor;
- stencil painting;
- photo wallpaper.
By decorating the ceiling with your own hands, you can completely change the design of the room. Ceiling decoration is modern. The apartment becomes more interesting. Sometimes ceilings are decorated independently, without turning to professionals. You need imagination, desire and no serious expenses. The nursery, kitchen, and even the hallway create the mood and give a special charm to your home!
General rules
Choosing the best decor option for a ceiling slab is not as simple a task as it seems. It is quite difficult to develop a design project for a room and combine all the elements together.
Experts recommend avoiding excess and thinking in advance about what to focus on: finishing or lighting.
A ceiling with pictures depicting Disney characters is not suitable for a classic bedroom. Drawings using the Gzhel technique will not fit into the high-tech style. Therefore, you need to take into account the design of the room and clearly imagine the desired result.
The photo of the ceiling decor shows that the principle of color selection applies here. Bright colors are only possible if the walls are in pastel colors. Otherwise the design will be annoying. It is recommended to use a maximum of three colors: the main one, its shade and accent.
It is also important to never forget to correlate the type of construction and the weight of the ceiling decorations. Solid wood panels are not suitable for using vinyl stickers, and with stretched fabric it is not possible to use brass decor.
LEDs
How to create beautiful original lighting in an apartment? Install LEDs in a suspended ceiling! The gentle light emanating from the ceiling devices will add a unique atmosphere to the interior.
- You can also choose spotlights or modern LED strips.
- Another option is to find a niche in the ceiling where you can place lamps.
- However, it is necessary to select reliable and high-quality devices, as well as to install them correctly so that there are no problems in the future.
In addition, you should carefully consider the ceiling idea before installing lighting.
Current ideas
Below we will consider the most current ceiling decor ideas.
Required materials and tools
To install a ceiling molding you need to buy:
- baseboard;
- glue (screws for wooden fillets);
- connecting corner, if you do not plan to cut the corners;
- putty (not needed for smooth walls);
- water-based paint for painting the baguette, if required by the interior design.
Tools and equipment you will need:
- stepladder or strong table (chair);
- miter box for cutting 45o corners at the baseboard;
- cutting tool (construction knife, hacksaw or wood saw);
- construction pencil;
- roulette;
- a hammer drill or electric drill when working with wooden baguettes;
- putty knife.
Coloring
Even an inexperienced craftsman can paint the surface. This is the simplest decor option.
Its advantage is the possibility of additional decoration with stucco elements, stencil painting, vinyl stickers, etc.
Before applying paint, the ceiling should be leveled and primed.
Here are some recommendations:
- A good solution would be to decorate the ceiling tiles in the same pastel shade as the walls.
- For high ceilings, you should choose paints that contrast with the wall decoration.
- For a nursery, you can organize a structure made of plasterboard with figured decor, painted in a tone different from the general background.
- For the bedroom, a soft, calming color scheme is preferred. It is better to refuse patterns.
The nuances of cutting skirting boards depending on the material
The different densities and strengths of the material do not allow the use of the same cutting tool for all occasions. What and how to cut the ceiling plinth in the corners, taking into account the material it is made of?
Knife. It is most convenient to use a construction knife or a sharp kitchen knife to cut foam baseboards, as well as products made of PVC, polystyrene, rubber and flexible polyurethane.
Hacksaw for metal. A cutting tool with a fine tooth, like a metal cutting blade, is used to trim corners on moldings made of plaster, polyvinyl chloride, polystyrene and rigid polyurethane.
Wood saw. You can saw down the corner of a wooden fillet with a fine-toothed wood hacksaw, resulting in an even, burr-free cut.
Saws are used when working with a miter box, where a knife is useless. When using other devices, it is more convenient to cut off the corner of the baguette with a knife.
painting
This decoration method is exclusive. Its peculiarity is the ability to create a unique finish by a person without an art education. The painting will enliven any interior solution. And she can also increase its value.
- Applying the image by hand is quite troublesome.
- First you need to prepare the base and transfer the sketch there, then mix paints on the palette and draw every detail of the drawing.
- First of all, the background is created, and then the key lines are created with brushes.
- Next, small elements are worked out and shadows are formed. After drying, the painting is protected with acrylic varnish.
- To create a painted ceiling, without having experience in drawing, use stencils. They can be purchased at any construction market.
- An adhesive layer placed on the back of the stencil template allows it to be fixed to the ceiling slab.
All the master has to do is take a spray gun and work out the internal contours, and after taking the picture, draw small details manually.
Trimming fillets
Trimming using a miter box
How to evenly trim the corner of a ceiling plinth using it?
A miter box is a simple tool used by carpenters. With its help, you can cut any workpiece at the desired angle.
It is usually a wooden, metal or plastic tray on which special vertical slots are made for cutting at an angle of 45° and 90°.
There are complicated designs, which, in addition to the mentioned angles, also have a hole for making a 60-degree cut.
A special miter box is produced for professional work. Its rotating mechanism allows you to fix the cutting blade in relation to the workpiece at any given angle.
Internal corner
The prepared plinth is applied to the ceiling, and the required length is set aside.
Then this same bar is inserted into the miter box exactly as it will be located on the ceiling. It must be pressed against the far wall of the device. In this position, the plinth is held with your left hand.
The hacksaw blade should be in such a position that its angle is 45 degrees, and the handle is as close to the hand as possible. Trying to avoid pressing on the saw, we carefully cut the workpiece.
Next, you need to cut off the counter strip at the baseboard. It is also placed at the far wall of the instrument, held and pressed, this time with the right hand.
The position of the hacksaw is similar to the previous procedure - its handle approaches the hand at an angle of 45 degrees. The baseboard is cut.
Then the finished, already cut planks are joined - the accuracy of the fit is checked. It is believed that for better orientation, when making an internal corner, it is better to start cutting from the front part of the product. The cut locations usually have to be adjusted with a file.
External corner
The most correct thing to do, in order to keep the dimensions more accurately, is to first start marking the inner corner, and only after that move on to the outer one.
Otherwise, it may happen that the entire length of the bar is not enough.
The plank is applied to the ceiling, and marks are made according to the size. Holding with your left hand, the ceiling plinth is pressed against the nearest wall, the handle of the hacksaw moves closer to your hand. The workpiece is cut.
The strike plate is pressed against the nearest wall, while it is held with the right hand. The hacksaw blade should be at an angle of 45°, the handle of the tool should be close to the hand of the master. A piece of the workpiece is cut off, the corner is neatly joined.
This type of edge processing of parts using wort is good in cases where the angle between the walls is even and straight (90°).
If its performance leaves much to be desired, then it is worth using a different method.
How to cut a ceiling plinth without a miter box?
Markings on the ceiling
The method with markings on the ceiling allows you to cut the corner accurately and evenly. It has one drawback - the plinth strip is quite inconvenient to hold in weight during the procedure.
In all other respects, using this method you will be able to mark the angle for cutting even more accurately than others.
When the plinth is applied to the intended installation location, all dimensional deviations and inaccuracies are noticeable and immediately taken into account.
Corner cutting
First you need to take a couple of blanks, then cut them at a right angle. Pressing the end of the plank against the perpendicular wall, we apply one plank. We draw a line on the ceiling along the contour of the plinth. We remove the first plank, then, in the same way, resting the end against the wall, we apply a counter plank. We mark a line along the contour in the same way.
The point where the two separate lines intersect is the mark at which the workpiece is cut. Each strip is applied to the surface again, and the point of the future cut is marked on both. From the found point to the other edge of the plinth strip, draw a line. We cut the skirting boards according to the previously made outlines, carefully join them, and place them in the place where they will be installed.
This method allows you to more accurately process internal corners.
How to make a miter box template with your own hands
If you don't have a miter box, you don't have to buy a tool for one-time use. You can make a template with similar functions yourself.
To do this, the required cut angles are applied to wood, paper or cardboard.
Then you need to draw a pair of parallel lines, find the center, and then use a protractor to measure angles of any given size.
This method is especially convenient because, using it, you can set an angle of any size, even larger than a straight line.
The method of processing a plinth blank using a homemade tool is practically no different from working with the original. The plank is pressed against one of the parallels, after which the hacksaw is set at the required angle and cut off.
Remember that before cutting the corners of the workpiece, be sure to check the size of the angle between the walls! To do this, use a protractor and a corner.
Wallpaper
You should plan to decorate the ceiling with wallpaper if you want to get a colorful pattern or patterns over its entire area. To create a monochromatic surface, paint is preferable.
Also, designers do not recommend using textured wallpaper: Venetian plaster is better suited for implementing such a design solution.
Today, the fashion trend is wallpaper with photo printing. They allow you to create an exclusive design.
A wide range of colors, high quality printing, and ease of installation explain the incredible popularity of this finishing method. Photo wallpapers are used primarily in children's decor.
Decorating with fabric
Fabric is an environmentally friendly material. This material is safe and very versatile, able to resist bacteria and mold. The feeling of the size of the home will change the decor with fabric and will definitely make the room unusual. You can use any modern fabric - everything will do! Any texture, color and density of the material will be used. You can decorate a nursery especially fabulously by creating the sky and clouds on the ceiling or the illusion of a hot air balloon. It all depends on what effect you want to get and what your capabilities are.
Related article: Various DIY home decor (+41 photos)
Polyurethane stucco molding
An equally popular solution is polyurethane stucco for ceiling decoration. In the list of design services, such finishing work takes pride of place.
This is explained by the fact that, if necessary, you can quickly restore or replace the damaged part of the composition.
In addition, using fragments of moldings, it is easy to mask defects in the ceiling covering. The visual aesthetics of this type of decorative finish also plays an important role.
Unlike traditional gypsum stucco, polyurethane products are lightweight. This greatly facilitates their fastening: the decoration parts are mounted on the adhesive mixture.
Moldings and rosettes made of polyurethane bend well and are able to take the shape of curved structures. They are not afraid of high humidity, they tolerate painting well.
As a rule, they are used when it is necessary to close the joint between the ceiling and the wall to give the room a clear configuration.
Simple smooth moldings are appropriate to use when decorating in a classic style. Patterned details fit perfectly into styles such as Provence and Art Nouveau. Polyurethane stucco is also suitable for high-tech.
Concrete options
A modern concrete ceiling looks unfinished, but at the same time gives an impression of elegance, stability and nobility.
This finish looks good in houses whose arrangement does not include many additions.
- They do not have to be decorated in a loft style; only a certain color restraint is required.
- It is also good for the floor to have the same level of shine as the ceiling.
Bamboo decorations
A ceiling covered with bamboo wallpaper is the choice of people who value originality in the interior. This is ideal if the room is furnished in an Asian or Egyptian style.
The material is distinguished by its textured appeal and recognizable color palette.
Until recently, bamboo decorations were used in the design of hotels and office buildings. Today they are used to decorate residential apartments.
Stores sell ready-made wicker bamboo modules that can be used to cover the ceiling completely or partially, combining, for example, with plasterboard sheets.
- You can also use individual bamboo stems. They need to be broken in half and attached with PVA glue.
The decor of suspended ceilings and suspended structures is always exclusive in design. When independently carrying out this kind of repair and decorative work, it is important to take into account your own skills and knowledge.
Don't aim at something you can't handle. It is better to start small and only after gaining experience, take on complex projects.
Using photo wallpaper
Ceilings can also be decorated with photo wallpaper. Modern photo wallpapers come in a very wide variety. They are very bright, most importantly, high quality and easy to install. They can be used in different rooms. If you want to decorate the ceiling with an individual design, you can place an order at specialized companies. You can also arrange a fairy tale in a nursery or relaxation room, guided by the child’s wishes.
Related article: Useful tips for decorating a niche in the wall
Photo of ceiling decor
Briefly about the main thing.
Ceiling plinth is an important element of finishing the ceiling surface, which simultaneously plays a decorative role and masks visible defects in the interface between the floor slab and the vertical structures of the room. This element is made of polystyrene foam, PVC, wood or gypsum. When cutting, you will need a special portable bench - a miter box, or a cross-cutting machine. In the absence of such a tool, a miter box template with diagonals at 45 degrees can be drawn on paper.
Design secrets
When choosing a ceiling finishing option, you should always focus on proven techniques, which will become especially fashionable in the coming season.
Expert opinion
- Light neutral shades on the ceiling will visually make the room appear larger and taller. If you want to add bright accents, it is recommended to focus them on a small area, which will not allow you to overload the room with unnecessary color details.
- The glossy surface, which diffuses light well, creates the amazing effect of endless three-dimensional space.
- If you decide to make them on a plasterboard frame in a room with high ceilings, it is recommended to place LED strips around the perimeter. Their flickering creates the illusion of increasing the overall volume of the room.
The completeness of the overall style of any room will depend on how fashionable and beautiful the ceiling design looks. If you decide to make your ceiling plan extraordinary, bright, modern and fashionable, you should think through all the decorative elements down to the smallest detail.
Decorative plaster
In fact, it is ordinary plaster, but with a designer texture and texture. The plaster can have an original relief that stands out on the main plane of the ceiling. Special combs and rollers are used for production.
Making such plaster is quite difficult; not only experience and skills are important here, but also artistic abilities. Decorative plaster can be painted and processed mechanically.
Cloudy sky simulation
Quite an original decoration of the ceiling, the implementation of which will require paints and a simple sponge. Given the laboriousness of the process, ceilings in small rooms are most often decorated in this way. To do this, you will need to purchase a certain list of paints of various types and colors, but the final result is worth it.
The starting point for decorating the ceiling is its central zone. If the persistence to create a cloudy ceiling over the entire surface is not enough, the finished part is framed in a circle in the middle of the room. This makes it possible to get an imitation of a round porthole with a view of the sky. There is also an option with the image of white clouds on only one section of the ceiling: the rest of the area is allocated to a clear blue sky.
Before starting work, purchase the following materials and tools:
- A set of brushes, a roller and a container for preparing paints.
- A set of paints: matte acrylic glaze, aquamarine and gray acrylic paint, white water-based emulsion, matte emulsion paint (the latter material is the base material and is purchased for the entire ceiling area).
Operating procedure:
- Preparing the base. The ceiling is cleaned of the old finish, primed and leveled. After sanding, it is coated with light blue paint using a roller.
- An aqueous solution of white paint is prepared: the components are mixed in a 1:1 ratio. To recreate the outlines of the clouds, use a sponge or brush. Application is carried out with careful, controlled movements. The outlines of the clouds are enhanced by white paint: this will make the figures more dense.
- Using gentle, free movements of the sponge, paint different areas with aquamarine paint. This will create the effect of the white showing through.
- Using a sponge, apply a little more white paint to the clouds: this will make them thicker and more saturated. To achieve depth of perception, it is recommended to lay the paint in several layers, pausing for them to dry.
- Using light movements, they enhance the imitation of one side of the clouds being illuminated by the sun. The reverse side of the clouds is made gray.
- When applying subsequent layers of paint, it is necessary to ensure their transparency: it is important that the previous images are clearly visible.
- The edges of the clouds are once again outlined with white paint. Acrylic glaze is used as a general coating.
This option for decorating the ceiling allows you to get a nice room decor.
Let's sum it up
As you can see, there are many materials to use, each of which has its own pros and cons.
| Material | pros | Minuses |
| textile | environmental friendliness, ease of use, unusual decor | difficulty in care |
| Styrofoam | low cost, ease of use and maintenance, thermal insulation | not environmentally friendly, turns yellow over time, poorly resistant to moisture |
| drywall | easy to use and maintain, waterproof, provides ample opportunities for creativity | expensive, not environmentally friendly |
| stucco molding (polyurethane) | easy to use, does not require special care | may change color over time (but lasts longer than foam |
| dye | low cost, large field of use, combines well with other raw materials | may cause an allergic reaction, the pattern fades over time and requires updating |
| tree | natural base, creates an ecological background in the room | high cost, requires special care |
Ceiling design option
Ceiling decor
Ceiling decoration is an art. A wide variety of materials and ideas makes it possible to make the most of your imagination and decorate the ceiling yourself, or get the room of your dreams with the help of specialists.
See alsoThe design of the ceiling in the hall is crucial
Applications
Also the most relevant solution for a child’s room, but also suitable for other rooms, for example, a bedroom. There are a lot of different stickers on sale. Applications not only stylize the ceiling, but also cover its imperfections, such as dirt and scuffs.
You can also make homemade applications from plasterboard or vinyl. The stickers leave virtually no traces on the ceiling, so they can be removed or replaced with others if necessary. In addition, children can be involved in the process of creating and gluing applications.
Family vacation: how to choose a resort for a trip with children?- How not to lose money when selling an apartment?
- Bathroom curtains: review of popular models and new designs
