Photo: grandisconti.ru Photographs are the guardians of the most valuable moments in life, so they often decorate our homes, evoking pleasant memories. How much more attractive will a photo look if you put it in an original frame made by yourself! Today we will tell you 14 ways to make a photo frame with your own hands, which will become a real interior decoration or a unique creative gift.
From cardboard
Anyone can make such a fake, even a child.
Action plan:
- Cut 2 rectangles, in one of which make a rectangular hole in the center. Its size will be smaller than the photo size.
- Attach the sides and bottom sides of the resulting elements together with glue.
- Cut out a support leg from thick paper and glue it to the back of the photo frame.
- If you plan to hang it on the wall, then you need to secure a loop of rope.
- All that remains is to insert the photo into the upper unglued part of the homemade frame.
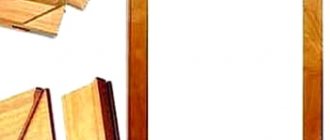
Wooden half frame
Another option for making a photo frame using wood. Such a product can fit into more modern designs, and its manufacture does not require special skills. It is enough to follow all the rules and recommendations.
Tools and materials
To create a half frame, prepare the following:
- photo in the size you choose;
- two light wooden strips;
- a piece of fabric;
- natural rope;
- special eye screws large enough to pull the rope through;
- some polymer clay;
- stapler;
- universal glue;
- scissors;
- pencil and knife.
Making a wooden half frame
You also need to prepare a ruler or other measuring instrument. Once everything is ready, you can start working.
Instructions
Step 1 . Set the recommended temperature to preheat your oven to make polymer clay. Then, using a knife, cut the clay into two even pieces. Roll them in your palms to form smooth balls. Use a pencil to make a hole. The diameter of the hole should be slightly larger than the thickness of the rope. Place the finished clay on a baking sheet and bake for a few minutes until the material hardens.
A hole is made in the ball
Step 2 . While the clay is baking, use a cloth to rub the varnish or stain into the wood, giving it a deeper shade. Don't forget to add old sheets of paper to avoid damaging your home surface. Leave the wood until completely dry.
The wood is given a deeper shade
Step 3 . Take one of the wooden strips and, measuring about 3 cm from both ends, make marks with a pencil.
A wooden strip is marked
Step 4 . Screw both eye screws into these points until they are tight.
The eye screws are tightened
Step 5 . Place the top of the photo or painting face down on the top strip of wood (with screws). This will be the back of the picture. Carefully align the paper so that it is centered and straight. Then secure the canvas with a stapler and glue.
The paper is neatly aligned
Step 6 . Place both clay balls onto the rope and thread the end of the rope through one of the eye screws. Tie a tight knot and then do the same on the other side. Remove any excess rope and use all-purpose glue to secure the edges. This will protect the clay balls from wearing out and the knot from coming undone.
The edges of the nodes are fixed with universal glue
Step 7 . Now all that's left is to hang your new wall art in a place of honor.
The finished frame is hung on the wall Photo of the half frame
Another photo of the craft
From the branches
This is the most budget-friendly way to decorate an old frame with your own hands. The material for its creation can be easily collected by simply leaving the house.
In addition to thin branches you will need:
- cardboard;
- glue;
- varnish;
- decorative elements (flowers, beads, ribbons).
We make a beautiful frame at home using the following procedure:
- Cut out a rectangular base from dark cardboard.
- Clean the twigs, removing excess bark, and cut them to fit the sides of the frame to the same length.
- Secure the branches by intertwining their ends in the corners.
- All that remains is to glue the decor and open the photo frame with decorative varnish.
Vintage photo frame at home
For lovers of classic interiors, we recommend making an original vintage frame with your own hands. It will perfectly complement the design of the room and become a stylish decoration.
We will prepare the following materials:
- cardboard rectangle;
- PVA glue;
- ruler;
- thick cardboard;
- pencil;
- tea bags;
- lace ribbon;
- toothpicks;
- a small piece of gauze.
Of course, you can use a ready-made frame and decorate it at your own discretion. But we still suggest making it yourself using cardboard blanks. The result should be a frame like the one in the photo.
We will use roses made from tea bags as decoration.
Keep in mind that if you use black tea bags, the roses will have a brown color. In turn, hibiscus tea bags will give a pink tint.
To make these roses, take an already used bag and cut it. We take out all the tea leaves and divide the bag into strips, as in the photo.
After all the blanks have dried, we begin to create roses. We take one of them and carefully bend the tip.
Gradually twist the rose, holding the base.
We wrap each flower in gauze colored with tea leaves. We prepare the required number of buds.
Glue the blanks to the frame using simple PVA glue. If desired, you can use other additional decor in a vintage style.
From shells
Seashells can be found in every family's arsenal. Now you can find a use for them too, namely to make a beautiful photo frame in a marine style out of them. And if you are looking for a way to decorate an old frame with your own hands, then shells will come in handy.
As a base, you can take a regular frame made of wood or plastic. You need to select whole shells, wash them thoroughly, dry them and stick them in any order. At the end of the work, open the fake with varnish.
Photo gallery
Making a photo frame with your own hands is an interesting creative process that allows you to make a real masterpiece from simple materials. Don't forget to check out our photo gallery! Here you will find even more interesting ideas that you can safely experiment with using different decorating methods.
Photo: mebel-v-nsk.ru Photo: culture.ru Photo: livemaster.ru
Photo: dk-ritm.ru Photo: skolkogramm.ru Photo: plusto.ru
Photo: koffkindom.ru Photo: azbukaplavania.ru
Photo: azbukaplavania.ru Photo: clevercamp.ru Photo: dmitryk.ru
Photo: severdv.ru Photo: in.pinterest.com
Photo: pinterest.ru Photo: eldomo.ru Photo: pinterest.co.uk Photo: culture.ru Photo: dompodelok.ru Photo: km-toys.ru Photo: domhauz.ru
Photo: pinterest.ru Photo: shh.cso52.ru Photo: eldomo.ru
Photo: mikrobleyding-msk.ru Photo: decor-decoupage.do.am Photo: furnilux.ru Photo: deco-magic.ru
Photo: skolkogramm.ru
Photo: hostboard.ru Photo: liveinternet.ru
Made from denim
If you want a beautiful DIY frame option, you'll have to say goodbye to your old jeans.
To create this masterpiece you will need the following materials:
- denim ribbons;
- glue;
- thick sheet of paper.
Note!
- DIY furniture decor - 145 photos of exclusive and modern design ideas
- DIY pot decor step by step: simple decorations and decor options for pots made from different materials
Process of creation:
- Draw the outlines of the future photo frame on cardboard and cut it out.
- Indicate the location of the photo.
- Apply glue to one side of the denim ribbons and twist them. The number of such parts will depend on the size of the frame.
- Cover the future fake with them, and after complete drying, carefully trim the bottoms of the outer elements from the back side.
Volumetric photo frame on the wall
Necessary materials:
- wooden frame;
- hammer;
- saw;
- sandpaper;
- nails;
- wood glue;
- angle brackets;
- spray paint;
- wooden piece.
Based on the size of the frame itself, we cut four pieces of wood, as in the photo.
We connect the blanks together with nails into a box. We treat the surface with sandpaper. Spray paint each side and leave until dry.
Apply a thin layer of glue to the box and place the frame on top. Leave the structure for an hour until it dries.
For greater reliability, you can connect the parts using angle brackets.
Install the frame on the wall. You can put various figurines, printed photos and much more in it.
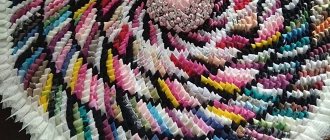
From yarn
A photo of a homemade yarn frame is best suited for a family or child.
Necessary materials:
- knitting threads of different shades – 80 g;
- 2 cardboard bases;
- decor: beads, buttons, artificial flowers.
Procedure:
- Wrap one and the other base tightly with yarn, make 2 passes each so that there are no voids.
- Cover the photo with two frames and go through the threads again so that the photo does not fall out.
- During the winding process, you can decorate the product by stringing beads and buttons on threads. The finished product can be decorated with artificial flowers.
Collages - an effective solution for a modern interior
Collages, along with paintings from several parts, are a good alternative to conventional photo frames, which, as a rule, use one photo. To make it you will need a sheet of plywood and a jigsaw. The main advantage of creating such large improvised photo frames is the ability to place several dozen photographs, arranged in a given order, in a small area. You can select one central one, for example, with a larger area, and stick small pictures around the perimeter. Here your imagination is not limited in any way: both a collage on a free theme and a narrow thematic concept dedicated, for example, to one family member are allowed. Look how beautiful such products look in the interior - fresh, modern, inventive.
From the test
A durable and original photo frame can be made from puff pastry.
Materials:
- flour – 1 glass;
- water – 100 ml;
- food coloring;
- sunflower oil – 50 ml.
Procedure:
- Knead the dough from the above ingredients.
- Leave it for 2 hours.
- Make a frame and place it in a preheated oven, bake for 2 hours, turning over from time to time.
- At the end, the product can be cut out with paints after cooling, and at the end it can be opened with varnish.
Decorating with wallpaper or paper
It will look no less impressive if you cover the frame with beautiful wallpaper, self-adhesive tape, or newspaper clippings or comics. Here it is important to take a little more material so that when appliqueing, the protruding edges are folded onto the back side of the frame, which will then be hidden by the back.
Also, do not use glue that is too liquid, because... Paper materials are easily soaked and the result will be messy. Even a simple glue stick will do.
Place a sheet of wallpaper or self-adhesive under the frame and make cuts at the corners so that the paper does not wrinkle when folded. This is the simplest way, but you can achieve a very stylish effect without going overboard with the decor.
You can also cover the frame with fabric, gluing the edges to the back side; if you add a little cotton wool or padding polyester, you will get a cushion frame. It will be possible to decorate with several buttons or seams.
From the window frame
Using a regular old window frame, you can create an original panel in the shabby chic style. Moreover, a frame with old paint and chips will do. They will become the “highlight” of the future masterpiece.
Process of creation:
- Disassemble the frame, install one large picture or several small ones (it all depends on the number of windows).
- Glue the photo onto cardboard in advance. Black and white photos will look best.
- Assemble the finished product and place it on the shelf.
Stand
This is not a frame in the classical sense. It's more of a stand where you can display your photos. You will need rectangular plywood, a few nails, dark thread and wooden clamps.
You need to attach a hook to the back of the plywood so that it can stay on the wall. It is necessary to drive small nails into the plywood itself on both sides, but not completely, at the same distance from each other.
When the nails are driven in, you need to stretch the thread between them. Here, as anyone wants, they pull it. Some people just make classic crosshairs, others try to make patterns, it all depends on their imagination.
The wooden clip is needed just for the photographs themselves. When placing a photograph on such a stand, it must be attached to one of the stretched threads between the nails. It looks quite unusual and beautiful.
From cereals
In addition to cereals, the frame can be decorated with coffee beans.
Materials:
- thick cardboard;
- colored paper;
- glue;
- paints;
- any cereal.
Procedure:
- Prepare a cardboard base and cover it with colored paper.
- Coat the frame with glue (the layer should be thick) and sprinkle cereal on top.
- In order for the composition to last longer, it must be coated with decorative varnish.
From clothespins
Using this method, you can get a fun sun frame where the pictures will be arranged in a circle.
Procedure:
- Form a circle from thick paper and cut out the core.
- Secure the clothespins with glue along the entire length of the circle so that the opening side of each of them is directed upward.
- It is best to use clothespins of different shades to make the fake colorful and original.
From children's hairpins
If there are girls in the family, then you probably have collected a considerable amount of decorative hairpins and elastic bands. Most often they are decorated with various flowers, twigs, and berries. You can safely cut them off from the elastic bands and paste them over the entire frame in a circle.
Alternatively, you can attach the decor only to the upper part of the product, leaving the lower part untouched. If the flowers are white, then the part of the frame free from decor can be coated with silver paint.
From books and newspapers
To create another masterpiece of handicraft, you need the same base of cardboard or wood, as well as old newspapers, books or glossy magazines. All you need to do is just cover the newspaper into pieces of different sizes and then cover the frame with them. You can make a whole pattern using a large geographical map.
All the ideas presented for what you can make a frame from are simple and budget-friendly. You just need to show a little imagination to get a bright, stylish and original fake that serves not only a decorative role. After all, photographs are a memory of happy days and important events.
How to decide on the design and size of a picture frame
What determines product design? The interior surrounding it. It’s not enough to just want to see a blue ornate frame on a picture in a room with a classic interior - so we focus strictly on the style of the room.
Classic frames make your home cozier
Frame width plays a big role in perception
We don’t forget that no matter how beautiful the frame is, the main thing will be the picture, so when choosing a design we remember the goal: to decorate and complement
The size of the canvas and the image itself will tell you which sizes are preferable. Agree, if the canvas is small and the frame takes up half the wall, this indicates problems with the person’s taste.