SHARE ON SOCIAL NETWORKS
FacebookTwitterOkGoogle+PinterestVk
The bathroom is a special room, which is small in size and replete with an abundance of accessories for daily use. Therefore, furniture elements must be selected with special attention. They must provide competent organization of space, convenient storage of personal hygiene products, household chemicals, textiles and fit organically into the interior. Bathroom shelves can cope with this task.
The presence of shelves in the bathroom makes the room more functional and convenient.
Tile bathroom shelves: pros, cons and design options
As in any room, there are many things in the bathroom that need to be arranged so that they can be used at any time.
But often it is the question of what to use to store things that causes difficulty. A more common option is shelves. Today there are many types of this furniture, so it becomes difficult to choose. Most often, shelves are made of plastic, wood, and metal. But metal and wooden furniture in the bathroom are in rather difficult conditions: high humidity is contraindicated for them. Therefore, recently, tile shelves have become increasingly popular here. Let's consider their features, pros and cons.
Plastic product
Recently, plastic shelves for the bathroom have become very popular. It has a number of advantages:
- sufficient structural strength allows you to place the necessary things;
- excellent aesthetic appearance complements any bathroom interior;
- The low cost of the product makes it even more attractive.
Plastic products are made in a wide variety of design solutions. They have a wide range of colors.
Main functions
A bathroom shelf should be ergonomic, easy to use and safe. Such products can improve the appearance of the room. They help arrange things conveniently and reduce the likelihood of accidentally dropping containers, cosmetics and personal hygiene items.
Additionally, free space in the room is freed up. If you place all the small items and things on the shelves, you will have space that you can use as you wish.
Corner stand
In order to use free space most efficiently, corner furniture is installed where other interior items cannot be placed.
The corner shelf allows you to place soap, shampoos, and washcloths above the bathtub. The bottom of such products is most often perforated to allow water to drain.
The shelf is attached to the side walls and can be mounted on a special rack.
General requirements for bathroom shelves
The bathroom has two features that complicate the choice of furniture items: limited area, difficult operating conditions. These factors are taken into account when selecting products. When choosing a shelf for the bathroom, you need to pay attention to:
- compactness;
- practicality;
- resistance to external influences;
- matching the interior style.
Compact dimensions are important not only for a small room. Bulky furniture can also look unprofitable in a spacious bathroom. Maximum practicality is ensured by a thoughtful design. A good option are laconic models with optimal shelf depth. If the shelf is intended to accommodate small items, bottles, vials, it must have sides to prevent objects from falling.
Bathroom shelves should match the style of the interior
Even with good ventilation, the room will often create high humidity and temperature. To keep the room clean, you have to clean it using household chemicals. The materials from which the shelf is made must be reliably protected from adverse influences.
Features of the material
Today it is possible to produce products of any color. Plastic products are resistant to humidity and temperature changes.
The negative side is the low service life. Plastic is not easy to fit into an elegant interior.
The advantage of a plastic bathroom shelf is its practicality, compactness, weight, and ease of use.
The corner shelf for the bathroom is not original in its design and construction, and it is difficult to fit it into an elegant bathroom.
- Pond film
- Materials for ceilings in bathrooms
- Ways to make money on telegram
The main positive quality is that you don’t need to create an expensive designer furniture project.
Bathroom shelf designs
The fundamental criterion for choosing a shelf for a bathroom is its purpose. This furniture can be used to store various things:
- towels;
- hygiene products;
- household chemicals;
- cosmetic products, etc.
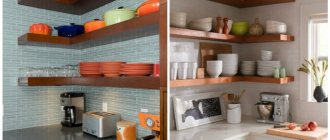
The optimal design of furniture allows you to perfectly fulfill its purpose. If hygiene items will be stored on the shelf, a convenient option is a compact open model that can be placed next to the sink or bathtub.
Open shelves for hygiene products next to the sink
The range includes combined designs that are perfect for decorating small spaces. Many consumers buy a mirror with shelves for the bathroom. The design allows you to place shaving accessories, dental care products, and toilet soap. This provides convenience in carrying out daily procedures.
It is advisable to store household chemicals in locked cabinets, especially if there are small children in the house. You can install a floor cabinet, build an appropriate structure under the sink, and use the capabilities of the screen. Many homeowners install shelves under the bathroom with their own hands. This area is usually useless. The arrangement of the storage facility allows for rational use of this area.
Shelves under the bathroom for household chemicals
In a small room, a combined design can be used, including shelves and towel racks. These models take up little space and make it possible to conveniently place everyday items.
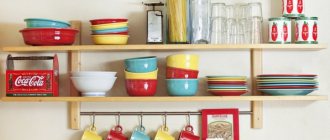
Open shelves are very popular. This design will be an excellent option if you need a shelf for towels in the bathroom, you need to provide convenient placement of cosmetic products. You can install a shelving unit in a spacious room.
The open shelf is convenient for placing towels
Design Features
There are various photos of bathroom shelves. They have their own design features:
- can be made in the form of a set of hanging shelves attached to the wall;
- have the appearance of a hanging cabinet, it is possible to use glass doors;
- are made in the form of an ordinary cabinet, equipped with several shelves and drawers;
- cabinets made in the form of trolleys, equipped with small wheels, allow you to bring the structure closer to you if necessary.
There are quite a lot of similar features. All of them are distinguished by their simplicity and ease of use.
What does the shelf consist of?
Installing a tile shelf is a massive undertaking. Therefore, it is worth thinking about it in advance, even before renovation. But, of course, if you really want to, then such a ceramic product can be built in the bathroom at any other time.
This shelf consists of a base covered with tiles. Most often, the base is a waterproof plasterboard sheet (GKL), which you can recognize by its color – green. You can use moisture-resistant chipboard, as well as ordinary wooden blocks.
There is another more complex method - creating a base from concrete or plaster.
Having familiarized ourselves with the design, let's look at the main types of tiled shelves.
- Built-in shelves are those that are formed in a pre-existing or specially constructed niche. A more global structure that is part of the bathroom.
- Wall-mounted shelves are shelves that take less time to install, but are less strong compared to built-in ones. Usually installed on a metal structure.
- Corner shelves - usually mounted in the corner on two walls. They are much easier to install and also do not take up much space.
Materials for making bathroom shelves
Modern manufacturers have a large selection of materials for making this furniture. The following are used to create structures:
- polymers,
- glass,
- metal,
- natural wood,
- MDF boards,
- drywall.
Bathroom floor shelf made of natural wood
Each material has certain advantages and disadvantages. These factors need to be taken into account when choosing furniture for your bathroom.
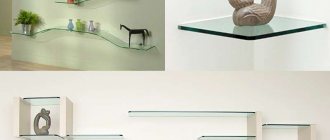
Glass bath shelf
This bathroom shelf is fragile, although products made from durable glass are made for installation in this room. It requires careful maintenance, as limescale deposits will be clearly visible during operation.
The advantages of such structures include attractiveness and the ability to visually increase space. In addition, this material is combined with metal and wood. The design of the shelves may be unusual.
It is characterized by lightness, wear resistance, moisture resistance and ease of maintenance. Thanks to such a property as fusibility, it becomes possible to create products of various configurations.
For a bathroom, this option is the most preferable, because it is safe to use and resists moisture, thereby extending the service life of the structure.
However, plastic shelves are not always attractive. In addition, it is advisable to purchase products with small holes so that water does not stagnate on the surface.
Plastic shelf
Design options:
- corner plastic shelf;
- rectangular.
Wooden
The disadvantage of the material is its instability to moisture. Wood is characterized by hygroscopicity; upon contact with water, it expands and deforms, and after the moisture evaporates, the original shape is restored, but the quality of the product deteriorates. As a result, the service life of the shelf is reduced. There are different types of products:
- wooden corner shelf;
- rectangular.
Wooden shelf
When caring for wood, do not use aggressive detergents. To obtain a structure with a long service life, it is recommended to consider models made of moisture-resistant species (oak, beech, larch). They must be varnished.
Metal
Such products are used for a long period. However, for this they need to be protected with paints and varnishes. In terms of attractiveness, these shelves can be compared to glass or wood.
Stylistic design of classic and corner shelves in the bathroom
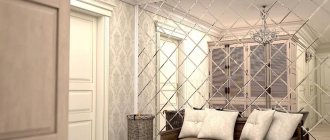
The shelf should not only provide convenient storage of accessories, but also fit harmoniously into the overall style of the room. Each interior has certain features that should be reflected in the furniture elements. For bathrooms in a classic style, you should choose laconic storage systems made of natural wood, glass or stone. Tiled bathroom shelves look appropriate. They can be complemented with carved and forged elements, gilded fittings and stands. Rectangular, trapezoidal and square designs fit perfectly into classic interiors.
For a modern design, bathroom shelves can be made of different materials. For a high-tech style, preference should be given to multi-tiered structures and shelving made of metal, combined products using chrome and glass surfaces. For minimalism, shelves made of MDF and glass of simple geometric shapes are suitable. Glass structures will organically fit into Art Nouveau style rooms.
For romantic trends, such as country or Provence, the best option would be oversized glass or wooden shelves in oval, semicircular or round configurations. In rooms decorated in an oriental theme, built-in shelves in a niche in a bathroom made of tiles or mosaics will look most organic.
Beautiful wrought iron shelf with mirror and towel holder
What are the types of bathroom shelves based on location and installation method?
According to the location and method of installation, shelves are divided into the following types:
- Mounted
Neat shelves for a bathroom in a Scandinavian style
Wall-mounted shelves are the most popular option, as this includes shelves made of any materials and installed at the top of the walls. This is an excellent replacement for mezzanines and wall cabinets.
If you have a spacious bathroom, wall shelves can be installed anywhere. If the room is oversized, explore places where the walls are already partially occupied - above the washbasin, door or cistern.
Types of shelves by placement
A glass shelf for the bathroom is a universal organizer. It can be placed anywhere: in a corner, under a mirror, just on the wall. This allows you to make the space more functional. In addition, daily use items will always be at hand.
A rich assortment allows you to choose the ideal option, taking into account the design of the room, size, placement option and personal taste preferences.
Depending on the location, the following types of shelves are distinguished.
Corner
Corners are a place that can't always be used. However, with the help of a special shelf you can turn them into a practical place for storing bath accessories. Thanks to its shape and size, it does not overload the space.
Glass plates must be attached to the wall in at least 4 places and be in a metal frame.
When choosing a corner glass shelf for a bathroom of any design, you should pay attention to its thickness. It must be at least 7 mm. This will make it more durable. The overall size may vary.
Mounted
This type of shelf can be mounted directly on the wall or using a metal structure. They serve as mezzanines: personal hygiene products, towels, and bathrobes are stored on them.
Wall mounted shelves can be located anywhere in the bathtub and at any height.
Under the mirror
This shelf is an indispensable part of the bathroom. Due to its location, it is considered the “most popular”. It stores small items and accessories that are used most frequently.
Products made from high-quality and wear-resistant glass will last for decades, maintaining practicality and elegance.
Note! The glass shelf for any type of mirror in the bathroom is not wide, but quite spacious. However, you should not overload it with a large number of items. This not only looks unsightly, but can also damage the glass plate.
An original solution would be to place such a shelf not under, but on the mirror itself.
Types of tile shelves
A tile bathtub shelf is a functional, but primarily design solution for the bathroom, which primarily serves the purpose of decoration. In order to begin installing the shelf, you need to decide on its type.
An independent element that is attached to the wall. This option really looks like a classic shelf that sticks out from the wall. At the same time, the shape and its size are an individual matter. Often this type can take up a lot of space, so it is not recommended for small rooms. There are corner and hinged ones. The shelf is not suitable for storing a large number of things, because... it may fall under its own weight;
Niche. This model is a shelf recessed into the wall. The shelf looks impressive and practical. You can store a lot of things in it, because... she definitely won't fail. However, this design takes up a lot of space. Recommended as a stylistic solution in a situation where there is empty space between the bathroom and the walls; Unusual shaped design. Such models are not similar to ordinary shelves, although they perform the same functions. You can create a figure from plasterboard and adapt it to store bath accessories. This option will be the highlight of the renovation. See also: Catalog of companies that specialize in finishing materials and related work
What to consider
It is better to stick the tiles using special adhesives designed specifically for wet rooms. If you use standard glue, there is a very high risk that everything glued will soon fall off. In this regard, the savings are not justified - cheap adhesive mixtures may turn out to be counterfeit and everything will have to be redone, therefore, glue is needed that is proven and not the cheapest.
You can decorate the shelves not only with tiles that have already been used to decorate the bathroom. Combinations of tiles of different sizes look good - you can create a kind of mosaic or simply choose tiles of a different size for your design.
Despite the fact that the size of the tiles can be any, the color scheme should be selected based on the general design idea. All surfaces, including niches and shelves, should match each other well in color. The rest is left to your choice - the appearance of the structure can be very different - from complex multi-storey niches with openings of complex shapes, to simple rectangular tabletops.
Advantages and disadvantages of tile shelves
Shelves made of tiles have many advantages compared to shelves made of other materials:
- Visual component. Such shelves are not banal and can be a decorative element. The niches are decorated with the same tiles as the walls of the bathroom. Wall-mounted models can be finished with tiles of a different color, which will match the design of the bathroom. This interior design option is much more modern than standard glass shelves;
- Wear resistance. Ceramic tiles themselves are a durable and resistant material that is ready for constant exposure to water. If handled properly, the shelf will last for many years;
- Minimal care. The tile does not require a special type of cleaning. All you need to do is use a bathroom cleaner and a damp duster.
Shapes and sizes
The choice of design depends on the space allocated for it: in small bathrooms, corners are usually left free, so a single or double corner shelf will fit into any space. It can be either round (softening the situation) or triangular in shape.
Based on capacity, shelves are divided into two-tier and multi-tier. The former take up little space in the room, can be suspended and are attached to self-tapping screws or suction cups. Cannot withstand high loads.
Multi-tiered ones, on the contrary, require more free space in the bathroom, but they are reliable, functional designs: they can easily accommodate not only bottles and shampoos, but also towels.
The photo shows a bathroom with a low but spacious openwork shelf on the side of the washbasin.
Design ideas
Sometimes a bathroom shelf becomes a real interior decoration. Niches decorated with mosaics look very elegant and picturesque. If the bathroom is designed in a high-tech style, shelves with built-in lighting are ideal.
The photo shows a beautifully decorated niche made of golden decorative mosaic.
Marble-effect shelves in the bathroom look expensive and elegant, and wrought-iron lattice designs give the decor a special character. Hanging products with a rope base attached to the ceiling, as well as shelves in the form of stairs, look original and distinctive.
The photo shows open shelves located on the side of the bathtub. By changing the content, you can add color accents and transform the appearance of the room.
Photos of bathrooms in various styles
Some models of shelves are universal and suitable for any style, for example, straight wooden ones, which will fit perfectly into both the natural eco-style and cozy Provence. In a loft room, it is appropriate to add rough decor in the form of metal pipes to such products.
The photo shows a wall shelf that combines the floor and walls, which imitate the texture of wood.
In the classic direction, exquisite form and expensive materials come first, so products made of acrylic stone, glass or with curved details will emphasize the luxurious style.
In modern style, functionality is valued along with beauty, so shelves “with a twist” play an important role in such an interior.
The photo shows a snow-white bathroom in eco-style with wooden shelves that echo the parquet.
Preparatory work
A plasterboard shelf can be of such a configuration that your imagination allows you to create it.
For proper design, you need to know exactly how your planned shelf should look. Drywall shelves can be straight, angular, semicircular, curved, protruding or recessed into the wall surface.
- We make a detailed drawing, marking on the drawing where measurements need to be taken.
- After we take measurements, we measure out the section of the wall on which the future plasterboard shelf will be located. We show maximum accuracy, otherwise problems with fastening may arise later.
Using a detailed drawing, you can calculate the required materials. During manufacture and installation you will need:
- moisture-resistant drywall;
- guide and load-bearing profile (UD and CD, size 25 × 50 will be sufficient), for a curved shelf design - arched;
- self-tapping screws for plasterboard 25 mm, dowels;
- serpyanka mesh;
- primer;
- putty.
Important! To create a shelf, it is better to choose thick drywall, 15–18 mm thick, or lay plasterboard in two layers. When using sheets of standard thickness - 12.5 mm - you need to take care of the reliability of the frame: load-bearing profiles should be spaced frequently.
Shelves made of plasterboard make the interior unique, beautiful and functional.
Material of manufacture
The strength of a high-quality plastic shelf is high. Shelves made of ABS plastic have a long service life and are wear-resistant.
Polystyrene and polypropylene are used to produce those products for which the load is minimal.
Making your own shelf
The process begins with the installation of the frame, which is the basis of the structure.
- First, the perimeter of the shelf is constructed from guide profiles (UD).
- Reinforcement is created using load-bearing profiles (CD). It must be remembered that the structure will be sheathed on both sides. Consequently, the supporting profiles are attached in different directions. This is how a frame of any geometric shape is made.
- The resulting product is mounted to the wall. If there is lighting, we install it in the structure, not forgetting that in a damp room we use devices with the appropriate level of protection, and the wires are hidden in corrugation.
- Let's start covering the shelf with plasterboard. We cut the sheet according to the dimensions of the frame and fasten the resulting pieces using self-tapping screws.
- We hide the corners under perforated corners and putty the joints. After unevenness we clean it up.
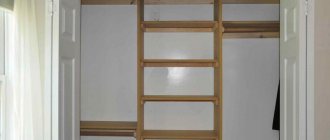
Timber shelving for the bathroom
In terms of complexity, this option for making a rack is almost no different. But the appearance is completely different; you can choose the one you like from two options. The set of machines, tools and devices is the same as in the previous version. To make the rack you will need 45×60 timber for the supporting posts and boards for the shelves. The optimal height for a rack is 1.5 m; adjust the width of the shelves and the distance between them yourself. Work should begin with a drawing. Draw it in as much detail as possible, indicating all dimensions and joints.
Prepare a drawing in advance
Step 1. Sort the lumber and check its quality. Align the ends of the posts to length, cut them at an angle of 90°.
Lumber
Cutting lumber
Step 2. For slats, you can use timber cut in half in thickness. Cut the timber with a circular saw, work very carefully, and do not forget about safety precautions. To feed the timber, use wooden sticks, do not keep your hands in the cutting area of the saw.
Cutting timber lengthwise
Received blanks
Step 3. Cut the slats from the blanks, dimensions according to the drawing. Measure accurately using a tape measure and square. We have already mentioned that cutting workpieces is very convenient with an electric pendulum saw. If you are making your own furniture from wood, then you must have such a saw in your workshop.
Before cutting you need to mark with a pencil
Sawing blanks
Step 4. To attach the crossbars to the racks, you need to make cuts. The width of the cuts should be equal to or slightly less than the width of the crossbars. The cutting depth is no more than half the thickness of the rack.
Marking cuts
Practical advice. To make it easier and faster to apply cutting marks, first mark one side, and then apply the workpiece widthwise to it and apply a second mark.
Step 5. Make cuts on the posts. It's better to use a miter box. This is a fairly cheap but very useful device. The cutting angle is adjustable and its depth is easily controlled. The miter box has a saw with fine teeth, which improves the quality of the ends. The depth of the cut should be slightly less than the thickness of the slats.
Making cuts
Step 6. Use a sharp, wide chisel to select grooves for the cross members in the racks. Hold the chisel flat against you, tap the handle with a hammer, and remove wood from the cuts in portions. If you come across a knot, reduce the width of the wood you are knocking out, work with the chisel more carefully, and do not rush. If the technology is violated, a large crack may appear and the rack will have to be discarded. Use a chisel to straighten the groove. There is no need to achieve great accuracy; this part of the groove is hidden by the cross member. The main condition is that the depth of all grooves at the highest point must be the same.
Choosing grooves with a chisel
Step 7. Connect the two posts with crossbars. Place them on a level table and use a hammer to place the cross sections in the prepared places. To increase the strength of the connection, screw self-tapping screws to the crossbars. The length depends on the thickness of the crossbars. But you need to remember that for all wood hardware there is one universal rule: the thickness of the joined part should be no more than two-thirds of the length of the hardware. For example, if the thickness of the crossbars in our case is 20 mm, then the length of the screws should be more than 30 mm. Of course, you should pay attention so that the end of the screw does not go right through the rack.
Connect two posts with crossbars
Practical advice. To eliminate the possibility of splitting thin elements being connected, it is recommended to pre-drill holes in them with a diameter slightly smaller than the diameter of the hardware.
Drilling holes
Before twisting the crossbars, it is advisable to apply glue to the saddle and the crossbar itself.
Applying glue
Screwing in self-tapping screws
Removing excess glue
Step 8. If you have a hand router, you can make a pattern with a figured cutter along the outer parts of the rack. The second side of the rack is made in the same way. Next you can start making the shelves. Boards with a thickness of 20 mm or more will be required; the width depends on the purpose of the rack and should be indicated on a previously drawn drawing.
Milling
Making shelves
Step 1. If the boards are not prepared, then you need to run them through a jointing machine on both sides.
Practical advice. For those who have a desire to make wooden products in a home workshop, professionals strongly recommend purchasing one of the types of combined woodworking machines. They operate on a voltage of 220 V, perform many operations, and in terms of the quality of processed surfaces they are in no way inferior to modern industrial equipment.
To improve the appearance of the shelves, process their surfaces with a portable hand router.
Board after processing
Step 2. Apply wood glue to the joints of the parts and secure the elements with self-tapping screws. Use the same algorithm to attach all the shelves. Allow time for the glue to dry completely, this will take at least 24 hours.
Glue application process
Glue is applied with a brush
Tightening screws
Step 3. To improve the appearance of the rack, all screws need to be replaced with wooden dowels. The diameter of the dowels depends on the size of the furniture. Prepare a drill bit for drilling holes for dowels. Its diameter should be slightly smaller than the diameter of the dowels. Mark the drill depth on the drill. For these purposes, you can simply wrap masking tape or electrical tape at the required distance from the end of the drill.
Dowels
Step 4. Unscrew the metal screw from the shelf. In the place where it is fixed, drill a hole for the dowel.
Unscrew the screw
Step 5. Coat the dowel and hole with wood glue. Place the dowel in the hole and hammer it into place. Remove excess glue immediately with a sponge soaked in water. Remember that it is very difficult to remove high-quality glue from the surface after drying; in most cases, you will then have to specially seal the areas of contamination.
Applying glue
Applying glue to the dowel
Installation of dowels
In this way, secure all the shelves on the rack.
If you don’t want to install dowels, then when connecting with self-tapping screws you need to make holes of a larger diameter for their heads. After twisting, the holes are sealed with wood putty of the appropriate shade.
Wooden rack
Rack shelves close up
Step 6. Finishing work. Clean the rack from dust, sand problem areas with sandpaper. The assembled rack can be left untreated; it will look very original and fashionable; many designers advise doing just that. But we recommend finishing the external surfaces with at least two layers of clear varnish. This coating not only protects lumber from moisture, but also greatly simplifies the process of caring for furniture. The fact is that the surface of untreated boards quickly gets dirty; stains can only be removed by sanding or completely painting. Conclusion: you don’t always need to listen to the opinions of designers, don’t use the rack, they only see it in the picture of the design project. Read the link to install a water heater in a bathroom.
Features of manufacturing built-in shelves
You can make niche shelves recessed into the wall from plasterboard. They look beautiful, take up less space, but cannot be very deep and are more difficult to execute. The order of work during their manufacture will be as follows:
- You need to outline the structure, starting from the ceiling. We draw a line, highlighting the internal part of the system. We draw the second line from it at an angle of 90 degrees, setting aside the depth of the shelves, the third - parallel to the first, it will mark the outer boundary of the structure.
- Using a plumb line, we design lines on the floor and wall. In the end, we get two parallel lines on all planes. This marking is intended for attaching guides that are attached to the ceiling and floor.
- We attach the supporting profiles to the edges of the horizontal guides and secure them. Future shelves will be mounted on these racks.
- We attach the parts cut from plasterboard to the frame. If it is not possible to mount an element of a single height, then we install it with a joint resting on the lintel. Otherwise, cracks will appear in the putty areas.
- We create grooves for horizontal profiles. We fasten guide elements of suitable sizes from bottom to top from inside the racks at a distance the size of the shelves. Using a level, we check the horizontality of the elements.
- We cut the supporting profile according to the length of the shelves. One shelf will require two elements. We install one in the groove and press it against the wall. We screw it to the plane and the racks. We install the other part in the groove and attach it to the outer edge of the structure.
Important! If the structure is wide, to strengthen the frame you need to install jumpers: install profiles cut to size between the load-bearing elements and screw them.
A few words about preparing the shelf for finishing
To prepare for finishing, plasterboard structures are puttied.
- A primer is applied to the surface of the drywall.
- In order for the surfaces to be smooth, the joints are filled with starting or special putty, after drying, a reinforcing mesh is applied to them and putty again with a thin layer.
- The corners are reinforced with special corners and puttied.
- The entire surface of the plasterboard structure is puttied.
- After drying, the uneven surfaces are smoothed out and the surface is treated with primer again.
The shelves are ready for decoration.
Despite the fact that drywall is easy to work with and makes it possible to implement any ideas, in order to make shelves for the bathroom yourself, you will have to tinker. If you are not confident in your abilities and do not want your time and effort to be wasted, you can turn to specialists, so you are guaranteed to get a high-quality result.
Fast and clean: glass bathroom shelves
The main advantage of glass shelves is that they literally dissolve in space and do not visually reduce the area of the room. It is also important that the glass is not afraid of high humidity, is easy to clean and does not become stained after contact with detergents. To equip your bathroom with glass shelves, you do not need to wait for a major renovation - their installation does not involve messy processes. Glass furniture looks stylish and does not require special skills and professionalism to make it yourself.
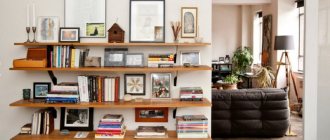
Bathroom plank rack
Bathroom plank rack
To make work easier and improve quality, it is advisable to have several home woodworking machines: thickness planer, circular saw, electric hand saw. If they are not there, then you can do all the work manually, but this will take a lot of time and effort, and the quality will be noticeably worse. A set of carpentry tools is required in any case.
Lumber
Important. Before starting work, prepare your work area. It should be clean and level, provide easy access to machines and tables. Store finished parts separately and remove waste promptly. Experienced carpenters know that the time spent on maintaining order is more than returned during the work. In addition, it is occupational safety.
Step 1. Draw a sketch of the future shelving. Choose sizes taking into account the parameters of the bathroom and the features of the items placed on the shelves. You can make all the shelves the same, you can reduce or increase some of them in size. Linear parameters must be indicated on the drawing; this data will be required not only during the work, but also to calculate the amount of lumber.
Sketch
Sketch with dimensions
Practical advice. It is better to buy planed edged boards, this will speed up the work much faster. The thickness of the boards is within 20 mm, width 15–20 cm. It is recommended to use softwood for bathrooms; they work better in conditions of high humidity. Coniferous lumber contains natural resins that prevent decay processes.
Step 2. Start cutting the material according to the drawing data. Plan cutting in such a way as to reduce the amount of unproductive waste. If the length of the lumber does not allow you to use it to the maximum, then you can change the dimensions of the rack; at this stage it is not too late. Be sure to record all changes in the drawing, do not rely on memory. There are often situations when, for one reason or another, it is necessary to take a break from work; a fully modified drawing will allow you to avoid annoying mistakes.
The boards may have minor damage to the side surfaces, this is not a problem. During the assembly of the rack, defective surfaces are installed on the back side of the furniture.
Pencil markings for ease of cutting
Checking the markings with a tape measure
Cutting is much better done with a pendulum saw. It accurately maintains cut angles and leaves smooth edges. In addition, it is one of the safest woodworking machines. And another plus - the pendulum saw allows you to adjust not only the angle of cut, but also the depth, which greatly simplifies the process of preparing the connection of individual wooden parts into a single rigid structure.
Uncover
Practical advice. If you have many blanks of the same size, then never measure them separately. Use the first one as a template and make all subsequent ones according to it. In this way, minor variations in length resulting from measurement errors are avoided.
Material cutting completed
Step 3. Proceed to marking the blanks for the connections. Before doing this, carefully sort them taking into account the location of the front side, do not forget that all small problems in the wood should be placed on the back side. Assemble blanks of the same size together, align their ends with a square and compress them with two clamps. Use a pencil to mark each piece, they will be completely identical, which will facilitate the process of assembling the rack. According to the drawings for the square, make marks on the ends of the workpieces. Using these marks, the boards will be cut to connect the shelves.
Marking using a square
Step 4. Do the same operations for the vertical posts, pay attention to which side is better to choose half a tree.
Practical advice. Apply the square only to one side of the board. The fact is that the planes may have a slight deviation from parallelism. If you apply it from both sides, then the marking for the cut will be inaccurate.
Step 5. Cutting out the mounting sockets for the shelves is much easier with an electric jigsaw.
Jigsaw
Before starting work, check the cut of the tool; it should be exactly 90° to the end of the board. Use only a serviceable and adjusted tool, otherwise you will not be able to avoid defects. Correcting a defect will always take much more time than preparing and checking the instrument. If you don't have an electric jigsaw, you can make the cuts with a hand saw, but this will require more practical skills. Pay attention to the lighting of the workplace. Lack of light increases the likelihood of errors and is very tiring for the eyes.
Sawing out planting nests with a jigsaw
Cutting with a jigsaw slightly worsens the appearance of the cut; there are always small chips. If you want to have the perfect look for your shelves, then use a shape cutting saw.
Step 6. Check the condition of all workpieces. If you find any roughness or chips, lightly sand them with sandpaper. At the same time, clean out the pencil marking lines; if you cover the furniture with clear varnish, they will be noticeable.
Sand away rough edges and pencil marks
Step 7. Start assembling the rack. Insert the cuts in the shelves into the cuts in the uprights. Don’t forget to keep track of which direction the workpieces with problem areas are facing. When you have done all the dimensions and cuts correctly, the parts will fit in with little effort. To assemble, use a wooden mallet or an ordinary hammer. But between the parts and the tool, be sure to make a spacer from a small piece of board. This will prevent dents from appearing on visible surfaces.
Assembling the rack
Practical advice. With inexperienced craftsmen, the half-wood connection often turns out to be loose, which causes the rack to wobble. In such cases, assembly must be done using wood glue. Large gaps will have to be sealed with special putties or sealants after the glue has dried.
Step 8 . Screw the side boards, top and bottom to the assembled shelves. They can be fixed with ordinary self-tapping screws; pay attention that they are made of stainless alloys. The side surfaces can also be assembled using dowels, but this is much more difficult to do. We do not recommend using dowels for inexperienced craftsmen. To make the self-tapping screw easier to screw in, first drill holes in the board with a diameter 1.0–1.5 mm smaller than the diameter of the self-tapping screws.
Drilling a hole for a self-tapping screw
Screw the screws into the holes
At this point, the assembly work on making the rack is completed. Clean it from dust and cover it with varnish, stain or paint.
Check the equality of the diagonals after assembling the rack
The finished rack can be painted
Original and uncomplicated: rope shelves made of wood or laminate
For a bathroom design in a country style or with a nautical twist, a simple but practical hanging rope shelf is perfect, the shelves of which can be made of wood or laminated chipboard. To work, you will need planks, which you can buy in a store or look for among unnecessary furniture. Excellent shelves can be made from the doors of an old wardrobe or chest of drawers if you give them a second life with the help of decorative moisture-resistant film.
It’s even easier to use laminate or parquet boards as a base. If these materials are left over from the renovation, great; if there is nothing in the house, then you need to go to the store and buy one board of moisture-resistant laminate of a suitable color.
Even a woman can make rope shelves
Looking at the photo of finished shelves on ropes, it is easy to understand the principle of their manufacture: through holes are drilled in the boards, through which a strong rope is passed from top to bottom. Under each hole, it is necessary to fix the position of the rope using a knot or wooden spacer. A loop is left at the top so that the structure can be hung on a hook, and the lower ends are secured with knots and decorated.
This is how a shelf on ropes is assembled without a nail or screw
If you like the idea, you can use wicker baskets instead of chipboard shelves - in this case you will get a small hanging cabinet in which it will be convenient to store towels, shower products and other necessary things. To prevent rope structures from looking lonely, in order to continue the rope theme, you can wrap several accessories with rope, weave a rope towel holder, hang a mirror on it, or make a frame from rope.
Bonus: what to put on the shelves to make them look stylish
- Decorative candles and diffusers.
- Wicker baskets and boxes.
- Mini vases with artificial flowers.
- Florariums with succulents.
- Battery operated mini lights.
- Plain cans and bottles.
Waste into income: bathroom shelves made from unnecessary things
The wide ceiling cornice remaining after the renovation can be used as small shelves for small items. It is most practical to choose polyurethane moldings for this purpose and attach them to the walls using liquid nails. Of course, it is better not to place heavy objects on these holders; they are more suitable for decor, souvenirs and small items.
Wide ceiling cornice will support small tubes and decorative items
Plastic pipes are another valuable material that can be turned into an original structure for storing towels and other important things in the bathroom. The pipes can be of the same or different diameters, they can be placed close to each other or at a distance, at right angles to the wall or at a slight slope. If desired, the plastic is covered with colored laminating film.
In the case when the elements will be placed on the wall separately from each other, each circle will have to be fixed. Another option is to fasten all the parts together and then hang the finished structure in the chosen location.
This design can be made from pipes, cans or hat boxes
If there is no use for an unnecessary basket in the house, then it makes sense to look at it from the other side and turn it into a stylish miniature towel cabinet. The basket can be attached directly to the wall or mounted on a holder. A wonderful hanging shelf will be made from 2-3 baskets, which can be the same size or vary around the perimeter.
Round baskets as towel holders
Working with drywall requires experience - it is important not only to clear the entire structure and assemble it with maximum precision, but also to properly process the material, taking into account the high humidity of the room. For those who do not have skills in repair work, it is better not to take risks, but to immediately entrust the complex process to professionals.
Types of whatnots
The following types of designs are often used in the bathroom interior:
Floor models with legs or hard bottom. If the product needs to be moved periodically, you can opt for a bathroom shelf on wheels. It is worth considering that if you choose the wrong location for the structure, the likelihood of it falling will increase.
Wall-mounted models that differ from conventional shelves in their frame and unity of design. This option is suitable for rooms with limited space. But here you should approach the choice of fasteners wisely.
Built-in shelves. The space under the bathtub or sink is often used as a niche. Less commonly, the structure is built into the wall, as this requires more effort.
A transformable shelf becomes an original type of bathroom furniture. Due to its original design, it can be transformed from shelves into other pieces of furniture.