This curtain holder is suitable for both classic and more informal interiors - from boho to “high technology”. It all depends on the choice of material and finish.
So, in order to sew a classic curtain tieback with your own hands, you will need fabric (preferably the same fabric from which the curtains are made, but you can choose another one that matches the color and texture), matching threads, and two rings.
Operating procedure:
1. Make a pattern for the scoop out of paper. The diagram shows a smaller version of the pattern, so you need to draw a part of the same shape, but in larger sizes, on a newspaper or large sheet of paper.
The overall size of the tieback should be approximately 11 x 70 cm. The width and length of the tieback can be varied depending on the thickness of the curtain fabric and the look you want to achieve, so attach the tieback pattern to your curtains before sewing. Based on the results of the fitting, increase or decrease the size of the pattern.
Helpful advice: you don’t have to make exactly this pattern for the pick-up. A tie in the form of a narrow rectangle (wide ribbon) would look quite good.2.
To sew one tieback, cut two identical pieces of fabric. Don't forget about seam allowances.3. Fold the pieces, fold them with the wrong sides facing each other and sew on a sewing machine.4. Sew rings to the narrow edges of the tieback. Instead of rings, you can sew hanging loops from the same fabric. Useful advice: to make the tieback better hold its shape, place any thick fabric inside when sewing. If you want to make the tieback for curtains more interesting, unusual, decorate it, depending on your existing skills, with embroidery or appliqué .
The simplest option is to decorate the tieback with ready-made fabric flowers or make a pattern of rhinestones and beads on it. Tiebacks for curtains can be sewn in different ways, let’s look at one of them. This way you can sew tiebacks from both thick and thin fabric. To work, we will need the fabric itself, adhesive interlining, adhesive web and bias tape. We cut out two tiebacks from the interlining. We select the size individually, I have a pick-up length of about 60cm, a width of about 8cm. We glue the interlining onto the fabric and on top of the interlining we put an adhesive web over the entire area of the interlining. On top of this “pie”, carefully so as not to move the web, we apply the fabric and iron it.
My organza is white, so I'll stop there.
If the fabric had been dark, for example red, I would have glued another layer on top using cobwebs to make the tie-back a more saturated color. Next, we cut out the tie-backs. Since my fabric is transparent, it’s easy to see where to cut. If we sew from thick fabric, then we do the same thing, only with a piece of non-woven fabric sufficient for two tiebacks, and only then we cut them out. We edge the tiebacks with tape from the bottom. And then we process the top of the tiebacks, leaving long “tails” from which we will form loops. We burn the trim sections with a lighter. You can just make loops, or you can make a bow on the front side of the tie for decoration. Ready tie. If something is not clear, ask in the comments, I will answer all your questions. Did you like the master class? I would be very grateful if you share this article with your friends on social networks by clicking on any button below. If you would like to share your experience with the readers of the site or just show your work, write and send a photo to me by email. In the “Site Map” tab you will find a complete list of articles posted on the site. If you are looking for a specific master class, then look at the “Master Classes” tab, there is a complete list of them. Sincerely, Oksana Fadeeva. Use of site materials only if you have an active links https://moishtori.ru Date: 05/17/2015 Comments: Rating: 10 Curtain tiebacks are not only a universal means for fixing the curtain fabric in the desired position, but also a wonderful element of additional decor.
As part of the interior, a tieback can modernize tired curtains, add a new touch to the design of a curtain, or add a bright accent to a window. Tiebacks create a beautiful drapery and help regulate the flow of daylight. By purchasing expensive fabric curtains or ordering the latter from famous tapestry design studios, you need to know that these curtain fastening elements will be included in the kit. However, no one has yet canceled hand-made, so you can do the decorative fastening of curtains yourself. First of all, it’s worth learning how to sew curtain tiebacks. Curtain tiebacks can be made from a large number of available materials: all kinds of fabric bases; cords and ribbons; lace; satin ribbons; straps and threads; hooks and rings; beads. The tieback itself is fixed on curtains in several ways: from clips and adhesive tapes to tightening it on a special hook driven into the wall.
How tiebacks can hold curtains
Let's start with the fact that a tieback can open a curtain like this:
Or like this:
Or like this:
Please note that the angle at which the curtains are grabbed changes, thereby changing the pattern of the window opening. This technique provides additional opportunities for interior decoration.
Not only fabric tiebacks can hold curtains. An alternative to such holders can be magnets. However, not everything is as simple as in the next video, because on very light curtains, when tacked from the side, the entire curtain will tend to the center, and the weight of the magnet will have an effect. And for curtains that are too dense and heavy, the strength of a small magnet may not be enough .
Sewing instructions
Further work is carried out with the cut material.
Preparing for sewing
- Smooth out the material thoroughly.
- Apply a strip of adhesive fabric to the bottom edge of the base material.
- Use the iron, pressing it firmly against the fabric. This will form the main part of the product.
- The adhesive fabric should melt well inside and connect the two parts tightly enough. To do this, fold the other side of the fabric to the right side and iron the strip again. That is, a piece of adhesive fabric will be inside the workpiece, and the main fabric will be on both sides.
- If the edges of the adhesive fabric and the main part do not match in size, cut off the edge, aligning the bottom.
- Give the workpiece the desired shape. Using scissors, make an arched line along the edges of the strip from the bottom (remove the corner). You can fold the workpiece in half and cut through both sides at the same time. Draw a line with chalk first; it will be easier for you to make an even curve along it.
- Fold the bias tape in half along its entire length and smooth it out. This will make the work easier, especially this advice will help beginning craftswomen.
Natalia Orlova
Interior Design Expert
Ask a Question
The resulting gap after attaching the adhesive fabric to the main strip can be cut off. When cutting, always add fabric 1 cm more than the intended width.
Tailoring
After preparing the materials, you can proceed directly to sewing.
We also recommend: How to make a lambrequin for curtains with your own hands
The detailed master class shows the main stages of work on creating a product yourself:
- Measure 8 cm on the bias tape and stitch this length. The free end of the workpiece will remain, this is necessary to form the loop. Cut off the corner of the strip.
- After you have joined the bias tape, lift the machine foot and insert the tie back into the binding, making 2 stitches. Make a loop from the left free end of the bias tape, sew forward and then back, that is, secure the seam.
- Along the entire length, catching the tie in the binding, sew the straight edge of the future product.
- Once you have reached the opposite edge of the piece, stitch the end of the bias tape, make a small neat loop, and secure the seam.
An easier option: leave the edges of the binding free without making a loop. In this case, you need to measure 10-12 cm of binding. This option is the simplest; it is easy to cut out any shape.
Instead of adhesive fabric, you can also use dublerin for strength. Beginning craftswomen sew bias tape to the tieback, and then make loops out of it and attach it with two or three stitches to the strip along the edges. Fabric loops are needed to attach the product to the wall holder.
Natalia Orlova
Interior Design Expert
Ask a Question
For inexperienced housewives, before attaching bias tape to the main piece on a sewing machine, you must first connect the parts with a basting stitch.
What to hold the grips on
How to attach the tiebacks that we will create with our own hands.
Maybe just go ahead and sew a button to the wall:
Great way. However, the situation is much simpler.
Metal threaded loops like these are screwed to the wall:
Or, even cooler, a special set of hook and eyelets:
Or buy special holders:
The choice of such gizmos is huge, but an enterprising interior decorator will not resist the opportunity to improve and decorate and will tie everything that can be tied.
Knitting in the interior
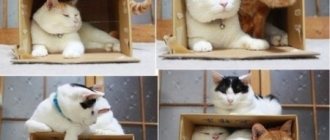
You can decorate a standard holder using a photo of your favorite cat, stick the photo on the holder and varnish it. Well, after this, who will say that an expensive, sophisticated holder is cooler than your homemade, striped one?
Compare. After all, you must admit, the one on the right is cuter. Let's not forget that our beauties live in our houses, which are, at the same time, their houses, houses for cats .
Ideas for inspiration
There are many more options for making curtain tiebacks than one article can cover. For this purpose, the most unexpected materials and various technologies are used, allowing you to make exclusive accessories with your own hands, which not only add convenience to everyday life, but also please the eye.
This option looks good on folk style curtains
Wrapping this accessory with thread in the color of the curtain connects them into a single composition
This decor looks good on thick curtain fabric
The contrast of thin fabric and natural dense thread looks impressive
This version of the product will fit perfectly into the interior of the kitchen.
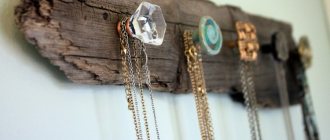
Metal, stones and key - a good combination
Looks simple and cute on thick fabric
Sometimes curtains are held up by unusual objects such as ties or belts. The straps can be shortened if necessary and attached to the wall. Or they simply pull the curtain together, like ties.
This option is at least very original
The pattern here must either exactly match or be on one of the elements - a combination of two different textures is undesirable
In children's rooms, you can decorate the curtains not only with fairies, but also with other toys.
The gentle colors and themes of bear cubs and honey look very positive
One such large and bright initial will convey to the child a warm attitude from the parents
This way the child will unconsciously learn to respect nature.
Tiebacks in marine or eco-style look interesting.
A mosaic knot tied on it will add interest to the composition.
This accessory looks very beautiful precisely due to the combination of colors of the same range and the naturalness of the materials of the entire composition.
Are you refurbishing your kitchen? Then you might find this article about choosing curtains useful: https://mydesigninfo.ru/dizajn-shtor-dlya-kuxni-originalnyie-variantyi-i-novinki/.
Curtain tiebacks are an important element of window design. They hold the curtains, which allows light to enter the room, and also visually adjust the shape of the window and complete its appearance. Plus, making them with your own hands is easy. For this purpose, available materials are used: fabric, ribbons, ropes, beads, etc. Such products will give the room comfort and individuality, and their options are limited only by your imagination.
- Author: Pat
Rate this article:
- 5
- 4
- 3
- 2
- 1
(10 votes, average: 4 out of 5)
Share with your friends!
Picking up from CDs
It is simply impossible to pass by such beauty. Here's how it's done:
Option one - The curtain is threaded through the hole in the disk.
Option two – The curtain does not fit through the hole in the disk.
Types of materials
To make grabbers use:
- textile;
- ribbons;
- cords, ropes, decorative twine;
- burlap;
- fur;
- knitted fabric;
- skin;
- plastic;
- metal;
- magnets;
- elastic materials, etc.
Foamiran
Foamiran is a decorative foam material (its other names are foam rubber, foam EVA, plastic suede, revelour). Looks like thick paper, soft, elastic. Used to decorate flexible holders. Leaves and flowers are made from it - orchids, roses, bouquets of crocuses, tulips, etc., which look life-like. Foamiran is not afraid of moisture and sun.
Tree
Wooden holders complement the classic interior with simple-style curtains. More often, wood is used for gripping in the form of a pin (pin) or a handle attached to the wall. The surface of the wooden model can be smooth or carved.
Plastic
Plastic tiebacks imitate the texture of wood, stone, and metal. They come in different models. Plastic is used to make rigid holders and parts for other models. Jewelry is made from it (small figurines, beads, etc.). Plastic holders will not be able to support the weight of heavy curtains.
Cords
Suitable for interiors in styles: country, Scandinavian, minimalism. For weaving cords, cotton, linen, acrylic, viscose, polyester, metallized and hemp threads of 1 or 2 colors are used. Natural fibers are soft and pleasant to the touch, but require careful handling.
Synthetic ones are elastic and do not stretch during use. The minimum diameter of the cord for grabs is 5 mm.
Leather and leatherette
Leather tiebacks are used in medieval and loft style interiors. The products are durable - even a narrow strip of natural material will hold the curtain. The belt is in harmony with curtains of similar shades, with forged elements - a cornice or a hook on the wall. The product can be decorated with inlay or metal parts. Tiebacks made from a piece of suede or woven from 4-6 narrow strips of leather look more delicate.
Metal
Metal tiebacks of various designs will decorate industrial, loft, hi-tech, and empire interiors. Varieties of products: matte, shiny, simple and sophisticated, in the shape of a hand or a lion's paw, decorated with forging (leaves, curls, flowers), balls, stones, glass, embossing, etc. Metal tiebacks are the strongest and most expensive.
Knitted tiebacks
Let's assume there are already curtains, and they have been there for a long time. How to update curtains that are already a little tired. Tiebacks do not require a large amount of yarn and it will not be difficult to knit the most beautiful thing for the windows using leftover yarn, which will also allow you to make a color accent. Here are some ideas:
Many people knit toys. On forums you can find discussions about the use of small treasures. Most craftswomen accumulate toys at home, because the number of friends they give gifts to is finite, but they want to create all the time. Here is a great idea to use for such work. And how pleasing to the eye is the exact copying of the colors of the curtains with a knitted cat.
Large, double kanzashi flower, made of 5 cm ribbon.
First, I prepared the sharp petals. Each flower needed 10 petals, since I decided to make double flowers themselves. The lower petals on all flowers will be white, and the upper petals will be pink and lilac. I’ll show you how to fold the petals in pink.
- From ribbon wide. 5 cm cut out a square.
- Fold the square diagonally with the wrong side inward.
- I folded the resulting triangle again.
- Then I folded it a third time and trimmed the edge (in the photo it is marked with a blue dotted line). I trimmed it in order to even out the cut of all layers. I pinched it with tweezers.
I fold petal
5. I brought the cut side to the candle so that the ribbon melts slightly. Advice: it is better to melt in the area of the wick (there is less smoke here). If it touched the flame, it was only lightly. She passed the petal several times along the fire so that the entire edge melted.
6. When the cut edge was slightly melted, I pressed it with tweezers for a few seconds so that the tape would stick together.
7. The result is a petal, as in photo No. 7.
8. Then I turned out the petal, as in photo No. 8.
I fold a petal
I prepared these petals: white - 30 pcs, pink - 20 pcs, lilac - 10 pcs.
Prepared the petals
Now you can collect the flowers.
9. Glued together white and pink petals. To do this, I applied hot glue to the white petal along the fold. And immediately, on top, I put a pink petal (so, I collected 20 pieces of white-pink and 10 pieces of white-lilac petals).
10. When the double petals were collected, I began to collect flowers. I applied hot glue to the edge of the white petal and pressed the next petal against it, edgewise. I tried to apply the glue slightly short of reaching the middle and the end of the petal. By the way, you can vary how open the flower is. If the strip of contact between the petals is small, the flower is more open and vice versa.
11. Collected 5 double petals. I pulled apart the last petals that were not glued together, applied glue and pressed them.
12. Using this principle, I collected all the double petals. In the end I got 6 pieces. large, double flowers, 3 pieces, for each scoop.
Picking a flower
Also, I made small flowers.
Decoration with flowers
There are an incredible number of techniques for making flowers. Surely you also know a couple or three of these techniques. And now is the opportunity to use them in interior decor.
Chic and safety
An interior detail in the color of a powdery rose will attract everyone's attention with its unusual appearance. To create unique accessories, you need to use imagination and a simple set of materials. Most of which are present in any home.
How to make DIY curtain tiebacks with ruffles
Don't be biased when it comes to ruffles. It’s like the joke: “You just don’t know how to cook them”
The simplest in execution and the most delicate, magnificent tiebacks with ruffles. And it's easy to do. Tie thin mesh ribbons onto a cord, this is how tutu skirts are made, and decorate with a pink bow.
Tulle curtain tiebacks with pink ribbon
The site has an article on how to make a lampshade from tulle. This is not a “craft” - the tulle lampshade is an exact copy of the designer’s design. Read about it HERE.
And here a strip of curtain fabric is gathered with a wide elastic band to create a beautiful frill, then, on the wrong side, the tie is reinforced with braid, the length of the braid is determined by the length of the tie. And decorated with beads.
What you need for sewing
To work you will need the following set:
- A piece of fabric.
- Bias tape.
- Scissors.
- Threads to match the fabric.
- Tape measure.
- Ruler.
- Chalk.
- A piece of adhesive fabric.
- Sewing machine.
- Iron with steam.
The tiebacks are about 70-80 cm long when unfolded, and 30-35 cm long when folded. You can take measurements yourself using a measuring tape. Before sewing, you need to make a pattern. To do this, cut out a strip of fabric 14 cm wide and 70 cm long.
For the density of the finished product, adhesive fabric is used. A piece of the same length (70 cm) is made from it as the main piece; the width is measured to be 7 cm. In this size, the tieback will look harmonious on your curtain. To finish the edge you will need 1 meter of bias tape.