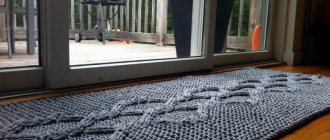
In every family, over time there are many things that have become unusable. This includes children's clothing with stubborn stains, old T-shirts that have served their purpose, and jeans. But many thrifty housewives have found a way to breathe a second life into this rag. Crocheting rugs from leftover threads and rags, weaving them from various cords and ribbons, and making them using carpet-based techniques has become increasingly popular among them. Some methods for making such a home attribute are given later in the article.
Yarn preparation
Crocheting rugs from rags involves preliminary preparation of yarn from them.
It consists in:
- Choosing old things based on fabric structure that match each other.
- Cutting sorted raw materials into strips.
- Selecting ribbons by color (if necessary).
- Final preparation of yarn for knitting.
In order to correctly select the necessary material for making floor mats from rags, the first step is to sort it out and sort it by type of material. That is, put knitted items in one pile, denim in another, cotton in a third, synthetic in a fourth, and so on.
- After sorting the rags by fabric quality, you should prepare them for cutting. To do this, you need to trim all the seams, that is, along the bottom of the product and the sleeves.
- Next, lay the item on a hard surface and cut it into strips from one side seam to the parallel one, but not reaching it by 2-3 cm. This is necessary in order to create one continuous strip in the future.
- When performing this operation, you should know that it is recommended to cut dense fabric into narrow strips, and thin fabric into wider ones.
- After such a cut, in place of a continuous section of material, oblique cuts are made from one strip to the next, that is, the result should be a spiral-shaped continuous strip.
- If it breaks, it is advisable to sew the ends together by placing them on top of each other. Tying knots is not recommended. This will create inconvenience during further work and spoil the appearance of the finished product.
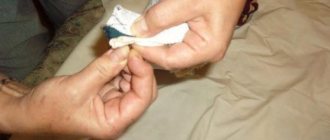
- After cutting the tape from very frayed fabrics, before winding it into a ball, it is advisable to treat its sections with fire. This technique will secure the cut threads and extend the life of the rug.
- The resulting yarn is wound into balls.
Preparing yarn
Before you start knitting a rug from a variety of T-shirts and knitted rags of different colors with your own hands, you need to prepare the yarn.
Attention! The denser the fabric, the narrower you cut the ribbons for work.
Let's look at the step-by-step process of preparing yarn:
- wash and dry things well;
- cut them into even strips of equal width (about 1.5 -2 cm);
- stretch the ribbons a little so they curl into yarn;
- sew the strips together;
- Carefully roll the stitched ribbons into balls (make sure that they do not twist and have uniform tension).
It will be great if the balls turn out to be multi-colored.
The width of the strips depends on the density of the material. The thinner it is, the wider the cut strips.
Note! Knitwear for work can be cut in two ways: in a circle and in a spiral.
Simple round crochet rug
Crocheting rugs from round rags is not difficult if a person knows how to hold a hook in his hand and knows how to make two loops - a chain stitch and a single crochet stitch or just one stitch.
In order to avoid a hole in the center of the rug, experienced craftswomen recommend starting work with a ring of yarn formed by twisting it twice around the index finger. With this method, after knitting the first row of loops, it is convenient to eliminate the gap in the ring by tightening the end of the yarn remaining from the entanglement. Next, this remainder is hidden inside the knitted posts and cut off.
- After knitting the first row, it is closed by connecting the outer column to the first, pulling the captured working thread under the two arcs of the initial loop through the loop on the hook.
- Next, to complete the second row, you need to knit 2 lifting air loops. This technique prevents the canvas from skewing and also maintains its flat shape.
- Then knit the second row with the same single crochets. But in order to create the correct round, rather than domed, shape of the rug, you need to make 2 stitches in each subsequent loop of the previous row. Finish the row in the same way as the first.
Each subsequent circular row is knitted similarly to the one below, but to maintain the flat shape of the rug, additions must be made. Their number and frequency are calculated individually. This depends on the number of stitches in the first row, the thickness of the material used and the knitting density. With existing experience and skills, the need for additional loops is determined visually.
After reaching the desired diameter of the product, the outer row is closed, secured and the end of the yarn is hidden inside the knitted loops.
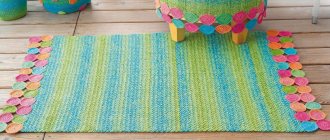
How to knit a rug from leftover yarn
Rug dimensions: 126 by 240 cm.
To knit a rug you will need:
- leftover yarn of any composition;
- jute twine;
- hook number 6.
How to knit patterns
Element No. 1 – performed according to the scheme.
The square is knitted from 10 rows. Width of one st. s/n – 1 cm, row height st. s/n – 2 cm, row height st. b/n – 1 cm.
Description
The jute thread is used in two folds; we fold the yarn in two or three folds, adjusting it to the size of the hook.
The carpet is assembled from elements of different sizes, knitted using the granny square method. The elements consist of three squares connected to each other. Each individual element is tied with jute thread.
We knit square elements. We lay them out horizontally according to size (each side of the square is 40 cm), secure with pins, steam, and dry.
Now let's do the calculations with the required width of 126 cm and length of 240 cm.
We calculate 126 cm - 3x40 cm = 6 cm. We put these missing 6 cm into the harness of a subassembly of three squares.
The harness consists of two rows:
1 p.: st. s/n (= 2 cm);
2 p.: Art. b/n (= 1 cm).
Since the binding is done in a circle, an equal number of centimeters will be added in each row on each side.
Thus, in the length and width of the fragment we will get plus 6 cm. It will have dimensions of 46 by 126 cm.
Since the carpet pattern is symmetrical, on the opposite side there will be exactly the same subassembly of squares.
Since the width of the middle squares has not changed and is equal to 40 cm, the width of the middle element will be equal to 40 cm.
Knowing the length of the central fragment and the length of the sides of the square without strapping is 40 cm, we calculate the sizes and locations of the fragments of horizontal blocks.
To calculate the dimensions of the central element, we subtract the length of two fragments from the total length of the carpet:
240 – 2x46 = 148 cm.
On these blocks the strapping will be st. b/n in two rows. One row st. b/n is equal to 1 cm, which means that when tying in a circle in two rows, 2 cm will be added on each side. This will give an increase in the length of the block of 4 cm.
So that in the future the block does not turn out to be larger and takes its place, we subtract these 4 cm from the total length of the middle fragment.
We get 148 cm - 4 cm = 144 cm. This is the length of the horizontal block without strapping.
These are three whole squares of 40 cm and another 24 cm.
We find and draw the middle line on the central fragment.
One of the three squares will be located exactly in the center.
The remaining two will be located at the edges of the central fragment.
We will distribute the missing 24 cm equally on both sides of the central square of the horizontal block - 24: 2 = 12 cm.
These will be intermediate inserts of the horizontal block.
Central element
We start knitting the carpet from the central rectangle, because it is around it that all the fittings will be lined up in the future, all the blocks will be tied to it.
Its dimensions are 40 by 148 cm.
We know that the square pattern is knitted from 10 rows, the length of each side is 40 cm.
We calculate how many loops to cast on to get 148 cm. The difference is 148 cm – 40 cm = 108 cm.
Width of one st. s/n is 1 cm, so you need to dial a chain of 107 VP + 3 VP.
Calculation of intermediate rectangles
To obtain an intermediate rectangle of 12 by 40 cm, we must perform the calculation, knowing that the height of the row is st. s/n is 2 cm.
After the calculations, we determine that for the rectangle we must dial 32 VP and then knit in the round according to the pattern.
We knit the elements, fix them according to the required dimensions, and steam them.
Video instruction
Assembly
We assemble the rug from connected parts according to the diagram.
We connect the parts of the rug by knitting the loops of the last rows behind the inner arcs.
We iron each seam made.
We tie each block with jute twine.
We lay out each assembly according to the required dimensions, secure it with pins and steam it through a damp cloth.
When all the parts are ironed, we begin assembly.
We connect the parts by knitting the loops of the last rows behind the inner arcs.
We immediately steam each knitted seam.
In this MK, only the upper and central blocks are knitted.
The rest are connected with hooks.
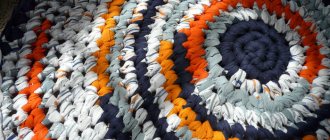
Round rug with braid
Another option for making a round rug is a combination of crocheting and sewing. This combined technique is used if the yarn is thick. It creates inconvenience during circular knitting. Therefore, to make such a rug, first a very long chain of air loops is knitted from prepared yarn. Then it is laid out evenly in a spiral, securing each subsequent turn with the previous one with a needle and thread. The result is a not too rough, but dense rug.
Knitted product
To create a T-shirt rug, use a size 15 hook.
It’s good if, before creating a rug from outdated old T-shirts, you had experience in crocheting or knitting.
Instructions: knit a ring, then tie it in a circle using double crochets, chain loops and skips.
The openwork product is obtained using air loops.
Knitting the rug in the round is done to the required size.
You can knit beautiful crochet rugs from T-shirts filled with a variety of patterns.
By alternating different knitting techniques, you will get a beautiful and practical rug.
Floor rug made of round motifs
One of the interesting solutions for making floor mats is various combinations of round fragments. They can be done:
- from the same material in structure, but different in color range;
- from fabrics of different composition and color;
- from several types of patterns.
The motifs can be connected to each other both when knitting the outermost row of each fragment, and after they are completely knitted. It depends on whether there is a preliminary layout of the elements or whether it is drawn up during the knitting process, how many and what sizes the parts are prepared.
Materials for a crochet rug
The textile market and human imagination offer a huge number of different properties, prices, appearances and materials from which you can create your own knitted masterpiece: from classic to the most original. Simple and beautiful rugs will serve you for a long time, bringing joy and peace to your household.
Softness, warmth and homely atmosphere arise from seemingly insignificant, but actually important things - accessories.
There are many ways and methods of knitting, each of which is determined by the functionality, desired size, shape and materials used to create the product. The most popular option is knitting from thick thread made from sheep, camel or any other wool, as well as from ribbon yarn. As a rule, such yarn is a set of knitted fluffy segments, which is why products made from it look soft and homey.
Crocheted rugs are one of those details that will help make the environment feel lived-in and truly homely.
There is a separate category of yarn - knitting. It is denser and looks like strips of fabric. Rugs made from knitted yarn allow you to create something unusual and interesting from classic materials.
Homemade rugs will look equally impressive both in the interior of a modern city apartment and in a country house.
You can also knit from special rope threads. These are small ropes that, when tied together, look very Scandinavian.
If we talk about artificial threads, the leader among them is acrylic, which will last much longer than wool, as well as polycarbonate threads.
It’s easier and faster to knit rugs by crocheting rather than knitting.
Unusual materials include clothesline, twine, jute, fillet mesh, cut polyethylene from garbage bags and thread from tights. Products made from them will look very original and bright.
Openwork rug
Crocheting rugs from rags using openwork hems has become quite a popular phenomenon in the interior of many homes. This is due to the fact that the “gaps” formed between the rows can be designed in a variety of ways. For example:
- You can stretch contrasting yarn or ribbon through the vertical constrictions;
- used to introduce finishing details in the form of leaves, flowers, ruffles, etc. into a standard pattern;
- During knitting, an LED cord can be inserted into some circular openwork rows. This will not only create coziness in the room, but will become an original addition to the interior.
For openwork rugs, it is recommended to use yarn of thin and medium thickness, since the finished product made from thick material will look awkward and rough.
Any pattern, as well as a diagram for its implementation, can be applied to floor mats. A wide variety of them can be found on the Internet. Round napkin patterns are also suitable for this. But too complex and ornate openwork should not be used.
Firstly, performing operations with a large number of loops will be difficult due to the thickness of the yarn.
Secondly, in places with a large number of posts or their combinations, compactions will be created, which will adversely affect the appearance of the finished product and will cause discomfort during direct use.
Below are some patterns for floor mats:
Video lesson:
Rug with openwork hems
To knit the rug we used Karachay yarn, a fairly coarse thread that will also fold in half. Hook number 4 is used. We cast on 16 double crochets into a sliding loop. Instead of the first one, three air loops are cast on. The next row is a hemstitch. Single crochets here are knitted through one loop.
The next row is made up of tight double crochet stitches. In the next row, a wavy hem is performed. The instructor explains in detail how a round rug with a beautiful pattern is formed from row to row. The rows are not alike, so you need to carefully monitor the actions of the instructor. The craftswoman tells how the decision is made to form certain elements of the pattern. Three tiers of the pattern provide a 50-centimeter rug.
In the form of a scarf
Crocheting rugs in the form of a scarf from rags can be done in 2 options:
- longitudinal,
- transverse
The difference between these methods is that when knitting longitudinally, you must immediately set the desired length, since it will not be possible to increase it later. With cross knitting this possibility exists. The same applies to the width of the product. It can be changed in the longitudinal direction, but not in the transverse direction.
Since the production of rectangular rugs involves straight and reverse rows, it is recommended to choose double-sided patterns for them, that is, so that they look the same on the front and back sides.
If knitting is carried out using the most common method, single crochets, then in order to avoid compactions between the rows, with each subsequent knitting, the working thread should be grabbed not under the two arcs of the lower loop, but only at the back one. Thus, smooth horizontal or transverse stripes (depending on the direction of knitting) are formed on the front and back sides, created by the remaining front arcs.
Rectangular rugs with square motifs
You can also create a beautiful floor rug using numerous multi-colored elements or fragments that differ in the structure of the material used.
Their knitting pattern can be either circular rows or straight or reverse. This depends on the thickness of the yarn used. For thinner source material, openwork patterns will be acceptable. Motifs from straight and reverse rows are better suited to dense raw materials. The size of the fragments is determined individually and depends on the required parameters of the finished product.
The coupling of motifs with each other can also be done in two ways: when knitting the outermost row and after making a complete set of parts. The connection of separately connected motifs is done by crocheting or sewing with a needle and thread.
Mat knitting technique
Homemade yarn rugs can be solid, of any shape and with different manufacturing patterns.
So, rectangular ones are knitted in straight rows. Round starts from the middle and continues in a circle.
Manufacturing using the fillet technique requires the presence of a base mesh as a basis. A pile of yarn is added to it, and separately connected elements are combined into a whole fabric.
Pentagonal rug
A simple, but at the same time original solution is to make a pentagonal rug from an ordinary round rug. It is enough to make some calculations at the beginning of knitting. Before you begin making the first row around the starting ring, you should decide on the required number of loops, a multiple of 5. Depending on the thickness of the yarn, there can be 10, 15, and so on.
When knitting the second row, you should make constrictions from a certain number of air loops between the resulting five groups of loops. Their length is determined individually, based on the thickness of the material used.
When performing each subsequent circular row, do not forget about additionally adding loops in each first and final loop of a separate group. Their frequency is determined visually to avoid both the formation of a dome-shaped mat and the presence of tails.
After reaching the required diameter of the rug, the outer row is closed with a connecting post, the loop is secured, and the end of the yarn is hidden in the previously knitted rows.
Rug made from old things
This option is suitable for people who have a lot of old clothes that have nowhere to go. It’s a shame to throw them away, but this way you can breathe a second life into them. Almost any clothing is suitable for knitting a rug: T-shirts, wool, towels, sweaters, leather belts and tights.
Before you start knitting, old things need to be prepared. To do this, they need to be cut to make one long strip, this will be the yarn. After this, the yarn must be collected into a ball, now you can start knitting.
Based
Crocheting rugs from rags can also be done on a base. This technique for making rugs is called carpeting. It consists of filling the warp cells with pieces of yarn or strips of fabric. The result is a fluffy, soft rug with a pile of a certain length.
In order to knit such a rug, you need a special base. Due to the repeated use of the finished product, it must be strong and wear-resistant, so Stramin is used for such purposes. But due to its high cost and difficulty in acquiring, experienced craftswomen have found an excellent way out of this situation.
They suggest making the base for the rug yourself. For this you will need strong cotton threads. Next, depending on the shape of the intended rug, as well as the thickness of the material used, you should knit a mesh with identical cells. This can be a fabric of regular alternation of single crochets and 1 chain stitch, or a single crochet stitch and 2 chain loops.
In the case of knitting round rugs, it is necessary to introduce additional cells into the mesh so that the base maintains an even horizontal position. The size of the mesh base must be equal to the final parameters of the product.
After making the frame, it should be carefully treated with waterproof glue. In this case, you need to ensure that all the cells inside are not covered with adhesive film. Then let the base dry and you can start making the mat itself.
It should be noted that a special hook is designed for knitting products in carpet technology, which is a slightly curved tool with a closing head and a thick wooden handle. This hook structure is necessary for the convenience of gripping yarn or material under the warp and forming a fastening loop.
In addition to knitting the base for the rug, you should also pre-prepare the yarn. This process involves cutting identical pieces of leftover thread or strips of fabric. The length should not be less than 6-8 cm, since in addition to the pile, its consumption is used to make a fastening loop. There must be many of them, because one unit is used to cover one cell of the base grid.
The color scheme in this technique can be varied. By using multi-colored pieces of fabric, you will get a bright rug with an abstract pattern. If a more clear pattern or ornament is provided, then it is necessary to prepare material of the appropriate color scheme. To make a rug with a pattern, the preliminary preparation also includes a diagram of the pattern in boxes for the convenience of translating it into reality.
To get started, you need to take the hook and place it under the broach of the first cell. Fold the prepared strip of fabric in half and grab the resulting loop with a crochet hook. Pull it over the base, holding the ends. Pull the connected ends of the strip through the loop formed. Use your hand to pull up the resulting pile, while securing the loop to the base. Exactly the same operation should be performed with each subsequent cell. For convenience, it is recommended to knit from right to left.
By filling one row of cells after another in this way, you get a continuous, fluffy and very soft floor rug.
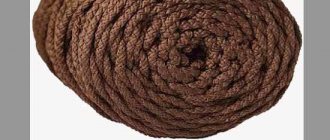
Made from polyester cord
Round rugs made from polyester cord are elegant, textured, elastic, do not fade and do not accumulate dust. These rugs hold their shape well and are easy to clean or wash. Thanks to its rigid structure, the product is suitable for the bedroom or living room, as well as the bathroom.
We offer a choice of two interesting patterns of round rugs, crocheted using different techniques.
Spiral
To create this simple rug you will need:
- polyester cord Caramel in two colors;
- hook No. 5.
Sequence of work:
We form a ring from the thread, knit a loop, then another one into it.
We knit 7 sc, after which we tighten the ring.
We immediately mark the first loop of the new row with a marker, and then knit 2 sc into it in a spiral. Add a thread of a different color, knit 2 sc. We change the color again and then knit 2 sc each, alternating shades until the end of the row. There should be 16 columns in total.
In the first knot of the new row we knit a single crochet, in the second - 2 sc. Repeat the pattern throughout the circle, alternating colors. The total number of columns in a row is 24 pcs.
We knit according to the pattern: sc, sc, 2 sc in one loop, 32 pcs in total. That is, with each row the number of columns will increase by 8 pieces.
At this stage, the repeat of the pattern consists of one single crochet in the first three loops and 2 sc in the last knot of each color, a total of 40 pcs.
We increase the number of columns by one in each round until the carpet reaches the required size.
You can clarify the nuances of how to properly crochet a round rug made of polyester cord in two colors in this video tutorial:
Snail
To work you will need:
- polyester cord Caramel in different shades;
- hook No. 5.
To create a carpet using the snail technique, you can use leftover cord of different colors. The more shades of thread you have, the brighter and more original the product will be.
Step-by-step instruction:
We knit a chain of 4 ch, tie it in a circle with sc.
We continue to knit a single crochet stitch in the circle until the knitting element reaches the desired length.
We cut off the cord, add a thread of a new color, and hide the tails inside the workpiece. We continue to knit a single crochet stitch using the same pattern.
Upon completion of the work, we twist the resulting “pipe” like a snail, stitch it from the inside out with threads or glue it together with a glue gun.
How to crochet a round rug from multi-colored cord is described in more detail in the video tutorial for beginners:
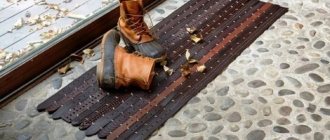
Made from denim
Due to the fact that denim fabric is quite dense and rough, it is recommended to make strips of it for knitting floor rugs as thin as possible. But the problem is that this material is very friable. During cutting, as well as twisting into balls, its structure quickly collapses and the strength of the prepared yarn is lost. To avoid such troubles, after cutting denim products into strips, it is advisable to treat their cuts with fire. The threads sintered along the edges for a long time prevent the yarn from shedding and create more comfortable conditions for working with it.
Due to its density, denim yarn is difficult to crochet. The best option for making a rug from this material would be to prepare a chain of air loops, crocheted, which will subsequently be assembled into a spiral and secured in layers.
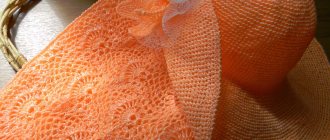
Knitted “Sun”
Many housewives like to create rugs for the children's room. The canvases blend harmoniously with the interior and are beautifully knitted. We knit a rug from “Cotton” yarn; the colors are yellow and orange. The hook for work is suitable at number 2, 5. It is better to fold the yarn into two threads.
The six air loops cast on are connected into a ring with a connecting post. The yarn is taken yellow and knitted in a circle in this order:
- Row 1 – one chain lifting loop, nine single crochets in a ring.
- 2nd row - two single crochets are knitted in the RLS of the first row.
- Rows 3-8 – SC, adding six SC to each.
- Rows 9-32 – sc, knit eight in a row.
- Rows 33-60 – single crochet, six added to each row. From the 59th row the thread switches to orange. At this stage you can complete the knitting.
- The rays can be knitted separately in the shape of a triangle and attached to the base.
- The eyes and nose are knitted with orange, white and blue thread, each circle separately. The knitting is normal.
- A red stripe is knitted for the mouth.
The prepared parts are sewn to the base of the sun. The ears can be crocheted to the head.
Made from knitted fabric
Products made from knitted fabric are the most common and high-quality material for the manufacture of knitted floor rugs. It can be cut into strips of any width. The resulting yarn is soft, elastic, and durable. It does not crumble, but, when stretched, creates an even, twisted thread. When knitting from such yarn, very aesthetic and beautiful products are obtained.
Crocheting floor rugs from rags you don’t need in your wardrobe will help you not only gain handicraft skills, but also create additional comfort without financial expenses.
Knitting material for floor mat
You need to select materials for work taking into account their quality. They should be pleasant to the touch and not cause discomfort. For example, for the room where a child spends time, rugs made of soft yarn are used.
You can put a polyethylene mat near the front door in the hallway.
- The use of natural threads in making the rug makes it soft. However, if you need something for a long time, then it is better to choose mixed yarn for work, for example, with the addition of synthetic fibers.
- There will be no problems with creating and maintaining the shape of the product if you use knitted yarn made from cotton and polyester.
- A good material can be old unnecessary fabrics, cut into strips two centimeters wide. The knots are large and suitable for rustic-style rugs.
Elegant-looking rugs are made from polyester cord, which is elastic and retains its color well.
LiveInternetLiveInternet
Japanese rugs only look complex in appearance, but upon careful analysis of the crochet technique, it turns out that this is the usual knitting of hollow circles that are connected in a certain sequence. For a simpler option, it is enough to use a model of 4 circles, which were later “filled” with a canvas of double crochets.
Here is a detailed master class “ HOW TO KNIT A JAPANESE SQUARE RUG ”
For experienced craftswomen
Experienced craftswomen can choose to crochet more complex patterns and variations, where most techniques use stitches that are difficult to knit. It is also worth noting the compatibility of complex patterns - pineapples are combined with cones, and cones with floral motifs, and so on. But you should still present several models for crocheting rugs yourself.
Rug based on the "Grand" napkin
You can easily make carpets from crocheted napkin patterns, and here, if necessary, you can increase the size of the future canvas by combining or “wedging” several rows with certain patterns. So the “Pineapple Song” napkin prompted experienced craftswomen to knit based on the existing pattern of the rug, called “Grand”. The new model fits perfectly into the interior design of Provence, Rococo, Baroque, Classicism, the more luxurious Gothic or Empire style. There is nothing complicated in knitting it - the main thing is to use the given patterns with descriptions:
Cast on 8 chain stitches and close the chain into a ring. Next, continue knitting according to pattern 1. If necessary, you can increase the diameter by repeating the last few rows. Photo pattern for crocheting a rug grand
Next, move on to knitting pattern 2 - here you can also increase the size of the rug by adding a third row of petals above the pineapples. Photo pattern for crocheting a rug grand
At the end of the work, go to pattern 3 - this will allow you to finish the rug smoothly and textured. Photo pattern for crocheting a rug grand
For edging, pattern 4 is used, consisting of air loops and picot.
The presented model is recommended for independent execution in white, but if necessary, more attractive shades of thread that suit the color scheme of the room are also taken into account. The finished rug is simply soaked in cool water and laid out on a cloth, or directly on the floor until completely dry.
Simple but attractive blue lace
An openwork rug can be knitted using a simpler pattern - here it is only important to correctly arrange the petals from ordinary double crochets. So, it is proposed to use the following diagram, which will help to create a very attractive and versatile crochet rug model - change the shade, and you will get a completely different version of the fabric.
Rugs from bags
Rugs from bags are knitted using the same technique as from T-shirts and knitted fabrics. Here you will also need to cut long strips from the bags; see the detailed master class on .
It is not recommended to use an openwork pattern, because the joints of packet threads may become accessible to the public.
Children's variations
Children prefer their own rooms with appropriate furnishings - everything should be bright and fabulous. Therefore, the task of parents is to take into account every little detail. If you previously did not take care of purchasing furniture or textiles for the children's room with appropriate prints, then today you can easily correct the situation:
First, buy curtains with a child's pattern for your child's room.
Secondly, replace the existing dark blanket on the bed with a bright children's option.
Third, tie the rug! But not a simple one, but a special one - in the form of an animal.
Do you think knitting rugs in the shape of animals is a difficult task? Not at all - here only circles, ovals, squares, hexagons, rectangles and other individually connected figures are correctly assembled into a single composition
For example, you can see how to knit a simple rug in the shape of a bear:
tie the bear's face - a simple circle of a suitable size in a gray shade;
bear ears - 2 semicircles of white and gray;
the bear's nose is a white circle, and the triangle is cut out of black suede (later it will be sewn on);
bear cheeks – 2 circles of pink shade;
eyelashes - 2 suede parts, which are also later sewn on in the designated places.
The rest of the children's rugs are knitted using the same principle - use your imagination and don't look for complications in the patterns! Everything ingenious is simple!
Bathroom rugs
A crocheted bath rug can be the key point of the entire design. Thus, a set of a rug in the toilet, in the bathroom, a “seat” for the toilet and an “organizer” for toilet paper can outshine expensive tiles or a super-functional bathroom. Moreover, similar knitted bath and toilet mats make an excellent housewarming gift. Below we offer the most interesting crocheted rugs for the bathroom and toilet.
.
.
.
.
.
.
. . . .
Whale
A knitted bathroom rug can be made in the shape of a whale, which is knitted quite simply:
Knitting begins in the round - this is the body of a whale.
Having tied it to a suitable size, they begin to knit the tail, where the fins are simple and standard pineapple tying patterns.
Next, you can begin tying the harness from half rows of fan-shaped repeats. It is better to do this even before knitting the tail - this will eliminate the need to constantly turn over the already bulky fabric.
Finally, a fin is knitted - this is the same standard pineapple pattern.
Finish knitting the whale by knitting and attaching the eye, as well as the line of the waterfowl's mouth. You can separately give the whale a bow and splashes - let it be soft and cute.