A DIY shelving unit is not only simple, but also economical. If you have never made something with your own hands before, then a whatnot is the first step for a novice craftsman.
What is a bookcase? This is a furniture option that consists of shelves combined into a common structure. The shelf can be used for flowers, shoes, personal care products or tools.
There are no restrictions on the use of shelves, except for weighing ones. You should not load the bookcase with too much weight, because it is not a rack.
A bookcase, as you know, is a cabinet without walls.
Long gone are the days when the whatnot was the “highlight” of the living room and the hostesses of secular salons vying with each other to see whose was cooler.
The benefits of making it yourself
Do you know what the advantages of any “hand-made” product are?
- Savings in its purest form. Often, when buying a finished item, you have to overpay for the brand name, for low-quality material purchased in bulk, and for the work of the craftsman.
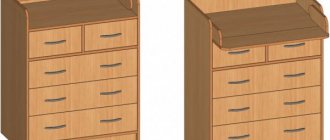
- Meets all requirements. You make a bookcase according to certain technical characteristics: width, height, number of shelves, material, color. Of course, stores offer a huge variety of options for any furniture. The bookcases were no exception. But most often, products produced on a machine are measured in whole units. You can make an interior item that is ideal in size and style.
You can name other advantages to making a bookcase with your own hands, but all the main ones are highlighted.
It is also shelves height from the floor, sometimes on wheels, or a rack for a relatively small operational load, not attached to the floor, walls or ceiling.
Nowadays, most of the shelves in everyday life are used to place indoor plants.
Recommendations for placing shelving
Installation of stationary shelving can be done in the kitchen, pantry or garage. Large open shelves provide great visibility. In this case, all items are easily obtained and just as easily returned to their place. It is better to install a closed shelving unit in a children's room or living room . For example, you can store a large number of books or toys there. The baby will be able to store his things in such a rack.
Kitchen shelving
If we talk about the rotating structure, then it can be installed almost anywhere, be it a children's room, a garage or a living room. The rack is more complex to make, and you also need to learn how to decorate it, because if you install the product in the middle of the living room, it will always be in sight of guests.
Deciding on design and construction
The design of the bookcase depends entirely on your desires and capabilities. If we are talking about a bookcase as a decorative element, then you can choose an interesting material: rattan or glass, beech or forged metal.
A multifunctional piece of cabinet furniture that can effectively zone a room and be aesthetically significant in the interior.
Here the openwork of the whatnot works for functionality: using the whatnot, plants can be placed on a minimal floor area so that they do not shade each other and it is convenient for the owner to care for them.
Naturally, only a true master who knows how to work with this or that material and has the necessary tools can do this with his own hands.
You can make a bookcase from any more or less durable and workable material, but novice furniture makers should not get carried away with their variety.
For the same purpose, special shelves for flowers are built, but they are, as a rule, stationary, attached to some kind of base, and the shelf is adjustable.
Speaking of practical applications, making a bookcase with your own hands is quite simple. The design consists of two vertical bases and horizontal shelves between them. There are an incredible variety of mounting options and they depend on the material of manufacture.
- The easiest way is to screw the shelves to the base from the outside. This assembly method is relevant for wooden shelves. If you think that it will not be beautiful, then we can reassure you, there are plugs for self-tapping screws in different colors.
- Each shelf has holes in the corners; posts are inserted into these holes to separate the shelves from each other. Most often, this design is offered for plastic shelves for bathtubs or shoes. But glass shelves can also be organized in a similar way. Dividing posts can be chrome plated. Although metal can also be assembled into a bookcase in a similar way.
- The variety of fittings allows you to choose fastening elements hidden in the body of the product.
Shelves assembled using hidden mortise carpentry joints are rarely made independently, and are expensive to sell.
Even today, a shelf can become a key element of interior design.
These are the main examples of whatnot design. You can improvise or use decor. Thus, forged elements can give the simplest and most inexpensive wooden product not only charm, but also luxury.
The most durable is a wooden shelf assembled with an overlay.
Well-made rustic furniture looks amazing and fits into almost any interior, down to the loft.
To the hallway
In a modern hallway, after installing a hanger, wardrobe, key holder and shelves for small items, there is often no space left for a large bookcase. But there is an area of application where a mini-shelf for the hallway is extremely necessary: a shelving unit for everyday, common shoes. Out-of-season shoes are stored in a special shoe rack, but before placing them there, the shoes need to be dried thoroughly.
Improper and correct storage of shoes
There is no need to dry shoes and maintain them as shown on the left in the figure: for shoes to last for a long time, they must dry evenly on all sides; especially from below, from the sole. For this purpose, use special shoe shelves with lattice shelves, on the right in Fig.
Drawings of a shoe rack in the hallway for everyday shoes are given below. rice. Material - scraps of cellular polycarbonate and PVC or metal-plastic pipes in a PVC shell. Both can be purchased cheaply from plumbers and awning, gazebo, and greenhouse specialists. You can also use propylene pipes, but then you will need to drive hardwood bosses into their ends and assemble a shelf with self-tapping screws, because Polypropylene does not stick to anything firmly enough. Holes for pipes are drilled with a Forstner drill or cut with a mounting knife.
Drawings of a shelf for the hallway
If the materials are polycarbonate and PVC, then the shoe rack is assembled using dichloroethane glue: polycarbonate sawdust is dissolved in dichloroethane until the consistency of low-fat kefir or yogurt is obtained. Remember: dichloroethane is a volatile, toxic, flammable liquid and must be handled with the necessary precautions!
Necessary materials
How to make a bookcase with your own hands is clear. You should decide on the materials needed in this matter.
- Assembling a plastic shelf bought in a store is as easy as shelling pears; just assemble the “construction set” according to the instructions and use it with pleasure.
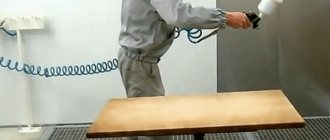
- When working with wood, in addition to the main material, you will need fastening elements (screws, nails, corners). Let us note that wood is a material subject to mechanical damage: the wood dries out, the wood rots, and insects eat it. To protect your piece of art, you should coat it with varnish or wax. To add color, you can use paint or tints.
- If we are talking about metal, then you should study the issue in more detail. In an apartment, an iron shelf can be used quite rarely. There is stainless steel in the kitchen, stainless steel in the bathroom, stainless steel in the hallway. Ferrous metal is only suitable for a tool.
- Glass can be a material for shelves, both individually and in the overall design.
It may have four or more legs with shelves between them. As a rule, it does not have back or side walls.
Those who want to learn how to make rustic things are faced, first of all, with two tasks: aging the wood while simultaneously increasing its decorative qualities and surface strength, and also, as regards rack-mounted shelves, adjusting the junction of branch cuts for the racks.
Working with all these materials requires certain skills and tools. What can we say about more complex materials?
A type of shelving made from overlay planks is household frameless (with sidewalls made of one board each) shelving-ladders.
Use decorative forging, ropes or leather inserts
How to make a classic shelving unit with solid walls
Classic shelving is reinforced with a solid frame on the outside, and sometimes also with a back wall. This design will withstand heavy loads, such as full shelves of books.
What do you need
- Plywood sheet 2×125×250 cm;
- plywood sheet 0.6×125×250 cm;
- three slats 2.5x5x250 cm;
- one rail 2.5×8×250 cm;
- a circular saw;
- pencil;
- long ruler and tape measure;
- jig for drilling ends (if any);
- drill with a diameter of 3 mm;
- clamps;
- drill;
- hammer or nail gun;
- confirmations and nails;
- 220 P grit sandpaper;
- paint and brush, wallpaper and glue (optional).
How to do
Unfold the plywood sheets and battens onto the following elements.
Frame:
- two side walls 2×30×180 cm;
- five shelves 2x30x70 cm;
- top of the rack 2×30×75 cm;
- back wall 0.6×75×180 cm;
- bottom plug 2.5×8×70 cm.
Facial finishing:
- two vertical slats 2.5×5×170 cm;
- two horizontal slats 2.5x5x75 cm.
Let us remind you: if you do not have a circular saw, you can cut the elements to the desired size at a hardware store.
Frame: The Home Depot / YouTube
Mark under the shelves on the side walls. Using a pencil and ruler, place marks at a distance of 8, 36, 72, 108, 144 cm from the bottom edge.
Frame: The Home Depot / YouTube
To install shelves, prepare holes for fasteners. If you don't want the screws to be visible, use a jig and drill holes in the shelves at a sharp angle. If there is no jig, drill through the outer side walls of the rack at right angles along the marking lines from the previous step. In both cases, step back 5 cm from the edges.
Frame: The Home Depot / YouTube
Assemble the outer frame with nails and reinforce the joints with confirmats. Place the shelves along the marking lines and screw the euroscrews into the pre-prepared holes.
Frame: The Home Depot / YouTube
At a distance of 10 cm from the front surface, attach the bottom plug in the same way as you attached the shelves.
Frame: The Home Depot / YouTube
Nail the trim pieces around the perimeter of the frame. To do this, use a nail gun or a regular hammer.
Frame: The Home Depot / YouTube
Sand the surfaces and paint if desired.
Frame: The Home Depot / YouTube
Attach the back wall with nails.
Frame: The Home Depot / YouTube
If you haven't painted the back wall, you can, for example, stick wallpaper on it.
Frame: The Home Depot / YouTube
What other options are there?
Such a rack can be of any shape, for example triangular:
Or stylized as antique:
A classic shelving can be made from one material, as in this master class, where it is made from MDF sheets:
Required Tools
what tools you will need to assemble a bookcase with your own hands ; it depends directly on the material.
When working with plastic:
- hands and intelligence.
If the material is wood:
- screwdriver or drill;
- hammer;
- sandpaper;
- brushes
If the shelf is iron:
- welding machine;
- Bulgarian;
- sandpaper.
Glass shelf:
- glass cutter;
- sandpaper;
- grinder (for cutting jumper pipes).
For the strength of the attached ladder shelf, its shelves must be box-shaped without extension.
Some knowledge about measures to ensure it is useful not only for designing furniture.
It’s not a fact that all the tools will be useful to you, but you shouldn’t start work without having basic technical tools at hand.
Rack-mounted shelves have the highest ratio of strength to the amount of material required for manufacturing.
The same openwork will allow you to express yourself in an object and get a unique thing with minimal consumption of material.
Kinds
These designs are actually produced in a large number of types. They differ in appearance, size, production material and other factors.
Office
Racks used in different office spaces are highlighted separately. They are indispensable elements that ensure a comfortable working process. Their main features include:
- They are small in size, so they easily fit into small areas located next to each employee’s desk;
- They have good capacity, so they can store numerous papers, small items or other elements;
- Available in standard colors and optimal design, perfect for an office work environment;
- the most popular are structures made of metal.
Typically, office shelving is purchased for each employee, so all these products in one office have the same appearance.
Household
These shelves are usually used in residential premises. They are installed in the kitchen or bedroom, and their main purpose is to store various small items, books or even household tools or dishes.
Household shelving can be created with your own hands, and for this you can use different materials. They usually have a standard appearance. They do not use any specific decorative elements, so they do not decorate the premises. Most often, the minimalist style is chosen for them, so they take up little space and do not stand out in any way in the room.
Decorative
Such furniture shelves are presented in numerous versions, and also have the following features:
- designed to decorate any interior;
- perfectly match the specific style formed in the room;
- they wander around not too spacious;
- do not have numerous functionalities;
- They have unusual shapes and unique colors.
Numerous different materials are used to make decorative shelves, and the most popular are designs that combine different components.
Manufacturing process: step-by-step instructions
It’s quite difficult to say how to make a bookcase if you don’t know what material and design option you will choose.
The process looks like this:
- choice of material;
- design choice;
- measuring the height and width of the product;
- production of horizontal shelves (size should take into account vertical racks
- production of vertical support);
- assembly;
- decoration.
The plan is quite general, but the design of the bookcase is not a standard of skill, but only the first stage.
Rack-mounted shelves are assembled using glue and pins that pass through the shelves and go into deep holes (sockets) along the axis of the racks.
You can make a bookcase from any more or less durable and workable material, but novice furniture makers should not get carried away with their variety.
Setting up the kitchen
It happens that in the kitchen there is a narrow space between pieces of furniture, which spoils the appearance and seems to be unsuitable for use. We offer you a master class on how to make a roll-out shelf.
You need to prepare:
- boards, according to the number of shelves you plan to make;
- slats;
- furniture wheels;
- handle for easy rolling out;
- wooden slab;
- screws and dowels;
- glue.
We measure the space that we want to fill with a shelf, and accordingly decide on the width of the shelf. We cut the necessary parts.
We begin to attach the shelves to a wooden slab, which will serve as the back wall of the product. Before assembly, coat the joints of the parts with glue, and only then connect them with screws.
We screwed the shelves, now we fix the sides.
You can press it with a weight for better adhesion of the glue.
The base is ready.
Now we glue the slats that will prevent the contents of the shelf from falling from it.
Screw on the wheels and handle. We install the shelf in the opening.
The roll-out shelf is ready. And the empty space has been filled, and additional storage spaces have appeared.
The final stage is decoration
If you are interested in the question of how to make a bookcase with your own hands, the answer is in front of you. But how to decorate a ready-made bookcase? The easiest way is painting. Choose a color that suits you and paint your counter shelf in wood or metal. Use decorative forging, ropes or leather inserts. Wood is combined with metal, textiles, and plants.
Functionally, the shelves of rack-mount shelves can be of any required height and extended to almost the entire width.
A forged or cast bookcase can be a work of art, but is functionally very reliable and durable.
Good luck!
Rack-mounted bookcases have a rather serious drawback from the point of view of an amateur: in order for the bookcase to turn out beautiful and original, you need turned wooden parts.
Shelves on the wall
In any room there are places on the wall where you just need to hang something. After all, most modern furniture occupies only the lower part - sofas, tables, couches. The upper part remains empty and dissonance arises: the lower part of the room is overloaded and the upper part is half empty or completely empty. These voids on the walls are organically filled with shelves.
The whole system, and the most “dead” space is used - the corner
Structurally, most shelves consist of the actual shelves and lintels. But these components are combined into so many options that it is impossible to count. A simple design is good: you can make any shelves with your own hands. Moreover, these products may be the first self-made things. It's really simple.
How and what to attach it to
It’s not for nothing that we start with fasteners. The design of a wall shelf largely depends on the type of mounting. Or maybe it’s the other way around. It depends on what to dance from...
Traditional hinges
Traditional hinges for hanging shelves
There is a traditional way - on loops. It is suitable for wood and fiberboard, any other material that is thick enough to attach. Screwed onto the sides with self-tapping screws. Then the distance between the centers of the loop holes is measured and marked on the wall (make sure it is horizontal). At the marked points, holes are drilled for the dowel, the dowel is inserted and a dowel-nail with a small head is screwed into it, which fits into a loop or bracket (a pin slightly bent upward). Then a shelf is hung on them.
Not all materials can be drilled. For example, glass shelves. You definitely can't screw anything into them. Fastenings for glass shelves are special: they consist of two parts, between which glass is inserted. Often elastic pads are installed between the holders. The bottom mount usually has a small clamping screw to secure it in place.
Fasteners for glass shelves
The most popular mount for glass shelves is called “pelican” - for its unique shape. It looks good on its own and is available in different colors. The thickness of glass that it can hold is from 8 to 34 mm. You can insert not only glass into it, but also any other material of such thickness. It just looks stylish with glass.
It’s easy to make glass shelves on the wall with it: you buy a mount, order pieces of glass with processed edges of the required size and shape from a glass workshop (or cut them yourself, if you know how). All that remains is the assembly itself:
- Attach the pelicans to the wall. Two dowels each. The case is collapsible - the decorative trim is removed, and there are two holes in the mounting plate. One is higher in the body, the second is lower. We secured it and put the decorative trim in place.
- Glass was installed.
- Tightened the screw. All.
Glass shelf holder for wall
There are other forms of similar fasteners. The photo below shows a few of them.
Some mounting options for glass (and not only) shelves
Decorative brackets
Another type of fastening is brackets. They are reliable, some are decorative, so much so that they themselves are decorations.
Wall shelf brackets
Concealed installation - shelves without support
And the most amazing device for hidden installation. It makes it possible to hide the fasteners. A seat for the pin and the holder body is cut out at the end, and the shelf is simply put on it.
Hidden fasteners for shelves
As you can see, even a simple board or piece of glass on such mounts is not bad. But there is still a sea of all sorts of ideas.
DIY bookcase: 50 photo design ideas
PreviousShelves and racksMaking a shelf for the wall with your own hands
Next
Shelves and racksThe “house” shelf is a convenient and original idea for a nursery
Form
In specialized stores you can find racks of any configuration and size. Some designs are compact, while others, on the contrary, are massive and spacious. When choosing a product, it is worth deciding in advance what the user will store there and where it will need to be installed. If you can fit any furniture into a large room, regardless of its dimensions, then in a small space it is best to provide a compact classic shelving unit or a combined model. The most popular among buyers are:
- Island shelves.
- Cabinets.
- Products in the form of stepladders.
What are they?
Depending on the purpose, a plywood box can have a different design. This type of container comes with or without a lid, retractable, tall, folding, collapsible, with a pencil case or a lock. But there are the most common types of plywood products.
- Folding box The box is characterized by the principle of fastening the side walls to the bottom. The connection of structural elements is carried out using canopies.
- Box – packaging is arranged quite simply. The sides are attached to each other using nails and screws. These products are used for transportation purposes, which is facilitated by their compact dimensions, namely 50 by 40 cm.
- Decorative box. This box is characterized by groove fasteners.
Description
Plywood boxes can be made from different types of wood, often birch, linden or pine. The box body is made from edged boards, and their lids are made from plywood or chipboard. The dimensions of this product may vary; therefore, if necessary, manufacturers can add ribs for rigidity, consisting of 12, 16, 24 strips.
The production of plywood boxes is regulated by GOSTs. These products are characterized by the following advantages:
- low cost of material;
- good performance;
- light weight;
- environmental safety.
In addition to the above features, plywood is capable of withstanding all kinds of processing, and the application of various inscriptions is no exception. Boxes of this type are quite durable and can withstand moisture; even if the product gets wet, it will not lose its performance capabilities. Plywood boxes have a well-thought-out design, so they can be quickly disassembled and assembled. Since the boxes are light in weight, transporting cargo in them is characterized by low cost. Despite their lightness, plywood boxes are very reliable and maintain the integrity of the products they contain.
Plywood products also have disadvantages, including a high combustion rate. Also, if wet and not dried, such boxes can swell and become moldy.
Interior items made of plywood
Perhaps you have not paid attention to the fact that a significant part of the products present in your home are made of plywood. So, they often collect from it:
- cabinets;
- frame for upholstered furniture;
- tables;
- chairs;
- even kitchen sets.
As you can see, the material is suitable for making any furniture, therefore, a box from it can be assembled with almost any parameters. The result is a very practical device that will add a certain comfort to life and functionality to the furnishings of the apartment.
Plywood is a very flexible material, so you don’t have to worry about damaging the sheet with careless movements while processing it.
As for how such boxes can be used, there are also a lot of ideas. By making a “box” out of plywood, you can:
- fill the shelves of the closets and put things inside that were previously thrown there in a shapeless pile;
- turn it over, attach the legs on casters and turn it into a coffee table;
- use as a book stand;
- stack several identical boxes on top of each other, making a multi-story organizer, etc.
Particularly experienced craftsmen can turn a piece of plywood into a work of art, such as a jewelry box
Peculiarities
The most important specificity of plywood shelves is convenience and simplicity. Pressed veneer can be obtained from both birch and coniferous wood. Various types of plywood can be used to make shelves.
By the markings you can judge what kind of glue was used. Depending on its composition, the sheets are:
- flame resistant;
- moisture resistant;
- susceptible to moisture.
There may be some difference in processing methods. Sanded plywood is quite common. Sanding is done on one or both sides. The last option is optimal.
In the vast majority of cases, plywood is produced using the circular peeling method. But, for aesthetic reasons, in some cases it is more profitable to use material that has been peeled with eccentric torsion of the workpiece. With flat planing, you can achieve a strictly specified type of pattern in accordance with the progress of processing. For the most complex aesthetic effects, veneer is obtained by sawing (this technique eliminates the requirements for preliminary preparation and ensures the production of natural patterns with a natural range of tones).
For work, you can take plywood brands:
- FSF;
- FC (much better than the previous option, but with less moisture resistance);
- FB;
- FBS (with the maximum level of strength and resistance to moisture);
- FBA (all natural material).