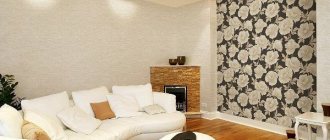
Today there will be a useful review for those who avidly read books and like to do it not in electronic form, but in traditional paper form. And the main question is where to put all the goodness accumulated over the years? The hand will not rise to throw it away. But making a home library is a great idea. The IKEA bookcase is the best assistant in this matter.
IKEA bookcases "Billy"
Pros and cons of modern materials
Cabinets made of natural wood are now quite rare. This is due to both the high cost of such products and their bulkiness and heavy weight of the structure.
The average consumer has long been accustomed to being satisfied with storage systems made from laminated chipboard (laminated chipboard) and MDF (fibreboard made from a finer fraction of sawdust than chipboard).
Various manufacturers offer a large selection of cabinets made from these materials. But the quality of the wood-based panels themselves often leaves much to be desired. Low density and lamination flaws lead to the fact that the corners of the doors break off and quickly lose their appearance, and the plate itself crumbles at the fastening points. Many buyers, having been “burned” by furniture from Russian companies, chose the Swedish brand IKEA.
Why IKEA
The IKEA wardrobe catalog offers a wide range of storage systems from open shelving to sliding wardrobes and walk-in closets. The company's policy is aimed at meeting the needs of the broad masses of the population and offers products for every budget.
At the same time, the quality of raw materials both in inexpensive models and in the middle price segment is equally high. And compact packaging and simplicity of design allow you to save on delivery and assembly.
Photos of IKEA cabinets presented in the catalog, with a detailed description of the sizes and materials used, allow you to decide on the choice of model. In addition to ready-made cabinets, IKEA offers a wide range of storage modules that can be configured to suit your needs.
In addition, the internal fillings of cabinets (shelves, storage drawers, hanging rods, etc.) can be placed at different heights, depending on personal preferences.
Assembling a wardrobe system: step-by-step instructions
Today we will look at a detailed version of assembling the Pax wardrobe. In addition to cabinet parts, this kit includes additional elements for installation.
Step one: you need to open the packaging and conveniently place all the elements on the floor. The width of the finished frames will be 100 centimeters and 70 centimeters. In the assembly process itself, we will not need anything other than one screwdriver and a hammer and a hammer drill.
In this case, we will place two parts of the modules side by side - here you can see the presence of all the necessary holes for fasteners
Step two: First you need to install the wall brackets on both sides.
Installed corners for the wall
Step three : next, according to the instructions, we need to secure the holders for the upper crossbars. In total, these screws are screwed in three places. The same steps should be repeated in the second half.
Screw in the crossbar screws
Step four: Next, you need to hammer wooden pins into the upper and lower crossbars on all sides. Here we need a hammer.
Hammering the pins
Step five: Now you need to attach threaded washers to the bottom of the wardrobe (as shown in the image). They are needed in order to then screw the legs with stops into them.
Screw in the washers
Leg
From the inside of the wardrobe, you can adjust the optimal height of the legs using a Phillips screwdriver.
This is what the assembled leg with a plastic stop looks like
Step six: at the bottom of the cabinet we tighten the metal pins on which we will have to put the crossbar. They should not be secured from the extreme part, but by retreating some distance in order to place other perpendicular crossbars.
It is necessary to insert the lower crossbar into the metal pins
The sides with the cutouts should be aligned. The longitudinal part will be fixed to the wall
Step seven: when we put the bottom shelf on the metal pins, here you will notice a hole for a special nut that needs to be tightened. Using the same principle, it is necessary to secure the second shelf. It is also pre-attached to metal fasteners.
The nuts will need to be tightened using a screwdriver in three places
Step eight: when the top shelf is secured, it will be necessary to install stiffening ribs at the bottom.
They are a type of planks into which wooden pins are also installed - they should be securely fixed to the bottom.
Stiffening rib
At this stage, most of our cabinet is ready, you just need to secure the part on top.
In order to connect the remaining parts into the grooves, it is better to involve another person to help. After all, this is quite a responsible process.
This is what the finished cabinet base will look like
Step Nine: Now we need to attach the back wall to the cabinet. It is attached with nails.
It should be placed in this groove, and then nailed evenly. This is what the fixed wall will look like
Now you need to put the cabinet straight.
Using the same principle, we assemble another meter-long cabinet with a height of 70 centimeters
Step ten: the next step is to connect all these cabinets into a single system using prepared holes.
You will need to attach the cabinets to each other using the fasteners that come with the kit.
To do this, you will need to first align them exactly to the level, and only then secure all the screws and nuts. It is advisable to double-check the correct location of the cabinets several times.
Then, through the holes in the furniture corners, each module of the system must be secured to the wall. You should also make holes in the wall itself using a hammer drill into which dowels will be inserted. As a result, two dowels were used for each such cabinet.
Fastening furniture corners
Step Eleven: Before installing the cabinet doors, you will need to secure the runners at the top and bottom. These doors will move on them.
This is what the top bar looks like: Bottom bar
This is done quite simply. So, first, using two self-tapping screws, screw the top bar according to the instructions, install plugs so that it does not move back and forth. Then we screw the plastic holders on top.
Plastic holder
The lower bar is even easier to install. It will have to be secured with 8 screws.
Step twelve: the next step is to assemble the doors.
First you need to screw the corner and crossbar
After the main crossbar is installed, we need to secure the middle crossbars with screws.
The crossbars will connect the mirror and the wooden panel
Step Thirteen: Once these plates are installed, we will move on to the step of joining the mirror to the wood panel. This is the most difficult process of all stages of structural assembly. The canvases must be alternated with each other.
On top we install a wooden panel in special grooves. In this case, all seats must be sealed with a rubber seal.
Rubber compressor
Then a jumper is installed and only then can glass be installed up to the next jumper.
Step fourteen: all that remains is to put on the other side of the fastener, and our door will be ready.
Door assembled
Once assembly is complete, you can tighten all the screws again for greater reliability. Otherwise, they may unwind during operation.
It should be remembered that the door marked “A” is installed on the right side. The only difference is that it is a little thinner because it slides behind the other. Therefore, during assembly this feature will also have to be taken into account.
The door marked “A” is installed on the right side.
Then you have to hang the wheels on the door and install it in the wardrobe system. The mechanism should open and close smoothly.
Doors vs coupes
Hinged wardrobes are increasingly being replaced by sliding wardrobes, which, on the one hand, do not take up space with opening doors, and, on the other hand, due to their large height, allow you to use the occupied space as efficiently as possible. IKEA sliding wardrobes are equipped with high quality guide elements, which allows them to remain functional for many years with daily use.
The Pax line of wardrobes offers ready-made sliding wardrobes of two or more sections with different internal equipment. The height of two standards: 201 cm and 236 cm allows you to select the cabinet to match the height of the ceilings, using it to the maximum. Different cabinet depths: 44 cm and 66 cm make it possible to make a choice in favor of storing more things or less space occupied by cabinets.
The minimum width of the Pax wardrobe combination is 150 cm. This area contains two compartments with rods for storing things on hangers and a sufficiently large number of shelves or containers for storing folded things.
Other combinations come in widths of 200 cm and 250 cm, which, with little difference in space required, provide huge advantages in storing a much larger volume of items.
Sliding cabinet doors are made of tempered glass or laminated chipboard. Classic colors: white and black, as well as shades of natural wood, allow you to choose cabinets to suit any interior.
Module sizes
As part of this system, the company produces modules of several possible sizes:
- width: 20, 40, 60, 80 cm;
- frame height 80 or from 140 cm (pencil cases, sideboards and tall cabinets for built-in appliances)
- depth: 61-62 cm and 38-40 cm.
Standardization of IKEA furniture sizes is both an advantage and a disadvantage of the METHOD system.
On the one hand, standard parameters allow you to assemble the headset yourself by selecting modules of the desired type and functionality.
On the other hand, the system does not take into account the design features of the premises.
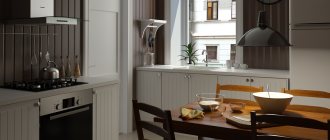
Small kitchen with U-shaped set METHOD (gray facades “Budbin”)
Despite its shortcomings, the IKEA METHOD system still remains one of the most popular among buyers. A wide range of sizes allows you to assemble a set that will suit most kitchens in apartments or private houses. This meets the main principle - universality.
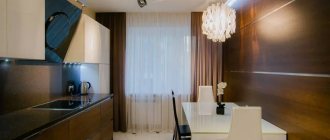
Kitchen IKEA METHOD “Ringult” (glossy) in a Khrushchev apartment
Another important principle is practicality, which is expressed in the ability to quickly and easily replace the necessary elements - frame, plank, cornice, etc. This is convenient and practical in case of damage to individual parts or if you want to inexpensively and without unnecessary hassle update the kitchen interior that has become boring over the years.
The METHOD kitchen can be composed of several functional and additional parts:
- frames of floor and wall cabinets;
- facades;
- table top;
- plinths and legs;
- overlay panels, strips, cornices.
For a series of videos on how to assemble a METHOD kitchen from IKEA with your own hands, see below:
- Assembly of frames (in 2 parts):
- Installation of the countertop (part 3):
- Installation of cornices, plinths, panels (part 4):
- Installation of sink, siphon, mixer (part 5):
Put it in a corner
In small rooms, installing a bulky wardrobe often becomes impossible, and then IKEA corner cabinets come to the rescue. Taking up a minimum of space, they rationally use the free corner of the room.
The Pax series offers a large selection of models of corner cabinets, ranging from a combination of two compartments to a U-shaped complex of five or more cabinets, which, in fact, is a dressing room.
Several rods for long and short clothes, a large number of standard open shelves and special shelves with a slight angle of inclination for storing shoes, as well as a large number of convenient drawers - the standard “stuffing”.
Glass cabinet doors add lightness to the design and visually reduce it, while mirror surfaces visually increase the space even in the smallest rooms.
Dazzling white
Scandinavian style implies simplicity and minimalism, and the climatic conditions of the northern countries with long winter evenings and a lack of sunny days are reflected in the love of white in the interior.
The Swedish company IKEA illustrates this style by offering all kinds of white furniture: open shelving, chests of drawers and cabinets, hinged wardrobes and sliding wardrobes.
White IKEA cabinets, despite the obvious soiling, are easy to clean, because the high-quality MDF coating is easy to clean, and the white color visually makes the furniture less bulky.
The line of famous open shelving “Billy” is diversified with interesting models of white shelving “Kallax” and “Fridlev”, and the new product for 2022 - the “Besto” storage combination with glass or wooden doors is one of the best solutions in the middle price segment.
Swinging snow-white wardrobes “Kleppstad” with two or three compartments occupy the niche of budget models. With a small height of 176 cm, they allow you to create perfect order in small apartments. Their solid white facades are simple and unpretentious.
Brimnes models from the same price segment have a more interesting design of door panels, and the three-door wardrobe is decorated with a mirror insert.
Distinctive qualities of the company
The main feature of the company is to provide the client with all possible design options, plus design; in each store there are good specialists who will help you and answer any questions. The material from which furniture is made is chosen very carefully; it must be environmentally friendly and of high quality.
Ikea cabinets have all possible dimensions. You have a huge range of wardrobes for the bedroom or hallway, children's and living room, dining room and even for the cottage and your garden.
Everyone has shortcomings, and Ikea also has them, if you need tasteless, not compact and not high-quality furniture, then turn to other manufacturers. Simplicity and quality are the key to success, durability and practicality are the main rule of the company.
In our production there is no ala psychotic ensemble, everything is simple, but not as simple as shelling pears. For the last ten years, the company has been focusing on the quality and purity of the material, so that everything is safe for health.
Books and souvenirs: hide or display
The “Besto” line of cabinets has enriched its assortment, offering customers interesting storage combinations with a wide choice of front colors: in addition to classic white and black, rich blue, gray-green and red-brown are available.
IKEA promotes the idea of “bookcases are not just for books,” offering customers models of various configurations with open shelves, blank or glass doors, which allows you to display all your favorite souvenirs and remove anything that spoils the view from view. A large selection of cabinets allows you to furnish both a modern living room with a huge TV, and a classic office-library.
METHOD facades: style and color of the future kitchen
Facades determine the finished look of the kitchen. Here you can find doors for lower and upper cabinets, front panels for dishwashers, and fronts for drawers.
Because Since IKEA has Swedish roots, it is not surprising that most of the options represent the Scandinavian style. But some are also suitable for kitchens in the style of minimalism, Provence, neoclassical, modern, hi-tech and even loft.
METHOD kitchens with combined facades “Kallarp” and “Ersta”
The price range is due to the composition of the products. The most expensive ones, for example, the “Lerhyttan”, “Ekestad”, “Torhamn” series are made of solid wood and veneer.
Let's take a closer look at the possible types and designs of IKEA facades.
*The price range below the photo is for one door, one front panel or one drawer front.
Framework
These will look great in a kitchen in the Norman style, Provence, or modern classics.
- "Budbin." This series is one of the most popular among IKEA kitchens. There are front panels for built-in appliances, frame doors - solid and glass. They are distinguished by beautiful bindings, which are ideal for window displays.
Colors – white, grey.
"Budbin." Cost: 2,400 - 3,900.
- "Sevedal." Only in white.
"Sevedal." Cost: 1,800 – 2,600.
- "Edserum". In brown color.
"Edserum". Cost: 1,600 – 2,300.
- "Torhamn." Kitchens in the color of natural ash.
"Torhamn." Cost: 2,800 – 6,300.
- "Lerhyttan." The design is natural wood, covered with black stain.
"Lerhyttan." Cost: 3,700 - 5,500.
Matte white with smooth surface
Presented in series (in ascending price): “Häggeby”, “Weddinge”, “Vokstorp”.
Such options are an ideal solution for kitchens in minimalist, hi-tech, Scandinavian, and modern styles.
The disadvantage of the Heggeby facades is that there is no front panel for the dishwasher. But the design allows you to install white appliances, which, in combination with such an IKEA set, will look harmonious and holistic.
Kitchen "Häggeby". Price category – the lowest: 950 – 1,100 rubles. "Weddinge". Cost: 1,800 – 2,600. “Vokstorp”. Also available in glossy and wood-effect design. Cost: 2,400 – 3,300.