You can make a beautiful and original panel with your own hands from scrap materials. This is usually cheaper than buying a ready-made option or contacting specialists with an order, but at the same time it allows you to create exactly the option that the owner will like.
In this way, you can turn your house into not just a living space, but a real “your corner”, reflecting the inner world, interests and fantasies of its inhabitants.
Also, if necessary, the panel can hide wall defects or poor-quality repairs without requiring large financial costs.
How to place it correctly
To place it correctly, you should consider some points:
- integrity and volume - do not cut off or hide part of the work, then the meaning will be lost and it will look ugly;
- purpose of the premises - for what purposes it is intended;
- harmony in combination with decoration - selection of things and palette.
The kitchen will be decorated with thematic items: fruits, vegetables, still lifes, grain products, cereals, spices, including cutlery and dishes.
The bedroom creates an atmosphere of lightness, peace, and tranquility. Here people relax not only with their bodies, but also with their souls. Heavy objects will be out of place.
Light bright colors, the child’s favorite characters, animals, collages of children’s photographs and other interesting objects are chosen for the child’s room.
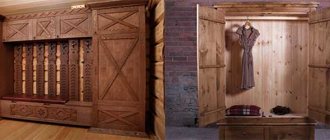
In the hall, the design is complemented with wood products, macrame or abstractions.
Fabric use
Beautiful dense fabrics that match the main wall decoration can complement the overall interior. You can use leftover textiles or purchase material from a studio. The fabric is stretched over wooden plywood and secured using a furniture stapler, tacks or nails.
When decorating walls using panels, it is important to remember that the finished product does not just play an accent role. First of all, it is selected in the same style with the overall design.
Master class on making
Guests from the shores will fit perfectly into a nautical-style room. Before starting to make a masterpiece, the shells are washed, cleaned and sorted by color and size. To work you should prepare:
- sorted shells;
- stain;
- watercolor;
- flap;
- glue.
The main contestants are coated with clear nail polish to make them last longer. Prepare a piece of plywood. It is covered with mesh, burlap or sprinkled with sand. Shells are piled randomly on top. If a needlewoman has planned a whole sea adventure, she first draws it and then lays it out according to the markings applied.
The easiest way to brighten up a boring design is to make paper crafts. It can be:
- photos;
- wallpaper paintings;
- figures made of colored parchment.
They do not require special skills, abilities or costs
Using a branch
A budget, but original and stylish option can be obtained using a regular branch and any thread. Initially, the colors of the threads are selected, and the placement sequence is determined.
The threads are cut to the same length. Each piece is folded in half and attached to a branch. Upon completion of the work, the product is trimmed at the bottom using scissors. A loop is attached to the panel for placement on the wall.
What can you create a canvas from?
Often after repairs there are pieces left that have no use. You can make a beautiful canvas out of them. For this you will need:
- boostilate;
- scissors and knife;
- baguette (made of polystyrene foam or polyurethane foam);
- level, ruler;
- pencil or marker;
- moisture resistant dye.
The level is used to measure and outline the space for gluing the rim. The baguette itself is cut at the joints at an angle of 45°. Along the drawn lines, they connect it to the wall. After this, excess adhesive is removed and the frame is painted. Use your imagination and glue together a masterpiece from scraps, a single piece, or combine these two methods together.
Original collage on the wall
Creating a collage is a fun activity for the whole family. It is necessary to think in advance how it will be designed and where it will be placed. Select suitable frames and print out pictures. The drawing of a branched tree with leaves and photo frames on the branches will be original. They dilute the photographs with views of nature, mountains, and unusual images.
We use available means given by nature
Eco-friendly material is very popular and is used in the implementation of various design ideas:
- wood cutting;
- landscapes with branches and dried leaves;
- photo frames.
Abstractions made of bars and inlaid with stones look beautiful and original. Wood products will look elegant in any setting. To preserve wooden structures, they are treated with special means and varnished.
Select flexible branches so that they take a position in the composition and do not break. They are secured with staples and self-tapping screws (the caps are rubbed down). Thin ones are tied together with wire. For the background choose cardboard, fiberboard, burlap. Suitable for interiors in the bedroom, hallway, living room. You can always diversify and add new elements. They go well with dried leaves and flowers.
- Wall mirrors in the bedroom: rules for ideal placement according to Feng Shui
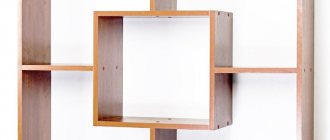
- How to make a shelf with your own hands - diagrams, drawings, design and features of use in the interior (105 photos)
- Roller blinds for plastic windows: examples of ideal design and combination
Stages of work
- The basis for a star-shaped panel is formed from long sticks.
- The product is fixed in the center with threads.
- A thread is woven between the sticks. From time to time the color changes to a shade that matches the color map. For faster work, it is recommended to select thick threads. The cut ends are tied into a knot on the back of the craft.
- Upon completion of the design, the tails of the sticks are sawed off.
- The panel is ready, you can decorate the wall!
From wine corks
Unusual canvas made of wine corks. Prepare for collection:
- fiberboard sheet;
- liquid Nails;
- mastic.
They collect plugs of different sizes and shades. When the set is assembled, pre-purchased plywood is used. Using a gun with a glue solution, draw strips from edge to edge and insert them in any order. When the entire sheet is covered with them, varnish or mastic is applied on top.
By sewing
Technique for sewing images from scraps. Contours are drawn on cardboard, the pieces are laid out on top and sewn together by hand or on a sewing machine. For fabric or hard canvas, patterns are used. Not only fabric is used for the work, but also paints and brushes.
Needlewomen sew New Year's toys from it, for children, and make canvases. You can buy it at any store. Patterns, scissors, thread and needle will come in handy. This craft will decorate a room and is perfect as a souvenir.
DIY arch - step-by-step instructions on how to make a stylish and beautiful arch (115 photos)Bottle decor: master class on making a stylish and original decorative element (85 photos)
- Cake decor - master class on original design and decoration methods (75 photos and videos)
They use it under the base, tighten the frames, and sew brownies. Herbariums, flour collections, things with the addition of buttons, stones, beads, ropes look very good against its background. Burlap paintings are placed in bright colorful frames for greater impact.
Drawings created with “non-standard” brushes
Here you can take a brush made of feathers or threads for painting. To get patterns like in the photo, the brush needs to be dipped in almost dry paint . You can also use rag painting for a similar result.
It turns out that our fingers are the perfect shape for creating delightful modern paintings. Thanks to this, a wonderful picture of the panel turned out.
Handmade weaving
For ancient weaving you will need threads and cords. For beginners, cotton, linen or wool are suitable. When choosing, you should focus on the twist, so the pattern will be more clearly visible. A panel knitted with knotted weaving can be made in a square, circle, rectangle, large or small. The palette of shades depends only on desire. Macrame can be immediately woven from colored ones, or from white ones, then painted. Add decor.
Complex and painstaking work that requires patience and attention. You will need: scrap, glue, fishing line, beads in a palette and sizes. There are three ways to create a bead masterpiece:
- glue them to the base;
- embroider on fabric;
- classic - weave according to the pattern.
First, the decoration itself is made using the chosen method. In the latter, it is secured with wire or glue. The finished product is fixed in a frame and hung.
What to give preference to?
Which panel style should you choose? First of all, it depends on the preferences and interior features of the room where it will be located. But other details should be taken into account.
Firstly, a children's panel should not consist of small parts that a child can tear off and swallow. There should also be no sharp elements there. Therefore, when thinking through the drawing and design, you should also remember about the safety of materials.
As for the design on it, it can be anything from a simple ornament to a scene from your favorite fairy tale. You can also come up with an educational picture, for example, a schematic map of the world or something about forest inhabitants. Then a fabric or paper option is better.
You can cut out the necessary parts from different scraps and assemble them into one whole, adding anything if necessary. It’s even easier with paper: you can cut out characters from old magazines or pre-print them.
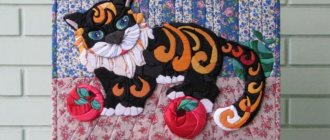
Secondly, if there is a cat at home, then it is undesirable to use feathers and other elements with which he will play.
Selling real estate in VladivostokArranging a small bedroom - 5 ideas for a cozy and comfortable interior
Interior decoration with flowers
Thirdly, it is desirable that the panel fits harmoniously into the interior, and does not catch the eye because it stands out from the general style. It should be part of the design of the room, and not a tacky spot that seems unnecessary and out of place.
Modeling from decorative plaster
The process is similar to plaster, but requires more time, skill and expense. Plaster work is performed on a prepared surface. It should be smooth and even. For this:
- draw a sketch on parchment;
- transfer it to plaster;
- apply layers, determine the shape;
- add texture with a hard brush;
- when it is ready, let it dry;
- Use sandpaper to level the surface and remove excess;
- painted with paints.
Decorative plaster is used for panoramas on walls or ceilings.
To prepare the dough you will need:
- salt - 1 tbsp. l;
- water - 125 ml;
- unrefined vegetable oil - 1 tbsp. l;
- flour - 2 cups.
Instead of oil, it is recommended to add face cream, hand cream or dry bustilate. To obtain a pleasant aroma, add spices or a drop of essential oil; for color, add food coloring.
Execution steps
A design is applied to a sheet of one color.
A sharp blade is used to cut out the design. It is recommended to use a mat underneath to avoid damaging the table. Depending on the design, some parts are cut out completely, while other parts are slightly notched.
Two contrasting sheets are glued together. To make a 3D panel on the wall with your own hands, you can bend several elements; they will give the product volume.
Wooden planks are fixed at the bottom and top of the craft.
Using pushpins, a cord is attached to the back side.
Decoupage
The new is the well-forgotten old. The decoupage technique is used to update old canvases, boards and other decorations. Beads, ribbons, stickers, and clippings are glued to the base. Elements are drawn. They hang themselves on a rope or by a hook.
In a large room, several paintings are hung, united by the same theme, made using the decoupage technique.
From colored paper
Many small butterflies with figured wings are cut out of colored paper and folded into a shape. At one end they recreate the effect as if they are flying away. Performed in the same range with gradients from light to more saturated bright shades. Attached to the surface with double-sided tape.
They also make 3-D figures from it. The squares are folded like an accordion, bent in half and stretched. The resulting circles are connected to each other with a stapler and attached to the selected location. They are able not only to diversify it, but also to close defects.
Such DIY decorations will not take much time and effort.
Additional Tips
If in a classic interior a panel can correspond to curtains, bedspreads or carpets, then in a modern interior the plot should take the form of glazing, furniture, electrical appliances or fittings.
A panel on canvas with a stretcher is hung on a screw using a rope. But how to make a panel with your own hands if the supporting base is thin cardboard or board?
It's simple - you need to drive several 4-mm staplers into the thematic material, and then tie a rope to them for hanging. In this case, it is advisable to bend the brackets on the front side of the panel if they protrude through the supporting profile.
The beauty of the panel is that it can demonstrate stories through thematic products. For example, to demonstrate a still life with morning coffee, it is enough to glue a bowl to the board, and to the bowl - a brown piece of synthetic fabric with foam swollen from heating. Such a focus of attraction can only be supplemented with coffee beans, a sugar bag and a teaspoon.
We are preparing for the new year
Creating New Year's decor requires creativity. To make it, you take pasta, pine cones, cotton pads and other household items.
The noodles easily stack with each other and take the required format, like Tetris figures. You can simply paint them the color you want. The round ones are used to make snowflakes, and the long ones are used for the Snow Maiden’s hair.
If the cones are washed white, they will be much more interesting in the overall landscape. They make complex, voluminous works.
Snowdrifts are made from cotton wool. All these items are attached with glue.
The simplest ones are made from disposable tableware. For this:
- take a circle (cut it out of thick parchment or use a thick disposable plate);
- Disposable forks or spoons are laid out around the entire circumference with the handle towards the center and glued with hot glue;
- the resulting structure is decorated with tinsel.
This decoration can be hung or presented as a souvenir or craft to a kindergarten.
Wall canvases are a simple design solution for updating a room, making changes to the familiar environment.
Expert advice:
- a large panel is placed in a hall where there is a lot of space;
- For safety, things are covered with paint and varnish;
- the paint base for the painting should be identical to that with which the walls are covered;
- in the absence of artistic skills, stencils and aerosol dyes come to the rescue.
Involve children in the process. They will enthusiastically collect twigs, leaves, flowers and come up with new ideas, among which they can find excellent solutions for creating an unusual image.
Holiday panel idea
There are a lot of bright and cheerful holidays in the world, which most people celebrate with a large circle of family and friends. A panel made in a festive style will be a worthy decoration for any feast, infecting the atmosphere with a festive mood! It can also serve as a wonderful gift for:
- New Year;
- Wedding anniversary;
- Birthday;
- International Women's Day, etc.
You can make it from any available means. For example, a New Year's panel can be decorated with paper snowflakes, cotton wool snow, sparkles and beads, and in the middle of the composition there can be a luxurious multi-layered spruce cut out of fabric. The main thing is to use your imagination and creativity!