how to make a glass table
Glass tables go well with many styles and always look great. Making a glass table with your own hands is easier than a model with another type of tabletop, because all the work involves making a durable frame. But more attention needs to be paid to the base, although this is a plus because with a transparent top you can also show off the interior decoration. If you have a small room, then a table with a glass top will visually make the room much larger than a regular table. In addition, glass countertops are needed to protect furniture made from soft wood or textures that can be easily damaged without the need to hide a beautiful surface. This is especially useful if you have valuable antiques in your home. When making a glass table with your own hands, you can create an amazing design without much experience or complex tools. You just need to come up with a unique base, for example, from driftwood, unique frames of antique furniture, from pipes - you can use anything. Or make a glass dining table , and even an original table with a glass top over a pot with succulents. There are many ideas, however, only ten examples are presented here, but believe me, there are a million of them.
How to choose glass for a table?
The most important parameter in the characteristics of glass is its thickness. In second place will be the texture: matte, glossy, with a relief pattern. In some cases, the color of the glass will be important. The type of material you choose depends on the purpose of your table. Glass with a thickness of 5-6 mm is suitable for a coffee table. Such products do not experience heavy loads, so this thickness will be optimal. If you are planning a large dining table, then the glass thickness should be 8-10 mm. It is better to order the tabletop itself from a glass company. Using professional equipment, you can cut any shape of the tabletop, as well as carefully process the edges.
Shelves
Glass shelves are an ideal solution for small spaces. They help to rationally use the space of the room without visually reducing it. Also, glass shelves do not create shadow areas on the walls, so the room maintains a feeling of lightness and airiness. To make glass shelves you will need planed timber with a cross section of 20×80-100 mm and glass with a thickness of at least 5 mm
- Cut out rectangular blanks measuring 200x800 mm from glass. Their number depends on how many sections your shelf will have. Process the edges of the workpieces.
- Make cuts in each piece of timber with grooves of about 50mm. To do this, it is better to press the beams together and make cuts simultaneously in both workpieces. The shelves should be inserted into these grooves with light force. If the grooves are too wide, then strips of adhesive tape can be attached to the glass. The edges of the beams can be decorated at your discretion or simply sawed off at an angle of 45 degrees.
- Carefully attach the beams to the wall, while controlling the location. Insert the shelves into the grooves. One or more shelves can be replaced with wood or made of laminated chipboard - and then heavier objects can be placed on them
Design
The table must fit into the interior of the room in which it will be located. If the furniture in your home is in a classic style, then the table legs should be made of solid wood, with carved patterns and curls. To make the tree presentable, you can cover it with stain, imitating expensive wood. If you have even a little experience in creating furniture, then it will not be difficult to make a glass table with your own hands. The photo shows an option that is made of only one glass.
For lovers of high-tech style, a table with metal symmetrical legs is suitable, and the tabletop itself can be in the shape of a circle or square. The Mediterranean style implies simplicity in the interior, so the glass tabletop can be placed on rough wooden legs of the correct shape, painted, for example, white.
Pros and cons of the design
What advantages, besides beauty, does a glass table have? It is easy to care for: a household mirror cleaner will do. Glass is one of the few materials that does not absorb odors, and there are no permanent marks left on its surface from drinks or hot objects.
The glass table is easy to care for.
Transparent or painted countertops will not fade, even in direct sunlight. The only drawback is the need for polishing. If high-strength glass was chosen to make the table, then the product is unlikely to break under the influence of normal mechanical loads.
Making a glass tabletop with your own hands
The most important and most expensive element of a glass table is the tabletop. If you are wondering how to make a glass table with your own hands, then you need to know about some rules for glass processing. Cutting it to the right size can be a challenging task for a beginner. Practice on scraps before starting work. If the glass cutter is roller and not diamond, then the pressure force should be approximately 2 kg.
If you have a good, even cut, you can proceed to the next stage - processing the edges. Before starting work, be sure to take care of eye and hand protection. For convenience, you can soak the file in turpentine or kerosene. Movements should be smooth, along the edges of the sheet. You can use an emery block.
Next comes the stage of grinding the edges. To perform this work, a grinder with a special grinding attachment is used. The angle at which the corners are cut should be the same throughout the entire perimeter. Sanded edges are polished. The curve of the tabletop should be smooth and smooth.
Beginning of work
Start by preparing the base for the countertop. Measure the length of the sides of the glass and cut the bars, there should be four of them. Now sand each of the resulting bars on three sides with sandpaper (do not level the fourth, the one on top, its roughness will increase adhesion to the glue). Now cut four equal-length bars (for legs), the length of which is identical to the desired height of the future table. Sand all sides with sandpaper, and you can begin assembling the structure.
Table with glass top
On a flat floor, place the legs vertically, and between them place (with the rough side down) those first bars that are prepared for the tabletop. Fasten the structure with self-tapping screws; to avoid cracks in the bars, the place where the screws fit can be pre-drilled with a drill of a smaller diameter.
The heads need to be slightly recessed and later covered with plasticine, putty or paraffin. Now turn the resulting structure over and install it on the legs. Prepare glass and a glue gun, as well as any small decor - glitter, beads, beads and other beautiful small-diameter tinsel.
Wooden base
To make such a table you will need a 50 x 50 mm beam if you are planning a coffee table. You can use a board, it all depends on the design of the structure.
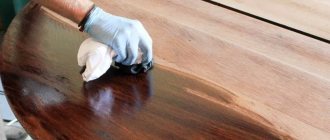
Let's consider making a glass table for the kitchen with your own hands, measuring 800 x 1400 mm. For such a massive product you will need a beam of 150 x 150 mm. The surface of the timber must be carefully sanded, it must be perfectly smooth. To protect the wood, you need to apply varnish, stain or paint. If you want the structure of the wood to be visible, then use varnish or stain.
To join beam elements, it is better to use an open tenon joint in half a tree. This will disguise the joint and increase the level of strength at the junction. Even a person with a minimum amount of experience in this field can make their own legs for a glass table and a base made of timber on which the tabletop will rest.
Cabinet for equipment
A glass cabinet for equipment does not clutter up the space and visually makes it more free, and a TV, DVD-meep or stereo system looks elegant on it. Despite the fact that there is a huge selection of cabinets in stores, their cost is quite significant. Additionally, it can be difficult to find the right size and design to match your decor and fixtures. You can solve these problems by making a glass cabinet with your own hands.
To make it, you will need a chrome pipe with a diameter of 50 mm, fittings for pipes, glass 10 mm thick for the top shelf and at least 5 mm for the lower ones.
- Cut glass shelves to the required size. Process the edges of the workpieces
- Cut the support parts from the pipe: four 150 mm long, four 550 mm long and four 50 mm long. Dimensions are approximate and can be changed to suit your project.
- Attach the top shelf to the supports using glue, as described earlier.
- Assemble the cabinet upside down. To do this, place the top shelf of the cabinet with the top supports glued on a flat surface. Screw threaded rods into the threaded holes of the upper supports. Fasten the 150 mm long support parts to the studs.
- Secure the middle and bottom ones using break knots. To do this, drill holes with a diameter of 10 mm in the corners of the shelves. Insert cylindrical thrust bushings into the lower part of the supports. Screw the flat supports into the bushings as described in
- her. Hold the cabinet by its supports and carefully turn it over.
Glass furniture in interior design, thanks to the play of sunlight, can enliven any environment and create a feeling of weightlessness, airiness, extraordinary comfort and coziness. Cabinets, tables and coffee tables, cabinets and other objects made entirely of glass or combined with glass elements do not clutter up the space at all, but, on the contrary, visually expand it, which plays a significant role in the arrangement of small rooms. Thanks to the transparency and clarity of designs, glass can be called a real find, allowing designers to bring to life many different ideas and solutions.
Metal base
Not every carpenter can afford to use metal. To work with such material you will need special equipment and skills. To connect the elements of the table frame you will need a welding machine. You can use metal tubes, corners or even a profile.
Consider how the glass will be attached to the tabletop. In this case, the tabletop is installed in a special recess, which was formed when connecting metal profiles. All you need to do is fix the glass to the profile with glue. A self-made glass kitchen table on a metal base will ideally complement a minimalist kitchen.
If you intend to manufacture a forged product, then it is better to connect the tabletop and base using mechanical fastening. Holes are drilled into the surface of the glass and fasteners are inserted.
What should you pay attention to when purchasing?
For starters, this is, of course, the quality of the glass countertop. Its thickness is usually 10-12 mm. There should be no scratches or chips on the surface, and no bubbles, inclusions or voids inside.
As for the structure itself, it is necessary to make sure that the fasteners and components are reliable, as well as the presence of all seals between the table top and the frame. Finally, read the information about the manufacturer and read reviews from other customers.
A glass sliding table in your kitchen is not only interesting and unusual, but also practical. It will easily decorate your kitchen and also complement the atmosphere of family comfort.
Chipboard base
The simplest material for making furniture is, of course, chipboards. Coming up with a design for a glass table with a chipboard base is not at all difficult. There are a large number of options, colors and textures of laminated coating for chipboard.
The chipboard sheet is cut using a circular saw. The cut produces a rough edge that needs to be covered with an edge. If you don't have specialized edge finishing equipment, don't worry. The end tape can be glued using a regular iron.
The connection of chipboard parts is carried out using euroscrews, self-tapping screws, and corners. The most acceptable option is to use euroscrews. For them you need to make holes in the chipboard using a drill. These screws are tightened with a hex wrench. In the places where the screw heads are located, special stickers are installed to mask the joint.
How to attach glass to the base?
There are several ways to attach glass to a base; the choice of the appropriate method depends on the materials and weight of the glass. If the glass is massive and thick, then you can simply install rubber fasteners on the surface of the tabletop; the mass of the glass and the friction force will not allow the tabletop to move.
The mechanical method of fastening is as follows: holes are drilled in the glass and fasteners are inserted into them. There must be rubber gaskets between the metal of the fastener and the glass.
In some cases, the glass is glued to the surface of the underframe. This is a very common fastening method. The main thing in this case is to choose the right glue. It must be compatible with the materials used.
Another time-tested method of securely fastening glass is using rubber suction cups. This fastening method is often used when it is necessary to secure a tabletop with a wooden base of a non-standard shape.
Imitation glass using epoxy resin
Epoxy resin can be used to make not just a table, but a work of art. Particularly interesting are the tabletop options, which include time-warped wooden elements connected with transparent epoxy resin.
To make such a glass table with your own hands, we will need a suitable cut of wood. It is desirable that it has cracks and signs of aging. You can add irregularities yourself by artificially aging a wooden piece. Two elements of wood 4-5 cm thick are laid out at a distance of 20-30 cm from each other. The uneven side surface should be between the saw cuts, and the edges of the tabletop should be smooth and even. The surface is carefully polished and leveled.
A container for casting epoxy resin is constructed - bottom and walls. You can color the resin using pigments. After the resin is poured into the container between the two halves of the tree, you need to wait about 1 day. After complete drying, you need to cover the surface of the product with several layers of varnish. Remember safety precautions when working with epoxy resin. A respiratory mask and gloves are required. Resin is toxic and can cause poisoning.
Individual work on cutting glass and pouring epoxy countertops
The portal's users liked the idea of ipmakeev, and they intensely delved into the discussion of the technology for producing tables with glass embedded into the tabletop.
The option is naturally exciting, but not everyone has access to a waterjet cutting machine. I'm thinking of taking a rectangular glass and placing it on two pieces of wood for the tabletop. The option, of course, is more ordinary and does not look as original, but it’s worth trying.
They do this too, but this is a different development. Looks good too.
Regonsait asks ipmakeev how he milled the tabletop of a huge round table, without the help of others, or also ordered the work.
I actually do everything myself: from preparation to final finishing. The only thing I order is cutting glass on a machine. There are no problems with milling wood either. The main thing is experience and ability to handle equipment.
The user was also offered the option of filling the countertop with epoxy. We have already talked about this version of the design table, but it has a number of pitfalls.
I experimented with epoxy. Did not like. And it looks worse than glass, and it is very difficult to achieve transparency and uniformity of the layer. Due to the different densities of the materials, after the final varnishing, dirty stains seem to remain on the tabletop.
According to SPOsob, only an imported product is suitable for filling countertops with epoxy, because Russian epoxy resin is poorly purified. Although the process of pouring epoxy resin onto a wood countertop is well-established, there are a lot of aspects that the craftsmen don't talk about in the videos. You have to figure everything out on your own, experimenting with resin, hardener and action.
I'm just learning how to pour epoxy resin. Already “ruined” 5 thousand worth of resins. Something is coming out, but the products are still a long way off for sale. To fill a “river” on a comparatively large table, you need a lot of resin and two weeks of work. Because you have to pour the resin in thin layers, almost two mm at a time, to expel air bubbles. Even if it is possible to remove all the air from the resin (for example, in a vacuum chamber), then during the polymerization process heat is released, due to which the resin “boils” with the release of air and bubbles. You also need a dust-free chamber.
Let's show what the user got in the end.
Table with glass top in eco-style
Recently, rough interior elements have been gaining popularity, which are transferred almost unchanged to our home from the wild. Eco-style is a direction of interior design that involves the use of natural materials or their imitation for the design of furniture, walls, floors, and decorative elements.
Large driftwood or tree roots are an excellent basis for making a glass table with your own hands. This piece of furniture looks very original. The process of processing natural material itself can take a significant amount of time, but this process should not be neglected.
The first step is to remove the bark and flaking rotten elements from the wood. A strong frame should remain. All bends must be sanded. At the point where the glass is attached, you need to cut down the branches so that they form supports for the surface of the glass. At the final stage, you need to treat the wood with several layers of varnish or stain. It is better to fasten glass using suction cups, as other types of fastening will look unsightly.
