Wallpaper can also be glued to furniture
It is better to use vinyl wallpaper and special glue. Having previously carried out an inspection and restoration, we do the following.
- During restoration, leave unpainted areas on which you will paste wallpaper.
Treat them with acetone or gasoline. Apply primer. - Make accurate drawings of the areas on the wallpaper and cut them out.
- Carefully coat the cut piece of wallpaper with glue and carefully apply it to the surface.
- Smooth with a special roller or dry, clean cloth.
Avoid peeling and blistering.
ON A NOTE! If there are no convex or decorative elements on the outer surface of the old cabinet, then you can completely cover it with wallpaper.
Method number 1. Large vinyl sticker
Vinyl decorative stickers for wardrobes, as a rule, are produced on a single-color German Oracal film, which greatly simplifies color matching. Outwardly, they look like a stylish pattern applied with paint. At the same time, you will be able to care for the cabinet in the usual way. Unless you resort to strong friction. And most importantly, when you get tired of one design on the door of a closet, you can literally remove the sticker in a minute without any traces and apply a new one.
This method is universal and can be used for doors made of any materials. You can safely apply stickers to glass and mirrors of sliding wardrobes. They hold up well and look very impressive. At the same time, you get rid of the obsessive reflection, and fingerprints that constantly appear on the glass surface will no longer be too noticeable.
The procedure for applying a large sticker on the wardrobe door:
- Preparation . Clean the surface from dust, fingerprints and other contaminants;
- Smoothing. Place the sticker on a flat surface and smooth it with a squeegee (smoothing spatula), which our store always sends in the kit;
- Fitting. Attach the drawing to the door and mark the position of the corners with a pencil or erasable felt-tip pen. For accuracy, we recommend sticking the sticker with a backing onto masking tape and seeing from a distance how the drawing will look.
- Removing the substrate and applying . Since the sticker is large, remove the backing directly from the canvas attached to the tape from top to bottom in small pieces. Immediately apply the freed pattern to the surface and smooth it carefully with a squeegee without unnecessary pressure. And so on to the very bottom. At the same time, remove the transparent mounting film from top to bottom. The work should be done slowly and carefully. Carefully smooth out everything, even the smallest bubbles. It is most convenient to apply non-adhesive adhesives to closet doors with two people. If bubbles still remain, pierce them with a needle closer to the edge and remove the air with a squeegee.
- Examination. After removing the backing and mounting film, take the time to carefully look at how each element is stuck. Even for a small flower, all edges should be level on the surface.
This video will show you how to apply large vinyl stickers on surfaces:
Helpful tip: when applying a sticker to a mirror or glass of a wardrobe, spray the surface with water. The sticker will be easier to smooth out.
You can make patterns with plaster
You can apply a three-dimensional ornament. To do this, you need a design stencil, a spatula and special decorative plaster. After repairing minor defects, do the following.
- Secure the stencil to the surface to be decorated with tape.
- Apply plaster to the stencil.
- Remove the stencil and stick it on the next section.
Plasters are excellent for creating decorative coatings. - Dry the plaster thoroughly.
- Cover with acrylic paint in several layers.
- Apply a final coat of varnish.
Decorative plaster today is an excellent alternative for interior decoration.
ON A NOTE! It is better to make a stencil from plastic or PVC. Cardboard quickly wears out, gets wet and loses its shape.
Decorative plaster will appeal to those who appreciate the sophistication of interior solutions.
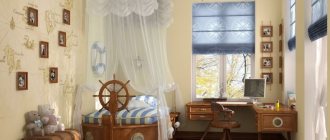
"Dress" for an old wardrobe
Yes, you can cover the body and doors with cotton fabric with a suitable pattern! You will also need PVA glue, acrylic paints and varnish.
One of the original and affordable ways to decorate a cabinet is to cover it with bright fabric.
After priming, do the following.
- Carefully coat the outer surface of the cabinet with glue.
- Gently apply and roll the pre-made fabric blanks. Avoid bubbles and creases.
- Apply a second layer of glue.
- Dry thoroughly.
- Paint the drawing.
- Make inlay from available items - beads, buttons, multi-colored pieces of glass of the correct shape. You can make edgings from braid along the edges of the door. Glue it all together using Moment glue.
- Coat several times with acrylic varnish.
It is better to cover large elements such as wardrobe doors with fabric.
Overlays for decorating the end of the cabinet
Usually the ends of the cabinet or any cabinet furniture are covered with simple melamine tape or PVC edge. If the equipment uses an overhead facade, this is quite enough. After all, the end of the cabinet will be completely closed by the door.
But there is always an opportunity to play with this inconspicuous element of furniture in a beautiful and interesting way! Moreover, the thickening on the sides gives the cabinet a more solid and respectable appearance. There are several ways to do this.
For example, use special overlays for the end of an MDF cabinet. At the same time, some changes are made to the design of the box.
A simpler, budget-friendly way is to cover the end of the cabinet with a plank made of the same material, chipboard. It will cost much less than MDF overlays, and the look of the furniture will become more interesting.
Antiquity in noble craquelure
Create with your own hands an antique rarity from a cabinet with a beautiful gilded texture, consisting of many small and deep cracks, “testifying” to the venerable age of the item.
Craquelure is a painting method in which the base layer of paint, enamel or putty cracks.
To create a “magic potion” you will need:
- Two-phase craquelure varnish;
- Transparent acrylic varnish with a matte texture;
- “Golden” powder as a grout (powder made from non-ferrous metals crushed to a finely dispersed state - bronze, aluminum, copper);
- Grout sponge.
To ensure that the paint becomes cracked, the surface is first coated with craquelure varnish.
Sequencing.
- Apply the first phase of craquelure varnish. Wait until it dries to a thick sticky consistency.
- Apply and dry the second phase in the same way.
- Use a sponge to rub the “golden” powder into the cracks that have formed.
- Apply a final coat of matte varnish and dry thoroughly.
A cabinet aged using the craquelure technique will look like an expensive antique.
ON A NOTE! Instead of powder, a special composition for patination and bitumen wax, “dry” pastel are suitable. The longer the craquelure layer dries, the deeper the cracks appear on the surface of the furniture.
How to decorate the end of a cabinet? Easy to implement and effective ideas
The end of the cabinet is usually called the front edge of the side panel. Most often, it is hidden by an overlay facade and covered with a simple melamine tape or PVC edge. Also, the end of furniture is sometimes called the entire plane of the side, and there are many more ways to decorate. Let's look at how to decorate the end of the cabinet beautifully and effectively in both cases.
Secrets of good design
If you want to decorate your furniture with a pattern, then do not use more than two or three colors. They should resonate with similar shades of the interior elements of the room. In this case, the furniture will not look like a foreign body. When wallpapering furniture, follow the same principle.
Try to choose wallpaper whose background matches the overall color scheme of the interior, and the design itself is made with brighter and more contrasting colors.
Another option is also possible. When the walls are painted in a deep color (like deep purple), use a light-colored paint (like white) and wallpaper the doors and drawer fronts with small, interesting designs. There are cabinets with open shelves on which small interesting things will stand - paintings, figurines, books.
To provide them with an expressive background that enhances their beauty, cover the inside of the back wall of the cabinet with wallpaper with a single-color ornamental pattern.
Choose the color so that it does not “clog” the items on the shelves and emphasizes their beauty. Don't rush to throw away old furniture. Put in a little effort, use our tips and you will create a small miracle from your closet with your own hands.
Beautiful facade design
An apartment with ordinary, standard wardrobes is no longer interesting. Progress does not stand still; the range of styles, finishes, and colors is so diverse that the customer often has difficulty making a choice, so before purchasing it is important to decide on the purpose of the cabinet and its location. This will not be difficult to do if you pay attention to the numerous photos of design developments on the Internet.
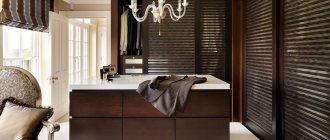
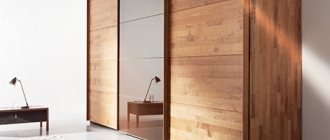
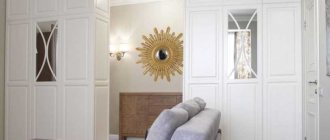
The facade is the part of the cabinet that people pay attention to first. There are many ways to beautifully and unusually decorate the facade of a cabinet using a variety of natural materials - bamboo, rattan, natural wood, leather. Glass or mirror doors for cabinets, with a pattern or photo printing on them, are very popular. The main types of facade design include:
- mirrored ones are good in small rooms because they have the property of visually enlarging the space;
- glass - frosted (lakomat) or colored (lakobel) glass is used, which has a special film on the back side that protects the surface and reduces the risk of breakage from impact;
- practical chipboard is a good budget option, but it cannot be called too creative; in order to attract attention, it is better to use this material in combination with other, more effective ones;
- processing glass facades using sandblasting patterns or mirror ones with original painting etched on them - there is room for the creative abilities of designers to roam.
A photo drawing can also serve as decoration for the front elements of cabinets. Using this technology, you can make a piece of furniture that will look aesthetically pleasing and beautiful. Today it has become fashionable to produce translucent panels and decorate facades using imitation embossing and artificial stone.
Beautifully designed furniture creates a mood, making the room more stylish, original and attractive. In the photos of furniture catalogs you can find different options for beautiful design of facades.
When choosing a cabinet with a front designed in a certain style (even if you are “crazy” about it), be careful, since the overall decor in the house may be at odds with the style of a particular piece of furniture. In this case, there will be some dissonance in the room, and you risk getting not an original piece of furniture, but a simple pile of furniture.
Source: mblx.ru
How to decorate the ends of kitchen cabinets
The desire to somehow decorate the ends of kitchen cabinets can be dictated by several reasons:
- Due to the standard sizes of the facades, there was an unoccupied bottleneck that needed to be somehow used. Various variations of open shelves come to the rescue.
- It is necessary to give the end of the kitchen row of cabinets and cabinets some kind of streamlining in order to visually make the modules less massive. Here they mainly use beveled and radius closed modules or open shelves.
- I would like to use the free sides of kitchen cabinets more functionally and use some original and effective solution.
Although the tasks are different, their solutions are somewhat repeated.
To “conceal” the depth of kitchen furniture, the best technique is to use rounded or beveled modules. They can be either closed or open.
In general, you can decorate the ends of kitchen cabinets with open shelves. This solution looks equally appropriate in both classic and modern kitchen interior styles, in small and large spaces.
The functionality of the kitchen will be added by placing such shallow “secret” cabinets with doors at the ends of the kitchen cabinets.
It is very convenient to store household products and household equipment for cleaning and maintenance separately from food and kitchen utensils. Interested in the storage idea?
Rehabilitation course
First carry out inspection and restoration. During the audit, invisible defects and malfunctions will definitely be discovered.
Main stages of restoration.
When disassembling, be careful not to damage any parts of the restoration item.
Use special cleaning products to remove rust stains from metal.
Small ones can be eliminated with furniture wax, and large ones can be eliminated with putty applied in several thin layers.
Be sure to dry each new layer.
FOR YOUR INFORMATION! Restoration is useful for any cabinet furniture, not just old cabinets.
If you are completely satisfied with the result of the restoration, then you can stop there.
Read on if you want to make a masterpiece with your own hands.
How to beat the end of a wardrobe
The sides of the wardrobe serve as a stop for sliding doors. Some manufacturers of sliding systems provide special linings for the ends of sliding wardrobes, made in the same design and from the same material as the profile itself.
To visually make the sidewalls more massive and solid, and to decorate them in the same style as the interior, special moldings and MDF profiles are used.
In a modern style, the end of the wardrobe is designed more concisely, but no less beautiful. Most often it is played with contrast using an edge (for example, a light edge against a dark body) or chipboard overlays.
Kinds
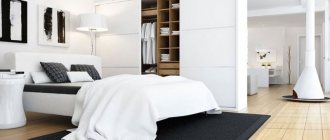
There are several types of wardrobes:
- The built-in wardrobe is mounted between the walls or placed in a niche. This structure has no floor and roof.
- The case version may have different dimensions, the number of doors also varies. Such models are placed near the wall.
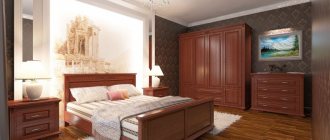
How to fit a wardrobe in a classic style into the interior, tips
The shape of the wardrobe can be angular or linear. The first option is placed exclusively in the corner, which allows for more efficient use of the room area. Such structures are made in the form of a triangle with two doors; L-shaped models are popular (often with a large number of doors). There is also a trapezoidal cabinet, which is more spacious.
The linear model is located in a straight line along the wall. Such furniture can be equipped with a different number of doors. Designers still advise placing a moderate number of mirrors. It is better to combine such surfaces with inserts made of leather, bamboo, frosted glass, and photo printing. Otherwise, the room may create an uncomfortable atmosphere.
Hull
Built-in
Straight
Angular
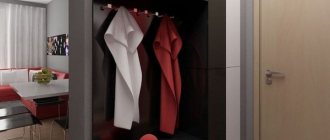
Mirror on the end of the cabinet, how to attach it?
If the closet is located at the end of the hallway, then you can hang a mirror on its side and attach a couple of shelves with hooks for all sorts of small things. This method expands the functionality of the furniture and adds convenience to its owners.
You can stick a mirror on a cabinet in any of three ways:
- Using double-sided tape. Degrease the surface well with solvent and alcohol so that the chipboard-mirror “adhesion” is as reliable as possible!
- Using special glue or liquid nails . In construction stores you can purchase special glue designed specifically for gluing mirrors. Before gluing the mirror onto the chipboard, you must also degrease the connecting surfaces. It is recommended to apply the glue in strokes in one direction to avoid excessive tension inside the mirror sheet.
- Overhead fastener . Special corners and clips can be either extremely simple or interestingly designed; they will allow you to not only securely, but also beautifully fix the mirror on the chipboard. Be careful when choosing: some fasteners are designed for mirrors with through holes.
If there is no need to expand the functionality, you can simply decorate the front side of the cabinet with special interior decor - acrylic mirrors in various designs. Such decorative elements are glued to double-sided tape.
If you are interested in decorating the end of a cabinet specifically from a design point of view, we recommend reading about furniture decoupage. Perhaps this will help you decide on a way to beautifully beat the “boring” standard look of the cabinet.