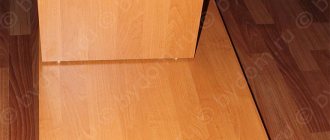
First, insert one end of the rod blank into the holder and measure the distance from the cut of the blank to the plane where the holder is attached to the wall. In my case it turned out to be 3 mm.
To do this, it is not necessary to attach the holder to the installation site of the furniture rod - the rod blank will not fit there. The holder with the workpiece inserted into it can simply be attached to any flat surface.
Then we measure the distance w between the left main wall and the laminated chipboard wall at the location where the furniture rod is installed, and subtract 3 mm from this distance twice. Total minus 6 mm. As a result, we obtain the length of the furniture rod d.
In my case, the length of the furniture rod d was 912-3-3=906 mm
Using a hacksaw, cut the furniture rod to the required length from the workpiece.
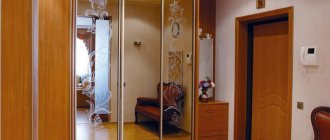
What options are there for installing a clothes rail?
I hope everyone has read this article? If not, then you may not understand what will be discussed next. So, I advise you to follow the link above and read the publication posted at this address.
So, you already know that there are three most popular types of closet rods:
- Standard closet rod.
- Retractable rod (microlift).
- Elevator pantograph.
There are also two types of rod installation: longitudinal and transverse. This figure visually shows what each installation option is:
For longitudinal installation
a standard rod and a pantograph lift are used.
For transverse installation
The same standard rod and retractable rod (microlift) are used.
And the choice of installation option for the rod is influenced by two factors: the depth of the wardrobe and the width of the opening of the section in which the rod will be installed.
How to fix a hanger on the wall
How to fix a hanger on the wall with your own hands? To complete the work you will need:
- tools for marking (pencil, tape measure);
- drill;
- screwdriver (screwdriver);
- dowels (plastic products can be purchased at the store, and wooden ones can be purchased or made independently);
- hammer;
- self-tapping screws
Fastening is carried out according to the following scheme:
- at the initial stage, markings are made, during which the locations of the fastening screws are determined;
Determining where to attach the hanger
- using a drill, holes are drilled;
Preparing holes for fixing the hanger
- dowels are inserted into the prepared holes;
Placement of dowel for self-tapping screw
- The shelf is fastened with self-tapping screws.
If a hanger suitable in size and design is not available in stores, then you can make this piece of furniture yourself. How to make it yourself and secure it, watch the video.
Varieties
Depending on their purpose, furniture manufacturers distinguish the following types of rods:
- retractable fittings such as microlift. The microlift system is used in wardrobes with a depth of up to 550 mm. The length of the structure varies from 250 mm to 500 mm. A retractable bar implies transverse placement of hangers. The number of retractable structures is set at the request of the client. The advantage of fittings is that by placing several elements in the closet, you can effectively sort clothes;
- pantograph lift - the design is suitable for completing built-in wardrobes with a height of more than two meters. The holder is attached to the top of the inner panel, lowering to the level of human height using a special mechanism, which makes it easy to remove or hang hangers with clothes and get things out;
- The standard rod is placed parallel to the bottom of the cabinet. An oval or round pipe has a high degree of strength. Depending on the length, a cabinet with two crossbars is possible;
- The trouser hanger is usually located at the bottom under the outerwear. Externally, the design resembles a clothes dryer. It will be convenient to place your trousers on it so that they do not wrinkle during storage;
- bar for accessories - the hanger is located on the side panels and cabinet doors. Designed for belts, ties, underwear (bras). On such a crossbar, small accessories will be conveniently located and easy to find.
Materials
- Metals and their alloys - galvanized steel, nickel, aluminum, brass. Primary colors: metallic, white, black, gold, bronze.
- Plastic.
- Wood - oak and ebony have the highest strength.
Purpose and where it can be used
A modern clothes rail has one direct purpose - to neatly hang clothes in the closet. A large number of things is a problem familiar to every person. The use of hangers and hangers makes it easier to organize space in the wardrobe, and the rod allows you to place them.
To ensure that your closet is always in order and the search for the necessary clothes is not long, a rod is used. It is fixed along or across the garment, depending on its type. In addition, the use of two or three devices at once allows you to place wardrobe elements on several levels.
The clothes rail allows you to store:
- dresses - they are stirred by special internal straps;
- shirts - shoulder seams should be on the hanger, and buttons should be fastened;
- T-shirts – quick access to T-shirts will save time on ironing;
- blouses - should be positioned in the same way as shirts;
- outerwear - it will require reinforced hangers that can provide reliable fixation of jackets, coats and raincoats.
When selecting hangers, you should give preference to an anti-slip coating. This material will prevent clothes from rolling off their hangers and secure them comfortably in the closet.
Options located on the side panels allow you to conveniently organize the storage of ties, scarves and belts. A small gap between the fixture and the cabinet wall will save space. You can also additionally install second-tier rods and hang trousers and jeans on them. With this approach, the number of shelves in the closet will be reduced to a minimum.
Depending on the type of device, it can be used in two different ways: stationary and as an element of a wardrobe or wardrobe. The element finds another application in the dressing room as a separate element of the interior. The mobile rod for things conveniently moves around the room, and if necessary, hides in a secluded place. Hanging models are distinguished by their functionality due to the large gaps between the furniture panels: various types of clothing can be placed there.
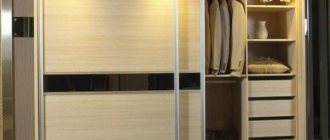
Features of installing a wall-mounted rod
Taking into account the shape of the rod - oval or round - purchase appropriate holders. An easy option is to purchase a three-meter clothes rail with a wall mount and then cut it into pieces of the required length.
How to divide is shown here:
Then, using flanges with a diameter of 25 mm, they are attached to the wall of a closet or bedroom.
The installation process is shown here:
If the structure is retractable, it is secured with 4 screws. This mount is not strong enough if you plan to hang a lot of clothes.
If necessary, install LED-based lighting, this allows you to carefully examine the wardrobe.
If there is very little free space in the dressing room where the wardrobe is located, then it is recommended to purchase a telescopic design. It makes it possible to place things on trempels in furniture with a depth of 31 cm. For ease of use, it extends to 365 mm, so the furniture can be placed close to other interior items, in a narrow place.
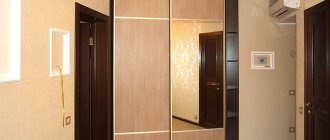
Installation options
There are two ways to install the fittings: lengthwise and crosswise. Depending on this, the closet will be as spacious as possible.
For longitudinal installation, a standard rod and a pantograph lift are used, and for transverse installation, in addition to the universal one, a retractable one (microlift) can be used. The following features need to be kept in mind:
- The installation option depends on the depth of the cabinet and the width of the section.
- The classic longitudinal installation requires a depth of at least 53 centimeters. If this parameter is smaller, then the hangers will not fit there.
- A clothes hanger rod is most effective in the transverse version, if the opening width is at least 60 centimeters.
The influence of cabinet depth and opening width on the installation of the rod.
The thing is that for the classic (longitudinal) installation of a clothes rail, it is necessary that the internal usable depth of the wardrobe be at least 530mm.
If the depth of the cabinet is, say, 450mm, then it will not be enough for the longitudinal placement of hangers. As a result, the hangers simply will not fit in the allotted space and the socks will hang on the barbell, or the barbell will have to be placed in a transverse position. However, not everything is so simple here either.
To install and effectively use the rod in a transverse position, it is necessary to ensure an opening width of at least 600 mm. So, if your opening has a width of, for example, 500mm, then the hangers will not be able to fit in such a width and here you definitely have this section becoming a “dead zone”, which you simply cannot enter without a gas mask due to the chemical-organic attack of the socks , stored on a clothes rail instead of hangers.
How to make a closet rod with your own hands
When making your own closet, the rods need to be selected and placed so that the weight of the clothes placed on them does not exceed their capabilities, and the closet space is used as rationally as possible.
It is important that the rod rests entirely on the supporting planes of the holder. To calculate the length of the rod, you need to subtract a gap of 5-6 millimeters from the distance between the opposite walls. For example, if the distance between the walls is 600 mm, then the length of the rod will be 600 - 6 = 594 mm. The rod mounts are marked horizontally in the middle of the wall, measuring the distance using a tape measure.
The easiest way to choose a material is wood that is durable and easy to process. You can take an ordinary gymnastics stick or cut a round or oval barbell yourself using a plane or knife. All excess from the sides is sawed off from the finished stick, the surface is cleaned with sandpaper, degreased and, if desired, varnished. The fastening can also be made from what is at hand. For example, a regular beer stopper is suitable for this purpose.
It’s even easier to purchase a ready-made steel pipe, the necessary fasteners and screws in the store. To adjust it to the desired length, all excess is sawed off with a hacksaw.
If the cabinet already has rod holders, first of all pay attention to whether they have a round or oval cross-section and whether they have a thread. If there is a thread on the inner surface of the fasteners, you need to measure its diameter and depth and subsequently cut the same thread on the rod using a thread cutter. To make it easier to screw in the threaded rod, you should slightly increase the gap between its ends and the cabinet walls.
Practical materials
According to the production technology of clothing storage devices, all materials must be durable and reliable. Constant high load gradually pushes the bar, which can lead to its breakage. To prevent a sad outcome, it is recommended to take a closer look at the materials for the production of floor and hanging rods:
- Chrome steel is the most common material for clothing storage devices. The raw materials are highly reliable and can withstand heavy loads for a long time. If you install the product correctly, choosing the length of the rod correctly, it will last for many years without a single scratch;
- metal alloys - used for the production of rods for commercial purposes. For example, metal fixtures are well suited for organizing the storage of theatrical costumes, and can also serve as clothing racks in a store. Such a rod will be highly durable, but the appearance will not be attractive due to the lack of coating;
- galvanized steel. The production technology makes it possible to apply a special coating to the steel material, protecting the product from wear and corrosion. A hanging place for storing ties and scarves can be made from this material.
The method of installing the rod will depend on the parameters of the closet or dressing room. If it is narrow and small, it makes sense to use a longitudinal fastening. If the cabinet has good depth, you can perform a transverse installation.