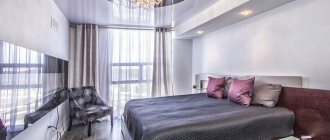
Stretch ceilings in the modern world are deservedly popular due to their beauty, convenience, low cost and a host of other positive qualities. They are suitable for any ceiling surface and rooms for various purposes. The only drawback is that they reduce the height of the room.
After installing the stretch ceiling, the question arises about lighting the room. The selection of lighting fixtures and their diversity, as well as the pricing policy, are impressive. However, the LED strip has the greatest capabilities. It cannot heat up to such a state as to harm polymer materials. The proposed color range of such a product sometimes puts a person in an awkward position: the choice is so large that it is difficult to settle on something specific. Their durability, safety and damage resistance are enviable.
Brief characteristics of LED strips
Outdoor advertising shines brightly thanks to the built-in LEDs. They surround us everywhere: the interiors of entertainment and shopping facilities, simply for illuminating certain sections of roads. We are used to them and rarely pay attention to their presence. However, using them to illuminate a stretch ceiling is a unique idea. This is a great design decision.
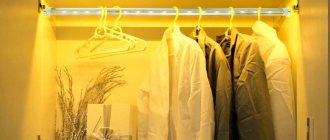
The stretch ceiling consists of a transparent polyvinyl chloride film. If you strengthen the lighting fixtures underneath, the suspended ceiling will have beautiful decorative lighting. For these purposes, a decorative luminous tape will come in handy. It is not dangerous and does not get very hot. Its presence gives a soft and diffused light. Neither a chandelier nor other lighting elements can produce such an effect. Moreover, an LED strip placed around the perimeter of the room can serve both as a decoration element and as the main source of lighting. Moreover, LEDs consume several times less electricity than other lighting devices. And this significantly saves the family budget.
LED Strip Light
LED strips come in several types, the most common among them: SMD 3028 (3528) and SMD 5050 (5060). The latter option is superior in price, but it also has more power. The appearance of the diodes is different. The tapes also differ in the density of diodes on them. 1 meter of diode strip can contain from 30 to 120 LEDs. Moreover, the brightness directly depends on the number of diode elements located on the tape.
Types of LED strips
Another characteristic indicator of tapes is moisture resistance. If there is a degree of protection IP44 or more, this product can be used in rooms with high humidity, for example in swimming pools or bathrooms.
Why is this necessary?
You can place the tape both above and below the canvas, or use other patterns to achieve the desired effect. Typically, LED strip or single elements are used for the following purposes:
- Decorative lighting around the perimeter of the room or in niches that are pre-constructed from plasterboard. Options can be used with the location of the tape in multi-level structures, on ledges or around the circumference of a protruding element, which creates a floating effect.
- Basic lighting. Most often in this case, single-color options with high power are used to ensure optimal luminous flux. The tape is most often located around the perimeter or above the canvas.
- Creating artistic effects - starry skies, various shapes or abstract lines.
One of the options for placing the tape.
The stretch ceiling canvas scatters the light of the diodes, which provides an additional decorative effect.
Advantages and disadvantages of the design solution
Using an LED strip has many advantages when it comes to the option located above the canvas. If the ceiling is already stretched, then you can place the lighting a little lower, this is also a good solution that has the same advantages. The main advantages are:
- The service life is 50,000 hours. You can place elements above the ceiling and not worry about having to replace them in a year or two. Depending on the mode, the lighting will work from 10 to 20 years or even more.
- Small sizes. The width of a couple of centimeters and the height of less than 5 mm allow the tape to fit almost anywhere, even if the distance of the canvas from the ceiling partition is small. In such cases, it will not be possible to install built-in lamps.
- During operation, the LEDs do not heat up much, which is important for a confined space. Of course, to improve heat transfer and eliminate problems, it is better to use an aluminum profile; it will additionally remove heat and prevent overheating.
- You can implement different projects and make lighting of any color. And thanks to the control panel, you can adjust the brightness or hue in a few seconds.
- Low power consumption. This is an economical lighting method that consumes several times less electricity than analogues.
The tape is easy to apply on corners, the shape of the room is not a problem.
If we analyze the shortcomings of the design solution, it is worth noting several important nuances that should not be overlooked:
- It is necessary to prepare the structure and install the LED strip in advance. After this, the craftsmen must carefully carry out the installation so that dust does not fall on the installed elements.
- If something is done incorrectly, it will not be possible to redo it without dismantling the ceiling.
- To replace a burnt element, you will have to remove the canvas; to do this, you need to call the experts. The service costs money.
- It is necessary to correctly place all the parts of the system. If you leave the controller under the ceiling, it will overheat during operation, which will cause rapid failure.
- Until the canvas is stretched, it is impossible to assess how bright the backlight is and whether the result corresponds to what was intended.
The tape can only be replaced after the blade has been removed.
Advantages of LED strip
To make a final decision on the choice of lighting sources, you need to thoroughly familiarize yourself with the positive qualities of the decorative tape. Its advantages are as follows:
| Fast payback | It is worth noting that the cost of LED strip is considerable. However, it is necessary to take into account the low energy consumption and calculate the savings. It will become clear how profitable such a product is. |
| Long service life | From the moment of installation it will last about 100,000 hours. Even with a constantly turned on light source, it will last for several decades. |
| Ideal lighting angle | The light dispersion of LEDs is 140 degrees. The result is soft and uniform lighting of the room. There will be no shadows in the room, which will allow photographers to take beautiful pictures without the use of expensive equipment. |
| Purity of shade | The diodes will give exactly the color you chose when purchasing the product. There is no need to apply additional filters for the desired shade. Moreover, throughout the entire service life, the lighting will not change color. |
| No strong heat | Thus, the stretch ceiling fabric does not heat up, which can lead to its deformation and sagging. The only light source that has such qualities. |
| Elasticity | It is possible to create a variety of figures and compositions, configurations of any complexity. |
| Unique Design Features | Makes the interior of the premises unique and inimitable. |
| Adjusting the light intensity | It is possible if the LED strip is connected to a dimmer. |
Advantages and disadvantages
Advantages of tapes:
- Easy installation.
- Reliability.
- Economical.
All these three advantages are much superior to energy-saving analogues, and even more so incandescent lamps.
There is only one significant disadvantage - the high cost of LED systems. On the other hand, with the right choice of diodes (beware of Chinese and other dubious manufacturers) and operation, they pay for themselves, as they last for many years.
Types of LED strips
LED strips are available in two types:
- monochrome, which can produce one color;
- universal, which sparkle in a variety of shades. A special remote control is used for this.
Additionally, diode strips are divided into moisture-resistant, moisture-proof and moisture-proof. In dry rooms, such as offices, bedrooms, work rooms, you can use any type of tape, while in rooms with high humidity or in open space, you should give preference to moisture-proof options.
Types of built-in lighting for suspended ceilings
A suspended ceiling with built-in lighting is a luxurious, pleasant and elegant option to update your interior. All modern types of lamps are used for suspended ceiling structures.
- Spotlight lamp - suitable for illuminating a space at night and for separating or highlighting functional areas. This is one of the most budget-friendly lighting options.
- LED - has a long service life, provides the room with diffused light (uniform, illuminating all objects in the room).
- Classic - these are ordinary chandeliers that do not always fit into an interior with a suspended ceiling.
- Fluorescent lamps are great for economical and long-term use. Such lamps are often installed in non-residential public spaces. The only negative is that they are very sensitive to power surges in the network.
- Fiber optic - this type of lamp will create spectacular lighting for your room. Its cost cannot be called budget; it is quite expensive.
Which LED strip to choose for illumination
The choice of products is huge, but it is necessary to take into account the following characteristics of diode strips:
- The number of diodes placed on 1 meter of tape. The intensity of lighting depends on this. LEDs also vary in size - the larger, the brighter.
- The power indicator of the power source, which is predetermined. If we take the SMD5050 model, where there are 30 diodes, each of which will require 0.24 watts, then for a stretch ceiling, no more than 2 strips of 5 meters each (standard length) are taken. This makes 300 diodes (10 m x 30 diodes). 300 x 0.24 = 72W. Taking into account the small power reserve, installation of such an LED strip will require a power source of at least 100 W.
LED type Number of LEDs per meter Power consumption of one meter of tape, W SMD 3528 60 4,8 SMD 3528 120 9,6 SMD 3528 240 19,2 SMD 5050 30 7,2 SMD 5050 60 15 SMD 5050 120 25 - Voltage and power supplies. All diode strips are powered by 12 VDC. As a rule, the network contains 220 V AC. There is a need for a step-down transformer.
An example of connecting an LED strip to a step-down power supply - Availability of colors. Basically, manufacturing plants produce diode strips with RGB elements, where R is red, G is green, B is blue.
- Availability of controls. To change the light saturation in the room, use special remote controls. Thanks to them you can change the brightness of the lighting.
Types of lighting fixtures
Fluorescent lamps are a classic lighting element that has been used for a very long time. Since then, when the ceiling had only one level, and whitewash or paint was used to decorate it. Nowadays, fluorescent lamps mainly illuminate individual surfaces and are used as elements of hidden or open lighting.
Fluorescent lamps for suspended ceilings
Despite the widespread use of such lamps, they have many disadvantages that prevent their widespread use.
- Operation is possible only along the main circuit, as additional light elements.
- Despite the fact that they do not get very hot, they will have to be changed regularly - the service life of fluorescent lamps is short. To replace them, you will have to remove the entire ceiling and then re-stretch it, which entails large financial or time costs.
- The brightness of the lighting cannot be adjusted.
- At low temperatures such lamps do not work well.
- There is mercury inside fluorescent lamps, which is not environmentally friendly and unsafe for others.
Neon light sources are never used as the main light source, as they do not burn very brightly. But they have other advantages - a large number of bright colors that are convenient to use for design. Neon lamps decorate individual ceiling elements well and complement or shade the main light sources.
Prices for suspended ceilings
suspended ceiling
Neon light sources
LED strip is the best light source for illuminating a stretch ceiling. Let's consider the advantages of such tapes.
Very long service life of diode elements, which will allow you to rarely replace them
In the case of a stretch ceiling, whose dismantling is quite complicated, this is critically important. The LED strip is flexible, which allows you to create smooth light lines and shapes on the ceiling. It can be used in ceiling structures of various types - from straight to curved and multi-level. Uniform, adjustable light
LED lamps can be natural white or multi-colored - choosing the appropriate option is not difficult. Diodes hardly heat up - an invaluable quality for the elastic surface of vinyl ceilings. They also use a small amount of electricity. The brightness of the lighting is adjustable - along with the tape, a remote control, power supply and control unit are included.
LED Strip Light
The Duralight cord has a flexible structure, which allows it to be used for the same functional tasks as in the case of diode strips. But Duralight has a number of disadvantages - the light is not as uniform as that of diodes; The cord also consumes more energy and requires fairly frequent replacement.
LED Strip Light
LED Duralight
Characteristics of different types of light sources
Backlight options
If we take it globally, there are only two types of lighting: external lighting of a stretch ceiling and internal. There are mainly four main methods of ceiling lighting:
| Diffused light around the perimeter | The most preferred option. In this case, the tape is placed on a special stand under the suspended ceiling. The light is directed upward and diffuses softly. |
| Directional backlight | Separate lampshades are mounted on slopes and directed to the ceiling surface. Visually, the resulting rays are directed along the canvas. |
| Curly lighting | The lampshades are placed in such a way as to create the appearance of various configurations. Inside the suspended ceilings there is a diode strip, which is laid in intricate shapes. |
| Spot lighting | The LED is mounted in such a way as to create spot lighting. This creates a “starry sky”. In this case, the light is directed downwards. |
Placement methods
The design of a stretch ceiling creates free space between the load-bearing slab and the canvas. Therefore, most often electrical wiring and lamps are placed there.
LED strips are also installed in niches, cornices, on profiles of multi-level ceilings, above and behind baseboards. The light flux can be directed at any angle relative to the ceiling surface.
To obtain uniform lighting, LEDs need to be placed five centimeters from the ceiling.
List of required materials and tools
It is worth noting that for work related to the installation of LED strip, you must have certain tools, devices and materials available. The main and most necessary item is a soldering iron, the power of which does not exceed 25 W. In addition to this device, you must purchase:
- surgical forceps or tweezers. They will make it possible to use them to hold the wires being used;
- pliers for biting off wires or wire cutters;
- special devices used to strip insulation from wires;
- rosin or soldering flux;
- solder;
- heat-shrinkable tube;
- soldering acid;
- insulating tape with excellent adhesive properties;
- double-sided tape;
- effective solvent;
- high-quality synthetic glue;
- primer;
- devices for applying primer.
Preparing the LED strip for installation
Before installing the LED strip, you should decide on the number of LEDs on it and their density. If there is a need to illuminate certain areas of the room with tape, then use type SMD3528 (60 diodes per 1 meter) or SMD5050 (30 diodes per 1 meter). If the LED strip will be the main source of lighting, then strips with diodes from 60 pieces per 1 linear meter are purchased. (SMD5050) or from 120 pieces per 1 linear meter. (SMD3528).
Once the diode density is determined, the required tape footage is set. The total power of the diode strip is taken into account and the appropriate power source is selected. In the absence of proper experience in this matter, it is best to seek help from a consultant in the store, who will offer the best option based on different power supplies for different tapes.
Power supplies for LED strip
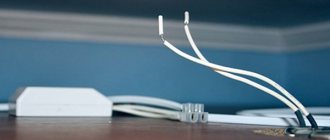
As a rule, the cut points of 3 LEDs are determined on the tape. When using a simple tape, the soldering occurs “+” and “+”, or “-” and “-”.
Soldering LED strips together
If you decide to use RGB tape, then you should solder it based on the labeling requirements. The wires included in the kit are usually soldered by buyers. Preference is given to stranded wires due to their greater reliability. In this case, tips with a 0.75 mm cross-section are attached to the reverse ends. Special clamps are used for this. Experts do not recommend using teeth or pliers for these purposes. The result is that the wires have better contact with the controller, dimmer, and power supply. Afterwards, the contacts inserted into the block are secured with screws.
Connector for LED strips
As soon as the soldering of the wires to the LED strip is completed, a special heat-shrinkable tube is put on it. This will increase the safety of the lighting device, since the contacts will receive additional insulation and the strength of the connections will improve.
Installing heat shrink tube onto tape
The standard length of LED strip is 5 meters. It is rolled into a bobbin. If additional length is needed, the tapes in the reels are cut and then connected to each other. The main point is taking into account the power of the power source that will be used.
How to cut LED strip correctly
The steps to connect LED strips with an amplifier are as follows:
- The amplifier performs almost the same functions as the controller. If the controller does not have enough power and the LED strip is not completely installed, an amplifier is installed.
- The number of amplifiers can be any, depending on how long the LED strip will be installed and how much power is required for its operation. You can connect the tape to a power source in different ways. The principle of connecting RGB strips to amplifiers and controllers
Useful videos on the topic:
LED lamp device
The method and nuances of installation are largely determined by the type of LED lamp. Regardless of the external design and structure, they are all united by the LED element used as a light source. The latter is classified according to a number of parameters:
- Power consumption.
- Color temperature.
- Brightness.
- Like.
- Durability.
- The angle of dispersion of the light flux.
- Pulsation intensity.
The design of most LED lamps used in everyday life includes one or more led crystals, a housing with a reflector or diffuser, and a radiator necessary to remove the generated heat.
Based on external design, installation nuances, operating features and place of application, LED lamps are divided into the following subtypes:
- Invoices. Installed directly on the ceiling or wall.
- Built-in. Mounted in a pre-prepared cavity or box.
- Hanging. Suspended using a hook, chain or wire.
- Rotary. Using the bracket, the direction of the light flux is changed.
- Narrowly targeted. They have concentrated radiation.
- With a wide light dispersion angle. Light travels in all directions.
- Panel. The device is a matrix with many led elements, covered on top with a diffuser made in the form of a panel or plane.
- Specific. This type includes lighting devices of specific models, such as, for example, Armstrong, Grilyato and others.
The simplest type of lamps under consideration is an LED lamp. Its installation is carried out in a standard way - by screwing it into the base E14, E27 and other modifications.
How to install LED strip under a suspended ceiling
Many people try to place LED strips in such a way that they are not visually noticeable. It is enough to have outgoing soft and uniform lighting. The main ways to install LED strips are as follows:
- A metal frame structure is mounted under the ceiling.
- As soon as the surface is primed and puttied, a cable is laid for the wires of the LED strips.
- Those areas where the LED strip will be installed are thoroughly cleaned and degreased.
- The tape is attached to the ceiling cornice using construction tape. Power supplies are located in places where the ceiling structure is reinforced.
- Next, the suspended ceiling is installed.
The standard mounting method is to use a ceiling cornice. With this installation, the tape will not be visible. The main stream of light is directed to the ceiling, and its reflection fills the room. There is an alternative mounting option - behind the baseboard. The principle of room lighting is identical.
Recommendations from experts! If there are suspended ceilings in the room, the LED strip is placed at a distance of at least 2 cm from the surface of the ceiling covering.
Step-by-step instructions for installing LED strips to the ceiling
Useful videos about installing LED strips under suspended ceilings:
Installation
At the first stage, the ceiling niche structures are installed to accommodate the lamps. The height of the structure must be sufficient for the height of the lamp base. Electrical wiring is placed inside and becomes completely hidden behind the surface of the ceiling.
Holes are made in the ceiling for spotlights. Strip LEDs are placed in a special profile fixed to the surface of drywall. To create a diffused glow, the profile with the tape is covered with frosted glass. Neon strip lights do not require a glass profile or screen; they simply need to be secured using fasteners in several places.
Features of installing LED strips under the ceiling
You cannot mount an LED strip to illuminate a ceiling surface without using wires and power supplies. The process of installing this type of lighting is not particularly difficult and does not require special knowledge or little experience in this area. But there are certain nuances that it is not enough to know about. They still need to be taken into account during the installation process.
- First of all, the length of the LED strip and the required power to service it are calculated. Purely mathematical calculations: the power of 1 linear meter of strip is multiplied by its total length.
- It is strictly forbidden to connect more than 2 pieces (10 meters) of strip in series. If the rooms are large and this amount of lighting material is not enough, it is necessary to use the parallel connection method. You can purchase multiple power supplies. Moreover, an additional unit is required if the total power is more than 40W.
Parallel connection diagram for LED strips - When choosing a backlight with multi-colored reflection, in addition to the power supply, an RGB controller is also installed, thanks to which you can change the color scheme. Connection diagram for RGB strips
- It is not recommended to install an LED strip without pre-treatment with a primer.
- The principle of gluing the tape is quite simple: the protective layer is removed and the tape is pressed onto the selected areas.
- The last step is to connect to the power supply and check the operation of the entire system.
- After carrying out a complex of works, the vinyl sheet of the stretch ceiling is stretched.
Video on how to connect an LED strip to a power supply:
Let's get started
The installation of a multi-level illuminated ceiling should begin with the design and marking of the future structure. The initial frame is installed and sheathed with sheets of plasterboard, they are attached using self-tapping screws.
For this, a laser level is best suited and it’s good if you have an assistant; it will be quite difficult alone and a lot will depend on the quality of the screws, so you shouldn’t skimp on them.
When the frame is ready, the next step is covering it with sheets of plasterboard. This is how the first level is formed, here you can already install the backlight. After this, the second level is attached.
What materials will you need?
- Guide profiles 28x27
- Ceiling profiles 60x27
- Separator tape
- Sealing tape
- Dowel-nails 6x40
- Anchor wedges 6x40
- Level
- 2.5 m rule
- Drywall 2500x1200x12.5
- Self-tapping screws
- Hammer
- Screwdriver
- Roulette
- Hammer
- Stationery knife
- Direct hangers
- Metal scissors
- Primer
- Spatulas
- Seam tape
To eliminate damage that may have appeared on the material during installation and to hide the joints between the sheets, putty should be used. This can be done both before and after installing the lighting.
Soldering LED strip
Installing an LED strip is not difficult. However, many are put off by the need to solder it. These actions should be taken in cases where the length of the purchased tape exceeds the required one or one sheet is clearly not enough for a large room. For complex figures, the tape rotates many times and changes direction, which also requires cutting it. Afterwards, the contact points must be reconnected. You shouldn’t immediately look for professionals – electronics engineers. Just get started by purchasing connecting wires or connectors.
Soldered RGB strips
Using connectors for LED strip
Connecting LED strips using connectors is much easier than soldering them, but this option has its drawbacks.
The principle of connecting the connector and LED strip
When a connector is used, there is a small contact area between the contact on the connector and the contact on the tape, which can cause heat. LEDs located in the immediate vicinity of this place may lose their brightness and differ from other diodes, which will negatively affect the uniformity of the backlight. Moreover, in the absence of soldering and tinning, copper will darken over time, then oxidize, forming a green coating (oxides) that prevent the passage of current. When the contacts are heated significantly, oxidation occurs much faster. The result is that the diodes will begin to blink and eventually go out. Even if the contact area is somehow increased, future oxidation may still occur. Therefore, if possible, you should opt for soldering.
Required tools for soldering
Soldering is not as difficult as it seems at first glance. It is necessary to have a general understanding of the work. Materials worth stocking up on:
- rosin;
- neutral flux - gel;
- low power soldering iron;
- thin copper wires;
- toothpicks;
- stripper or knife;
- tin-lead solder.
How to solder LED strip
Brief instructions for carrying out the work look like this:
- We are preparing a soldering iron.
- We dip it in rosin.
- Then we lower it into the solder.
- We dip it in rosin a second time.
- We solder the wires and tape.
Installation Tips
To illuminate the ceiling yourself with LED strip, pay attention to the following recommendations and tips:
- in the process of fixing the cornice below the ceiling surface, for greater reliability, only one strip is attached instead of two. Then the cornice is fixed with dowels;
- Be sure to mask the heads of the screws in the cornices. Hats can be painted over with acrylic paint or puttied;
- After fixing the cornice, check the backlight by connecting it to the controller or power supply. If one strip is installed, the connection is made directly; if more, a parallel connection is made to each other;
- look at the video on how to install LED strip on the ceiling. If difficulties arise during fixation, double-sided tape will help. Using tape, you can glue a strip, repeating all the curves of the space;
- when soldering wires, as seen in the video for do-it-yourself LED strip ceiling lighting, try to do the work quickly so that the wire does not have time to cool down;
- soldering is performed in parallel. With a series connection, if one lamp breaks down, the rest will fail.
To know how to illuminate the ceiling with an LED strip with your own hands, watch step-by-step installation videos and consult with specialists.
The lighting of any room should match the color scheme with the decor. To change the backlight tone, a controller is used, which allows you to adjust the shades and select the desired tones for the design of the room.
In the video of installing the LED strip on the ceiling, you can see that the distance between the levels should be the same (20 cm). If you decrease or increase the parameters during installation, the lighting will be uneven.
How to mount an LED strip under a ceiling plinth
This option does not accept the use of mirror or glossy film, otherwise all the mounted elements that are located behind it will be visible. Often, separate lampshades or an LED strip are used to illuminate curtains or curtains. To do this, a small box , and the ceiling is stretched from below.
Installation of tape under a box with a suspended ceiling
Video about installing tape in a niche under curtains:
It is necessary to proceed from the fact that LED strip is used mainly for illumination. Therefore, the multi-level ceiling part is designed in such a way that other lighting devices , such as lamps and chandeliers, are placed on it so that there is enough light in the room. A chandelier is usually placed in the very center of the room. Lampshades can be placed anywhere. The main thing is that they look good and are functional.
The backlight can be mounted in different ways. It all depends on the person’s skill, his imagination and capabilities. The main point is that the ceiling must be in harmony with the rest of the room and be completely safe for others from a fire safety point of view.
It must be borne in mind that absolutely all lighting devices heat up to one degree or another during operation. Therefore, the suspended ceiling should be located at some distance from them. This will make it possible to avoid deformation of the ceiling covering and fire.
To be able to remotely control the RGB system, you need to purchase and connect an additional unit. As a rule, the delivery is completed with a special plastic or metal case, which is designed to mount the power supply and control unit. This design is attached inside the box using self-tapping screws so that it is not visible from below.
Strip lighting under a suspended ceiling is installed after preliminary cleaning of the mounting location from dust and dirt. If this is not done, the tape will not hold. Immediately before installation, the protective paper is removed from the tape, but not more than 1 meter. If the strip is completely freed from the protective layer, then dust and dirt will quickly settle on it, and you won’t have to wait for the tape to be securely attached to the surface. During operation, the tape freed from the protective layer may touch other surfaces, and the LEDs may stick together. Then the installation process will be seriously difficult. Therefore, you need to handle the protective layer carefully, without haste, and remove it in small parts as you attach the LED strip to the box.
If during the installation process there are extra centimeters of tape left, do not hastily cut them off. It must be borne in mind that the strip can only be divided in those places that are marked in the form of a perpendicular strip, and it passes every 3 to 5 diodes.
After completing the installation process of the diode strip, the end that is equipped with a connector is connected to the power supply. If there are no such connectors in the cut section, you must fill the gap and solder them yourself. Key point: don't get confused with polarity. If the connection is incorrect, the entire system will fail.
To facilitate work related to the replacement or repair of lighting fixtures, it is advisable to place the power supply and control unit in areas of the box where they can be reached without causing damage to the structure. When installing an LED strip around the entire perimeter of the room, certain difficulties may arise in this matter. Then it is advisable to install the blocks outside such a room.
Recommendations from experts! In order for the equipment to work for a long time and with high quality, it is worth choosing products from Western or Korean companies. Chinese products do not differ in quality and durability.
After completing the installation work, it is necessary to check the operating condition of the circuit. To do this, you need to turn on the power supply. If there are no questions about the lighting, the functionality of the remote unit is checked in various modes. If you are convinced that everything is working properly, you can begin installing the stretch ceiling.
How to make a plasterboard ceiling with lighting
The structure below, in which the LED or neon lamp will be located, is an ordinary shelf with an external edge - a screen, which must be fixed at a certain distance from the surface of the ceiling lined with plasterboard.
Traditionally, two types of niches are used - open and closed. In the first case, it is simply a shelf with a side, inside of which the tape and power supply are placed. In the second case, an additional vertical partition made of a metal profile and plasterboard is installed inside the shelf. It is used to strengthen the horizontal surface, for example, if the niche for lighting is wide enough.
In addition, this solution helps to hide control equipment and wiring behind a plasterboard partition, otherwise the light reflected from the plastic will be visible on the ceiling surface.
Marking for a plasterboard ceiling with a niche for lighting
Applying marking lines on walls and ceiling surfaces is not so difficult; for this you can use paint cords, a building level or a laser device.
The dimensions of the niche, the distance of the screen from the walls and the ceiling surface can be taken from the drawing below.
Closed niche with screen
Before proceeding with the manufacture of lighting for plasterboard ceiling cladding, it would be correct to check how accurately the location of the lamp complies with safety recommendations. A diagram of such a check is shown in the figure below.
Frame for a niche with lighting made of plasterboard
To make a load-bearing base, you will need 8-12 mm thick plasterboard sheets and two types of steel profile:
- PNP 28x27, the amount of material is calculated as the length of the perimeter multiplied by a factor of 3;
- PP 60x27, to make lighting around the entire perimeter of the room you will need a profile in the amount of 40% of the required length of PNP28.
Sections of the ceiling guide profile are sewn onto the walls and ceiling, as shown in the diagram. From PP 60x27, L-shaped jumpers are cut out and fastened - corners, which will serve as a frame for lining the niche with plasterboard.
If you make ceiling lighting using a closed scheme, then the number of guide profiles will need to be increased by 25%; in the case of an open version, strip lighting can be laid directly on a horizontal plasterboard shelf without a screen.
Plasterboard covering and finishing
To complete the work, you just need to cover the manufactured frame with two strips of plasterboard. Initially, the vertical cladding is laid, the cut strips 150 mm wide are sewn as a jumper to the supporting profile using self-tapping screws. Upon completion of the work, the lower edge of the laid piece of drywall is checked for level and, if necessary, cut so that the folded horizontal shelf is placed exactly along the marking line on the walls and ceiling.
After the walls of the niche have been assembled and fixed to the frame, the joints and points for screwing in the screws are puttied with a finishing mixture at the level of the drywall surface. In the final version, the putty areas are rubbed with an emery mesh and primed before painting with acrylic paints and varnishes.
Installation of lighting in a plasterboard niche
It is best to rehearse the installation of the wiring and the strip light itself in advance, even before covering the frame with plasterboard slabs. In this case, it is possible to select and adjust the position of the glowing cord inside the niche.
At the same time, you can check how far the light flow on the ceiling extends and, if necessary, make adjustments to the lighting system.