Edge functions
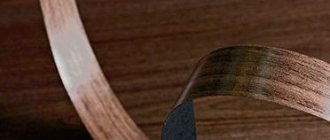
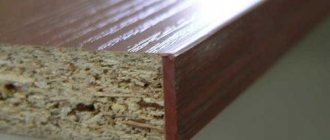
When cutting parts from laminated chipboard panels, unsightly edges inevitably remain. This is due to the peculiarity of the material, its pressed structure. To disguise the cuts, a special tape is glued to the visible ribs, which
called furniture edge.
In addition to camouflage, it performs the following functions:
- protects the ends from drying out;
- prevents moisture from entering the fabric;
- blocks the penetration of dirt into pores;
- allows you to stylize and decorate an item;
- increases shock absorption during physical impact;
- corrects, hides defects and irregularities.
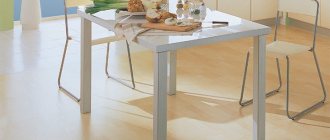
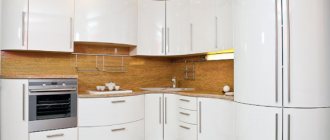
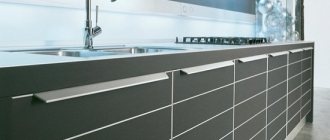
All of the above is especially true for cabinets, tables, and kitchen units.
Finn Plast edge materials
Dear Clients! moved to the address: St. Petersburg, st. Gruzinskaya, 5 We will be glad to see you in our new office!
We are glad to welcome you to the FinnPlast website! The information presented on our website will be useful to furniture industry professionals, as well as those who wish to purchase edging materials in bulk and are interested in new products and modern technologies in edging production.
The production and sale of edge materials is the main activity of our company. Today, FinnPlast is one of the most famous and popular brands in Western Europe, Scandinavia, and North America. Today, one of the priority areas is development in the markets of Eastern European countries.
founded in 1974. During its existence and successful activities, the company’s specialists have accumulated extensive experience in the production of edge materials, thanks to which today they are able to offer customers the highest quality products at competitive prices.
Types and their features
The most striking difference between the edges is in appearance. Ribbons can be of different colors, matte and glossy, with imitation of stone, concrete, wood, leather, stucco and other textured designs.
But the main difference is the material. The final properties of the part depend on the raw materials.
Melamine
They're paper. Made from very thick paper. It is impregnated with melamine and glued to a papyrus backing and varnished, which further increases its strength.
The papyrus base can be made of one or two layers. The thickness of the tape is respectively 0.2 or 0.4 mm. The second option is more expensive, but exhibits better performance.
Melamine edges are characterized by flexibility and easy installation. Most often there is already glue on the backside, which just needs to be warmed up before applying to the end. At the same time, this is the most short-lived type. The tape quickly wears out, fades, and is fraught with excess moisture.
Suitable for back edges of shelves and table tops. Not recommended for external parts.
Polyvinyl chloride
In other words, PVC. A mass of raw materials is formed into a tape, textures are applied and painted in different shades. The imitation of wood fibers is especially successful. The low price does not in any way affect the quality during use. One of the easiest options for self-gluing.
PVC edges withstand contact with objects, household chemicals, ultraviolet radiation, and water. They fit large curves and curves without any problems. Available with or without an adhesive layer.
Thickness varies from 0.4 to 4 mm. The width can be any in the range from 19 to 54 mm. As a rule, the size is chosen slightly with a margin from the end.
Expert opinion
Korzhavin Daniil Dmitrievich
Designer of stylish home furniture
The main disadvantage of PVC tapes is their poor tolerance to sudden temperature changes. Heating during installation must be done extremely carefully; furniture should not be left in the cold or in extreme heat for a long time.
ABS plastic
Edges made of ABS polymer material. They are good because they do not contain heavy metals, which makes them as safe as possible from an environmental point of view. They are also distinguished by excellent strength and long service life, despite active physical impacts.
They tolerate temperature changes well. They successfully imitate natural materials with their texture, including different types of wood. Available in glossy, semi-gloss, matte versions.
Despite the ease of gluing with any heat-resistant composition, they have some nuances in operation. When choosing ABS plastic, it is worth remembering that it shrinks when heated. The size of the tape should be approximately 0.3-0.5 mm wider and longer than the end itself.
The main disadvantage is the high price.
Veneer
Veneer is not the most sought-after material in the edging world, but it has its place. Such edges resemble thin plates rather than ribbons. They are made by thinly cutting wood, followed by pressing and painting.
Most often, veneer edges are used when processing problematic veneered products. They are expensive and require professional skills to operate. Rarely used independently.
Acrylic 3D
Edges made of transparent hardened acrylic. They resemble an aquarium or a piece of glass - there is a drawing on the back side. The structure makes the tape voluminous and creates beautiful highlights. The ability to make any ornament opens up scope for design activity.
It is actively used for decorating cabinets, chests of drawers, tables, and doors. Requires care in cutting, cutting and gluing, as seams can be noticeable.
Expert opinion
Korzhavin Daniil Dmitrievich
Designer of stylish home furniture
The cost remains high. Many companies allow manufacturing according to an individual project.
Advantages for wholesale buyers
- We have 400 color edging decors in stock, which can be delivered to you within 7-14 days. Delivery of the remaining 1,500 color solutions is carried out within 14 days.
- Our specialists constantly monitor the sales market for laminated chipboard decors and instantly respond to all changes in consumer demand. Therefore, we always have in stock the most popular color solutions today.
- Our range is represented by common edge sizes.
- Each client can purchase exclusive decors (available from 1 meter).
- Free delivery of your order to your chosen transport company in the cities of Smolensk and Moscow.
- Possibility of producing decor according to the client’s individual order.
- Professional advice and assistance in choosing the color of the edge to match the decor of the laminated chipboard.
- Competitive prices relative to PVC analogues give you the opportunity to earn more while maintaining high quality products
To start cooperation, you just need to leave a request on the form below, and our managers will contact you as soon as possible.
Difference from profiles
Finishing profile
Confusion often arises with the concept of edge and finishing profile. You can disguise the end of the furniture with both, but the products are strikingly different from each other.
Profiles are made of PVC, wood, aluminum of different hardness. They are sold with a section in the letters T and C (aka P), and are slightly moldable. The edges are produced smooth, straight, and much more flexible.
The most important difference is the installation method. The edges are always glued with glue. Profiles are inserted into a milling groove (T form) or put on with a hook at the bottom and top of the end (C form). To shrink the profiles, they are “nailed” on top with a rubber mallet. Sometimes they are additionally glued or fixed with finishing nails.
The end for the profiles must be processed as carefully as possible - the edges are trimmed, the surface is sanded. Otherwise it will not sit correctly. There is no such problem with edges.
Installation technology
Before starting work, you will need to prepare the surface and collect the necessary accessories.
Toolkit includes:
Glue Moment, Liquid Nails or construction PVA (if not a self-adhesive type of edge).
The edge itself (calculate the quantity in advance around the perimeter with a margin of at least 20 cm).
Sanding block or fine sandpaper.
Painting knife, scissors (depending on the softness of the edge).
Pressure rubber roller.
Thick rags.
Hair dryer or iron.
A file and wood putty may be needed if the end has large defects.
The main task of preparing an object is to remove all burrs, seal large holes, and level the surface as much as possible. When using sandpaper, the surface must be completely dry. If putty is used, it must be given time to completely cure. Then start gluing the tape.
How to glue
The algorithm for using tape without an adhesive layer and with it is slightly different.
Self-adhesive
- Measure and cut a piece of tape 2-3 cm larger than the end.
- Apply an area of about 20 cm, level it and heat it with a heated iron or hairdryer for several seconds.
- Roll the heated area with a roller.
- Proceed to the next segment. Continue this way the entire length.
- Trim off excess tape with a paint knife. Glue the edge.
Without adhesive layer
- Measure and cut off the tape to spare.
- Apply glue to the end and level the layer.
- Wait for the initial drying time (indicated on the packaging for each type of glue).
- Apply the tape in small sections, rolling it with a pressure roller.
- Wait until the adhesive has completely cured. Cut off excess.
When working with a self-adhesive edge, it is possible to level the entire length to the end, secure it with masking tape in several places, then warm it up. Before treating the area with tape, it must be removed before heating.
Expert opinion
Korzhavin Daniil Dmitrievich
Designer of stylish home furniture
Adhesive may come out during the process. It is collected with rags immediately, without waiting for it to dry.
Necessary tool
- Iron. Preferably small in size, without steam holes, with a thick, clean sole. The best option is with Teflon coating.
- Sharp knife. You can use a stationery knife or a shoemaker's knife.
- A block of sandpaper. Recommended sandpaper grit is 150 grit. You can buy a ready-made block or make it yourself by gluing sandpaper to any block.
- A damp cloth or piece of felt.
- Part holder (if necessary).
Lifehacks
Professionals advise paying attention to the following tricks:
- Ends hidden from view are often not processed. This is acceptable according to GOST, but in practice it is not very reasonable. It is optimal to go through parts that are invisible during operation with at least the thinnest melamine edge. This will reduce the absorption of vapors and moisture, and extend the life of the furniture. Relevant for shelves, drawer bodies, countertops.
- When working with an iron, it is highly advisable to wear a fluoroplastic attachment or add thick cotton. This reduces the risk of overheating the glue and melting the tape itself.
- The edges are selected either tone-on-tone or in strong contrast. A difference of 1-2 tones will make the furniture visually uneven.
How would you disguise the end of the furniture?
EdgeProfile
- To improve the fit, the ends must first be vacuumed and wiped with alcohol to degrease.
- The optimal heating for an iron and hair dryer is medium mode (usually 2).
- For facades and external ends it is better to use PVC edges 2 mm thick. There the friction is highest.
If it is necessary to replace the old tape, it is removed in the same way, but in reverse order. Heat the surface, use a knife or spatula to separate a piece from the end. Clean the surface, then begin installing fresh material.
FAQ
Can there be a cheap edge on expensive factory furniture?
Hardly. Manufacturers do not skimp on such details, realizing that the durability of the product depends on this. If the edge is cheap, the price is likely unreasonably high.
How to properly make joints on furniture edges?
It is advisable not to do them at all. The following approach will allow you to avoid joints: round the corners with a file, measure the entire perimeter of the tape, start gluing from the center of the front end, first going around the left side, then along the right. You need to connect the ends in the center of the rear end, in a place that is most invisible to the eye.
If this option is unacceptable or the edge is hard, you can leave sections at the corners and cover the seams with decorative overlays.
On veneer, the joints are sealed with putty, sanded and the entire perimeter is coated with varnish, wax or paint.
The edge breaks when cutting off excess. What to do?
The problem may be a dull blade or the direction of movement of the knife. The cutting is carried out inside the part, from top to bottom. To be on the safe side, you can use a metal spatula.
The hard edge does not adhere well.
For complete pressing, you can use a wooden beam the length of the entire end. After rolling with a roller, you need to press the block on top, secure it with tape or clamps and leave it until the glue dries completely.