Not everyone likes the hard seats of chairs and stools - it is uncomfortable to rest on them for a long time. Therefore, many try to make either pillows or special covers with soft filling; they do not move off the surface, but they can be removed at any time to use a piece of furniture as a stand for household work (screwing in light bulbs, whitewashing the ceiling, etc.).
New covers for stools will not only update the interior of the kitchen, but also make hard seats comfortable.
A hand-made stool cover significantly increases the comfort of use of a kitchen attribute. You can spend longer time over evening tea or family dinner. The kitchen space will benefit greatly if you complement the furniture with similar decor.
Stool covers are very easy to sew, and any housewife can complete the job in a couple of hours.
Pros of making it yourself
Hand-made items fully meet the style preferences of the apartment owners. Stools with removable “upholstery” are also practical and protect the surface of kitchen furniture from premature abrasion.
While working on the seat, you can evaluate how suitable the product is in size, which may not happen with a purchased version.
If you sew a cover for a stool with your own hands, it will cost a minimum of money or free of charge when all the materials are at home.
The made seats will look original in the kitchen interior.
The stools will require little fabric and filling, and the appearance of the furniture will change for the better.
The seats, improved by covering, are comfortable and durable. The “upholstery” can be easily removed and washed if necessary.
The seats can be removed to use the stool for household chores without dirtying the fabric.
Options that are easy to use
Let's look at all the options that you can easily do with your own hands. All the nuances and step-by-step implementation are below.
We sew a cover for a chair with a back
After we have measured the height of the back, legs, and width of the chair, we make a pattern of three elements: rectangles covering the sides and the back with the seat. Don't forget to add a couple of centimeters to the seams.
- Transfer the pattern to the fabric. Since we are dealing with rectangular parts, you can use a ruler for greater accuracy.
- Carefully cut out all the details, taking into account the shared thread.
- First of all, we sew the side edges.
- Then we move on to the side and bottom sections of the back of the back. They should be folded and then stitched.
- Sew the side parts to the seat.
- We tuck and stitch the sections of the side and front parts of the product.
- Ready-made covers can be decorated with a bow or other decor on the back of the chair.
We sew a simple seat
The easiest option, which is suitable even for beginners, is a regular stool seat. It's fairly quick to sew.
- We make a template from cardboard or other material according to the shape of the stool seat;
- using the resulting pattern, we cut out three parts of the same shape and size from the fabric (for the front, back side + padding polyester);
- We place the padding polyester between two pieces of fabric and secure it with pins;
- to quilt the future seat, you need to sew even lines parallel to each other;
- we baste the pre-prepared bias tape for edging, leaving the ends as future ties;
- We carefully fold the ties in half and stitch them on a typewriter;
- We sew bias tape on the sides of the product using a machine.
Elastic cover for a round stool
- First, as usual, we make a pattern. In order not to bother with measuring instruments when calculating the diameter, you can simply attach a sheet of cardboard or newspaper to the surface of the stool, then cut it along the contour.
- We transfer the drawing to a new sheet of paper, adding a few centimeters along the contour.
- Based on the resulting template, we cut out the piece from the fabric.
- We put an elastic band on the edge of the fabric, fold the fabric, and stitch it.
- Our cover is ready - all that remains is to put it on the stool.
- To add softness, you can sew foam rubber or padding polyester into the seat.
Crochet chair covers
A knitted cover can be an interesting option for decorating a room. Crocheting will take more time than sewing a simple pattern, but the result will be a special and original item.
Most often, round or square models are crocheted for seating stools. Let's look at an example of knitting a simple round cover:
- We make the upper part from rows of lush columns, separated by short chains of air loops.
- We make the hem by knitting several rows in stitches without adding. This way they will form an even side (for greater stability we make the side higher).
- In the last row we knit air loops - at the end you can insert a fixing elastic band or cord into them to secure the product to the stool.
Using various knitting patterns, you can knit absolutely any model with your own hands. For example, the so-called flower cover or models crocheted from motifs (they can also be decorated with crocheted flower appliqués).
Cover made from an old sweater
If knitting is not your thing, but the beauty and comfort of knitted covers haunt you, try making them from an old sweater. Any item of the desired size and color, knitted with knitting needles, large or medium knit, is suitable for this.
Depending on the size of the sweater, you can sew a cape only on the seat or on the back, or you can get a whole accessory, for example, by using several old products.
You can also sew models not only from knitwear, but also from other old things in good condition. For example, from jeans or coats that have become too small. The main thing is that the style of the resulting product matches the interior of the room.
On a children's chair
Chair covers in a children's room are more relevant than anywhere else. Bright, elegant fabrics can decorate the interior of a nursery and interest little fidgets. In addition, they are indispensable in protecting furniture from dirty handprints, spilled drinks or traces of children's creativity.
The product is sewn according to a standard pattern, as for a regular stool. All measurements are taken in advance. Very often, for children's furniture, capes are sewn only on the back: two rectangular pieces are cut out and sewn in three places. At the end, you can apply a design or decorate it with fabric, sew on “bunny ears” or, for example, design it in the shape of a snowman.
On the inside, so that the cover does not slip, you can sew decorative laces that will be tied behind the legs of the stool. You can also use buttons, ribbons or elastic.
Design and construction
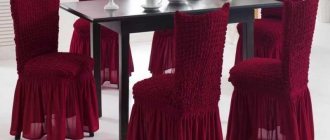
Your products will be shaped like the seats. If these are stools intended for the kitchen, then it is better to sew not cushions, but capes with elastic that can be easily removed for washing.
Such covers for stools are very practical: they can be removed and washed, which is important for the kitchen.
If the seats are made with your own hands, then you can choose any textiles and filling. These are unnecessary scraps, foam rubber, tapestry with a large pattern and other materials.
The seats can be decorated in one color or use an ornament.
The latter looks quite stylish and interesting if the color scheme is matched to the interior.
Fabric selection
The main criteria are functionality and stylistic combination.
In addition, it should match the curtains and tablecloths. It is recommended to buy covers with fabrics that are pleasant to the touch; they are perceived differently by people, so an individual approach is needed. It is important to pay attention to the ability of the material to maintain high quality after washing and be resistant to stains (depending on the color).
There are about 6-8 commonly used types of fabrics.
- Gabardine has a dense structure.
- Synthetic materials are worse in all respects: they quickly get dirty and dry out.
- Crepe-satin is elastic and soft, quite thin and has a shine.
- Lycra (supplex) is elastic, looks beautiful, and is easy to care for.
- Spandex does not allow water to pass through, but breathes well, so it is durable.
- The brocade is heavy , thick and looks expensive. It is difficult to care for, so it is better to use dry cleaning services.
Required materials and tools
To make a soft base for the seat you will need:
- Fabric (dimensions are calculated as follows: surface area plus 10 cm);
- Textile elastic band of medium width (2-3 cm);
- Strong threads to match the background color of the fabric;
- Chalk or piece of soap for marking;
- Ruler;
- Pin;
- Sewing machine.
Choose fabric for the seat that is dense and wear-resistant. The tapestry is perfect.
It is best to make a lining from softer textiles, which will follow the shape of the top of the stool.
The ideal filler is dense foam rubber with a height of 3-4 cm, no more, otherwise the seat will deform and slide off the stool. For chairs, filler should be 6-7 cm thick. If foam rubber is not at hand, then thin or thick felt, woolen fabric, padding polyester and even unnecessary shreds will do.
The material must be laid in several layers - three or four will be enough.
It is recommended to make the filling from shreds unmixed; you should sew the pieces of fabric together, since after washing they can bunch up in the corners.
Learn to crochet a beautiful and patterned chair cover with patterns
1) We start knitting the rug from the first row. We take a hook and a white thread in our hands. The first step we need to make is a sliding ring. We place the thread on the finger as shown in the diagram.
2) We wrap the thread around the finger of our left hand three times, take the hook in our hands and pass it under the first two threads, grab the third and pull it through the other two. This creates a ring.
3) Then, into the resulting sliding ring, we cast a double crochet and 2 chain loops, after which we tighten it. To do this, pull the tip of the non-working thread.
4) We knit 12 double crochets into the base of the resulting ring, and then tighten the ring tightly by again pulling the end of the non-working thread.
5) Now we begin to knit the second row. To do this, make a single crochet, then 2 chain stitches, then a double crochet.
6) When knitting subsequent stitches, we follow the principle: two stitches in one half-loop. In other words, you need to knit two double crochets at once into each half-loop of the first row. As a result, you should get 24 columns in a row, that is, exactly twice as many as in the first. At the end we make a connecting loop into the second air loop.
7) Let's move on to the third row. In the back half-loop of the next stitch we knit a double crochet, two chain stitches and one single crochet. In subsequent rows we observe alternation: 1 Dc – 2 Dc (in one half-loop of the previous row) – 1 Dc and so on. There should be 36 double crochets in total. The connecting loop is again made into the second air loop.
9) We knit the last row in a different way. When knitting, we grab both half-loops of the previous row, make a connecting loop, in the next we knit a double crochet and 2 chain loops, skip 2, and in the third we make a single crochet and 2 chain loops, and so on. In other words, we repeat the following sequence: RLS, 2 VP, 3DC (in the third loop) – RLS, 2VP, 5DC (in the fifth loop), etc. Thus, we get arches, in each of which we knit a double crochet, 2 air loops, 3 double crochets.
10) Now we move on to knitting the petals. Change the color of the thread and start the first row with a slip stitch. The method of its addition can be seen in the diagram.
11) Using it, we attach the thread to the first row of the front half loops and knit a single crochet.
12) In the same loop we knit 5 chain loops and a single crochet. Thus, an arch was created.
13) Then we make one air loop, through two loops we knit a single crochet, 5 chain loops and a double crochet (all in one loop) and one air loop. We repeat the sequence RLS, 5VP, RLS, VP two more times. At the end of the row we make a connecting loop in the first single crochet. The result should be 4 arches.
14) We begin tying the resulting arches. We repeat the following sequence of actions: single crochet, 2 chain crochets, 4 double crochets, 2 chain crochets, 5 double crochets and a connecting loop in the first double crochet. Thus, we have the first petal, after which we need to make a single crochet.
15) We continue in the same way: 5Dc, 2VP, 5Dc in the arch, RLS from the first VP and a connecting loop in the first Dc. This is how the first row of leaves turned out.
16) The second row needs to be knitted in the same way as the first, but with minor changes: 5DC, 3VP, 5DC in the arch, RLS from the second VP and a connecting loop in the first SC. We continue until the end of the row.
17) The third row is knitted similarly to the second, but again with changes: 5DC, 3VP, 5DC in the arch, RLS from the third VP and a connecting one in the first SC.
18) To avoid the petals losing their shape, it is worth making a small fixation for them. To do this, you need to make a connecting single crochet and at the same time use the middle loop of the three passed between the arches.
The final stage is decoration
For a DIY stool seat, appearance is important. If you use a tapestry with a pattern, then a large floral pattern with a flower in the center looks great. Due to the soft combinations of shades, it does not look pretentious, but rather stylish.
Several stools made in the same style give the kitchen an organic feel.
You can also decorate the seats using embroidery on your soft product. Like a tapestry with a central pattern, a large flower made using the satin stitch technique will look good. A perimeter ornament or an abstract image also looks great. For embroidery, use durable, color-resistant threads that will not wear out from frequent use and washing of the cape.
Design options for covers for chairs and stools.
Kitchen stools can be varnished or painted to match the seats. It is better to do this before sewing to allow the entire item to dry evenly. Considering that the furniture will be used frequently, it is recommended to apply two layers of paint or varnish for less wear.
Soft and beautiful handmade capes will immediately please your guests.
"Granny Square"
The essence of this technique is the constant alternation of threads of different colors. You can take five shades of the same color or five completely different colors. The choice depends entirely on your imagination, the main thing is that together they look beautiful and harmonious. Below we present several diagrams from this technique that will help you figure it out.
Please note that the yarn should not be very thick, as in the previous version. In this case, the finished rug will look rough and the design will be inexpressive. You can use acrylic or wool mixture, and take a hook one and a half times thicker than the thread.
Using this pattern, you can knit individual squares. Then they are carefully connected and you get a cute and beautiful rug.
There is also an openwork version using the granny square technique.
If you don’t want to spend a lot of time fiddling around and connecting different elements, you can knit a rug from one piece. The diagram shows this clearly. It can be used for both single-color and multi-colored products. But the pattern looks more beautiful and expressive when using several colors or shades.
As you have seen for yourself, knitting a seat mat for a chair or stool is not at all difficult. In addition, it is small in size, so you can finish knitting very quickly. But the result will delight and warm you for a long time!
Seat care
The soft removable part of the stools must be washed periodically as it tends to get dirty regularly. This is especially true for kitchen stools.
Washing should be carried out in a gentle mode at a temperature of 40 degrees, so as not to deform the base.
It is recommended to dry the product flat out, in a place where there is no direct sunlight, otherwise the design will fade.
Crochet covers for round stool
Products made from multi-colored acrylic yarn
Plain seats made of knitted yarn
Crochet seats for a square stool
Interior style where chair covers are appropriate
Chair covers for the dining room, kitchen, and children's room look most organic. In order for the covers to fit perfectly into the design of the room, you need to take into account the design features and color palette of the textiles.
Provence
Romantic style always remains popular.
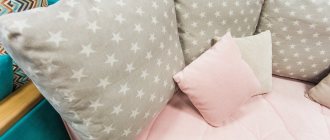
Many people like soft natural shades (pale pink, blurry lavender, blue, light green). Characteristic features of this interior trend: textiles with small floral patterns, decorating furniture with knitted and sewn products (tablecloths, covers).
Designer textiles in the Provence style (tablecloths, curtains, napkins) are decorated with ruffles and lace.
At first glance, the interior may seem shabby, and things old and abandoned. However, vintage antiques are not without sophistication. Openwork tablecloths, chair covers decorated with lace, decorative vases, and cute trinkets look elegant in the setting. The color palette is based on light shades.
Warm beige, faded pink and blurry pearl gray tones will add tenderness to the interior.
Country
The color scheme of the style is based on natural shades (milky, beige, light brown). Accents are emphasized with contrasting tones (gray, black, burgundy, bottle green). A balance of opposite colors must be maintained. Wooden furniture of simple shapes and forged products are welcome.
Natural fabrics (linen, tapestry) fit organically into the decor. Textiles with large floral patterns or checkered patterns bring home comfort to the room.
English style
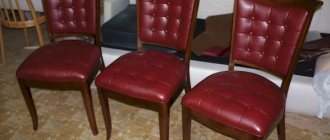
The interior with an English character is the embodiment of elegance and restraint. The stiffness of the setting is softened by textiles with floral prints or small patterns. Furniture upholstery uses both soft plush or exquisite leather, as well as chintz with a printed pattern.
A combination of materials with large and small prints is welcome. To furnish the room, select dark or light products from oak, pine, and mahogany.
American style
The multinational peculiarity of the country is reflected in the interior of the premises. The design mixes and harmoniously combines Oriental, European, and African decorative features. Furniture is most often placed in the center of the room, so an island or peninsula is the hallmark of an American-style kitchen.
Most often, bar stools with high legs are used indoors. Common colors are shades of beige, olive, and white.