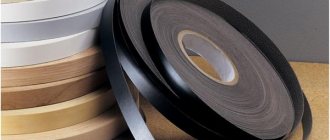
Self-adhesive film
This is one of the easiest ways to repurpose old furniture and doesn't require any special skills.
In construction and online stores you can choose any suitable canvas - with imitation wood texture, plain, with a pattern. A rich assortment will allow you to update your nursery, living room, bedroom or even kitchen. Its main advantage is moisture resistance, which makes cleaning easy. The film is easy to stick if you follow the instructions; it is resistant to temperature changes and even detergents. But this material lasts no more than 5 years, and fades in sunlight and in places of active friction.
Before purchasing film, it is important to take measurements and add a small margin. The surface requiring renewal must be leveled, cleaned, degreased and primed. Then apply the markings. When gluing facades or tabletops, you need to apply the film on top and gradually remove the paper layer. The canvas should be smoothed with a rubber spatula. If air bubbles form after gluing, make miniature cuts in these places and press the material to the base.
Alternative option
You can update polished furniture in another, alternative way. It is less labor-intensive, but after restoration your furniture will be ironed no less effectively. For this you will need self-adhesive film. Buy it at the store. Manufacturers offer a wide selection of colors and textures of this film. For every taste and budget.
For this work you will need:
- self-adhesive film;
- scissors and knife;
- ruler;
- paint roller, it is easy to smooth the surface of the film;
- flower spray;
- rags.
At the first stage, you will also need to disassemble (if possible) the furniture into parts. Remove all fittings. Then wash the surface with soapy water to remove dirt from it. Next you need to degrease the parts. You can use a solvent or alcohol solution. After the preliminary work has been done, we proceed to pasting.
Before applying the film, spray the surface with cold water. To do this, it is convenient to use a regular flower spray. This will make the job easier. The film will not adhere instantly to a wet surface. This will allow you to avoid unevenness and distortions. After covering all surfaces, use a soft cloth to smooth the film. Try to prevent the creation of air bubbles, otherwise all the work will go down the drain.
As you can see, you can update polished furniture yourself at home. This will not require a lot of money and time. The main thing is that you can make your own, more original design. You can create furniture that matches your interior.
Don't forget about the accessories. If you have changed the appearance of a cabinet or chest of drawers, then old handles and other small parts may not fit. In this case, it will be better to purchase new fittings. This will significantly improve the appearance of your “new” furniture.
By doing this simple work, you can create your own masterpiece and save on furniture purchases. And to get a beautiful interior detail, and even for little money, is the dream of every housewife.
Source: mebelvbloge.ru
Decorate with decorative elements
An old dining table whose top is swollen or cracked can be decorated with tiles or mosaics. To do this, you need to sand the base and apply wood impregnation, which will reduce the consumption of tile adhesive. The number of parts should be calculated in advance. To avoid cutting the tiles, the panels can be framed with wooden planks. Glue for ceramics must be applied at five points - in the corners and in the center. The tiles are laid one at a time and separated by crosses. After drying, the tile joints are smoothed with grout.
The photo shows a wooden table covered with tiles. This tabletop is not afraid of moisture and hot objects.
Old wooden furniture can be decorated with various fittings (rivets, original handles, belts) - this will give the product an unusual brutal look. Another way to turn a boring chest of drawers into a modern and stylish one is to stick mirrors on the fronts. It is better to entrust cutting of canvases and processing of edges to professionals, and you can do everything else yourself: paint the chest of drawers, fix the mirrors with special glue and attach suitable handles.
Nuances of recovery
Restoring lacquered furniture is an excellent option for restoring it in order to update the appearance of interior items. Basically, to eliminate a scratch you just need to remove the varnish from the problem area and apply a new coat of varnish. This method helps remove all types of damage.
Unfortunately, there are problems worse than scratches. The varnish coating gradually begins to darken and become cloudy, as a result of which the furniture sets lose their attractive appearance.
If the problem is darkening of the varnish coating, then there will be a need to eliminate the old layer of varnish and apply a new one. Such manipulations can be successfully carried out independently.
Remnants of wallpaper
This is one of the most budget-friendly options for remaking boring furnishings, but also the most short-lived. For decoration, we recommend using vinyl or non-woven fabrics, preferably moisture-resistant. After pasting the furniture with paper wallpaper, after drying it is necessary to apply varnish to it.
Before starting work, you need to prepare wallpaper, PVA glue, sandpaper, primer, roller, scissors and a ruler. If facades are decorated, they should be removed and sanded. If there are defects on the surface, they must be puttied and treated after drying. Wallpaper is glued to a pre-primed base and smoothed with a rubber spatula.
Using stencils
This is an ideal solution for those who want to decorate furniture with painting, but do not know how to draw. Templates for stencils can be made from thin plywood, cutting out patterns with a jigsaw, thick paper or film.
Before applying paint, the surface is sanded and degreased. The stencil is secured with masking tape (if the furniture is already painted, it is important to ensure that the adhesive trace does not damage the product). Aerosol or harmless acrylic paints are suitable for decoration. The finished work must be varnished for better preservation.
Repaint it a different color
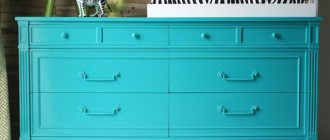
When you paint furniture yourself, you can show your creativity and give the product any look. The most popular paint used in home decorating is acrylic. It dries quickly, is resistant to external influences, is economical and has almost no odor. In second place are aerosol paints in cans, which allow you to quickly update the product. It is recommended to apply them outdoors due to the small splashes that may be generated.
The photo shows old but strong furniture, repainted with a gradient effect.
Before you start remodeling, you need to repair the furniture and clean it of dirt. If necessary, remove the old coating using a spatula, washing or heating. Defective areas should be puttied. Then the surface must be sanded with fine-grained sandpaper and coated with a primer.
It is more convenient to paint hard-to-reach places (joints and corners) with a small brush, and everything else with a roller. If necessary, use masking tape to protect areas that do not require painting. To paint over dark items, at least three layers of paint are required, which should be reapplied only after complete drying. To give classic furniture nobility and sophistication, style it as antique using artificial aging or gilding.
When using chalk paint, which consists of water and chalk with mineral additives, there is no need to remove or prime the old coating.
Ideas for remaking Soviet furniture for inspiration
Sofa in the hallway
A sofa from an old cabinet.
A small homemade mattress or soft furniture pad and a couple of sofa pillows will allow you to turn an old nightstand into a comfortable and functional sofa with space for storing shoes that will fit perfectly into the interior of the hallway.
Kitchenette
Children's kitchen from an old TV stand.
An eye-catching TV stand can be turned into a children's kitchen, which the growing housewife will surely like and will fit perfectly into the interior of the playroom.
Buffet
Stylish kitchen rack from an old sideboard.
Don’t rush to get rid of a bulky and, at first glance, completely inappropriate buffet. The new color and slate stickers on the doors will turn it into a stylish and modern piece of furniture that will fit perfectly into the interior of a modern kitchen.
Pencil case for toys
Redesign of an old pencil case.
A boring narrow pencil case is an excellent base for creating a bright, spacious rack for children's toys. To transform it, you will need white and bright paint, as well as wide decorative molding.
Banquette
Banquette from an old cabinet.
An old cabinet, painted in a light shade that refreshes its appearance, complemented by a soft quilted seat, will become a stylish and functional detail in a modern hallway.
Sideboard in a new way
Magical transformation of a sideboard.
White paint and replacing the wooden sashes with bright curtains made it possible to breathe life into an old sideboard that previously wanted to be thrown into the trash.
Shelving
Door shelving.
Old wooden doors can be used to create creative shelving for books and decorative items.
Decoupage cabinet
Decpage of an old cabinet.
White paint and simple pictures using the decoupage technique will help to transform an old, nondescript cabinet. The updated cabinet will fit perfectly into the interior of a modern kitchen and will become its unique detail.
Patchwork style chairs
Renewing old chairs.
New upholstery in the now popular patchwork style and painting of some elements made it possible not only to update the old chairs, but also to turn them into ultra-fashionable interior items.
Decorated chest of drawers
Transformation of a vintage chest of drawers.
A little effort, imagination and bright colors will allow you to turn your grandmother’s vintage chest of drawers into a bright piece of furniture that will become a spectacular interior detail and something to wow all your guests.
Table with drawers
The sofa has turned into a comfortable ottoman
Table on wheels
The dressing table has become a work table
The carved back was useful for a mini-sofa
Wardrobe-soldier
Coffee table
Worn chairs
All you have to do is change the upholstery and repaint the chair, and it will look like a creative designer has worked on it.
A chair forgotten at the dacha
Look how great it looks after the remodel.
Baushkin sideboards and buffets
Nowadays white furniture is very popular and looks quite stylish. So you can safely paint the sideboard, it will give it a second life! New modern handles will also improve the appearance.
If you are a fan of the shabby chic style, you can decorate your sideboard this way.
Cabinet Ideas
Budget option, but looks good.
Bookshelf from an old radio
Luxurious dark blue chest of drawers
The owner bought this chest of drawers from the 70s made of natural wood secondhand, paying only 300 rubles. Initially there were many cracks on it, and the veneer had defects. There were extra holes on the boxes that needed to be masked. The craftswoman wanted to get a chest of drawers in a deep color while preserving the wood pattern and scuffs.
The old varnish was removed with a grinding machine: careful preparation of the source is the key to a high-quality result. The defects were puttied and sanded, then covered with tinted glaze: 4 layers were required.
The legs and frames from the craft store were treated with walnut-colored stain. The total cost is 1600 rubles.
Black cabinet with engraving
The story of how this bedside table was remade is a complicated one: the owner found it in a landfill and several times wanted to take it back for “disobedience.” It took 10 coats of remover to remove all the varnish from the veneer! This took several days.
After applying protective oil, flaws were revealed, and the craftswoman partially painted them over. The owner was not satisfied with the result, so the cabinet was completely painted black. Only the legs remained intact.
Using a pencil, we drew a design on the door and drilled it out with a small drill with an engraver attachment. The result exceeded all expectations!
In order not to waste time on removing the varnish, you should sand the surface to a rough state, apply an acrylic primer and paint it with moisture-resistant paint in 2 layers. In this example, "Tikkurila Euro Power 7" was used. The top of the bedside table is covered with acrylic varnish.
From the wall - into a stylish set
The owners of this brown “wall” took it to their dacha, and then decided to try their hand at remodeling it into modern furniture.
The chipboard covering was cracked and peeling off in places, so it was completely removed. The cabinet frames were dismantled and re-attached with Euroscrews. The parts were sanded, puttied and painted. The tabletops and legs were made from old boards, and the door layout was re-nailed.
Moldings were added to the front of the cabinet, making it unrecognizable. The result was three sets for different rooms: two bedside tables for the living room, a wardrobe for the bedroom and another set of three cabinets.
And here you can watch a detailed video about remaking a bookshelf from an old wall. The owners turned it into a TV stand.
Armchair
The famous armchair, which was found in most Soviet apartments, is again at the peak of popularity today. Owners are captivated by its convenience, simple design and frame quality.
The owner of this specimen used foam rubber 8 cm thick for the back and 10 cm thick for the seat, also adding two layers of synthetic padding. Upholstery fabric with the effect of furniture screed in lemon color was purchased at the store. Rounded shapes were created by bending the foam overlapping the edge of the back and seat, as well as by stretching it tightly.
To paint the frame, inexpensive matte white enamel “PF-115”, tinted with black, was used. Painting was done with a velor roller in three thin layers.
After drying, it is recommended not to touch the chair for about two weeks - this way the composition will polymerize completely and will be stable in use.
Reincarnation of the Vienna chair
This old beauty was found in a landfill. It did not have a seat, but the frame was quite strong. The new seat was cut out of 6 mm plywood, and the base was carefully sanded.
In the 1950s, such chairs appeared in many homes. They were made at the Ligna factory in Czechoslovakia, copying the design of the No.788 Bresso model, which was developed by Mikhail Thonet in 1890. Their main feature is bent parts.
The owner covered the chair with “Tikkurila Unica Akva” without applying a primer: this was a mistake, since the coating turned out to be fragile and now there are scratches on it.
The craftswoman advises using “Tikkurila Empire”, the most popular and reliable coating. The soft seat was sewn by hand: matting fabric, spunbond and 20 mm foam rubber were used. The edging is made from braided bicycle cable.
Soviet cabinet with painting
Another Soviet-made bedside table from 1977, which has transformed from a faceless object into a beauty with its own character. The owner chose a deep dark green color as the main color, which she used to paint the tabletop, legs and interiors, and covered the facade with white. The painting in a botanical theme was done with acrylic paints. The standard handle has also been replaced.
Today, vintage furniture is valued for its laconic design and legs, which give it an airy feel. Thanks to “raised” structures, the room appears visually larger.
New life for the sofa
You can repair not only small wooden objects, but also large items. This book sofa from 1974 was once reupholstered, but has worn out again. His mechanism broke and the bolts were bent. During the remodeling, the owner of the sofa saved not only the budget, but also the space: this model is very compact and takes up little space.
There is no foam rubber inside - only springs and a harsh canvas on a cotton backing, so the design is odorless. The frame is in satisfactory condition. The owner bought new hinges, a piece of furniture fabric and new bolts.
Thanks to the perseverance and patience of the craftswoman, the mechanism of the sofa was updated, and the soft part was reupholstered with new material. All that remains is to add a couple of decorative pillows.
Table makeover
Using the same technology, a banal coffee table can be turned into a modern piece of furniture. In this case, it was covered with wrapping paper. It is dense, adheres well and does not become limp when applying varnish.
Before starting work on decorating the tabletop, the legs of the old table and the edges of the tabletop were painted in a light color: this way it fits better with the new design style. Then the process of its transformation began.
When pasting, the panel is cut out significantly larger than the dimensions of the tabletop. It's necessary. The paper is glued to PVA and rolled with a roller so that there are no lumps or blisters. The surface must be absolutely smooth.
The paper is glued gradually, roll it with a roller so that there are no bubbles
After gluing, take sandpaper with fine grain (it is more convenient to work if it is attached to a block). By running it along the edge, they bend and at the same time separate the excess paper.
How to make a beautiful edge
Even cutting with a guillotine will not give you a fairly even edge. And with this method, it turns out professionally designed. There is no smell of amateur activity.
This is what the edge looks like when all the excess has been removed
After the glue has dried, the surface is coated twice with a thin layer of varnish. It should be applied with a soft brush in a small amount. Layers are applied in different directions: first along the long side, then across.
Bright bookcase
The owner decided not to sand this bookcase - she just primed it with Tikkurila Otex. The wooden lattice and overlays on the facades were made in a carpentry workshop from 6 mm and 3 mm plywood. The overlays are glued to the "Moment Joiner".
The outer sides and fronts are painted in Tikkurila blackboard color. Orange and turquoise coating – “Luxens” for walls, protected with colorless wax “Lliberon”. The back wall is covered with wallpaper. The handles are an old IKEA collection.
Boho nightstand with ornament
To repaint an ordinary vintage bedside table from Avito you needed:
- White paint "Tikkurila Empire".
- Aerosol paint color “rose gold”.
- Masking tape.
- Small foam roller (4 cm).
The author marked the drawing with masking tape and glued it, pressing it tightly to the doors. I painted it white using a roller in three layers. Allow 3 hours between each coat. After the third layer, I waited 3 hours and carefully peeled off the masking tape. I unscrewed the legs, protected them with tape, leaving the tips, and spray painted them. I collected it after it was completely dry.
Remaking furniture is always an interesting and creative process. Things updated with your own hands acquire their own history and add soulfulness to the interior.
Artistic painting
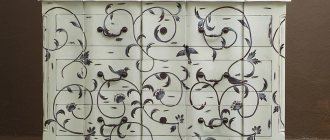
With the help of drawings applied to the furniture by hand, it becomes exclusive. It is important that the resulting work fits into the interior, becoming part of the whole composition. It is easiest to paint wooden or natural veneer products, as well as MDF facades coated with acrylic.
The photo shows a refurbishment of an old but sturdy cabinet. Hand-painted furniture fits perfectly into the rustic style.
Artistic painting is a painstaking work, as it involves drawing small details. The basis for painting is a primer. It is important not to neglect surface preparation - even the most talented painting can be spoiled by a defect or crack in the base. Acrylic paints are best suited for work, and matte or glossy varnish applied in several layers to protect the finished drawing.
It is not necessary to paint a chest of drawers or a closet on all sides: individual accents on the facades look more aesthetically pleasing.
The benefits of creating new furniture from old ones with your own hands
Do you want to change the decor, introduce original ideas into the interior, so that old furniture sparkles with new colors? Take advantage of the huge number of ideas and methods on how to reconstruct outdated furniture.
You will bring your ideas to life and create magnificent things.
And every piece of furniture keeps its own memories and family traditions.
The furniture of old times had its main advantage - it was very strong, durable, and was made from natural wood.
Using all your imagination, you will decide for yourself how best to use certain parts of the sets, what new purpose the table, chair, chest of drawers, etc. will have.
You just can’t raise your hand to take such things to a landfill.
You think this is difficult to do. It's actually not that difficult. You will give things a unique look. There are many materials and methods you can use to repurpose your furniture yourself.
By restoring interior items, you can save a significant amount of money than by purchasing new furniture.
Take advantage of the huge number of ideas and methods on how to reconstruct outdated furniture.
Before you begin, decide which restoration method you will choose. Purchase the necessary components. Remember, in this matter you need diligence, endurance, and a serious approach. Maybe this will encourage you to start your own business.
You will delight not only your relatives, friends and acquaintances with amazing things, but also fulfill orders.
Decoupage
This technique will be appreciated by those who do not own a brush. Depending on the thoughtfulness and accuracy of the procedure, the furniture can look professional and even luxurious.
The photo shows an antique chest of drawers, covered with paint and decorated with sheets of music.
You can decorate furniture with paper napkins, wallpaper, old photographs, geographical maps, and tram tickets. Before gluing the material, you should paint the surface with acrylic paints. After drying, the base is coated with PVA glue, onto which the picture is carefully glued. After this, another layer of glue is applied. The finished product is varnished.
Veneering
This method allows you to give shabby wood furniture an updated look. For home veneering, natural rotary-cut veneer is usually used. With its help you can restore door leaves, facades and countertops.
The base requiring rework must be smooth and sanded. Thin veneer, sold in rolls, should be straightened by wetting it with a damp sponge and placing it between two heavy slabs. Then the canvas needs to be trimmed along the edges to get rid of uneven edges. The veneer is glued with contact glue, which is evenly applied to the base in two layers. The sheets are fixed using an iron heated to 50º - ironed through the paper. After drying, the joints are sanded, and oil, varnish or stain is applied to the finished product.
The photo shows the process of finishing the table with veneer. The width of the canvas is usually 30 cm, so joints during use are inevitable.
Methods for carrying out restoration measures
Analysis of the degree of wear of lacquered furniture
First, you need to analyze the current conditions of the furniture to be repaired. A good reason to start the restoration process will be deterioration in the appearance of the headset, including darkening in the thread area. In addition, a common reason for restoration is small cracks on the surface.
In cases where such defects are not very pronounced, they may not harm the appearance, but, on the contrary, add solidity to it. In the case of severe defects, there is a need for restoration measures, which are organized by a professional from a specialized workshop, or they can be carried out independently at home, while preserving the antique qualities of the furniture.
If something goes wrong, you can cover the product with paint at any time, although then the unique pattern inherent in the wood will be hidden by the paint and the furniture will lose its presentable appearance.
Products for restoring lacquered furniture
There is an opinion that it is supposedly possible to restore the previous state of products only by treating them with alcohol. Without a doubt, alcohol can remove the top coating and repair the damage, but such a measure can lead to irreversible results.
In this regard, during restoration you should pay attention to more reliable methods, including:
- Shellac polish - this material emphasizes the refined structure of wood, enhancing it with an unusual shade. Varnish is one of the most ancient methods of restoration, which is a varnish that is similar in thickness to water. To restore the furniture, it is coated with varnish in 40-60 layers, which allows you to achieve an unusual noble shade.
- Nitrocellulose varnish - this material is used for the restoration of large areas. Nitrocellulose varnish is applied through a special spray bottle, which very quickly covers the area to be restored. At a lower speed, the particles of the product would solidify individually. For this reason, it is not recommended to use standard sprayers, as they will create areas with an accumulation of bubbles. Thus, such material should be used exclusively in a specialized studio.
- Pentaphthalic varnish - this substance is famous for its ease of use, so it is convenient to use at home. It does not require a special application procedure and dries very quickly. Pentaphthalic varnish needs to cover the surface with at least 4 layers, with the first one serving as a primer. After completion of the restoration, it is necessary to sand the treated area. To achieve a semi-matte effect, the varnish should be applied with a cotton pad, and to obtain a glossy shine, use a brush.
After determining the type of restoration product, you need to select a color scheme. If desired, it is possible to coat the product with colorless varnish or bright paint.
Source: restavracija.pro
Craquelure
This is a type of artificial aging, after which the item acquires the appearance of antiquity. Craquelure looks great on classic furniture, which fits perfectly into Provence and shabby chic styles.
One-step craquelure looks like a cracked layer of paint, through the cracks of which the base of the product is visible. This is the easiest way to give an item a touch of antiquity. The furniture is coated with a special craquelure varnish, which must be dried. A second, contrasting layer of acrylic paint is applied to it, which cracks picturesquely under the influence of the varnish. The thinner the paint, the larger the cracks.
Applying varnish
If all the preliminary work was done correctly, then there will be nothing difficult in applying the varnish. The main thing is to wait until the paint layer is completely dry.
- The varnish should be applied in two or three layers;
- The layers should be thin;
- Apply the next layer of varnish only after the previous one has completely dried;
- It is better to apply the varnish with a sprayer, roller or special brush.
Padding
This process is not complicated, but painstaking: you can reupholster an old chair, an armchair or a sofa. Dense natural fabrics are better suited for reupholstery. The first step is to disassemble the furniture and inspect it - this will help you understand how exactly the material is attached to the wooden frame.
If the upholstery is old, damaged or smells, it is recommended to remove it and strengthen the frame with metal plates. Sometimes the filler requires replacement. In the case of reupholstering Soviet armchairs that are popular today, we recommend adding foam rubber: the product will be softer, more comfortable and more solid.
Calculate the amount of fabric with a margin. It is important to fasten it tightly so as not to create folds. The material is fixed with a furniture stapler.
Photos before and after
We recommend starting remodeling furniture with small items - chairs, stools, bedside tables. A sanding machine will be an excellent assistant in restoration, as it will speed up the process of removing the old coating.
An excellent solution for a modern interior would be chalkboard paint: it applies easily, is safe, and has no odor. It can be used to paint old kitchen fronts, cabinets or sideboard doors.
A makeover can turn even the most boring dresser or nightstand into a work of art.
Updating furniture is an interesting process that allows you to get an exclusive piece of furniture and realize your creative abilities.
Remaking old furniture step by step with your own hands
Stage one: out with the old fittings
Let's start with the simplest, but also the most basic - fastenings. Often creaking doors or doors that do not close completely become the cause of anger and irritability on the part of their owner. That is why, if you decide to remodel, then start small.
Buy new accessories: handles, clips, buttonholes. Now there are many variations of details: from simple and laconic to sophisticated. It all depends on the style that you would like to embody.
In addition, you need to prepare special materials with which you can seal the loose holes. This can be done using putty, a screwdriver, and dowels of different sizes.
Despite the fact that this stage of transforming old furniture into new is initial, you should not pay little attention to it.
In some cases he may appear first and last. Often, replacing handles or fasteners on cabinet doors is enough to give it new life and transform it.
Stage two: clean it properly
Remaking Soviet furniture is not an easy process, but very interesting.
This is where you can feel like a real designer, express your emotions and get a little closer to real art. Maybe you are not a professional cabinetmaker and don’t yet know all the restoration techniques, but you must know that any element should be thoroughly cleaned before transformation.
First, prepare a soap solution.
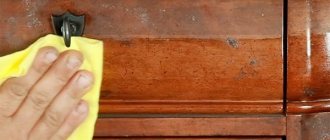
You will need soap and water. In this case, there are no special requirements for the cleaning substance. Now take a soft cloth, preferably cotton, and soak it in the prepared liquid. Wipe the furniture frame thoroughly, trying to remove all dirt and dust. Even the smallest piece of debris that you forget about can end up ruining everything. After all, it will manifest itself under a layer of paint, and under varnish, appliqué.
You can use an old brush to clean hard-to-reach nooks, cracks, and crevices. Just make sure its bristles are soft.
Stage three: let's start the repair
After you have wiped all the parts, the time comes when you need to remove the old coating.
This can be done using a simple sheet of sandpaper.
Walk it over the entire surface, ridding parts of old paint and varnish. If there are cracks on the furniture, you can fill them with putty, only then, when it dries, do not forget to sand the area again.
Stage four: let's start decorating
The final step is usually the creative process. You can choose one of the types of decoration and implement it yourself. Paint it, decoupage it, cover it with craquelure varnish, make applique – it’s up to you.
We talked about several general stages of remodeling old furniture in a new way with your own hands. Now let's look at the main ways and techniques that can turn your usual cabinets and tables into a real decoration for your home and make them the highlight of the interior.
