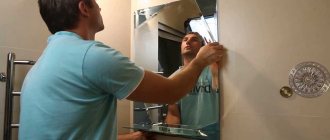
Methods for attaching a mirror to the wall
Large frames for this item are becoming irrelevant, and more and more often you can find the product “floating” in the air, which gives a feeling of lightness to the interior.
There are several options for hanging a mirror on the wall without mounting and invisible fittings, which will ensure safe operation and a beautiful design without a frame.
They contribute to the visual expansion of space and help to install special “diffused” light in the rooms.
Manufacturers offer special compounds that provide good adhesion to the surface, without drilling holes and fasteners.
It is very important to know how to correctly place a mirror on the surface chosen for this.
Sealant and glue
This is the simplest and safest method of fastening, but during installation you need to ensure a perfectly flat surface. A special adhesive-sealant will reliably glue a product of any thickness and size to the base.
The easiest way to install a mirror without a frame is to glue it to the surface using special glue.
The exception to this method is high humidity in the bathroom, smooth surface of ceramic tiles and decorative plaster.
When working with the composition you need:
- make markings in the right place for gluing accuracy;
- apply glue to the back surface of the product dotted in a checkerboard pattern or in stripes at equal intervals;
- press to the base for 5 minutes, if the mirror size is more than 1 m2, the product is fixed for 12-24 hours until the sealant dries completely.
Installation of reflective glass occurs in a matter of minutes.
When the glue has set on the surface, you can glue the decorative frame around the perimeter using the same composition.
The main thing is not to make a mistake with the location during installation. The composition quickly sets to the surface, and it will be impossible to remove the canvas from the wall; you will have to break it and remove it in parts.
If necessary, liquid nails can be used.
Special holders
They are used in the bathtub and on walls with an uneven surface, and during installation you cannot do without drilling holes, but it is the most reliable.
The brackets are fixed directly to the wall. They support the mirror from below or on the sides.
Types of holders and installation methods:
- Through, used when there are holes in the canvas. During installation, it is necessary to accurately drill the holes so that they coincide with the mounting points. Insert a special nail into the hole and thread the product onto the dowel. Such holders are made of chrome and stainless steel with plastic and metal decorative plugs that provide a strong fixation.
- Non-through, made in the form of a profile with plastic gaskets that support the blade from below and from the side for secure fastening. When installing, leave a gap of 2-3 mm between the product and the holder so that it fits freely into the grooves.
They differ in material of manufacture, design features and design.
This installation method is applicable to any base material, regardless of width and size.
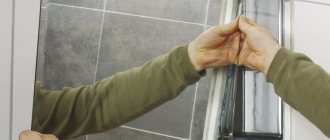
Double-sided tape
It is used when installing a mirror sheet on a wall made of tiles, plastic panels and smooth plaster. If necessary, the product can be easily removed from the surface, leaves no marks and can be used in the bathroom.
Double-sided tape is an ideal tool for attaching small mirrors to a smooth surface.
Hanging the canvas with tape is very easy. You need to remove the protective tape from one side and apply it around the perimeter of the mirror on the reverse side, for reliability, add a cross-shaped element in the middle. Remove the protection from the second part and secure it in the desired place.
This is a great option when you need to quickly and effortlessly attach a mirror.
Important. When installing, you need to take into account the size and weight of the product. For fastening weights of 1-4 kg, tape is suitable; for more massive models of 4-10 kg, sealant or glue is needed. When installing large models, it is better to use holders that are designed for heavy weight.
Recommendations for placement
With the help of a properly installed mirror, you can eliminate the shortcomings of the room layout, visually increase the area, and emphasize architectural features or design.
Information to help you find the ideal place for the mirror and install it correctly:
- Mounting it on the wall opposite the window will improve the lighting in the room by reflecting natural light.
- Location near heat sources is not recommended - constant overheating will significantly reduce the service life of the product.
- To make an elongated room more proportional, install a mirror on one of the elongated walls.
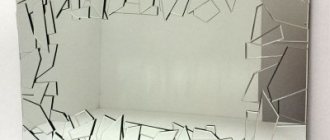
- It is recommended to stick a special protective film on a mirror placed in a child's bedroom. If it breaks, the film will hold the fragments, so the child will not be injured.
- When installing the canvas in the hallway, where there is usually no natural light, you can hang wall lights around the entire perimeter.
- When calculating the optimal amount of fasteners, the weight of the canvas and surface area should be taken into account. The fastener itself must be made of strong and durable material.
- To avoid having to make cosmetic repairs after dismantling the mirror, it is wiser to select fasteners that cause the least harm to the finish.
- Mirrors in which you can look at yourself at full height must have a length of more than 120 cm, and they must be installed so that the bottom of the product is located no higher than 50 cm from the floor.
- To protect the linens in the bathroom from destruction due to high humidity, it is recommended to apply a special water-repellent compound, transparent sealant or colorless varnish to the back side.
How to mount a mirror on a wall without a frame
Hardware manufacturers offer different wall mounts for mirrors without the use of adhesives. When installing, it is worth considering not only the size and weight of the model, but also the base material, on which the reliability of different methods depends.
Finishing drywall, PVC panels and ceramic tiles involves drilling a hole into the wall material and using dowels to secure the clips and strips that will hold the product.
For plaster, wallpaper and wood panels, use tape or a special sealant.
The main condition is that it is necessary to make an indent from the edge of the product, since it is almost impossible to remove the exposed glue.
Monolithic and brick material will require drilling 5-7 cm deep and installation of special holders.
If you have the appropriate skills and tools, you can make the much-needed holes yourself.
Brands
Most often, special mirror adhesives are used to glue mirrors. They do not damage the coating. A wide selection of such formulations is presented in the Leroy Merlin chain of stores. For example:
- Moment Liquid Nails. Suitable for application to most types of surfaces. Made from synthetic rubber, it remains flexible and does not harden over time;
- Soudal 47A. Consists of synthetic rubber. The advantages include a short hardening period and excellent adhesive ability;
- Tytan. Consists of rubber and various resins. Suitable for installation on porous and uneven surfaces;
- Penosil Mirror Fix. The base is synthetic rubber. Can be used for gluing to a large number of surfaces. Has a beige color. Drying time is about 20 minutes.
To learn how to properly install a mirror with your own hands, watch the video.
Fittings and profile for mirror
Mounting a mirror on a wall can be done using different clamps, strips and profiles.
The elements are made of chrome-plated and stainless steel, plastic and silicone. All fasteners have restrictions on the weight of the product.
If the mirror is without a frame, then you can use various types of fittings available in stores: brackets, profiles, brackets, clamps and strips.
Using connectors, bushings and washers attached to the base, you can create a mirror wall. Silicone and plastic holders do not require drilling holes, are attached pointwise and are held on with sealant, but are only suitable for small models and decorative shaped elements.
With their help, the mirror can be attached either close to the wall or placed remotely - with a gap of 5 mm to several centimeters between it and the wall.
Types of holders for installation:
- Hardware, for mounting which you need to make several holes in the wall. First, the fittings are fixed to the canvas, the fixation points are marked, a hole is drilled, and the mirror element is fixed using plastic dowels. The holders are made for different widths of the canvas; they can be located close to the wall or with a small gap. The attachment point is closed with a decorative plug.
- Profile, when a metal strip is attached to the canvas, and the product is hung on it using hooks and brackets, which are fixed to the canvas with glue or liquid nails. This installation method is invisible and leaves a gap between the surfaces, which prevents the appearance of mold in damp rooms and damage to the internal coating of the mirror.
- Cabinet-type, when a sheet of plywood or plasterboard is attached to the back surface using sealant, which ensures better adhesion to the base. The material is cut out at a distance of 3-5 cm from the edge of the canvas, fixed and hung on the wall using tape, glue or hanger.
Pay special attention to the lower fasteners - they must withstand the greatest load.
When choosing fittings for attaching a mirror to a wall, it is necessary to base it on several criteria - this is minimal disruption of the surface during installation, the strength of the elements, it is advisable to choose from metal with dowels included, and invisibility; the more massive the fastener, the more difficult it is to organically combine it with the canvas without a frame.
It is possible to install the fittings in which the fasteners are installed at the bottom and top, and the mirror is “nested” on the side.
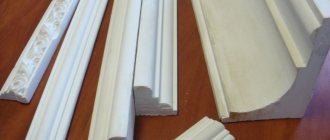
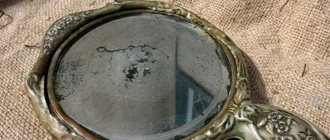
Features of installing mirrors in a frame
The frame-like frame gives the mirror a more solid look. However, the question may arise about how to properly secure it, and what devices will be needed for this. As a rule, the delivery kit already includes the necessary fasteners. If you don't have them, you can contact any hardware store. The hinges, purchased separately or included in the package, are attached to the frame and the structure is suspended on self-tapping screws screwed into the wall, as well as on hinges or hooks.
Before fixing the mirror in the frame on the wall, it is necessary to take into account that its weight is supplemented by the weight of the baguette. To avoid falling, fastenings should be selected with reserve. For heavy canvases, it makes sense to use hanging plates made of metal, to which loops are already attached for hanging mirrors from the frame. The metal fasteners are glued with special glue to the back of the mirror.
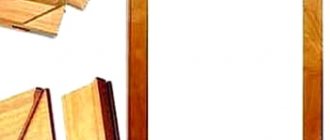
Construction of sheathing
The sheathing can be made from steel CD profiles with a section of 30 x 50 or 40 x 60 mm, as well as wooden blocks covered with two layers of drying oil.
On the ceiling, 40-60 mm away from the wall (depending on the evenness of the walls), draw a straight line parallel to the corner. Then, using a plumb line, transfer this line to the floor. These two lines indicate the plane in which the drywall sheathing should be located.
Vertical racks are attached to the wall using a self-tapping screw method in increments of 20 - 25 cm so that their ends do not extend beyond the lines marked on the floor and ceiling. The distance between the racks should be 60 cm, since the dimensions of a standard gypsum board are 2.5 x 1.2 m, which allows one sheet to be longitudinally supported on 3 racks. The installation must begin with the installation of the outer vertical posts, since it is unacceptable for any edge of the drywall in the corner to be left without support.
If there is a gap at the point of attachment to the wall between the stand and the base, then plates of the required thickness are placed there.
After installing the vertical posts, begin installing the horizontal jumpers, the spacing between which should be 40 cm.
Mini-oven with a stove bench: compact and simple
In a small house or dacha, a small Russian stove will successfully cope with the main tasks, the order of which requires the consumption of 700 pieces of red and 150 pieces of fireclay bricks.
Capabilities and features of a small Russian stove
Despite its miniature size, the stove is equipped with a 130 cm long bench, on which you can build a cozy place to relax. The design includes a stove for year-round use. You can heat the “new Russian” fireplace in six modes, choosing the one that suits the season and tasks.
- Firebox in Russian style: wood burns in the furnace, valves 1, 2 and 9 are open. The lower part does not warm up, efficiency is 30%.
- The second mode is turned on after ten minutes of work in the first. To switch, open damper 3 and the blower door, and close the furnace and door 1.
- You can switch to the third mode after five minutes of work in the second. Close damper 3, releasing heated gases through horizontal chimneys. In this mode, efficiency increases to 80%.
- Summer mode: fuel burns in the firebox under the hob. Valve 22 and door 11 should be opened so that gases can quickly escape into the atmosphere without heating the room.
- In the fifth mode, the stove bench and furnace are heated, closing the valve 22 5 minutes after working in the fourth.
- They switch to the sixth mode after 6-9 minutes of operation of the fifth. To do this, close damper 3 and heat according to the third mode. This option allows you to heat the room and use the stove.
Layout diagram and explanations
Diagram of a miniature furnace
The arrangement of the Russian mini-oven consists of thirty rows. Dimensions of the structure: 140*127.5 cm. Construction takes about 100 kg of fireclay clay.
Layout diagram of the first 20 rows
Upper part of the oven
Explanations for the diagram:
- 1, 2, 3 – smoke valves;
- 4 – device for smoking;
- 5 – steel corners;
- 6 – cast iron hob;
- 7 – grate for the stove;
- 8 – furnace grate;
- 9 – furnace damper;
- 10 – combustion door of the stove;
- 11, 12 – ash doors;
- 13 – doors for cleaning;
- 14 – crucible – main firebox;
- 15 – lower part of the furnace roof;
- 16 – pole – platform for dishes;
- 17 – temperature gaps;
- 18, 19 – blower;
- 20 – niche-stoves;
- 21 – lowering chimneys;
- 22 – smoke valve for the cooking furnace;
- 23 – horizontal chimneys for heating the lower part;
- 24 – gas inlet into the pipe;
- 25 is a dead end.
Laying tiles
Laying a ceramic coating has a clear sequence. The work algorithm comes down to the following points.
First, select the layout of the elements. In this case, the number of whole and shortened rows, the pattern, the method of laying the squares, and the distance at the seams are taken into account.
From the zero mark, the wall is marked using a water level.
After applying the glue to the wall, proceed to laying the tiles. Cross-shaped plastic spacers are inserted between adjacent elements. Remove the glue from the seam grooves before it hardens.
Having laid out 5 rows of coating, work is suspended for an hour to give the glue time to set.
Then lay another 5-6 rows. And again - a break.
After the adhesive has completely dried, the seams are rubbed down. The spacers are removed. Remove excess grout with a damp cloth.
Having studied the above recommendations, beginners will find a lot of useful information regarding tiling the bathroom and toilet using tiles applied to plasterboard surfaces. The complexity of these works is very great. So is it worth the risk? And isn’t it easier to entrust such a responsible task to repair professionals?
https://youtube.com/watch?v=jYrmerUyYSo
Consumption of double-sided foam tape for gluing mirrors
| Mirror area cm2 | Mirror 3 mm thick | Mirror 4 mm thick | Mirror 5 mm thick | |||
| tape width 19 mm | tape width 25 mm | tape width 19 mm | tape width 25 mm | tape width 19 mm | tape width 25 mm | |
| 600 | 14 cm | 11 cm | 19 cm | 14 cm | 24 cm | 18 cm |
| 800 | 19 cm | 14 cm | 25 cm | 19 cm | 32 cm | 24 cm |
| 1000 | 24 cm | 18 cm | 32 cm | 24 cm | 39 cm | 30 cm |
| 1200 | 28 cm | 22 cm | 38 cm | 29 cm | 47 cm | 36 cm |
| 1400 | 33 cm | 25 cm | 44 cm | 34 cm | 55 cm | 42 cm |
| 1600 | 38 cm | 29 cm | 51 cm | 38 cm | 63 cm | 48 cm |
| 1800 | 43 cm | 32 cm | 57 cm | 43 cm | 71 cm | 64 cm |
| 2000 | 47 cm | 36 cm | 63 cm | 48 cm | 79 cm | 60 cm |
| 2200 | 52 cm | 40 cm | 69 cm | 53 cm | 87 cm | 66 cm |
| 2400 | 57 cm | 43 cm | 76 cm | 58 cm | 95 cm | 72 cm |
| 2600 | 62 cm | 47 cm | 82 cm | 62 cm | 103 cm | 78 cm |
| 2800 | 66 cm | 50 cm | 88 cm | 67 cm | 111 cm | 84 cm |
| 3000 | 71 cm | 54 cm | 95 cm | 72 cm | 118 cm | 90 cm |