Wooden kitchen furniture is one of the popular and practical varieties, and when made with your own hands, it acquires a special charm and personality. A DIY wooden kitchen is an excellent alternative to sets that are offered by numerous furniture stores, sometimes at unreasonably high prices. Today’s material is about the main nuances of working with wood in the manufacture of kitchen furniture.
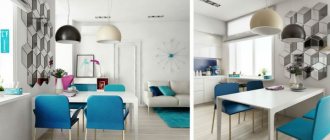
DIY wooden kitchen
The main stages of making a wooden kitchen yourself
The process of manufacturing kitchen furniture consists of several stages that should be performed in strict sequence, then the result will be positive.
Stage 1: material selection
Before purchasing material, you need to decide on the type of wood, learn about its properties and operating features. A kitchen is a room in which all surfaces, including furniture, are exposed to moisture, condensation, temperature changes, high temperatures, grease and other contaminants. Therefore, the material must be easy to care for, moisture-resistant, and resistant to mechanical stress.
Array
Now on the construction market you can buy more than forty types of wood, which differ in their qualities. One of the key properties is the hardness or softness of a particular variety. The wood of oak, beech, walnut, and yew has high hardness and strength. It is worth understanding that this material is more difficult to process, so it is best suited for the manufacture of massive, solid elements.
Variety of wood species
Soft woods such as pine, spruce, and poplar are used to make shelves, cabinets, and decorative elements.
Note! Regardless of the material chosen, special attention should be paid to the degree of drying, density, and the absence of defects in the form of knots and cracks.
No less important than the performance properties is the appearance of the wood, its shade and texture.
Table 1. Wood species
| Wood type | Description |
| Furniture made from ash is of high quality, durability and excellent performance properties. The versatility of the texture is ideal for decorating both classic and modern interiors. |
| Oak furniture exudes an atmosphere of solidity and stability. The material is characterized by increased density and hardness, resistance to deformation and mechanical stress. Oak is not afraid of moisture and temperature changes, so it is ideal for the kitchen. |
| Beech wood has a refined shade and texture. Tinting of such furniture can be done in any color. |
| Alder | Alder wood is used to make classic facades. The material is easy to process, so it can be decorated with carvings. |
| Pine | Inexpensive material with high performance qualities. Due to the content of resins in its composition, the material acquires waterproofing properties. Natural antiseptics and phytoncides participate in the formation of a healthy microclimate. |
| Of the hardwoods, the most budget-friendly is birch, which is distinguished by its durability and low maintenance. To prevent wood from rotting in high humidity conditions, it is carefully treated with special compounds. |
Stage 2: measuring and design
Before starting to design a set - choosing the number of modules, measure the kitchen space. To do this, you need to decide what its layout will be: straight, L-shaped, parallel, island, peninsular.
A preliminary design allows you to get the desired result
You can develop a drawing on a computer using one of the many design programs. A special article will tell you about the main nuances of making kitchen furniture drawings yourself.
You will need to take the following measurements and record them on the sketch:
- Determine the height and width of the room.
- Determine the distance from the corner to the edge of the tabletop.
- Determine the distance from the tabletop to the window, doorway, window sill.
- Determine the height of the tabletop, the lower and upper points of the hanging modules.
- Determine the location in the space of the gas pipe, communications, sockets, switches, and ventilation holes.
Basic measurements
Table 2. Planning process
| Illustration | Description |
| Step 1: freeze | On the kitchen plan, the dimensions of the room are noted - its width and height, the location and dimensions of window and door openings, structural elements, niches, protrusions, communications (water pipes, heating radiators, location of the gas pipe, meters), sockets and switches, the lowest point of suspended ceilings multi-level structures. |
| Based on the resources of the room, the most optimal planning solution is selected, taking into account that in addition to the furniture in the kitchen, it is necessary to allocate space for a functional dining group. |
| In accordance with the measurements obtained and the selected planning method, equipment and modules are “arranged” on paper. It is important to remember the “working triangle” rule, according to which the stove, refrigerator and sink are placed nearby so that they form the vertices of a conventional triangle. Between these objects there must be a working plane of at least 400 mm. The optimal plane is at least 500 – 600 mm. The equipment is located close to communications (water supply, sewerage, gas pipes). |
| They begin a detailed elaboration of the drawing, on which the kitchen set is drawn to scale and all dimensions of the modules are indicated. Each module is drawn separately, determining the number of parts it consists of, the method of their connection, the number and type of fittings for connection, the method of decoration and processing. |
Based on the measurements obtained, you can calculate the amount of material and fittings required.
Video - How to take measurements in the kitchen
Stage 3: purchasing material and tools
To work with wood, a standard set of tools is required: a hacksaw, a jigsaw, a hand router, a drill, a plane, a grinder, a Forstner drill, and confirmats. When making furniture not from solid wood, but from chipboard, you will need to purchase an edge strip, which is glued with an iron.
Woodworking tools
Iron for gluing melamine edge
Note! Sawing of parts from chipboard can be ordered in a furniture shop, where they will not only cut out high-quality parts to the specified dimensions, but also use special equipment to apply a PVC edge, which is much stronger and more durable than melamine. To do this, when developing a detailed diagram, it is necessary not only to indicate the dimensions of the parts, but also the location of the edge application.
Furniture edge
Stage 4: preparation and assembly of parts
As noted earlier, you can get high-quality parts for assembly with an edge applied to the ends by contacting a specialized company. In the future, it will only be necessary to make holes for the fittings and assemble the set.
Edgebanding in a workshop environment
The advantages of ordering sawing in a workshop are as follows:
- Saving time and effort.
- There is no need to purchase the appropriate tools or equip the premises.
- High-quality results and perfect fit, requiring no modifications during the assembly process.
When cutting parts yourself, you need to prepare a so-called cutting card, which will allow you to get the maximum number of parts from one sheet of material. You can use a special computer program for these purposes.
Cutting card developed in a special computer program
When creating a cutting card, consider the following:
- When placing parts, 10 mm are retreated from the edge of the sheet.
- Between the parts leave a space for cutting of at least 4 mm.
- When arranging the parts, leave space for a through cut.
- If it is necessary to cut a whole sheet, then the indents from the cut line are 4 mm.
Details must be signed
Note! The cutting of parts should be as accurate as possible, taking into account the fact that the parts will still be polished, their size will decrease slightly, and if the parameters of the parts are initially inaccurate, gaps and cracks will appear after assembly.
Stage 5: assembling the frame
You should start assembling the headset by forming the frame. For its manufacture, sheet material is used, the thickness of which is 18 mm.
Table 3. Frame assembly
| Illustration | Description |
| Guides for drawers and closers are fixed to the inside of the side parts. Make holes for the shelves. |
| The bottom is attached to the sides using self-tapping screws for wood, confirmations or minifixes. The joints will be more reliable if they are pre-coated with sealant or wood glue. |
| Attach the spacer element under the tabletop. |
| When all horizontal lines are mounted, use a level to check the geometry of the resulting box, measuring both diagonals. When assembled correctly, the diagonals should be equal. |
| Install a back wall made of thin plywood. Fixation around the perimeter of the box is carried out using furniture nails or staples. |
| Fix legs for floor cabinets and fasteners for hanging on wall drawers. |
Note! To prevent the heads of furniture bolts from being visible from the outside, they are covered with decorative overlays to match the wood.
Furniture plugs
Stage 6: hanging the facades
Facade structures include a front element with a drawer handle and hinged doors.
Drawer elements
A drawer is made as follows: a frame is assembled from the side elements, the guides are fixed, the bottom and the front element are attached, through which the handle is drilled. After the frame (frame) of the box is assembled, it is recommended to check the coincidence of the diagonals and only then attach the bottom and front.
Telescopic guides for drawers are modern fittings that allow you to effortlessly open even massive structures. Would you like to learn in detail about the installation of telescopic guides and the correct calculation for their installation? Read the special article.
The main task, despite the simplicity of the design, is to correctly and evenly secure the façade.
Table 4. Box assembly
| Illustration | Description |
| On the inside of the box, self-tapping screws are screwed in on both sides. |
| It is necessary to screw in so that the self-tapping screw remains flush on the outside. |
| The facade is applied and a gasket is placed between it and the top cover of the cabinet, the thickness of which is equal to the calculated value. It is convenient to use pieces of insulation wire of the required diameter. So, if the calculated distance is 4 mm, then the wire is taken of this diameter. |
| The self-tapping screw is screwed through the holes for the handles to temporarily fix the facade in a given position. |
| Tighten the screws so that they fit into the façade array. |
| The “temporary” screws are removed. |
| Using a drill, drill a through hole for the handles. |
| Fix the handle with a screw. The length of the screw should be several millimeters longer than the material of the drawer and facade. So, if there are two thicknesses of 18 mm each, the screw is taken 40 mm long. |
Table 5. Attaching doors to drawers
| Illustration | Description |
| Step 1 | Using a Forstner drill, recesses for the hinges are made. |
| The hinges are inserted into the recesses and leveled using a level. |
| Using a thin drill (1.5 - 2 mm), marks for the screws are made. |
| The hinges are fixed with self-tapping screws (16 mm). |
| The counter strips are unscrewed from both hinges and must be secured to the side of the cabinet. |
| Mark 3.7 cm from the edge of the cabinet - placing the strikers at this distance will ensure that the door closes tightly. |
| Make marks with a thin drill and fix the strips with self-tapping screws. |
| The loops are inserted and tightened. |
Stage 7: installing the countertop
After the bottom drawers have been assembled and secured to each other using intersection ties, proceed to the installation of the tabletop. Install it on the resulting frame, first checking its evenness. There are several fixation methods:
- Using self-tapping screws.
- Using corners.
- Using special fasteners.
End caps protect the tabletop material from moisture.
The ends of the tabletop, before installing it, are pre-protected with an end metal edge, which will reliably protect the material from moisture.
Table 6. Installation of metal edge
| Illustration | Description |
| Silicone is applied to the ends of the tabletop. |
| The silicone is evenly distributed over the end. |
| Press the metal bar. |
| The bar is fixed with self-tapping screws. |
Table 7. Tabletop installation
| Illustration | Description |
| The lower modules are connected and placed in a single horizontal plane. |
| Drill holes for self-tapping screws. |
| Step 3 | Install the tabletop and secure it with self-tapping screws. |
| Markings are applied along which the hole for the sink will be cut. |
| In the corners of the markings, holes are drilled for the jigsaw blade. |
| Use a jigsaw to cut out a hole for the sink. |
| Secure the sink using sealant. |
After this, the equipment is connected, drawers are installed and the facades are hung.
Pros of DIY
The advantages of making kitchen furniture yourself include the following:
- Quality control at each stage of work: from the selection of raw materials to assembly.
- Making furniture according to your own sketch, taking into account your own preferences.
- Selection of quality fittings. To reduce the cost of products, many furniture manufacturers use low-quality fittings.
- High profitability lies in saving money on paying for the work of the master.
- Making furniture yourself is a creative process.
If you have no experience in making wooden furniture, then you should start with simple forms. Mastery comes with experience.
When making furniture “for himself”, the master pays maximum attention to each stage of work.
Advantages of cooperation with Drev Mebel
Are you interested in inexpensive kitchen furniture in Moscow? Are you looking for where to buy a quality headset with a guarantee? The Drev Mebel online store sells wooden furniture (Belarusian, Moscow) from leading manufacturers. The catalog presents a wide range of solid wood products for the kitchen:
- cabinets (straight and corner models);
- cabinet bars;
- dining tables and chairs;
- buffets;
- cabinets for appliances (stove, refrigerator);
- wine stands;
- cabinets-tables of several modifications: under the sink, bar counter, balustrade, bottle holder;
- wall shelves;
- bar;
- sideboards;
- cabinet-pencil case.
The catalog contains detailed descriptions and high-quality photos of kitchen furniture items. By working with us, you get:
- favorable prices, free from intermediary markups, since we supply kitchen sets directly from factories;
- the opportunity to personally evaluate the quality of products sold. At your service is not only a functional catalog, but also furniture showrooms in Moscow (their address is indicated on the website);
- professional free consultations.
You can place your order on the website or by contacting our specialist by phone. The average waiting time for the production of kitchen sets is 1 month. Cooperation with the client is formalized through the conclusion of an agreement. We comply with the delivery deadlines for kitchen furnishings specified in the contract. A guarantee is provided for all products presented in the catalog.
The online store regularly holds promotions, by taking part in which you can save a decent amount on the purchase of kitchen furniture. There is a loyalty program for regular customers.