It is not good to throw away something that can be reused .
This is especially true for environmentally harmful materials such as tire rubber.
Used tires are a valuable material for craftsmen.
At home, in the country and in the yard you can build many interesting crafts from old tires.
The skillful hands of the craftsmen transform them into proud swans, a fence around the site, decorative wells, and comfortable benches.
How to make furniture from tires with your own hands - further in our article.
Advantages of furniture made from car tires
The characteristics of the tires include their high performance :
long service life;- resistance to sudden temperature changes;
- high strength and rigidity;
- ability to keep its shape for a long time;
- resistance to high humidity.
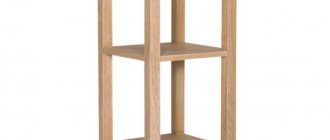
Tall poufs in the dining area of a private house
The two tires are connected with bolts or screws from the inside. Next, the structure is painted or left as is.
A wooden circle made of MDF or chipboard is nailed on top, which is also painted, and soft bedding is laid. Also, a wooden circle can be covered with foam rubber and fabric.
An excellent set will be made from high poufs and a table. The table is made according to the same principle, only its height is twice as large. Casual painting with white paint while maintaining a contrasting black tread pattern gives the furniture a stylish look.
How to make original furniture from tires with your own hands
Before the process of creating furniture, of course, the tires must be pre-treated. To do this, they are washed, dried, treated with an alcohol solution or acetone solution. If you want to give a car tire a certain color, it is better to use acrylic, alkyd or specialized paint (for rubber). There are many ways to create furniture from car tires. Here are some instructions for putting theory into practice:
- Comfortable armchair. One tire will be the base, and the other two will be the legs. The tires that serve as supports are cut in half and then attached to the seat with nuts or bolts. A sheet of plastic or wood of the appropriate size is installed on top of the seat.
- Another way to create a chair. Take several car tires with a pre-prepared slot (a plywood or plastic backrest is placed in it). The backrest is secured with bolts or wire. The base can be filled with soft foam rubber, pillows, or a hard seat can be made.
- The table can be made from several tires that form a rigid base, and a piece of plywood that will serve as a working surface.
- If you need a pouf, then take several tires from a car, connect them together, and fill the space inside with pillows or foam rubber wrapped in fabric. Wheels can be additionally attached to the structure to allow movement.
But this is just the “skeleton” of your furniture. You will have to work hard on finishing to give the product its final look. You can make a soft upholstery, a woven rope cover, or a removable fabric cover. It all depends only on your imagination. The surface of the table can be decorated with a pattern or decorative sheets of plastic can be attached. This way the design will acquire a finished presentation.
DIY furniture made from tires master class:
General technology and procedure
You can make a lot of furniture items from tires and give them a variety of shapes. However, manufacturing technology has a number of common procedures and operations. They are carried out in a certain sequence.
- First, the tires are cleaned of dirt. You can use special cleaning products to wash tires. This will give the tire a shiny, glossy look.
- Strengthen the base (frame). For this purpose, oriented strand board (OSB) is mainly used. Its configuration can be very different. Reinforcing spacers are inserted inside the tire. Mount legs or wheels. It is desirable that they coincide vertically with the locations of the spacers.
- Sometimes the frame of a chair or table requires the connection of several tires. They can be fastened with self-tapping screws, furniture ties or bolts.
Decoration. There are a great many options for external decoration of furniture made from tires. You can paint the side surfaces with acrylic paints. There are versions of an interesting combination of materials: the sides or seating areas are covered with leatherette and painted in bright colors. First, the gloomy black color is shaded with white or red paint. Then a multi-colored pattern is applied. You can add expressiveness with clear dark contours. Leatherette is dyed using the same technology.
For the side surfaces, a cape is knitted. Sometimes it is replaced with parts of an old sweater. The prepared knitted fabric is secured at the bottom and sides. The upper part of the tire is covered with solid material (OSB or plywood). The round knitted piece covering the top is connected with a hook to the side.
- Skillful cutting of the tire with a sharp cutter, grinder or jigsaw allows you to detach the parts from the metal court. They have sufficient rigidity and elasticity. Therefore, they can be used as legs, backs, armrests. You just need to give these segments the desired shape and fix them.
- Transverse metal plates give greater rigidity to the frame. They are camouflaged with a braided harness made of intersecting strips. The parts are fastened with self-tapping screws or rivets.
- Combining different materials gives good results. The tires are cut into halves, spacer bars are inserted into each, soft foam is inserted, and covered with fabric.
For garden or country furniture, it is better to make the soft parts of the seats removable. If necessary, they can be brought into the room. After all, drying quilted fabric or foam rubber after rain is quite a troublesome task. It’s better to save your labor and extend the service life of vulnerable elements.
If the structural parts of furniture made from tires are made using ropes or ropes, then nylon materials are better. They have increased strength and are not subject to rotting. Since nylon materials spring well, they are used for tension in seating areas. This gives additional comfort.
It is better to cover the surface of tables and tables, covered with strapping or wrapped with twine (rope), with glass. Its transparency will not interfere with enjoying the pattern and texture of the material. The smooth surface will allow you to conveniently place various objects and dishes on it.
In the manufacture of furniture elements, car tires are often used. However, products made from bicycle or motorcycle tires are no less original and attractive.
Car tires are a universal material. They are durable and strong. They are not afraid of rain, snow, or heat. Furniture made from tires will be organically placed in a country house, a terrace of a country house or in a picturesque corner of the garden.
From old tires you can make comfortable and unusual furniture for your home or garden.
An original design solution would be made from old tires, which can be stationary or portable, with or without armrests.
At the same time, the budget of the event will be very small, which will please the participants in the process.
The special features of the tires include their high performance qualities.
:
The advantages of making furniture from tires include:
- Availability and low cost of raw materials
. Old tires can be found in the garage or purchased at a low cost at a service station. - Efficiency of production
. You will only need to spend a few hours of free time on one piece of furniture. - High quality products
. Such furniture will delight owners not only with exclusivity and creativity, but also with high technical performance.
Advice
: A chair made from tires can be a wonderful garden decoration. At the same time, it will cope perfectly with all negative environmental factors.
Chair made of tires under a cover
Even greater comfort for relaxing or sitting is provided by a DIY tire chair. It can be made without much effort and time. A general scheme for creating a chair is proposed, which can be supplemented with various innovations or other original design solutions.
Required set of materials and tools
To transform old tires into attractive and original chairs you will need:
- screwdriver;
- furniture stapler;
- self-tapping screws;
- scissors;
- car tires (2 pcs.);
- felt;
- bendable plywood (100x90 cm);
- dense and thin furniture foam;
- knife (shoe or with a retractable blade);
- scissors;
- cover made of quilted fabric.
Step by Step Actions
- First you need to fasten the tires together. This is done using a screwdriver and large self-tapping screws that are threaded through the inside of the tires.
- Felt is attached to the bottom of the tire chair so that the rubber does not come into contact with the floor and the chair is easier to move.
- The felt is fixed around the perimeter of the tire with a furniture stapler.
- Excess felt is cut off with scissors below the fixation level.
- The frame is turned over so that the felt base is at the bottom.
- Next, construct the back of the chair. For this, bendable plywood made from special types of wood is used. Plywood is flexible and resilient. The fibers of such plywood are not located like a regular sheet, but in one direction. These structural features make it easy to shape the plywood sheet into the desired shape.
- The plywood backrest is attached to the tires with self-tapping screws with an intermediate step of 10–15 cm.
- To make the chair soft and comfortable, the frame is filled with thick soft furniture foam. The material is cut around the circumference so that it can be placed inside the tire.
- The corresponding parts are cut out from thinner foam rubber for the back and soft part of the seat. For the seat, it is better to prepare 2 circles: one equal to the inner diameter of the tire (to fit inside), the other larger (the area of which can only be 2-3 cm less than the outer diameter of the tire).
- A thick foam circle is placed inside the tire. You'll have to put in some effort.
- The top pads are made of thin foam rubber. A circle of smaller diameter is placed first, and a larger one is placed on top. To prevent the circles from slipping, the upper part must be secured with a stapler.
- Thin foam rubber is placed on the back. Attached to the plywood sheet on both sides using a stapler. The excess is trimmed off.
- The lower edge of the thin foam rubber is carefully tucked between the back and the seat.
- A cover is sewn from quilted fabric and put on the chair (you can order its production in the workshop). Internal filler – padding polyester. Such a cover will give the chair even greater softness and make it cozy.
The idea of using a cover is attractive because the material is easy to remove from the frame. It can be washed and refreshed. Over time, you can change the color of the cover to suit the updated interior.
Low ottomans for the garden and home: soft, comfortable and practical
The simplest thing that can be made from used car tires is comfortable ottomans for relaxing and gathering with friends. They can be in the form of “tablets” covered with thick rope or with fabric upholstery on legs. Let's consider several manufacturing options.
First, the tire is wrapped diagonally with a thick cord crosswise to block the through hole. Then completely cover the circumference. To do this, the rope is twisted in a spiral starting from the center of the hole blocked by the cord. The rope is fastened with a glue gun.
In another option, 2 plywood disks of the appropriate diameter are used to close the holes in the center. They are attached with self-tapping screws. Next, the structure is wrapped with a thick rope, fixed with hot glue.
You can make a soft ottoman covered in fabric. To begin with, make blanks from a plywood sheet to cover the holes. Then a foam strip is glued to the side of the tire along the entire circumference.
Using a screwdriver, screw the plywood disk from below. Next, they cover the tire with thick material, fastening it with a construction stapler. Legs or wheels are screwed to the bottom plywood.
The remaining disk is wrapped in foam rubber and covered with fabric. The resulting lid is placed on top. It can be fixed with glue.
Several fabric-covered ottomans can be used to create a cozy seating area.
Round coffee tables
Tires are also used to create an unusual coffee table. There are many ideas: on wheels, with or without legs, with a glass or wooden surface, painted or natural.
The option with a gold plated finish on chrome legs and a glass tabletop looks harmonious if it fits into the color background of the interior.
The option with a wooden tabletop and wenge-colored legs is perfect for a classic style. The legs are screwed to the lower wooden disk, and the tabletop is fixed with hot glue.
Country chairs made from old tires
There are several options for creating a product. Let's focus on the most popular, spectacular and uncomplicated.
- Cut off the beads of one of the tires. Cut the resulting ring on one side.
- Cut off one third of the second tire along with the bead.
- Paint two whole tires, one piece with the beads cut off to form a cut ring, and a second piece representing one third of the beaded tire.
- To make one chair from bald tires, you need to stack two whole tires on top of each other.
- To fix the joints between them, it is necessary to coat them with hot bitumen mastic . Glue or sew a plastic lattice onto the top tire with a strong thread.
- Screw or bolt vertically one third of the tire with the bead at the bottom to the top tire .
- screw the middle with the cut off beads to the top of the vertical one-third of the tire with the Bend this part into the shape of the back and handrails of the chair.
- Secure the lower ends or bolts to the upper lying tire.
It turned out to be a very comfortable chair made from tires for a summer house, a private farmstead, or a recreation center.
It is best to build several of these chairs for all family members.
Another chair option:
- You will need one whole tire, and from the second tire you need to cut a sector the size of one third .
- Wash both parts, dry them, and paint them with black rubber paint.
- Find legs from an old chair or from a Soviet TV. Screw the legs to the bottom of the whole tire with screws.
- Saw off two or three wooden blocks measuring about 5x5 cm, 40 cm long. Sand and paint with black rubber paint.
- the hole for the disc in the whole tire with a plywood circle covered with leatherette. This will be the seat of the chair.
- The inner cavity and ends of the second tire with the cut out sector are also covered with plywood and covered with leatherette . This will be the back of the chair.
- Assemble the structure: screw two or three bars to the tread surface of the whole tire with screws.
- The backrest is also screwed higher to the bars.
The result is a cozy chair with a minimalist and laconic design.
It can be as in the photo or slightly modernized depending on the materials that are at hand.
Why not an impressive leather chair from a designer furniture showroom!
It’s not a shame to furnish not only a country courtyard, but also the creative interior of an apartment or house.
In Europe, such furniture in residential premises has long been not uncommon, because the environmental trend is gaining popularity every year.
Tables
There are several options for creating tables from tires. Let's look at each of them in detail.
On two stacks of wheels
Washed, dried, degreased rubber wheels without discs are first painted with acrylic, bitumen, enamel paints.
The most suitable coloring mixture for treating tires is rubber paint . It can withstand hundreds of cycles of sudden temperature changes, as well as precipitation, without cracking or deforming.
The tires are stacked one on top of the other in the place where the table needs to stand. It is necessary to install two stacks of tires 4 pieces each , preferably of different colors, at a distance of about half a meter between the outer walls.
A rectangular sheet of strong material, which is at hand, is placed flat on top of two stacks of multi-colored tires:
- flat plywood;
- plastic;
- Fiberboard;
- chipboard;
- thick safety glass;
- metal sheet.
The tabletop is fixed to the top rail of each stack with four screws diagonally at the contact points.
The edges of the sheet should protrude beyond the outer diameter of the tires by at least 10 centimeters.
The table cover can also be painted in any color pleasing to the eye.
To prevent the wheels from moving, there are two ways to fix them:
- pour earth or sand inside each stack of tires ;
- Lubricate each joint between the tires - hot bitumen mastic 1 cm thick, which will allow the tires to reliably stick to each other after drying.
Depending on the design, such a table will be perfect for a country house, a playground, or a garage.
Magazine
This type of product is made from one tire, but in larger sizes . Using the same principle, you can make stools and chairs.
Of course, it will not work as a full-fledged dining table, but it can serve perfectly as a coffee table.
Let's get started:
- Wash and dry the tire of the required size .
- Find four legs from an old chair or make them yourself.
- Screw the legs to the tire with screws.
- Place a circle on top to cover the disk seat.
- Decorate - completely wrap the tire on all sides with yarn or create a pattern on the tabletop.
Such a decorative table with legs will serve as an effective stand for a beautiful vase, magazines, or pocket items.
Wicker
The next method will require a little more effort and creative skills.
Procedure:
- Cut a truck tire along the tread into two equal halves . One half will serve as a countertop.
- Cut the outer beads from five smaller diameter passenger tires to create five rubber rings .
- Using screws, screw four rings from below on four sides vertically to the table top. Using the fifth ring, connect together the vertical rings on the floor surface. This will be the reference plane of the table.
- Use the remaining rubber strips to tightly weave the mounting hole for the disk in the tabletop.
At such a table it is perfect to play board games in the evening at the dacha or read newspapers.
Finishing
As for finishing, a tire chair can be decorated in different ways. If the furniture is intended for outdoor use, it can be painted any color . You can also apply any ornament or design to the product using acrylic paints.
When using the product under a canopy or in the house, it is better to decorate it with textiles . To do this, you can make a cover for the chair. For those who know how to crochet, the cover can be made from thread.
Tip : If you are attracted to non-standard materials, try making a chair, table or even a bed out of pallets. And in the garden, next to such a chair, you can put a simple table or a table in a gazebo.
Types of furniture structures - choosing a project for your site
Tires that have become unusable can become an inexpensive and accessible raw material for the manufacture of various pieces of furniture. If the choice is on chairs located in the recreation area, then it is important to think through the design of the structure in advance; there are many types of furniture:
- armchairs with backrests, armrests and ottomans. Stable and comfortable, they can be installed separately in the garden or next to the house, in gazebos; if desired, entire compositions and sets can be created;
- products with a combination of materials. Original chairs made from tires can be complemented by decor made from inexpensive plywood, rough and soft fabric, and especially popular ropes and cords;
- mobile and stationary structures. By equipping the chair with fittings from old home furniture, you can freely move the structure around the terrace and place it under a canopy or in a gazebo in rainy weather.
You can make a high-quality and reliable chair from tires yourself; this requires a little dexterity, the ability to use ordinary construction tools and the desire to transform the territory.
Manufacturing instructions
The process of making an ottoman is simple, even a beginner can handle it:
- Lay the tire on the floor and measure its diameter. Make markings on a sheet of plywood and cut out 2 identical circles.
- Place a circle on the tire and attach it with self-tapping screws, screwing them along the edge. Turn the product over and secure the second circle in the same way.
- Glue the end of a rope or thin rope to the bottom plywood circle with a gun.
- Start wrapping the blank for the ottoman. The coils are laid tightly, but without overlap, in a spiral, from bottom to top. Each row is secured with a few drops of glue.
- After finishing the work, cover the pouf with a layer of furniture varnish - this will protect the product from moisture and dirt.
- If desired, the pouf can be placed on legs. The finished parts are attached at the bottom with self-tapping screws or liquid nails.
The ottoman can be made with a removable top, then you can put some things inside.
Selection of materials and stages of self-production
Having chosen the design you like from the options presented in the photographs, you need to draw up a project and strictly follow the instructions, observing the manufacturing steps to obtain the maximum result:
- selection of tools. To process wheels and durable rubber with cord thread, you will need a construction stapler, a well-sharpened knife, a set of screws for fastening, silicone-based sealant or liquid nails, a screwdriver or a portable screwdriver;
- preparation of materials. When making a chair from old tires, it is necessary to prepare several tires of the same or different diameters in advance, select additional materials for decoration and finishing, choose aerosol, facade paint that matches the textiles;
- manufacturing process. During the work, it is important to take into account safety principles, it is especially important to remember them when cutting a tire, connecting structural elements and forming the finished product, treat joints with sealant, clean open areas for applying paint;
- installation of the structure. When constructing a chair from a tire of any modification, all work can be carried out directly at the installation site; if desired, the preparation and painting of the elements is carried out in the garage, under a canopy, and their fastening in a designated seating area.
Spent rubber can be processed well, cut and has good ductility, requiring enhanced fixation. Ready-made chairs made from old tires have high wear resistance and look great in the garden or at home, on the open terrace.
Preparing wheels step by step
Before starting the work process, you need to draw a sketch of the future piece of furniture and prepare the material itself for use:
Tires are thoroughly cleaned of dirt and washed with soapy water.- To clean the wheels, it is recommended to use special products that will give them a beautiful and shiny appearance.
- Next, the material should dry well and for reliability it is recommended to treat it with a solution of acetone or alcohol .
- To create interesting design solutions, it is worth purchasing acrylic paints .
Tip: You can use textiles instead of paints. With its help you can hide all the defects of old tires.
Flowerbed in the shape of a swan
Garden crafts in the shape of a swan are quite common figures, but few people use them for planting. Master class on creating a figured garden flower bed in the shape of a swan:
- One tire is used as the base and body of the bird. The tire is firmly fixed in the ground.
- The neck and head of the figure are glued along the upper edge, the wings are formed from rubber strips.
- After painting and decorative finishing, you can start planting flowers. Soil is filled inside the chamber, moistened and plants are planted.
The swan flowerbed perfectly emphasizes the overall style of the garden plot. Crafts made from tires for the garden are a great idea for those who have some patience, imagination and accumulated old tires.
How to cut tires
In general, when making crafts from tires, they often need to be cut.
This is far from easy. It is more or less easy to cut off the side surface of the tread. People with strong hands and good knives do this by hand. By the way, a good workout for the hands and the entire shoulder girdle. If you are going to cut with a knife, lubricate the blade with grease: the rubber constantly “jams” the metal, and the blade covered with grease slides out well. You can also cut off the sidewall with a jigsaw or grinder. Cutting with a grinder is relatively quick, but the stench is wild. Therefore, with a grinder, even if there is one, only the first cut is made so that the jigsaw file can be inserted. Then they work with this tool. To cut rubber, take a blade with a reverse tooth made of good steel.
You can use tires with cut edges to make a raised bed for strawberries.
If you have to cut the tread, doing it with a jigsaw or, especially, with a knife is useless. At least with a regular knife. Blades made of special steel can even cut iron cord, but it’s unlikely that anyone would want to damage such a tool on an old tire. That’s why they most often work with an angle grinder. To avoid any troubles, the protector is secured: always think about safety. If the sidewalls have already been cut off, the tread tape is quite elastic and can be compressed with a clamp. Once cut, it will not spring back.
Other furniture and crafts
At the dacha, every item, every useful thing is welcome. The spirit of fantasy and creativity is in the air here. Every seemingly unnecessary item will always have its own use. Worn automobile tires are a valuable material here, a strategic raw material.
It makes excellent swings for children, front gardens for flowering plants and green spaces. Tires are used to make brightly colored houses.
Benches for sitting, rocking chairs, funny bugs and striped caterpillars, flowerpots - this list of uses for old tires can be listed endlessly.
Buried wheels on the border with a neighbor
You can use tires as an internal fence for the garden and front garden, or as a conventional fence from a good neighbor, by burying them vertically.
Stylish fence in the country
Installation technology
- Mark the outer side or axis of the fence. Draw a line the width of the tires.
- Dig a groove the width of the tire and a depth of one-third to one-half the diameter.
- Place tires in the finished ditch and cover them with soil. For strength, you can pour concrete up to half the height of the ditch, and connect the tires at the points of contact with studs. Leave soil on top.
- Take a brush, paints and give free rein to your imagination, painting a new fence.
- Plant low ornamental plants and flowers under the arches.
Tires buried halfway will look like protruding arches. Tires buried a third will create an original openwork of truncated rings. They will touch each other above the ground. The design is beautiful, but requires additional strengthening.
Example of territory delimitation
The advantage of a fence is the small number of tires needed to make it. It does not interfere with the flow of rainwater and retains snow without creating snowdrifts. A fence installed in a couple of days will last for many years. If necessary, it can be easily dismantled.
Third way
If you don’t want to bother with the rope, no problem. To quickly make a seat, you can simply place an old cushion inside the wheel. In this case, also prepare:
- foam;
- fabric/mesh;
- lace or fringe;
- thick threads for sewing;
- self-tapping screws
If you want the pouf to be as tall as a chair, use two wheels. Connect them together with self-tapping screws. Cut a rectangle of foam rubber large enough to wrap around the wheel. Sew its edges. Thanks to this, the frame will become soft and beautiful.
Armchairs with wicker
Instead of simple poufs, you can make chairs with a back and armrests. The backrest rail is also attached with bolts or screws. Armrests can be made from strong, thick, varnished branches. When the structure is assembled, begin to close the holes in the center.
In addition to the methods already listed, you can use weaving. To do this, holes are made in a circle using a drill in increments of no more than 5 cm (more often possible). Subsequently, a strong rope or cord is threaded through the holes using an awl, intertwining each longitudinal row with a transverse one. You can experiment with the pattern, especially if you have weaving skills.
Decor options
It should be said that even for such chairs, appearance is an extremely important aspect. At the same time, it is not necessary to buy any accessories for this at an exorbitant price. To do this, you can use some old unnecessary things. For example, the same pillows and bedspreads to make the chair not only beautiful, but also soft. For example, you can cover the seat and back with padding polyester, and simply stretch decorative fabric over this material. It is better to fasten such upholstery using the simplest furniture stapler.
A number of people believe that it would be best to decorate the back with buttons and cover it with fabric of the same color. If you need to hide the staples, you can do this with laces or simple decorative edging. The surface can also be painted, which will make your furniture an even more interesting addition to the interior. And if you wish, you can make some bright and beautiful cape.
Crafts for the playground
Homemade products made from old car tires can also be used in various playgrounds. There are a large number of ideas that can be implemented in order to give the yard a beautiful look. Using old car tires, you can turn a playground into a fairy-tale town where children will be very interested in playing and spending their leisure time. You can make a mini-sandbox, winged swings, fairy-tale animals or cartoon characters.
Sandbox.
The simplest idea to implement is creating a sandbox. Fill a large tire with sand to the top and place a beach umbrella in the center. At night, remove the umbrella and cover the sandbox with an awning, and so that it does not fly away when the wind blows, screw screws into the edges of the tire, and create loops on the awning itself.
Making a sandbox
Every child loves to play with sand on the playground. But not every yard has a structure in the form of a sandbox. That is why, in order to create a beautiful and convenient container for sand, you can get a KAMAZ tire yourself. This device will make an ideal sandbox. You just need to place the tire on the desired area, carefully paint it, and then fill it with sand. The entire manufacturing process can be accomplished with the help of a child. The kid will really like this, because he himself will be able to interestingly color the future sandbox with his own hands.
Swing
There are many options, from simple to complex. The easiest one is to choose a stronger branch of an old tree and tie a tire to it with a strong rope. The bungee option is ready. Kids will be delighted if you use a loop fastening and attach the head and tail of a horse made of the same rubber to the tire.
Baby swing
Having rummaged around on the Internet, you can find many photos and ideas on how to use tires collecting dust in the garage and please children by making a swing.
Such swings have many advantages and advantages over plastic and wooden competitors: they are harder to break, there is more than one option for seat shapes, they tolerate temperature changes and bad weather conditions well, if the swing breaks and falls, the rubber will soften the blow, and they are easy to manufacture.
In order to make a swing with your own hands, in addition to tires, you need: a strong rope or chain, self-tapping screws, eye bolts and a drill. The swing can be installed vertically or horizontally, the installation process is not much different. Vertical:
- Tie a rope or chain to the chosen location (tree branch or metal support).
- Screw the eyebolts onto one side of the tire.
- Connect the ends of the rope or chain with the self-tapping screws screwed in beforehand.
- Measure the desired height that is suitable for your child, allowing him to climb on and off the swing independently.
- Drill holes in the bottom of the tires for rainwater (to prevent water from accumulating inside).
- Check the safety of the structure for strength.
The horizontal design is not complicated and by spending a few hours and a little money you will give your kids joy and bright emotions for a long time. The manufacturing process is not particularly different from vertical ones; you just need to screw in four bolts for fastening and install the seat horizontally, avoiding distortion.