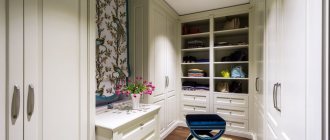
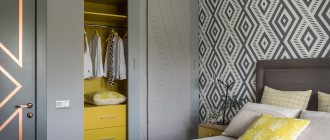
Owning your own dressing room is the dream of many women. It’s difficult to limit yourself to just one closet, having a heap of clothes and shoes, as well as handbags, scarves, hats and other things. But the wardrobe will accommodate all these items and will allow you to allocate a suitable corner for everyone. In private houses, you can often see a room for things that was originally included in the construction plan. Some modern apartments have small closets that can be converted into storage space. If they are not there, then there is a way out - a do-it-yourself dressing room. To arrange it, you will need to tinker, but spending time and money on purchasing materials and searching for suitable schemes is nothing compared to making your dream come true.
Kinds
Many people are interested in how to make a dressing room with their own hands. However, we note that not everyone considers it important to pay attention to such an important design detail as the door. This is completely wrong, since this aspect largely determines the level of comfort of the system for storing personal belongings and shoes. The following describes the most popular wardrobe doors in recent years.
Swing
A high level of practicality, comfort, the ability to organize personal belongings, shoes, bags, reliable protection for clothes - these are not all the advantages that spacious wardrobe systems can demonstrate. The main thing is to choose a door that is convenient for use.
If the space of the room allows, you can install a swing door for the dressing room. The photo will demonstrate similar options. It has a number of advantages, including the following qualities:
- the ability to provide the dressing room with reliable protection from the penetration of sunlight, dust, and insects;
- high sound insulation qualities;
- affordable cost of purchase and installation, widespread use;
- aesthetic appearance, special charm, brevity.
Remember, to install this option you will need enough space in the room. For this reason, swing doors are suitable for dressing rooms in the bedroom, living room or large hallway. If space is limited, installing, and even more so, using such a door will be problematic.
Harmonic
Accordion entrance doors for a dressing room are similar in aesthetics to a screen, the doors of which can be folded or moved aside. This is a practical, compact, easy-to-use option that is suitable for any room style. And if the doors of the model are translucent, the space of a small dressing room will visually appear more spacious. But in order for such a door to function without additional difficulties, you will need to allocate a space equal to the width of the doors.
Accordion doors are an interesting option in terms of original design and allow you to transform an ordinary interior by adding new colors to it.
But is it really that reliable? The door structure consists of many slats, so it looks quite fragile. But, as practice shows, problems arise only with models with low-quality fittings, which should be absolutely rejected. If you choose a high-quality product in the form of an accordion with all the certificates, there will be no problems with its operation for a long period of time.
Coupe
Coupe models are incredibly popular due to their practicality. When producing doors for wardrobe compartments, the same mechanism is used as in the production of sliding wardrobes. The doors move apart along aluminum guides thanks to the presence of rollers. Since the frame of such a door is made of high-strength metal, it becomes reliable, durable, and practical. But those models that have transverse metal profiles are even more reliable and resistant to impact. Therefore, they deserve the attention of buyers.
Very interesting to look at and incredibly comfortable to use, radius doors for a corner-type dressing room. The doors of such models move to the sides not along a flat guide, but along a curved one in the shape of a semicircle with a different radius, which allows you to somewhat expand the space of a small dressing room. They give the interior a special uniqueness, transform the space and fill it with comfort.
Roto door
The design has a very non-standard appearance, a laconic design in the style of futurism. It looks more like a door from the distant future, where all objects lose their usual appearance, than a modern product. For this reason, it is not appropriate to install roto fabric in a classic interior; it is more suitable for modern dressing rooms decorated in loft, high-tech, and fusion styles. Use a roto door when arranging a dressing room, and your home will definitely not be called outdated in terms of design or unfashionable.
The basis of this design is a rotating mechanism, so the canvas can rotate around its axis and open in different directions. To install the rotary version with your own hands, you will need enough free space, as in the case of a regular swing door. For this reason, rotary doors are used only in spacious rooms where you can install a conventional swing structure in a wardrobe.
Pencil case
Another original option for installation in the dressing room of a city apartment or country cottage is a pencil case door. Its design consists of guides, carriages, rollers, and door leaf. These are original-looking designs that have a high degree of comfort and reliability.
At the pencil case door, the doors are hidden in the wall, not requiring a large area. When open, they do not block the passage inside the dressing room, do not overload its space, and do not draw the emphasis onto themselves. All this is ideal for a small-sized apartment, where space is limited and it is simply impossible to install a lot of large-sized furniture.
But it is worth noting that the installation of such a system is somewhat complicated. Without certain skills and tools, doing it yourself can be difficult. Therefore, it is better to leave this issue in the hands of professional craftsmen, then the structure will work for a long time without difficulties or breakdowns.
Techno
Those who want to arrange a dressing room in their bedroom in their home should take a closer look at the techno door. These are unusual structures with an original design, a high level of comfort and an affordable price.
The principle of movement of a techno door for a dressing room is similar to the design of a sliding wardrobe. The doors move in different directions along an aluminum guide and fit one after another.
However, such models do not have bottom rails, so they are suitable for interiors with a flat, smooth floor without thresholds between rooms. That is why, when arranging a dressing room with a techno door, it is important to organize a perfectly level base and a smooth floor covering. On the other hand, this design feature somewhat reduces the soundproofing qualities of the canvas.
Such models are especially good for families with small children. After all, when entering the dressing room, they will not trip over the lower fasteners or catch their shoes on them, which increases the risk of falling and getting injured.
Why do you need a dressing room?
A dressing room is a room designed for storing and organizing clothes, shoes and accessories. Often they are supplemented with sports equipment or some household items, for example, additional blankets, pillows or equipment. These are rooms that are equipped with storage systems. Sometimes closets or separate suitable parts of the hallway are converted into a dressing room. Such premises are multifunctional and their use brings additional convenience to the inhabitants of the house.
A dressing room allows you to rid your home of large closets, chests of drawers and massive cabinets with clothes
You can build a retractable ironing board, mirror and other additional tools into the dressing room that will make life more comfortable.
Manufacturing materials
Modern doors that are used to equip a dressing room are made from a wide range of materials with different performance parameters and specific features. Let's describe the most popular options:
- The natural wooden door to the dressing room is distinguished by high aesthetic qualities, natural naturalness, and environmental friendliness. But it is heavy, bulky, expensive, so it is worth installing only when the room is large, spacious, and all the furniture in it is made of natural wood;
- A glass door for a dressing room has become increasingly popular lately, because it can be decorated with a drawing, photo, stained glass, or mirrors. The mirrored door to the dressing room looks very unusual. Of course, it is not suitable for every style of room decoration, but mirrored doors allow you to visually expand the boundaries of a narrow space, making it more spacious and comfortable. But when installing such products, many difficulties arise;
- plastic - lightweight, practical, low cost. But it has low wear resistance and scratches are very noticeable. In addition, the aesthetics of plastic is still inferior to other materials in its beauty, style, and charm;
- a curtain instead of a door is another option when arranging a dressing room if there is not enough space in the room, and its owner is used to order. It is worth choosing light translucent textiles for small rooms or thick curtains with lambrequins and other pompous decorative elements if the room is spacious, bright, and decorated in the appropriate way.
Tree
Glass
Plastic
Curtain
Location Features
Based on the location of the wardrobe compartment door, they can be divided into:
- Straight-line;
- Angular.
Most often, the dressing room has a rectangular shape. In such cases, doors of a straight-line compartment system are installed at the entrance. However, in some cases, when a corner part of a room or room is allocated for a dressing room, it is necessary to use a corner-type sliding door system. Each installation system has a number of unique features.
Decoration methods
The design of the door for a dressing room in a bedroom or hallway plays a very important role in creating a truly cozy living space. A solid canvas may look somewhat boring and monotonous, so the doors are selected with original decorations.
The decor must certainly be in harmony with the decoration of the surrounding space, becoming an organic part of it. The most popular dressing room door decorating techniques today are described below.
| Decoration technique | pros | Minuses |
| Stained glass | Glass with engraving looks very stylish and modern. This design can become a decoration for a room, bringing comfort, charm, and style. | The rather high cost of stained glass makes many people want to refuse this type of decor for their dressing room doors. |
| Mirror inserts | They allow you to visually expand the space of a narrow room to accommodate a wardrobe and make it lighter. | Mirrors are afraid of mechanical impact. Impacts can cause it to break, crack, or crumble. |
| Sandblasting pattern on glass | Durable, practical, does not fade when exposed to sunlight, and the most durable option does not scratch. The choice of designs is very wide, which allows you to choose the current option for every taste. | Doors with similar decor are not cheap. |
| Fluted glass inserts | Glass allows light to pass through, so the room will be brighter and more comfortable. Doors with glass inserts look interesting, stylish, and expensive. | Glass can break if hit hard, so you need to use these sheets carefully. |
Please note that the chosen decoration technique should be reflected in the decor of other objects present in the room. Then the interior will be harmonious, beautiful, and laconically completed in design terms.
Corrugated glass Mirror inserts
Stained glass
Sandblasting drawing
Installation of stoppers and seals
How to install sliding doors with your own hands? Step-by-step instructions include the following steps. Before installing the components and attaching the seal, begin installing the stoppers. Fix the door leaf, set the limit. Use the level for this. Place the motion limiter on both edges of the guide and screw it into the block. Attach end caps to each side.
The next step is attaching the flag roller. Attach it so that it can be inserted into the groove at the bottom end. While moving, the roller will dampen transverse vibrations. Next, proceed to install the handle. The sliding mechanisms must cut into the canvas. First, make a hole in the wooden sheet to the size of the future handle, attach the base and carefully place the overlay.
After installing the handles, we take on the platbands. The choice is yours - you can glue them or nail them with nails (it is advisable to take the latter without a head). The same manipulations need to be carried out with the false panel, which will cover the beam above the rail.
And the last thing you need to do is cover the future door with a sealant. After completing this work, the installation is formally completed. Thus, the installation of an interior sliding door with your own hands will be successfully completed without the involvement of a specialist. On average, the work takes one day.
Photo
How to mount the top and bottom tracks?
The upper and lower tracks are horizontal guides that serve to move the canvas from side to side. Accordingly, the upper track is mounted to the upper part, using the outermost line of the opening, which is located in front. Next, firmly and securely screw it to the surface of the opening or wardrobe. A similar track is installed at the bottom of the door. In this case, you need to take into account the indentation from the markings of the previously installed track. If you choose a one-sided door with an asymmetrical profile, you need 18 mm, and for a double-sided door with a symmetrical profile, 9 mm.
Before installing the floor track, you need to install the stoppers. The lower part is screwed with self-tapping screws to the bottom of the wardrobe, and if the opening has a ceramic floor rather than wood, you need to use double-sided tape. It is advisable to choose a quality one. These include products from the ZM company. However, you need to be careful not to run into a fake.
After installing the tracks, you need to start installing the canvas. How to do it? Place the canvas in the groove of the upper track, and then, lifting the canvas, press the lower rollers with your fingers so that they fit tightly into the door. Please note that there are springs inside. Position the door against the floor track groove. Release the rollers and carefully guide them into the groove.
Average cost of sliding doors
The cost of products may vary, as it is influenced by many parameters: brand, material of manufacture, type of construction, components and control mechanism.
If we consider the available options, then you should pay attention to chipboard canvases - their cost starts from 4,500 rubles. Canvases assembled from solid wood will cost more. For example, when using oak panels, the cost of the structure can vary from 17 to 40 thousand rubles.
As for mirror and glass surfaces, they can be classified in the middle price segment - from 10 to 20 thousand rubles. Of course, there are some subtleties here too: the size of the canvas and the method of decorating it are important. The presence of a pattern, painting, tinting or spraying increases the final cost significantly. Stained glass panels are the most expensive - about 40 thousand rubles.
Applying edging to cabinet parts
After all the parts have been cut out, you can start edging. Usually this is also done in the furniture workshop where the parts are made, since this requires special equipment. For edging, edges made of PVC of different thicknesses are used depending on the position of the ribs. Hidden ribs (bottom or rear) are edged with thinner edges, the thickness of which is 0.4 mm. For visible ribs, thicker edges made of 2 mm PVC are used. The edges of adjacent parts that are connected end-to-end do not need to be edged.
To make it clearer, here are a few examples:
- The ribs of the inner shelf are edged only on the front side using a 2 mm edge. The remaining ribs are butted against the inner walls of the cabinet;
- the ribs of the cabinet lid are external on all sides and therefore must be edged on four sides, while the rear invisible side has an edge 0.4 mm thick, and the rest - 2 mm thick;
- The edges of the drawer front on all four sides have a 2 mm thick edge.
These subtleties seem confusing at first glance, but using Basis, you don’t have to worry or think too much, because the program selects and places edges of the required thickness and in the right places on its own.
Like manufacturing, edging of parts with complex geometric shapes is paid separately at a higher price.
Thus, the cost of edging, including materials, consists of the following items:
- edging with PVC edges 0.4 mm thick;
- edging with PVC edges 2 mm thick;
- edging rounded parts.
On average, the production of cabinet parts and their edging takes up to 5 working days, but for an additional fee “for urgency” all these operations can be completed in one day. Some workshops also include home delivery of products in the cost of work.
How to make your own door leaf
Chipboard panels of the required size are taken. You can use one panel, or two. For example, if the doorway has a frame edging of 76.5x197.5 cm, then you need to take a canvas measuring 80x200 cm.
The door leaf must fit the size of the opening
To lighten the weight of the canvas, 1-2 squares or a rectangle are cut out of it. Glass is subsequently installed in these openings. You can create a kind of panel by inserting thin plywood.
First stage. The canvas is marked. 15 cm away from the edges, no less.
Second phase. The middle part of the canvas is removed using an electric jigsaw. For this purpose, a hole is drilled in the corner (any) of the marked figure so that a jigsaw file can be inserted.
Third stage. Along the perimeter of the door, as well as inside the created frame, it is advisable to refine the ends of the chipboard. To do this, use self-adhesive tape. Fix it by heating it with an iron.
Door leaf materials
You can choose another option: the door is made of timber, processed in advance. Fastening is done with jumpers consisting of bars of narrower sizes or of durable slats. And between them plywood or glass is inserted.
It should be understood. It may seem that a door made of timber is easier to make. This is a misconception. After all, you will need to have material that has undergone impeccable processing.
In addition, the assembly of such a structure must be carried out with special care. If at least one of the conditions is not met, the door frame will initially or will soon become deformed.
Sliding door design
Preparation for installation work
You need to prepare all the necessary tools and materials in advance, otherwise the process of installing compartment doors will take a long time.
The first thing you need to do is prepare your tools
Tools needed
A grinder (eccentric or vibration) will also come in handy.
Procurement of spare parts and materials
Here are the parts you will need to assemble the compartment door.
Sliding door fittings
First, the owner decides on the type of design, and taking it into account, the door leaf is selected. There is a table that determines the dimensions of the canvas (typical) relative to the opening:
A hanging structure is selected. The height of the canvas should be greater than the doorway.
A cassette compartment door is selected. Then the height of the canvas should be less than the size of the opening.
A door on 2 rails is selected. You should choose a canvas larger than the opening if this is an open option. And if the design is made in a cassette version (in other words, it goes into the wall), then it should be the same amount smaller than the opening.
Table of sizes of doorways and leaves of sliding sliding doors with 1 leaf:
| Door size | Opening size | External size with trims (width, | The height of the mounting beam from | Length of embedded beam | |
| No frame | With frame | ||||
| 600×2000 | 540×1975 | 565×1975 | 704×2042 | 2047 | 1300 |
| 700×2000 | 640×1975 | 665×1975 | 804×2042 | 2047 | 1500 |
| 800×2000 | 740×1975 | 765×1975 | 904×2042 | 2047 | 1700 |
| 900×2000 | 840×1975 | 865×1975 | 1004×2042 | 2047 | 1900 |
| 600×2100 | 540×2075 | 565×2075 | 704×2142 | 2147 | 1300 |
| 700×2100 | 640×2075 | 665×2075 | 804×2142 | 2147 | 1500 |
| 800×2100 | 740×2075 | 765×2075 | 904×2142 | 2147 | 1700 |
| 900×2100 | 840×2075 | 865×2075 | 1004×2142 | 2147 | 1900 |
| 600×2200 | 540×2175 | 565×2175 | 704×2242 | 2247 | 1300 |
| 700×2200 | 640×2175 | 665×2175 | 804×2242 | 2247 | 1500 |
| 800×2200 | 740×2175 | 765×2175 | 904×2242 | 2247 | 1700 |
| 900×2200 | 840×2175 | 865×2175 | 1004×2242 | 2247 | 1900 |
Compartment door assembly diagram
Wardrobe sliding door assembly diagram
The length of the rails should be equal to twice the width of the canvas. Let's say two canvases are installed. This means that a guide equal to their four sizes is selected.
Lighting
To illuminate the cabinet, I used one energy-saving lamp, which is turned on using an infrared motion sensor. You open the doors and the light in the closet turns on automatically. The device has a built-in timer; by adjusting it, you can set the time to turn off the light after the system is triggered.
Lighting in the wardrobe. Motion Sensor
DIY compartment doors
Dmitry Kuznetsov
Author of the article: editor-in-chief of the project, repair expert.
Installing compartment doors yourself: detailed instructions from choosing the material to checking the functionality of the system.
It is not easy to install compartment doors yourself. However, if you thoroughly understand the features of this design and the operation of all mechanisms, then there will not be any particular difficulties during its installation. The main thing is to carry out all operations in strict sequence, as indicated in this recommendation.
Various door designs of this type have been developed. Therefore, the owner of a residential property initially needs to understand what advantages and disadvantages they have.
Recommendations for selection
The main task of a dressing room is to organize and store things. The room is zoned as follows: allocate a separate room or delimit the space with sliding structures. In the first case, compartment doors are not needed, but in the second, you cannot do without such products.
Nowadays there is a large selection of a wide variety of systems. When choosing, you should start from the desired color scheme that matches the interior. If necessary, doors can be made to order, taking into account individual parameters.
The most versatile models are those made from chipboard, natural wood or tempered glass. They have an exquisite appearance, long service life and high strength. Aluminum profiles have similar characteristics, but they are more suitable for rooms decorated in high-tech style.
Sliding structures with grips are no less popular. Their main advantage is that fingerprints will not remain on the mirror surface.
When choosing sliding structures, it is recommended to adhere to the following tips:
Completion of installation
Having covered the door profiles with brushes, we set the stoppers. What is their function? They help to avoid opening the door on your own if your house has a slope or the floor is quite crooked. Use a screwdriver or wrench to slide the stopper into the groove and position it so that the roller does not move and is firmly locked. Thus, the installation of the sliding door to the dressing room will be completed. Then you can start using the design. Also in our article there is a photo of installing a sliding door with your own hands. Thanks to them, everyone can see the installation process clearly.
: Assembling the frame
Now the fun begins. The conductor I mentioned earlier plays a major role. The kit includes the necessary clamps and screws, but there are few of them, so you will have to purchase more. The included screws have a special head, so that is also included in the kit. I will not write detailed instructions for using the Kreg Jig, everything can be seen in the photographs. I'll just leave a few notes.
It is better not to do the frame assembly on the floor, as I did. Since the bars can move relative to each other and ultimately the frame will be deformed. It is better for the corner you are working on to hang from the table. The boards will lie in the same plane and after leveling with a square, you can twist them. It is very important to maintain a right angle!


