A cradle is a small bed for a baby that is suspended in the air. This is one of the oldest and, unfortunately, most dangerous cribs for babies. If you do not follow the correct technology and use low-quality materials, the cradle may simply break off along with the baby. In this article we will tell you how to make a cradle for a newborn with your own hands, only it will stand on the floor for safety.
DIY baby cradle
The cradle for a baby to sleep has been known since ancient times. The peoples of the world brought their original ideas to the classic cradle, but the designs were the same. The cradle has been replaced by modern cribs for newborns. But the use of cribs is becoming popular again. This is a convenient product in which the baby is comfortable and cozy due to the close proximity of the walls. A small cradle takes up less space than a bulky bed. In this article I will tell you how to make a cradle for a baby with your own hands.
Design elements
The main elements of a children's bed are:
- bottom;
- sidewalls;
- backrests;
- frame strips (frame);
- legs.
Cots also come on wheels. In models of this design, it is convenient to rock a baby to sleep; such cribs are easy to move around the room, if necessary. Some have rocking runners. There are also combined legs: the wheels can be replaced with runners, or you can unscrew them completely. There are also cribs in which the swing is provided by a hinge.
Children's beds can be made in the classic style familiar to everyone. However, today wooden models made based on the plots of fairy tales and cartoons are gaining increasing popularity. Undoubtedly, both models will look good in a nursery.
However, often beds made in themed decor take up too much space.
This is their main drawback, because not everyone can boast of a large living space. Often the crib has to be pushed into a very limited space. Therefore, sometimes, in order to save free space, homemade beds of the required dimensions are made:
- two-tier;
- transformers;
- attics or houses;
- with drawers and shelves.
This piece of children's furniture can be anything you want. The main thing is to comply with the basic requirements: the bed must be:
- safe;
- comfortable;
- beautiful.
Types of cradles
Cradles are used from the birth of a baby until 8-9 months of age, when the child can already stand up and being in a cradle is not safe for him. Modern commercial cradles are equipped with electronics that can rock a child to sleep and respond to crying; the cradles come complete with remote controls, fasteners for canopies and other accessories. Classic models, like in the old days, are only capable of rocking a child. Cradles are divided into two types:
The main task when building a cradle is to make it safe. All wooden elements must be carefully processed; wood and paint materials are non-toxic.
Hanging cradle
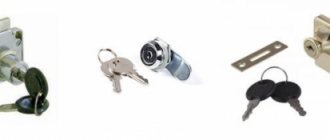
Use a cradle from an old stroller as a box, connect it with belts and hang it on a system of fasteners from the ceiling. If there is no cradle, we will make one from wood. To construct the fastener you will need:
In addition, prepare consumables (wood glue, dowels, corners, screws) and the necessary tools (jigsaw, drill, hammer drill, furniture stapler). Start by creating a drawing of the cradle, write down the size of each part. Cut out the necessary parts using a jigsaw from a plywood board. Start assembling the cradle structure from the bottom, glue the parts together with glue, and strengthen the connections with self-tapping screws. Attach the sides of the cradle. The structure is ready. Cover the inside of the cradle with foam rubber or padding polyester using a furniture stapler or glue. Cut out the future handles from the belt tape, measure the length of the handles from the ceiling to the required height of the cradle. Cover the ribbon with fabric prepared for decorating the cradle. Attach the handles to the bottom of the cradle with a furniture stapler. Use a hammer drill to make a hole in the ceiling, install fasteners from anchors, carabiners and angles. Secure the spring, inside which pass the safety cable. Hang the cradle on the spring. All that remains is to decorate it with fabric. The hanging cradle is ready!
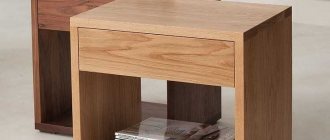
Cradle on legs
Let's consider the construction of a cradle with a fixed frame and a swinging cradle. Before starting work, prepare the necessary material (wooden boards and slats, screws and self-tapping screws, wood glue, varnish and paint) and tools (a jigsaw, drill, milling and grinding machine). Start by drawing a drawing with dimensions. Transfer the sketches to cardboard and cut out the templates. Using templates and a jigsaw, cut blanks for the future cradle from wooden boards. Carefully process each part with a sander; knots and hooks on the wood are unacceptable. Assemble the cradle structure using wood glue, self-tapping screws and self-tapping screws. At this stage, start decorating the cradle: carved tips, a heart-shaped hole looks cute and tender. Assemble a stationary, stable cradle frame. Fasten the frame and cradle together. Cover the cradle with several layers of varnish and, if desired, paint it with paints.
How to make a cradle for newborns with your own hands
In this article we will tell you how to make a cradle for newborns with your own hands in different ways. These are products made from waste material and wooden boards, ropes and thick fabric. There are options for weaving from wicker, and there are beautiful cradles made of wool rugs. The main condition for creating a crib is naturalness and environmental friendliness when choosing materials, so that the child does not inhale the “aromas” of synthetics or toxic varnishes and glues.
DIY cradles for newborns are made using natural wood or wool or cotton fabric. To fasten wooden parts, use only PVA glue (D3 or D4), and use only acrylic varnishes or paints for surfaces. They are completely odorless and non-toxic; they are widely used to cover children's toys and furniture.
Material options
The material plays a special role in making a crib. Today, store shelves are overflowing with children's furniture made from...
- natural wood;
- Chipboard and MDF;
- metal;
- plastic and synthetic materials.
Furniture made from natural wood is considered the safest from an environmental point of view - this fact has long been scientifically proven. Wood does not have that specific smell that artificial materials have. She is able to create a favorable, warm and cozy atmosphere for the baby, which has a positive effect on his health. It is worth noting that natural wood will always look expensive and solid. Products made from this material will fit perfectly into any interior.
MDF is a board made from fine wood chips pressed under high pressure. From the point of view of environmental characteristics, it is close to those of natural wood. Furniture made from MDF is considered safe for children's health.
In the production of chipboards, formaldehyde resins are used, so during operation they can emit substances harmful to health. But for many, the deciding factor is price. Chipboard models have the lowest cost.
Products made of plastic and synthetics can be bright, very beautiful and stylish. But are they good for the child? Young parents often do not realize that toxic substances are used in the production of these materials. Therefore, it is important to remember that during operation, harmful components will be released and harm the baby’s health.
Barrel version
A rocking crib for a baby made from a barrel will look very impressive. This DIY cradle for newborns is made up of two main parts. This is the barrel itself, from which a large piece has been cut off, and a wooden stand made of two strong legs and a lintel.
The barrel is attached to the side legs with dowels and mini-fixes made of hard wood. You can screw it on with bolts, securing it with nuts on both sides, adding a lock nut or a lock nut to make the structure reliable.
The remaining parts can be screwed on with screws or, if you have carpentry skills, tied onto tenons. You already understand how to make a cradle for a newborn with your own hands; all that remains is to cover everything with a layer of varnish and line it with fabric from the inside. It is advisable to attach a quilt to prevent the child from hitting the hard walls of the barrel. Don't forget to thoroughly clean the edges of the metal hoops so that they don't tear the fabric and harm your baby.
Cradle-boat
Therefore, if you are a carpenter, then you will definitely like the idea of creating such a spectacular cradle boat, as it looks quite original. It is not difficult to make stands for the cradle; these are ordinary legs with a jumper, the upper part of which is slightly raised and rounded. But it’s difficult to make the curved edges of the boat itself. You must have a steam generator and a chamber to steam the board and bend it according to the template of the required size. After cooling, the board remains curved.
Such a cradle is attached to cotton ropes threaded through holes drilled in the boards. To make it more similar to a real boat, small blocks were used, but they serve only a decorative function, since the cradle can neither lower nor rise.
Transferring the drawing to a furniture board
Using the drawing of a rocking chair with a cradle, we proceed to transfer the drawing to the furniture board. In the drawing, all dimensions are indicated in centimeters.
In order to outline the arc, we will use a homemade compass - a wooden plank 1250 mm long. A hole is drilled at one end of the wooden strip to accommodate a pencil. We simply rest the second end of the plank against the wall. This way we can easily draw any large circle.
Equipped with a jigsaw, we cut out all the parts of the rocking chair with the cradle. All parts must subsequently be sanded to remove burrs.
We secure the bottom and sides of the cradle using metal corners and pins.
We connect all other walls using pins and wood glue (you can use PVA glue). Be sure to let the glue dry under pressure.
If you want the cradle to be collapsible, then to connect the sidewalls, instead of glue, it is advisable to use confirmats, having previously drilled the holes with a special drill.
Cradle made of slats
For those who like to make wooden structures, there is another option for an original baby crib. It consists of two semicircular planks, for which several boards were first glued together, and then they were cut out from the resulting shields according to a pattern. The next step will be to connect them to each other with a number of identical slats, screwed on with screws on both sides. The bottom of the crib is made flat.
For beauty, stars were cut out on the sides with a jigsaw. All slats must be thoroughly cleaned so that the crib is smooth and safe for the baby.
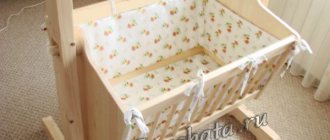
Carrycot for newborns
It’s easy to make a crib like the one in the photo below with your own hands. The wooden part of the structure is represented by two identical frames, which are connected at the central side points with bolts. They are held in an upright position by metal folding drawers, screwed to the top of the structure.
If you want to attach a canopy, you will also have to make a corner from slats with a central round stick for putting on the fabric. This design easily folds in half and can be taken with you outdoors or to the country. The cradle itself is made of thick fabric; satin or linen are suitable. A children's mattress is placed on the bottom.
Decoration
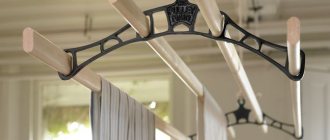
Canopy
Many people think that a canopy is not a very practical thing, because it accumulates too much dust and needs to be washed constantly. However, in the absence of this element, all this dust settles on the bed, and the child breathes it. In addition, the canopy can protect the baby’s light sleep from sunlight and annoying insects. This says it all: such a cape is necessary in a nursery. Natural fabrics are usually used as it:
- muslin;
- silk veil;
- cotton veil;
- silk organza;
- chiffon.
Like the crib, the canopy can also be made with your own hands. To do this, use our step-by-step instructions with photographs.
Bed dress
To sew a pillowcase, sheet and duvet cover, it is best to use natural, breathable and at the same time beautiful fabrics. The following are perfect: flannel, calico, satin, poplin.
Mattress cover
To protect your mattress from moisture, you usually use a waterproof mattress protector. Moreover, it is not difficult to do it yourself. To do this, a structure is made consisting of oilcloth (inner part) and knitted, flannel or calico fabric (outer part). To prevent the mattress cover from slipping, an elastic band is sewn around the perimeter of the product.
Blanket
Choosing the appropriate size, color of fabric and type of filling is an undoubted advantage of any hand-sewn baby blanket. An interesting option is a patchwork quilt. Unusual designs and textures will delight the baby and attract his attention. Sewing it yourself will not take much time. For production, flaps of any shape and color are suitable.
Macrame cradle
Many women are fond of weaving cords, so it is not surprising that the cradle for a newborn baby was made using the macrame technique. For this work you will need natural, durable cotton rope. The main threads are attached to selected hoops made of wire.
When the required height of the crib is reached, attach the lower hoop and weave a tightly mesh for the bottom. When the product is ready, insert the cut piece of plywood. Be sure to clean the edges with sandpaper; it is best to cover it with acrylic paint. Lastly, work on the bottom decorative fringe and make strong ropes to attach the crib to a hook on the ceiling.
Tool
Despite the fact that the children's bed has a simple design and can be assembled by anyone, it is still necessary to prepare. Before starting work, prepare:
- roulette;
- drill;
- circular saw;
- Kreg Jig set (a special device for drilling holes at an angle);
- adjustable measuring angle;
- wood glue;
- screws 30, 50, 60 mm;
- water-based varnish;
- stain;
- brush;
- sandpaper;
- wood putty.
Cocoon cradle for newborns
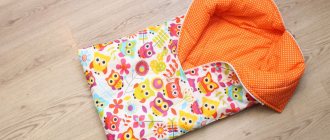
It’s easy to sew a comfortable portable cradle with your own hands, which is popularly called a cocoon, since it seems to hug the baby from all sides. You can take it with you on the road, on vacation in nature, or put it on the bed next to your mother.
Despite all the apparent complexity, sewing such a cradle is not at all difficult. You will need thick cotton fabric of one or two colors, a zipper, tape for tightening the corners of the cocoon, padding polyester, foam rubber and batting. If you have a sewing machine and very basic sewing skills, then feel free to start sewing such a cocoon, you will definitely succeed.
How I developed a crib rocker
This article is about how I developed a crib rocker with a pendulum mechanism. If you are interested, welcome to cat. This story began more than three years ago, when my wife and I were preparing for the birth of our son. Among other things, I became concerned about buying a crib and began to research the market on this topic. It turned out that the following types of cribs are currently sold:
- Just a crib, standing up. The legs are usually equipped with wheels.
- Rocking bed with an arched runner.
- A crib with a pendulum swing mechanism.
Pendulum mechanisms can be longitudinal (the crib swings along the long side, as in the title picture), transverse (the crib swings along the short side) or universal.
In the latter case, the same crib can be assembled either way. There are also cradles - a small cradle that is convenient to place next to you when you are doing something and the baby is awake.
There are also playpen beds, Chinese ones. There are also transformable beds, with a chest of drawers and a changing table attached to them at the end, and there are also options with a pendulum. And there are many more exotic things.
But I was in the mood for a traditional crib, standard sizes, made of birch or beech, with a pendulum swing mechanism. Well, as a “progressive person with advanced views,” I immediately thought that I couldn’t rock this crib with my hands. Surely, I thought, swing mechanisms have been invented a long time ago, you just need to go to the store and buy them.
However, to my surprise, I discovered that there was no ready-made device for sale. But there are tips. For example, tie a rope with one end to your leg and the other to the bed, and, swinging your leg, rock the bed. You can even sit at the computer. Or you can tie a string to the CD-ROM table and write a program that will open and close the table at some frequency. You can also use the wiper drive from old Zhiguli cars. To keep it quiet, place it in the next room, and lead a rope from this room to the nursery through a system of holes, pulleys and blocks. There are even more radical tips - don’t download at all. Because, probably, it is harmful and in general in Sparta, for example, children were not pumped, and everyone was happy with everything.
In addition to the advice, several patents were discovered, but no devices based on them are produced. There was one manufacturer that seemed to be, I probably would have even bought their device then. But at that time it was no longer possible - as far as I understood, production, if it existed, they curtailed.
So the idea came to me to develop my own device for rocking the crib.
I analyzed all the patents and other materials found on the Internet that could help me. We also had to disassemble the children's Chinese electric swing to see what was inside.
The requirements for the device gradually emerged:
- Silence. This means there should be no motors, gears, or gearboxes. You can, of course, add sound insulation, but it’s better to do without all this from the beginning.
- Possibility of remote control. And this, in turn, means the device’s ability to rock the crib from a state of rest.
- Easy to install on the crib. And, as a result, the possibility of installation, if not on all, then at least on the majority of commercially available cribs.
Reflecting on the design of the device, I noted several main points for myself.
Firstly, the swing device must adapt to the frequency of the crib’s own vibrations, pushing it at strictly defined, necessary moments in time, just like a person standing on the ground rocks a swing. In addition, the connection between the crib and the drive should not be rigid; it must be done so that the swinging crib can be stopped by hand at any time without damaging the drive and the hand. The crib should swing itself, and the drive will only compensate for the energy dissipated as a result of friction. This in turn will determine the low power consumed by the device. Remember when “tabletop perpetual motion machines” were popular at one time? There is a coil in the stand, and a magnet in the swinging part. It is enough to pump the “engine”, and it will swing until its batteries run out.
The principle of operation of the device is simple - a magnet, flying over a coil, induces an EMF in it, which changes sign at the moment when the magnet begins to move away from the coil. It was on this same principle that I decided to create my own device. An important point is that I decided to use the same drive coil as a sensor (and not, for example, another coil, an optocoupler or a Hall sensor). In other words, the microcontroller (and the design is assembled, of course, on it) first “listens” to the EMF in the coil, and then at the right time connects the same coil to the power source.
Going from an idea to a finished device, I had to solve many issues. ATtiny24 was suitable as a microcontroller. The magnet chosen was neodymium, in the form of a washer, with a diameter of 15 mm and a thickness of 8 mm. The coil is a separate story - its parameters had to be carefully selected, using both some theory and several prototype coils with different sizes, wire diameters and number of turns. Core geometry and materials also varied. Of course, I wanted to make the magnetic system as closed as possible; ideally, the magnet should move with minimal gaps between the poles of the core. In this case, the highest efficiency of the device would be achieved (and therefore the minimum amount of copper in the winding). However, for the sake of simplicity of design, high efficiency had to be sacrificed. One of the coil options (not final) is shown in the photograph.
In order for the swing mechanism to move the crib, a certain displacement of the coil relative to the magnet in the equilibrium position was provided.
The remote control was performed using a ready-made Chinese remote control with four buttons (start, stop, more, less) and a receiver for it. The following remote control is currently used:
The program for the microcontroller provided six swing speeds (essentially, the length of the pushing pulse changes). For the sixth speed, the algorithm is somewhat more complicated - it uses a series of short pulses with checking the polarity of the induced EMF in pauses between them. This allows you to achieve maximum swing energy.
Over the course of these three years, the program is improved as new ideas arise. For example, an algorithm for dynamically changing the length of pulses depending on the period of rocking the crib was tested (and is now used). An algorithm was also created for a smooth increase and smooth decrease of the current in the drive coil, which determines the complete, absolute silence of the device. Without this improvement, the device still produced some sound during operation, similar to the ticking of a clock. There is also the idea of creating a PI controller with feedback on the swing amplitude, but the problem of determining this amplitude using the existing “sensor” has not yet been solved.
A ready-made Gainta case was chosen as the body of the device; after some time it acquired a beautiful laser-engraved picture.
Power supply - ready, 12 V, 2 A.
A few more photos of the device:
Custom fasteners are laser cut and powder coated.
And video:
We used our rocking device for about a year, my wife was very pleased. And then the child refused to rock to sleep in the crib, and the device turned out to be irrelevant for us.
And then it turned out that such devices can be sold. But that is another story.
If you like this article, I can tell you: - about how I received a patent for a utility model, and how it turned out to be practically useless in a real-life case of violation of my patent rights; — about how I began to mass-produce and sell swinging devices, but have not yet become rich; — about how the device has a new control panel with a screen from the Nokia 1202, as well as additional functions.
Pattern-drawing of a cocoon
The figure below in the article clearly shows all the necessary dimensions for sewing a fabric cocoon for a child. Using this pattern, two identical parts are cut out of fabric. On the wrong side they are sewn along the edges, leaving only the flat lower part unsewn. The soft bottom of the cocoon will subsequently be inserted through this hole. This pocket will be closed with a snake, which needs to be sewn onto its edges.
Next, you need to roll up a “sausage” from padding polyester and insert it along the entire perimeter of the cradle, pressing it tightly against the side seam. Then only on the front side a seam is made along the line marked in blue chalk. All that remains is to cut the foam bottom to the required size, cover it with a layer of thin batting both above and below, and then insert it into the pocket reserved for this purpose in the center of the cocoon and fasten it with a zipper. A wide satin ribbon is sewn onto the edges of the thickened sides to tie a beautiful bow. This closes the cocoon from below.
The article presents several interesting examples of making cradles for newborn babies. Choose the manufacturing method you like and do the work yourself. Good luck!
Source
DIY cradle for a newborn: drawings with photos
A cradle is a small bed for a baby that is suspended in the air. This is one of the oldest and, unfortunately, most dangerous cribs for babies. If you do not follow the correct technology and use low-quality materials, the cradle may simply break off along with the baby. In this article we will tell you how to make a cradle for a newborn with your own hands, only it will stand on the floor for safety.
Sketches and drawings
If you decide to make a bed with your own hands, then it is advisable to draw a sketch yourself, make a drawing or diagram, which will depict the future “nest” for your child. In such a drawing, all dimensions must be accurately maintained, down to every millimeter. The strength and reliability of the structure will depend on this.
A drawing or sketch of the future design will greatly facilitate the entire process of manufacturing parts and subsequent assembly. Exceptions include bed houses. These are quite complex projects to make yourself. As a work plan, it is better to take a sketch made by a professional designer:
Manufacturing and assembling elements of a crib is a complex process. It requires special attention and great responsibility. Even a minor error in work can lead to dire consequences: the bed can break and injure the child.
Let's go to the lesson
You can see the process of making a cradle in the example of a master class. We took the diagram from the last drawing and simplified it a little.
We cut out the headboard and legs, then cover them with colorless transparent acrylic varnish.
Next we make the sides.
You can buy these round sticks at the store, then you will need to sand them and glue them to two strips.
Making the bottom of the cradle. As you can see, we make it not from one thick board, but from slats.
We drill holes and begin to assemble the crib.
This is what should happen at this stage.
Cut out the legs in the shape of the letter "L".
Cut out the swing mechanism.
At night, you can clamp the discs with clamps so that they stick better.
We present a photo of the cradle that we got, from different angles.
We sew the sides and mattress cover.
Required components
Before starting work, you need to stock up on materials. Buy:
- Edged boards.
- Bars, the cross-sectional size of which must be no less than 50x50 mm (needed to make the main frames of the structure).
- Slats with a cross-sectional size of 20x20 mm (will be used for filling, for example, making logs).
- Self-tapping screws and bolts.
It is worth going to large stores that have building materials in their assortment. Here it immediately becomes clear that the wood offered comes in different qualities. You need to choose straight boards with the fewest knots. This will greatly simplify and speed up the process of grinding all elements.
Important! Whatever the bed is made (the most ordinary, classic or made for a specific theme), you need to remember the rule - the bars and slats must be made of especially durable wood . The quality and further service life of the product depend on this.
Sweet nest
The process of creating a nest for a cradle with your own hands can be followed using the example of a master class. For this we will need cotton fabric measuring 80*100 cm, you can take two pieces of one or more colors, openwork lace and satin ribbon about three meters, holofiber or padding polyester.
First, we make a pattern. It is perfect for kids. It can also be downloaded from the link below.
Then we baste two pieces of fabric and lace. The front side should face inward. We begin to stitch and overcast the fabric. You need to make very neat seams for beautiful edges. Next, turn the nest inside out and steam the edges.
Stepping back two cm from the edge, sew the seam. We'll need it a little later.
We cut out and round the edges a holofiber measuring 70*35 or use padding polyester. Now we fill the nest with it and make a couple of horizontal seams. Also, don’t forget to stitch the side of the cocoon.
Then we stretch the satin ribbon. To make this job easier, use a pin.
We stuff the sides and hand stitch the open edges.
We tie a bow with a satin ribbon. The wider you take the ribbon, the larger the bow you will get.
Also, do not forget that when there are large edges left, there is no need to trim them. Thanks to them, you can adjust the length of the nest.
We sewed this cute nest for a newborn ourselves. As you can see, there was nothing complicated in the sewing process. The result is simply impressive! And the edges of the nest can be crocheted.