As they say, a bathroom wall is not covered with tiles alone. And the technology of laying tiles itself requires certain skills and knowledge. Even a master will lay it for several days, what can we say about an ordinary home craftsman. Until recently, there was no complete replacement of tiles and there are several reasons for this, the main one being high humidity, which is poorly tolerated by many materials.
Currently, there are several groups of products that can not only compete with tiles, but even imitate their texture. These are moisture-resistant wall panels designed to look like tiles; we’ll tell you everything in this article.
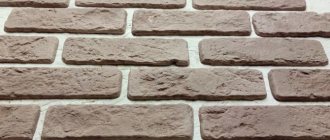
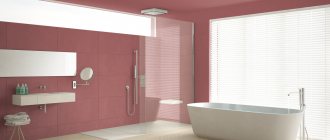
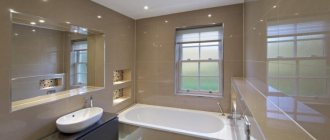
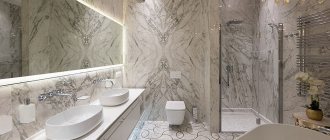
Plastic under the tiles is almost indistinguishable from the original
Tips for choosing panels
Choosing panels for the bathroom is an important step in finishing. The following recommendations will help you choose the right and high-quality panels:
- Check the panels for strength. The quality of the panels depends on the material from which they are made. There are cheap, soft, not durable panels. These won't last long. And there are rigid PVC panels, they are more expensive, but are perfect for the bathroom;
- Take a closer look to see if the patterns and designs on the panels match. It will be problematic to do this in a store, so you need to take the receipt, and when you get home, lay the panels on the floor and see if the pattern on the panels matches. It should move smoothly from panel to panel;
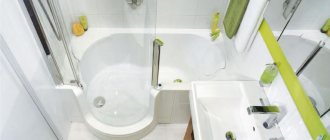
- The slats should fit tightly to each other. Some manufacturers leave gaps between panels of different widths. This type of defect is especially noticeable with spot lighting in the bathroom and looks very unaesthetic. In this photo of the panels in the bathroom you can see that all the slats fit tightly to each other;
- Check the thickness of the panels; it should be the same over the entire surface. The defect becomes noticeable if you connect the panels, but on the wall in the bathroom it looks simply terrible;
Make sure the lamellas are flexible. Panels made from recycled materials will crack during installation. Such material is much cheaper, but the high cost of the panels does not indicate their high quality.
How to calculate quantity
An important step when purchasing PVC panels is the correct calculation of the required amount of material. Correct measurements and calculations will allow you to avoid an additional trip to the store. It is not always possible to purchase a panel in your exact color scheme in the store.
Panels can be of different widths and heights. The width of the PVC panel varies from 10 to 30 centimeters. The standard width is 25 centimeters, that is, you need to buy 4 panels per linear meter of wall. With a panel width of 10 centimeters, there can be a lot of waste. The height of the panel is also chosen depending on the height of the bathroom.
If during installation it is necessary to combine the pattern, then add 10-15% to the resulting number of panels to match the pattern.
Panel processing
PVC panels are easy to process. This can be done in various ways:
- A special (assembly) sharp knife. Longitudinal cutting method: using a foot rod, measure the area to be cut. Cut the panel along its entire length, bend the lamella along the cut, and cut completely. Transverse method: measure the cut area, make a cut in the lamella including the jumpers between the sides of the panel. Bend the material and cut the panel completely.
- Grinder with a metal disc.
- Cutting with a hacksaw is time-consuming and difficult; it can be used if there is no other tool at hand.
Caring for polymer tiles
Thanks to the excellent moisture resistance of the material, it is quite easy to care for. The finished surface is easy to clean. Any minor dirt can be removed with a cloth soaked in soapy water.
The main thing when caring for polymer tiles is to carefully handle its “weak points”, that is, the joints of the side edges
To remove dirt stains, you can use cleaning compounds that do not contain abrasive components.
In case of subsequent installation of plumbing accessories - lamps, hooks and heated towel rails in PVC panels, you can always drill mounting holes.
Modern finishing with PVC tiles can transform the interior of a bathroom. The main thing is to show a little imagination when arranging it, approach the issue wisely and use only high-quality materials.
Preparing the walls
The main requirement for the surface on which plastic slats are mounted is that it must be flat.
- To do this, the protrusions on the walls must be knocked down and the recesses sealed with cement mortar.
- The permissible height of irregularities is up to one and a half centimeters.
- Wash the walls from dirt and degrease with a product containing alcohol. It is better not to use gasoline and thinner.
It is recommended to treat the walls with antifungal agents to prevent the growth of harmful bacteria and mold.
Dealing with them later, after the panels are installed, will be much more difficult. To do this, you will have to dismantle the panels, carry out processing, and re-repair the bathtub with panels. Between the wall and the panels is the most favorable place for the growth of fungal bacteria.
Panel calculation and configuration
When starting to finish the bathroom with panels, you need to calculate the required amount of material, you need to take measurements of the baseboards both on the floor and on the ceiling, and corners. Next, decide on what other materials. In addition to plastic slats, you may need them.
When calculating the number of slats, you need to keep in mind that the gap between them should be no more than fifty centimeters. In addition, they will need to be placed at the joints of the ceiling and floor.
The standard set of plastic panels includes:
- A universal corner used for covering the corners of a room;
- Skirting board, which is partially installed under the slats, hiding unevenness;
- External corner, which masks the shortcomings of the external corner;
- The inner corner also hides unevenness;
- The fastening profile allows you to fasten panels without a lock;
- The profile is installed first and last. In some cases it is used instead of a universal corner;
- The profile, in the form of the letter “F”, is used as a platband;
- The mounting rail is the main part of the frame;
- The clamp allows you to press the panel to the frame.
Material characteristics
The basis of the tiles in the bathroom is polyvinyl chloride, it increases its technical characteristics:
- Strength.
- Moisture resistance.
- Light weight.
- Hygiene.
- Thermal conductivity. It doesn't stay cold as tiles.
Plastic tiles for the bathroom are sold in almost any hardware store.
Panel installation
Plastic slats are mounted in several ways:
Installation on a wooden frame. After the necessary material has been purchased and the walls are prepared for repair work, it is necessary to mark the wall for the location of the slats.
- The first rail must be installed ten centimeters from the ceiling.
- The second rail is attached near the floor. Dowels are used as fasteners.
- Stretch a rope between the slats, following which you need to install the remaining slats.
- Secure all corners with a stapler, the angle of which should be strictly 90°. Measure the height and width of the wall to adjust the slats to the desired size.
- Place the first panel in the corner and secure it to the frame with a stapler. Next, install all the slats in the same way.
Installation on a metal frame. The principle of installing the frame is similar to installing wooden sheathing, only instead of slats, metal hangers are installed.
- Metal slats are mounted in the hangers, which are attached to the hangers with self-tapping screws.
- The slats are attached using press washers and self-tapping screws.
- Main. Avoid making mistakes during installation of the structure; for this you need to use a plumb line.
- It will be possible to correct errors only after installing all the slats, and this is very troublesome and expensive.
Ceiling panels
Installation of panels on the ceiling in the bathroom can also be done in several ways.
On the rough ceiling. This installation method does not require any preparatory work.
- You just need to saturate the ceiling with an antiseptic. Attach foil or polyethylene film to the ceiling and secure it with a stapler.
- The joints can be taped with tape. Secure three ceiling plinths, the fourth is mounted after the installation of the slats is completed.
- The panels must fit snugly against each other and are fastened with a stapler. The resulting cracks can be sealed with sealant.
On a metal frame. This method is used most often on uneven ceilings.
- Metal slats are attached to hangers; the distance between them should be no more than sixty centimeters.
- Skirting boards are fastened with liquid nails, slats are mounted using self-tapping screws and press washers.
Ceiling panels can be installed diagonally. In this case, installation begins with the smallest corner panel.
Laying method
Laying of panels can be horizontal or vertical. When laying horizontally, take the width of the wall as the length of the panel.
Horizontal
The horizontal installation method is rarely used when decorating a bathroom. In this case, the seams connecting the panels will be located horizontally, which will contribute to the accumulation of water in them.
If the seams are poorly sealed, moisture can get inside.
If you glue the panels to the wall well and seal all the cracks, you can install the panels horizontally. Work begins at the top of the wall, leveling the first panel horizontally using a building level.
Vertical
When installing panels vertically, water will roll down the wall, which is safer for use.
Typically, a vertical method of installing panels is used to decorate a room. It is more convenient and practical.
