Vadim
10679 0 0
Vadim February 26, 2018
Looking at the built-in furniture, most owners think that self-assembly of such beauty is impossible. However, when the home master receives sensible instructions, he changes his mind. Let us step by step figure out how to make a cabinet in a niche with your own hands, and in order to quickly understand the technology, we will break the whole process into 5 steps.
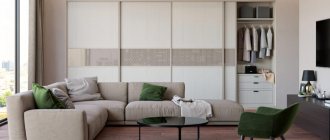
The best solution for an ownerless niche would be to install a built-in wardrobe in it.
Drywall cabinet project
What do you need to plan before purchasing materials and starting to assemble a cabinet with your own hands from drywall? On a piece of paper you can model and estimate what details will be included in the closet: the presence and number of shelves, the location of the rod for hanging outerwear, the dimensions of the departments and other elements of the built-in compartment. Drawing with the dimensions of the built-in plasterboard closet
To draw up a plan, measurements are taken on site. Very rarely, all surfaces are perfect, have the same dimensions, and the corners are exactly right. All these parameters should be taken into account in order to level them out in the future. The drawing can be made schematically, but with dimensions indicated.
Watch the video on how to make a built-in wardrobe from plasterboard with your own hands.
Fastening accessories
Depending on the type of content that will be organized inside the cabinet, the set of accessories will vary. In addition, the shelves can also be made of plasterboard, but the best option would be furniture panels made of chipboard. Today, there are many companies you can contact to cut large slabs of material to specific dimensions.
The following accessories may be required to assemble the interior:
- ball guides for drawer blocks;
- corners for fastening shelves;
- guides for removable baskets;
- rod and flanges for it.
A photo of the finished plasterboard cabinet can be seen in this material. It is worth noting that it is necessary to select fittings strictly according to the dimensions of the cabinet: if the depth of the product is 45 cm, then the guides must also have the appropriate depth.
The shelves can be fixed on special strong corners or fixed on the same metal profiles. To do this, it is necessary to first prepare the basis for them at the stage of assembling the frame. Self-tapping screw plugs can be closed with special plugs that match the internal design.
By making a cabinet from plasterboard with your own hands, you can save a lot. The cost of drywall is low, and metal profiles are also available in price. The most expensive element is the sliding system, but it is considered appropriate in the case of a small room.
Installation of a plasterboard cabinet
Before you start building a cabinet, you must carefully prepare the site for its construction. Clean the walls from old wallpaper and level them, carefully putty all surfaces. It makes more sense to form a screed on the floor, but if the covering is reliable and even, then the frame can be mounted directly on it. Only after the site has been prepared can installation begin.
To do this, the location of the main load-bearing profiles is marked on the walls, floor and ceiling. It should be borne in mind that the larger the cabinet, the smaller the distance between them should be.
The frame for subsequent installation of drywall is assembled by connecting metal profiles.
Be sure to check the correct placement of the lines using a level, plumb line and square. All sections of the cabinet must be of perfectly regular geometric shape.
First, guide profiles are installed on the walls, ceiling and floor. They are connected to each other with self-tapping screws. Then the hangers are attached. Next, vertical rack profiles are mounted, joining them with the guides. The entire structure can be strengthened by inserting a wooden beam of the appropriate size inside the profile.
For the same purpose, a special sealing tape is attached to the places where the load-bearing structures come into contact with the walls. This technique will also protect the cabinet from deformation and its surfaces from cracking. Lastly, the horizontal jumpers are assembled. They will give the frame additional rigidity.
Naturally, your own design may differ, since the arrangement of the frame elements depends on the cabinet model you choose. At the same stage, the wiring that will be required for lighting the cabinet is installed.
How to make a cabinet with your own hands
To ensure proper manufacturing and installation of the cabinet, builders recommend adhering to the following work plan.
Inspection of the planned installation site. Be sure to check the walls, floor and ceiling where the product will be placed. It is important to establish the presence of irregularities, defects, bottlenecks and other factors that may interfere and complicate the work process.
Before starting work, it is necessary to prepare a place for installing the cabinet.
Take measurements of the room. Absolutely nothing will work without dimensions. Remove the main dimensions, check whether the future structure will not interfere with the passage or darken the room, disrupting the flow of natural rays of light from the window. It is important to approach this step correctly.
It is necessary to carefully measure the room.
Multi-family homes, such as single-family homes, may have uneven walls near the floors and ceilings. To correctly calculate the materials needed, measure the length and width at both the base and the ceiling.
Drawing up a drawing. This includes measurements of the basic geometric parameters of the place where the structure will appear, the internal structure of shelves, partitions, canopies for installing clothes rails.
Drawing is necessary to do the job correctly.
Drawing up a cutting diagram for sheets. Saves money without going overboard.
To avoid excess material, it is necessary to draw up a cutting diagram for the sheet.
Purchase and delivery of components. It is important to choose the right profile for the frame, fasteners, screws and dowels. Savings at this stage are unacceptable.
The profile for the frame must be made of high-quality material.
Selection and purchase of cosmetic compositions. The choice of initial and final filling plays an important role. The final result depends on this.
It is important to choose high-quality putty and other materials.
Final work on installing the sheets. All joints are sealed, external and internal corners are processed, holes are drilled for lamps and other decorative structural elements.
After installing the sheets, final work is carried out.
Surface painting. The final result—the visual perception of the structure—depends on the correct execution of this stage.
How your cabinet will ultimately look depends on the right paint.
Installation of sliding doors. An equally important step towards realizing the idea.
An important step is installing the doors.
By following the step-by-step instructions for making a cabinet from plasterboard with your own hands, installing it yourself is not difficult.
Beautiful models in interior design
The question may arise about the meaning of all these manipulations, because drywall is not traditionally perceived as a good and durable construction material. This opinion is fundamentally wrong, since in fact it is quite possible to make from it not just durable and reliable, but also very attractive furniture.
Many models of beautiful plasterboard cabinets are equipped with LED spotlights, and hidden strips with the same LEDs are used unreasonably little, although they allow you to create very pleasant aesthetic effects. Designers recommend choosing multi-colored ribbons. Thus, the result will become even more interesting. Please note that finishing with tiles will not be possible if at the very beginning (during design) the use of the most durable types of drywall and strong profiles is not provided.
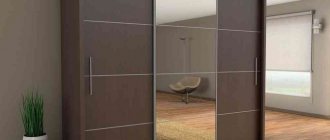
They combine the aesthetic and practical advantages of doors with mirror inserts. They will allow you to play with almost any room design, visually expand it and help you save money on purchasing separate mirrors.
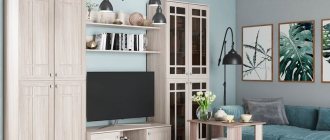
As for the configuration, making a plasterboard cabinet straight or angular is everyone’s personal choice. When you don’t have complete confidence in your abilities, it’s best to use the option with open shelves. Such furniture will allow you to store dishes and other utensils, bulk substances and all kinds of powders, jars and bags that are so common in modern life. In many cases, an interesting solution is to cover the surface with a film that imitates the look of natural wood and even its texture: it is inexpensive and elegant at the same time.
As we can see, building a cabinet based on gypsum plasterboard is quite simple; this will allow you to save money, and not be limited to ready-made store solutions, and get a completely convenient piece of furniture. If you still doubt the aesthetic merits of such a choice, know that it is drywall that is used by leading designers in Russia and the world.
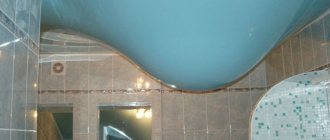
The following video shows how to make plasterboard shelves in the bathroom.
Putty and primer
There are putty compositions for starting and finishing gypsum board coatings. The building materials market offers dry mixtures and ready-made putty. The advantage of dry compounds is that you have the opportunity to always prepare the amount of putty required at this stage of work. The powder must be diluted with warm water and mixed thoroughly.
You will use the starting mixture to cover the drywall joints, seal the screw heads and secure the protective corners on the outer and inner sides of the frame cladding.
Once the starter coat is dry, apply primer to the entire cardboard using a brush. The mixture is sold in glass or plastic containers. The product will strengthen the paper base and the surface layer of gypsum.
Using a spatula, treat all surfaces of the gypsum board with the finishing compound. This coating is also applied with a spray gun, which forms a high-quality smooth surface of the cardboard.
Materials and tools
Wood and lining
Wood is a traditional material used in making furniture. Noble in appearance, durable and reliable... Ideal? Not at all.
Wood is sensitive to changes in humidity. If the wardrobe is installed in a niche (and this is very widespread), then when the doors are opened, a difference in humidity levels appears, which has an extremely negative effect on the wood. If it was decided to make a cabinet from wood, then the material must undergo careful processing.
The lining does not require special processing, but the door frames must still be made of wood. At the same time, the wood for them requires very careful preparation and is still sensitive to changes in humidity.
Drywall
Easy to work with, but extremely fragile material. The difficulty in making a wardrobe from plasterboard lies in the need to install a metal support structure: this is labor-intensive work, the result of which does not always live up to expectations. It is impossible to use drywall by itself as a load-bearing structure. It is impossible to say unequivocally that gypsum board is definitely a losing option for use as a material for a wardrobe, but its use is advisable only in certain cases.
Laminate, MDF, fiberboard
For the manufacture of sliding wardrobes, these materials are considered the best for a number of reasons. Firstly, they have the beneficial properties of wood, are durable and strong. Secondly, they are insensitive to changes in humidity, unlike wood
Plywood and particleboard
Products made from plywood and chipboard (chipboard) should also be highlighted. The main difference between chipboard and fibreboard (fibreboard) is the structure of the fiber itself. The advantage of chipboard is its affordable price, but at the same time this material does not hold fasteners – screws and nails – well and is environmentally unsafe.
You can assemble a straight cabinet wardrobe from scrap materials - this minimizes costs - but to achieve the best quality, it is better to spend money on good materials. It is also not a good idea to make cabinet elements from old waste materials. After this, you need to purchase components for the doors: guides, vertical posts that act as handles, a set of wheel rollers and door latches.
DIY wardrobe assembly sequence
The metal profile is easy to bend and shape.
First you need to decide what the future wardrobe will look like and draw its diagram. The depth of the cabinet should be at least 60 cm; you can show your imagination when arranging shelves and adjust the compartment exactly to the size of the room. Determine these dimensions and transfer them to the drawing exactly to the nearest centimeter. The next step is to purchase materials. They are quite simple and inexpensive, they can be found on any construction market.
So, you need to have:
- plasterboard sheets;
- GKL;
- fastening accessories for furniture;
- metal profiles UD and CD and all associated fasteners and accessories;
- protective corners made of plastic or metal;
- sliding system and facades to it;
- chipboard sheets;
- putty and mesh for painting;
- wardrobe accessories (clothes rail, sliding mechanisms);
- decorative coatings for drywall;
- lighting system.
To work independently, you will definitely need the following tools:
- perforator (necessary when making holes in concrete or brick, since such a cabinet is always built-in);
- a drill does a similar job if the surface is made of wood or drywall);
- hammer (needed for driving dowels);
- dowels and screws;
- glue;
- tape measure, level and a simple pencil (needed for notes);
- wood hacksaw (if necessary, you need to manually adjust the parts to the desired size).
Frame assembly
When the materials have been purchased, you can proceed to assembling the frame. Wall profiles are installed first, followed by ceiling profiles. If the cabinet has internal lighting, it is worth lighting it in advance. Only after the lighting is brought inside can the installation of the frame begin. Let's take a step-by-step look at the process of assembling the base for a sliding wardrobe.
Base After setting the wall level, it is necessary to secure the ceiling and wall profiles using concrete screws. Installation of horizontal elements In those places where shelves and other important load elements will be attached, it is recommended to install horizontal profiles. To do this, long elements are cut into the necessary pieces using metal scissors. The profiles are attached to each other using “crab” type connectors. Seal When attaching the profile to the wall, and on the other side to the profile, it is worth putting a rubber seal. It will prevent the filling from loosening. Racks When the wall frame is ready, move on to the protruding elements - façade racks
It is important to fasten it to the building level so that the finished furniture does not have differences in height.
The frame must be fastened to the wall and floor every 30 cm, while the dowel can be screwed into the concrete through the profile. This will provide additional structural strength.
Guides
The metal profile is easy to cut into the required parts. Sealing tape is used for the frame. Finished frame
What tools will you need?
It doesn’t matter whether you have a cabinet built into a niche or a free-standing one. The tools needed are approximately the same.
The standard set usually consists of:
- tape measures and rulers;
- level;
- plumb line;
- drills;
- screwdriver;
- screwdriver;
- hammer drill (not always needed);
- hammer;
- plane;
- marker;
- construction knife;
- metal scissors;
- electric jigsaw;
- hacksaws for metal;
- brushes;
- spatulas.
There are some unusual instruments here.
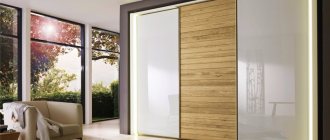
Sliding compartment doors
For the closet doors I chose the ARISTO sliding system. According to the dimensions of the niche, they cut me an ARISTO profile of the required sizes for doors and guides. Everything is very easy and simple to assemble according to the instructions. On You Tube you can find videos with an overview of the assembly of sliding doors.
Sliding sliding doors of the ARISTO system
The “ARISTO” coupe sliding door system is a profile for 2 doors measuring 2000 mm × 800 mm, a set of guides, stoppers, seals and other components I purchased from official distributors in the city of Krasnodar.
It must be said that the cost of ARISTO components is really overpriced. For example, in the Castorama building materials hypermarket, such doors would cost me almost half as much. But, unfortunately, I found out about this when the niche was already ready. Castorama sells compartment doors of certain sizes. And if I had known about this, I would have designed the dimensions of the niche in advance to fit the dimensions of such a system. But what's done is done.
Sheathing with plasterboard
The technology for covering the frame of a wardrobe with plasterboard with your own hands is quite simple to perform - it is identical to the process of covering walls and ceilings. To work, you will need 25 mm long metal screws. It is recommended to screw them in at a distance of 20 cm from each other. If there are doubts about strength, this distance can be reduced.
Pay attention to some tips for covering a frame with sheets of plasterboard:
- the screw head must be recessed into the surface of the sheets;
- It is recommended to install the sheets on the outside of the cabinet; if you do this on both sides, the internal space will be significantly reduced;
- the most common type of plasterboard with a thickness of 12.5 mm, it is also used for cabinets;
- before cutting the sheet, mark a cutting line with a ruler and a pencil, then draw along it 2 times with a sharp knife - then lift and bend the segment, it will break into pieces on its own;
- The remaining paper on the drywall should not be torn off by hand - it is better to do this with a knife;
- uneven edges after trimming can be processed with a plane.
Experienced craftsmen advise attaching drywall in the center of the vertical profile so that in the future, when finishing, the joints are not so noticeable.
Drywall should be cut carefully. Fastening plasterboard boards When covering the frame with plasterboard, you need to ensure the reliability and strength of the fastening
Surface preparation and marking
The first thing you need to do is decide what the finished structure will look like. To do this, you can use various computer programs if you have the skill to work with them. You can also manually draw a sketch of the cabinet on an A4 sheet, observing the required scale.
When thinking about the design of the product, pay attention to the internal space: the most optimal depth will be 60 cm. The height of the product will depend on the height of the ceilings, and the width will depend on the allowable free space near the wall. Having decided on the sketch, you should move on to marking the wall for the plasterboard wardrobe:
- the selected location must be carefully measured;
- after this, a drawing is made indicating the required amount of drywall;
- the wall must be perfectly clean: if there was previously an old coating on it, it must be removed by any available method and sanded;
- the floor surface must also be prepared for the installation of a new cabinet;
- When the preparatory procedures are completed, it is necessary to draw the cabinet on the wall and floor. To do this, it is better to use a ruler, a square and a building level.
After this, you can go to the hardware store for materials. Decide in advance on the frame - what it will be made of. Most craftsmen advise working only with a metal frame - it is less susceptible to temperature changes and is reliable.
The surface must be level. Marking
Types of plasterboard sheets
Each room requires its own cabinets - a bedroom, kitchen or bathroom have their own “microclimate” characteristics, which must be taken into account when creating or purchasing furniture.
Table 1. Types of plasterboard sheets
Type Description
Ordinary
When making a cabinet for rooms with a stable microclimate (such rooms include bedrooms, living rooms or corridors), it is recommended to buy classic gray plasterboard sheets
They do not deform under the influence of the environment and will retain their proper appearance for a long time.
Moisture resistant
When installing a cabinet for rooms with high air humidity (namely, exceeding 70%), you should pay attention to moisture-resistant plasterboard sheets, which were mentioned in the chapter on advantages
Fire resistant
In rooms where the risk of fire of furniture is increased (in particular in the kitchen), experts recommend choosing fire-resistant plasterboard sheets for cabinets (they are marked with a special red marking during production)
Interior placement options
Due to the versatility of the building material, a plasterboard structure can be placed almost anywhere in an apartment or house, from the hallway to the balcony. From plasterboard sheets you can make a corner, linear, wardrobe with sliding doors. It all depends on the tasks that this furniture will solve. The easiest cabinet to build is one with open shelves. However, it is not as practical as the same furniture with doors, which will need to be ordered separately (after all, using drywall in this case is not recommended).
A linear cabinet with shelves is a classic solution that is suitable for almost any room, especially for a living room or hall. If you need storage space, but the space is too small, then you can build a corner closet that will be conveniently located in the hallway or bedroom. A sliding wardrobe will become a lifesaver for people who need to store a lot of things, but have practically no free space. The coupe can take its rightful place in the living room, hallway, bedroom. Well, if there are niches in an apartment or house, then it would be a sin not to take advantage of this and not equip a built-in closet with lighting.
In some cases, thanks to this solution, even separate rooms appear - dressing rooms. A very practical solution would be to install a built-in wardrobe on the balcony.
An ensemble of kitchen furniture made from moisture-resistant plasterboard can be a very economical solution. Moreover, the cabinets can be assembled both upper and lower. True, kitchen cabinets made of gypsum plasterboard, despite the moisture resistance of the material (only green plasterboard), require additional protection from water. Therefore, at the finishing stage, such cabinets are covered with tiles or mosaics, and a special countertop is laid.
A lot of little things have to be stored in the bathroom and toilet. For these purposes, you can also build cabinets from plasterboard that is resistant to high humidity levels. It is also advisable to protect the surface of such structures with an external coating of tiles, mosaics, and wall panels.
Making a cabinet out of plasterboard with your own hands is quite possible. Such furniture will be an exclusive design solution that will significantly save your budget. The problem of storing numerous things will be solved. Built-in furniture will fit perfectly into the decor of different rooms.
You will learn more about how to make a cabinet from plasterboard in the following video.
Advantages over cabinet furniture
Many people are accustomed to buying cabinets and shelves in a store, but why not make them yourself. Today we will describe the process of manufacturing a sliding wardrobe, the main material for which will be plasterboard, which means you will solve problems such as production difficulties, high cost of materials, fragility, and small capacity. You can configure all these parameters yourself.
So, if you have at least a little experience working with drywall, then you will probably be able to easily complete all the work on its production; you will be able to independently choose the required shape, size, and location. You yourself will vary the amount of money you can spend on it. But if you don't have experience, you can start with simpler projects and then move on to building a cabinet.
If you have never worked with drywall before, we recommend that you familiarize yourself with it when making niches, as they will be useful in any apartment or house. Use standard drywall and profiles, but if it will be placed where there are high levels of humidity and large temperature changes, it is recommended to use moisture-resistant drywall. A wardrobe made from it can be easily placed in a dressing room (if you have one) or in a bathroom, and you can hang towels and bathrobes there.
By correctly following all the steps that we describe in this step-by-step instructions, you will provide yourself with an inexpensive, reliable and stylish place to store things, and if you want to completely rid yourself of the problems with the inconvenience of organizing things and searching for them at night or in the morning in a dark closet, Then we recommend adding lighting to the product. In this case, it is better not to use spotlights, since they are difficult for beginners to install, and even more so in the closet, since there is not enough space for them and for the wiring that powers them. It’s better to get an LED strip that can be easily attached to almost any surface, since it has a sticky layer on the back. And for the power supply you only need to connect a few contacts.
Design features of the built-in wardrobe
Before directly considering the possible locations of the built-in compartment, it is worth paying attention to the differences between the built-in and separate wardrobe. They may include both the installation method and design features.
A built-in wardrobe is always designed and manufactured for a specific part of the room. At the same time, parts of the interior often act as structural components of furniture, so it is almost impossible to move such a cabinet to another place. A simple cabinet does not have these features.
There are several ways to integrate a wardrobe into the design of a room, depending on its configuration:
- Installation in a niche is the most economical option and requires the least effort. The existing niche in the room is an almost ready-made wardrobe, which only needs to be equipped with shelves, fittings and doors. At the same time, the top cover, bottom, side and back walls are already in stock. This model will look good in a bedroom or hallway that has technological niches in its design.
- The next method is to install a built-in compartment along a blank wall of the room. It is in many ways similar to the first one, only a part of the room the width of a blank wall acts as a niche here. This method is often used in small apartments, when part of the living room needs to be turned into a dressing room, while minimizing the living space. If you properly decorate or finish the doors that make up the front surface, the volume of the room can even be visually expanded.
- Corner wardrobes occupy an intermediate place between built-in and cabinet options. On the one hand, they are designed for the place in which they are going to be installed, and cannot be used in another room without serious processing. On the other hand, they often have the characteristics of their cabinet counterparts - walls, top cover and bottom. Most often, this solution is used when furnishing hallways, as well as in living rooms, where a blank wall adjoins the doorway.
- An original way can be considered turning a small storage room into a wardrobe, which is often found in apartment building projects. It is enough to equip it with a sliding door and properly install the shelves - and the mini-wardrobe is ready. Typically, hallways in apartments equipped with storage rooms are remodeled in this way.
- There are also exotic varieties of built-in wardrobes, most often developed by professional designers. These include radial models, in which the front surface is curved, and models that have inclined planes in the vertical and horizontal projection. Due to the complexity of their design and the need to have special installation skills, it is not advisable to consider the construction of such options in our article.
Photo gallery: types of designs
When choosing a location for such a structure, it is worth considering a number of nuances:
- The compartment located in the hallway is intended for storing outerwear, so at least one corresponding section must be provided. It’s better, of course, to have two - for everyday clothes according to the season, and for clothes of other seasons. Another section should contain shelves for small items - umbrellas, gloves, bags. At the bottom there should be compartments for shoes. All sections should be made closed so as not to expose the contents to public display. In this case, one of the doors should be equipped with a mirror, preferably a full-length one, in order to be able to take a look at yourself before leaving the house.
- The design located in the living room also has its own characteristics. Basically, such cabinets are used to store light clothing, personal items and documents, dishes and household appliances. Therefore, its sections should have a large number of different shelves, as well as fittings that make it easier to store things and access them. Often the central section is made open, and its shelves are intended for installing a TV and other multimedia equipment, visually breaking the cabinet into two halves. At the ends of the side sections, small open shelves are often installed for storing all kinds of small items.
- Underwear and bed linen are usually stored in the bedroom, so you should not design open shelves in the closet. But, of course, it is better to equip the door with a full-length mirror.
- A wardrobe in a nursery should have signs of versatility. On the one hand, clothes will be stored in it, on the other - toys, books, and other personal items. Therefore, it is worth providing open sections. At the same time, it is quite possible that the compartment will take on the function of a furniture wall or will complement it.
Internal filling
The interior contents of the cabinet are quite diverse. According to purpose, the design space is divided into three zones.
- At the top there is a mezzanine or long shelf. This place is suitable for storing large items and things that are used occasionally.
- The lower compartment is traditionally filled with shoe shelves. It is separated from the general volume by a horizontal partition.
- In the center there is a spacious compartment with a barbell or pantograph, a trouser rack, and special devices for hanging ties, scarves, and belts.
- The outermost areas are reserved for shelves, drawers, baskets, and special containers. The first ones are used for storing clothes, bed linen, and towels. Shallow drawers are ideal for hosiery and underwear.
In some cases, it is appropriate to adapt one of the sections for storing a vacuum cleaner, ironing board complete with iron.
TV table
A do-it-yourself plasterboard bedside table for a TV can be easily constructed if you understand what sequence of actions is required to carry out this process.
Option for the design and design of a TV stand
- Measurements.
- Drawing.
- Cutting materials for frames and cladding.
- Frame construction.
- Finishing the blank for the cabinet.
- Finishing drywall with plaster or other desired material.
Measurements
This stage is important for the correct design of the interior item. A plasterboard TV stand needs to be measured based on the size of the equipment itself for which the product is designed. You need to write down the following parameters:
- height of the bedside table legs;
- width and depth of the tabletop;
- length and width of additional niches for a DVD player or tuner.
Each parameter should be measured twice.
Drawing with dimensions and design of a TV stand For measurements you will need:
- Roulette or ruler.
- Pencil or marker.
- A sheet of paper for a drawing.
Drawing
In order for a piece of furniture to be perfect and even, you should responsibly approach the issue of drawing the design on a sheet of paper before making the cabinet. The drawing will help reduce to zero the risk of errors in the process of creating a TV stand from plasterboard. In addition, using a drawing or photo from special programs, you can also think over the design and style of the product. A photo printed from the program or a drawing drawn will help speed up the process of creating a TV stand with your own hands.
Cutting materials
In order for the finished product to turn out professionally, you need to pay special attention to the process of marking and carving the parts of the bedside table. To make everything look perfect, you need to correctly cut the elements for the TV stand
For this you will need:
- Ruler or tape measure.
- A marker that can be used to mark material.
- A drawing on the basis of which the design details will be cut out.
- Cutting tools: drywall knife, metal scissors.
Frame construction
In order for the stand to withstand the weight of the TV, of course, it must be strong and reliable. To do this you need to assemble a frame. It is assembled in several stages:
- First, the required parts are cut from metal profiles. For this purpose, guide profiles and “U” shaped ones are taken.
- Then each element is bent as required by the design of the TV stand.
- When all the parts are ready, you can start connecting the workpieces. This will require fasteners and tools.
- First, the tabletop frame is assembled from metal profiles, to which guide profiles are attached, then the legs are attached to the structure, then, if provided, an additional plasterboard niche is attached.
- All parts are secured using special screws, glue, and cogs.
Frame cladding
When the frame for the TV stand is ready, you can begin lining the structure with plasterboard. To do this you need:
- measure out the required parts;
- cut each of them using special equipment;
- then, using sandpaper or a special jigsaw, smooth out the irregularities on the parts;
- only after this can you begin cladding;
- TV stands should be veneered carefully and carefully.
Helpful advice
If the design of the TV stand involves complex shapes, then you should use one trick.
Then water is poured into the resulting recesses. It is necessary to leave the plasterboard sheet for some time so that the moisture is absorbed and makes the material elastic. Video selection of the design and design of plasterboard TV stands.
In the attic niche
The attic area is usually small, and the shape of the ceiling limits design possibilities. To ensure that a room with a complex configuration does not lose useful space, it is necessary to position the structure correctly and not oversaturate it with decorative elements. Everything should be simple and functional.
Attic decoration Source peredelka.tv
Such a room must be carefully designed. Then you will be able to effectively manage the available space, giving it maximum functionality and integrity.
CASE STUDIES
1. A niche was planned in the corridor for a built-in wardrobe - a compartment, where there was a turned corner with a room height of 3100 mm
.
The customer did not know what to do to make it beautiful and inexpensive. I contacted our company for help in resolving the issue, they suggested the following: the corner part of the space is closed and covered with plasterboard, a partition is lowered from the ceiling, forming a straight and neat opening for the future wardrobe and the installation of compartment doors. As a result, the customer became the owner of a functional wardrobe in the hallway with a complex geometry, a “ problem angle
” and neatly “fitted” into the overall interior of the apartment
Photo 1
.
In Photo 2
we can see a gap between the vestibule and the wall, which does not look very nice, the choice is yours.
| Photo 1 | Photo 2 |
2. The room had a niche 3200 x 550 mm, the customer wanted to install a built-in wardrobe along the entire length, we suggested moving the interior door
10 cm to the side, which
increased
the depth of the niche, and the customer got a large and functional closet. There was room in it for outerwear, a wide mezzanine, many deep and functional drawers, etc., as well as space for an ironing board and vacuum cleaner. And if the initial work of moving the door had not been completed and the finishing work had not been completed, the cabinet would have turned out to be large, but at the same time insufficient.
Sometimes a situation arises when it is necessary to install a wardrobe in a room, but it is not possible to “give up” the entire length of the wall for the construction of a wardrobe. Let's try to plan this area a little differently: we have a corner, and so that the closet does not look like a separate element of the interior, it is better to build an additional wall (from plasterboard, blocks, etc.).
Three completed projects are presented: in Photo 1 and Photo 2
built-in wardrobes look like elements of an “ensemble”, where each item fits together and looks like a single whole.
In photo 3
we see an externally beautiful cabinet, but it looks like a separate element. The choice is yours!
| Photo 1 | Photo 2 | Photo 3 |
HEATING PIPE AND CLOSET WARDROBE
In panel houses, a situation often occurs in which installing a cabinet on the wall is difficult due to the presence of heating pipes passing in this particular place. How to be in this case?
Some people prefer a banal reduction in the length of the cabinet by moving away from the pipes. But is this necessary? By doing so, we not only reduce the usable storage area, but also provide ourselves with an excellent “dust and garbage bin” with an unsightly appearance. We suggest creating an additional wall from plasterboard, as shown in the photo.
WARDROBE LIGHTING
Now a little about the backlight. If you want to make a built-in wardrobe and are planning a place for a ceiling suspension ,
then the following solution is proposed: step back from the wall to the planned depth of the cabinet, in our case 600 mm, and along the entire cabinet make a
U-shaped structure
of plasterboard (min. 200 mm), in which the light bulbs will be installed, and
the wires will be hidden
.
Stretch ceilings are planned
, and want
a closet from floor to ceiling
?
Then, if the cabinet is installed in a niche, first of all, a mounting beam
to secure the compartment door guide, and only then the suspended ceiling will be attached to the beam.
In the case of installing a free-standing cabinet (under the ceiling), just as in the first case, a mounting beam is installed
, the ceiling is attached, and subsequently the guide for the sliding doors is attached through the suspended ceiling to the embedded beam.
If you make a suspended ceiling without an embedded beam
, then
the cabinet
will have to be made with a roof, and it
will be lower
due to the fact that there will be nothing to attach the top rail to.
Come to our office during the renovation stage, and together with you we will draw up a design for your future cabinets.
Mistakes when handling drywall
Even such a simple material as drywall can behave unpredictably if you do not know a few basic rules for handling it. In this chapter we will talk about the main mistakes that both beginners and experienced professionals make and tell you how to avoid them. There are several disadvantages when working with drywall:
- incorrect placement of screws;
- non-compliance with the screw tightening depth;
- ignoring the putty stage;
- improper cutting of drywall;
- non-compliance with indentations;
- use of low-quality or inappropriate profiles;
- incorrect connection of profiles.
Driving the screws too close to the edge
When installing drywall, profiles, sheets of material and self-tapping screws are used to hold these two elements together. If you tighten the screws in the wrong place, the drywall, due to its fragility, runs the risk of starting to crumble, which puts an end to the entire further structure. Correct installation involves placing the screws at a distance of 10-15 millimeters from the edge of the sheet.
An incorrectly screwed self-tapping screw destroys the gypsum board
Incorrect screw depth
If the screw is placed too deep, the cardboard layer may tear, which will further affect the quality of the structure, since the frame will not be rigid enough. The surface location of the screws will primarily affect the time of puttying, since the spatula will cling to the protruding screws.
Deep as well as superficial placement of self-tapping screws harms the structure
The suitable depth for screwing the screws is one millimeter (we are talking about the distance from the sheet to the head of the screw). To make it easier to determine the distance, it is recommended to use special attachments with a limiter, forcing the screwdriver to stop at the right moment, preventing damage to the plasterboard. This attachment can be easily purchased at any building materials store.
Ignoring the putty stage
For many inexperienced craftsmen, the puttying stage raises questions - what is the point of leveling a material that is smooth from the start? However, this meaning is still present. There are three good reasons why masters do not neglect this stage:
- The smoothness of drywall is deceptive. With suitable lighting, it is easy to see that the surface of such a leaf is strewn with microscopic grooves. If you want to paint the drywall right away, the paint will fall on these grooves sloppily, which will be noticeable after it dries;
In the absence of putty, grooves may be visible on drywall - putty allows you to balance the joints between the screw heads and the material, as well as between adjacent gypsum board sheets. You also need to remember that most sheets of drywall are painted green-blue, which will certainly show through when light, thin wallpaper is placed on it. White putty makes it easy to avoid this misunderstanding; If you skip the putty, the screw heads may be visible.
- the absence of putty increases the likelihood of damage to the front layer of drywall when changing wallpaper. This oversight usually manifests itself during repairs. And if the surface layer of plasterboard is really torn off, then the apartment owners will have to change not only the wallpaper itself, but also the plasterboard sheets.
You can skip the puttying step if the material is subsequently hidden by wallpaper (preferably embossed), which will allow you to “retouch” all the imperfections of the raw material.
Incorrect cutting of drywall
Despite the fact that drywall is a very flexible material that can be cut with any saw, there are a number of nuances in cutting it that you need to be aware of. There are special files designed for working with drywall, but after using them, the edges of gypsum boards often remain uneven, which makes them untidy. When making straight cuts, craftsmen periodically turn to an ordinary stationery knife and ruler.
Cutting drywall with a utility knife
Failure to indent
One of the common mistakes when handling plasterboard is mounting it close to the floor. During installation, it is important to leave gaps, which perform two important functions:
- prevent drywall from absorbing moisture. Of course, moisture absorption will occur in any case, but the presence of a gap will reduce it to a minimum;
- After installation, the drywall sheet gradually expands under the influence of the microclimate. If it does not have this opportunity due to its tight fit to the floor, then bumps may begin to form on the material.
An example of bumps on drywall when finishing a ceiling
Full compliance with the rules requires not just leaving a gap, but also gluing a damper tape, which will compensate for the expansion of the gypsum board and, moreover, reduce vibrations of the mechanical profile, which will help increase sound insulation.
Using low-quality profiles
The main drawback when choosing profiles is the purchase of too thin (0.3 millimeters thick) copies. The strength of these elements is much like foil - they can be easily bent by hand if desired.
Such profiles are completely unsuitable for creating walls or installing wardrobes. The optimal strength of profiles that can fix plasterboard sheets starts from 0.6 millimeters. Thinner options are used only for the formation of small boxes that do not involve loads.
The thickness of the profile is of great importance for subsequent installation and determines its success or failure
In addition to the thickness of the profile, it is also necessary to take into account its texture. Basically, there are two types of profiles in stores - smooth and embossed. Embossed profiles are great for beginners who tighten screws using a screwdriver (by fixing the screw in the recess). When working with a smooth profile, the self-tapping screw may slide, which sometimes leads to incorrect tightening, the danger of which we have already discussed earlier.
Incorrect profile connection
This point includes several errors that are observed periodically even by experienced craftsmen. One of these mistakes is connecting two profiles together using a press washer. It is believed that the use of such self-tapping screws allows you to reliably connect the profiles.
Connecting profiles using a cutter
The main problem is the protrusion of the caps of such washers, which does not allow subsequently to correctly apply a sheet of drywall - it simply does not adhere to the profile. Accordingly, despite the strength of the frame, we do not end up with a reliable structure due to the wobbly sheets of drywall. In order to carry out installation correctly, the best solution is to use a cutter.
Filling the built-in closet in the hallway
The built-in wardrobe allows you to store not only outerwear and shoes. For small apartments, such a storage system will be a solution if it is not possible to place cabinet furniture in the room. The modern version of the closet consists of many elements that serve to optimize the things inside: drawers, shelves, baskets, hooks, slats.
Traditionally, a built-in closet has three levels: shoes are located on the bottom, the middle one is for clothes, and infrequently used items are located on the mezzanine. Modern storage systems can deviate from accepted rules and arrange things more functionally. The more efficiently the storage of clothes and shoes is thought out, the more economically the internal space will be used and how convenient its operation will be. The wardrobe can be filled with:
- Shelves. Used to store folded clothes. They come standard and also retractable, giving easy access to far corners. The distance between two shelves should be at least 30 cm.
- Boxes. Used under small items and clothing. May have a roller extension system. Smooth, soft and silent closing of the drawer is ensured by a guide mechanism with a closer.
- Baskets. These can be built-in, roll-out, pull-out versions made of metal, lightweight and durable, ensuring free air circulation inside the cabinet. Plastic wicker baskets with slits for hands look stylish. Such elements carry not only a functional load, but also an aesthetic one. They can be placed on open shelves in groups of several.
- Barbell. This item is designed to be stored on outerwear hangers. They come in various lengths and purposes. They are placed at the owner’s request, for example, for long clothes - in one section, for short ones - in another. In shallow cabinets, the rods can be positioned perpendicular to the doors.
- Pantograph. This device for tall cabinets allows you to lower the bar with hangers to a comfortable height.
The built-in closet can be filled with other elements: hangers for trousers, pull-out shelves for shoes, hooks for bags. It all depends on the wishes of the owners. Additional filling of the cabinet increases the convenience of its use, and also increases the cost and production time.
Properly planning the hallway space for a built-in wardrobe is a rather complex process, possibly requiring the presence of a specialist. The designer will help you decide on the choice of location, style, size, content. Thanks to this, any room will look ergonomic and stylish. Below are photos of a built-in wardrobe in the hallway and photos of various ideas for its design.
Cabinet drawing
The creation of furniture begins with its drawing. A detailed diagram of the installation and arrangement of the wardrobe elements will help to avoid mistakes during its assembly. You need to determine the location of the future structure: in the hallway, bedroom, as well as in other rooms, you need to take into account the distance from the windows to the door, the height of the ceiling.
Form a body from profiles and cardboard. Design the future content and make a list of accessories for this. The sliding door system is created from traditional materials and will be independent of the frame design.
Having determined the dimensions of the built-in wardrobe, transfer them to paper. Draw the position of the shelves and partitions. Calculate the required amount of materials and prepare the tool.
We cover everything with plasterboard
Before starting work on covering a cabinet with plasterboard, you need to learn a few rules:
- screws are attached in increments of 15-20 cm;
- for work you will need phosphate screws 3.5 * 25 mm;
- There should be small gaps of a couple of millimeters between the drywall joints;
- the edges of the sheets need to be chamfered so that the joints can be puttied better;
- Self-tapping screws cannot be screwed into the very corner or from the edge of the sheet; you must always retreat 5 mm.
- The heads of the screws should be recessed into the gypsum board by a few millimeters, but not too deep so as not to tear the core of the sheet.
When cutting sheets to the desired size, they should always be applied to the frame to avoid jambs in the future. Moreover, it must be taken into account that the joints of the sheets must fall exactly in the middle of the profile. It is in the middle, and not on the edge and not hanging in the air.
The front shelves and partitions are sheathed with plasterboard last
It is advisable that the back wall is already covered with plasterboard, as this greatly simplifies the work.
All parts of the frame are sheathed with sheets of plasterboard so that the profiles are not visible.
Preparation for finishing
Externally, the plasterboard cabinet looks complete, because the frame is not visible and it has acquired a normal shape. However, it is not yet suitable for use, because it needs finishing.
The first step is to putty all the screw heads. They are slightly recessed into the plasterboard, so they are easily puttied. If the screw was not screwed in correctly, the spatula will constantly cling to it. This screw needs to be tightened.
Together with the caps, it is necessary to putty the joints of the sheets. To do this, a small chamfer is removed from the edge where the sheets meet. This creates a hollow in which the putty will be laid. This procedure will make all the sheets more seamless and hide the joints. To prevent the seams from coming apart over time due to vibration loads, they need to be reinforced with reinforcing tape.
The places where the chamfer was removed must be treated with a primer so that the putty adheres better and does not peel off.
Serpyanka or perforated paper is placed in the middle of the joint directly on a layer of putty, which is then squeezed out with a spatula and rubbed over the adjacent surface. This maneuver will prevent cracks from appearing.
A drywall cabinet has a lot of corners. Each of these corners is easy to knock off with one awkward movement, so they need to be strengthened. For these purposes, a reinforcing corner is used, which is attached to the putty. It will prevent damage to the corner parts of the structure in the future.
After everything has dried, it will be necessary to prime all surfaces and cover them with a thin layer of putty. The primer is needed to prevent the putty from falling off. The final layer of putty is applied to make the surface smooth and also prepare it for final finishing.
If after puttying there are any bumps left somewhere, they will need to be treated with sandpaper. After this, the plasterboard cabinet will be ready. Usually after this it is painted in the desired color. If you choose wood-look paint, no one will guess that there is drywall at the base.
Metal profile
Galvanized steel profiles for drywall are available in several types. These are UD, CD, CW and UW rolled products intended for the formation of partitions, suspended ceilings and cladding of wall enclosures indoors. Some of them are needed for the installation of supporting elements, while other long lengths are used to make the connecting parts of the frame, ensuring the rigidity of the entire structure.
From the entire assortment, we will select the profiles that you will need to install a wardrobe made of gypsum plasterboard.
UW (MON and PNP)
Guide profiles limit the horizontal framing at the top and bottom of the box. UW slats are fixed to the floor and ceiling using dowels. If, when installed in a niche of a built-in structure, the height is less than the distance from the floor to the ceiling, the upper belt of the box is attached to the walls.
Steel slats are available in the following sizes:
- length – 3 m;
- shelf height – 40 mm;
- base width – 50, 65, 75 and 100 mm.
For the cabinet, we select long-length profiles with a wall width of 65 mm. If the furniture is small in size, then slats with a wall of 50 mm can be used as guide profiles.
CW (PS)
CW posts form vertical metal support members. Their ends fit into the UW rail guides. The rack profile transfers the entire load from the filled shelves to the base of the room. Dimensions of steel products:
- length – 3, 3.5, 4 and 6 m;
- shelf – 50 mm;
- wall – 50, 65 and 75 mm.
In our case, we use a profile with a wall of 65 mm. The edges of the sides are slightly curved, the wall has longitudinal grooves so that the length has increased rigidity and increased load-bearing capacity.
CD
We use UD strips as connecting elements of the frame and to create supports for shelves. The products are manufactured with a length of 3 m, a shelf height of 27 mm and a wall of 60 mm.
Planning stage
There are many techniques that allow you to use even very narrow elements with taste and imagination. Large functional structures are used for cabinets, gaining usable space.
A few recommendations on how to design a niche:
- When arranging, you need to start from the purpose of the living space.
- The size of the niche in the wall depends on the area of the room.
- The color scheme and style echo the overall interior.
- To create a deep alcove, you should not use dark colors.
- To prevent the design from looking tasteless, you should not overload it with decorative elements.
Vases in niches Source roomester.ru Vertical recesses Source decorationinfo.ru
For rooms for different purposes, appropriate types of finishing are used. They are combined and complemented with LED lighting, mirrors and stylish elements.
Design ideas
When arranging a small hallway, you should build on minimalism. The fewer things on display, the better. Therefore, you should avoid open hangers, unnecessary furnishings, and placing unnecessary items on the top of the closet. Remember that for a small hallway, a non-bulky cabinet with a depth of up to 50 cm or less is more suitable. Even with these sizes, outerwear will easily fit.
To prevent space from being “eaten up” by open doors, you should consider purchasing a wardrobe. The doors of such a product open with a slight movement of the hand along the wall.
Don't forget about the corner space. Using a cabinet with a rounded corner, you can create additional storage space. It is worth noting that using a corner in some cabinet models is not very convenient, but if such spaces are filled correctly, you can arrange things in such a way that this space becomes useful.
It is not necessary for the doors to be solid; a cabinet in a small hallway, the doors of which are made of glass with a pattern, looks very nice. These could be unusual ornaments or even photo printing.
Today, almost any hallway closet is equipped with a mirror. For the manufacturer, it does not matter what material the product is made of
When using mirrors in wardrobes, pay attention to the dimensions; if the wardrobe is large, then high quality fittings are used
Among other things, the mirror is the most important interior element in the hallway. In his absence, household members going to work or school will have to constantly move around the apartment to take a look, which can lead to delays. Always remember this.
Step-by-step instructions for assembling the box and filling it yourself
| Step No. | Photo | Process description |
| 1 | We determine the location of the wardrobe. Furniture should not interfere with the passage of people and prevent the full opening of doors and windows. The corner closet is conveniently located opposite the entrance to the room. | |
| 2 | We mark the dimensions of the box on the floor, ceiling and walls. To do this, we use a pencil, marker, tape measure, metal ruler and level. | |
| 3 | According to the drawings and specifications, we cut the steel profile into the required sections using metal scissors, a hacksaw or a jigsaw. | |
| 4 | In accordance with the markings, we fix the UW guide profiles to the floor and ceiling with dowels. | |
| 5 | Having installed the racks, we fasten them with self-tapping screws to the top and bottom rails. Now you need to attach the vertical elements to the walls with dowels through perforated strips of hangers in increments of 40–50 cm. | |
| 6 | We install the transverse frame slats. They are inserted into racks and secured with self-tapping screws using a screwdriver. The crossbars are fixed in such a way that the openings between the shelves are at least 300 mm high. This is the optimal size recommended by furniture assembly specialists. You can maintain a different distance between the shelves. | |
| 7 | In the clothing compartment, you need to attach a rod to the metal crossbars of the box on which the tremels will be hung. | |
| 8 | To divide the contents of the closet into compartments for shelves and for outerwear, install a partition. Assemble it in the same way as the side walls of the box. | |
| 9 | You can also assemble the metal frame of the partition cabinet. Often a homemade wall is made open to delimit (zoning) a nursery, living room or room for another purpose. In this case, the structure can be used as an open bookcase. A plasterboard wall is often placed in the corridor to store everything that gets in the way in living quarters. | |
| 10 | If the box does not reach the ceiling, then you can make a straight arch, which fills the space between the ceilings. Make the arch from a metal frame covered with sheets of plasterboard. | |
| 11 | Mark the sheets of drywall using a tape measure and a metal ruler. Draw marking lines with a pencil or marker. | |
| 12 | Drywall cutting can be done in two ways. In the first version, cardboard is cut with a jigsaw. But this is not very convenient to do without a large workbench or table. You can cut the material directly on the floor. Place any flat length (beam or board) under the cut line. Applying a ruler, cut the markings shallowly with a construction knife (3–4 mm). Then, pressing with your hands on one side of the sheet, achieve an even break of the cardboard. If you have no experience in this matter, then it is better to practice on unnecessary scraps of material. | |
| 13 | Treat the ends of the facing elements with a plasterboard cross-cut plane. This work can be done with a sanding mesh secured with clamps to a special block. | |
| 14 | First, attach the shelves to the cabinet frame with self-tapping screws. After this, sheathe the vertical surfaces of the box. | |
| 15 | When installing shelves with a width of more than 50 cm, secure additional cross beams from the CD profile. Cut the ends of the crossbars with scissors, separating the shelves from the wall at a distance of 60 mm. Bend the ends of the shelves outward at a right angle. Then secure them with self-tapping screws on the side surface of the rack, and attach the end of the wall with a self-tapping screw to the base of the rack profile. | |
| 16 | To ensure that the thickening of the side surface of the rack does not interfere with the cladding, the contact area of the drywall must be sharpened with a plane or rasp. | |
| 17 | Apply primer to all surfaces using a brush. | |
| 18 | Use starting putty to cover the joints, cladding seams and cover the screw heads. Attach the screws so that their tops are recessed into the drywall. | |
| 19 | Cover all treated areas with sickle tape. Treat the ribbons with the starting mixture. | |
| 20 | Install the corner profile, covering it with a spatula and putty. | |
| 21 | After 24 hours, treat the drywall with a finishing compound. Clean up any imperfections with a mesh or fine sandpaper. | |
| 22 | Paint the entire box with a brush again with primer. | |
| 23 | At your request, the entire structure can be painted with a water-based composition or covered with vinyl wallpaper. | |
| 24 | Once the work is completed, proceed to install the sliding doors. To form the frame, use boards or timber with a width equal to the cross-section of the metal guide rails. | |
| 25 | Install the wooden frame almost close to the vertical posts of the box. It is necessary to maintain a gap of 1–2 mm. This must be done so that dynamic loads from the movement of door panels are not transferred to the drywall. Otherwise, the cladding material may crack and subsequently collapse. | |
| 26 | If the floor and ceiling have an ideal horizontal surface, then you can get by with installing only timber racks. Attach the guide strips of the sliding system with dowels directly to the horizontal railings of the room. | |
| 27 | The gap between the door frame and the coupe body must be filled with damper tape. | |
| 28 | It is advisable to attach swing doors to the bodies of small cabinets. If you nevertheless decide to install such doors on a plasterboard structure up to the ceiling, then you cannot do without installing a wooden frame. |
Disadvantages of drywall
Despite its versatility, drywall (like any other material) has its drawbacks, which are important to consider before starting repairs. The disadvantages of plasterboard sheets include:
- fragility. The downside of plasticity is the insufficient strength of such a material. However, this quality of gypsum boards is relative - it all depends on what weight loads the structure will experience during operation. When installing a wardrobe, it is recommended to cover the walls with several layers of plasterboard;
- poor sound insulation. When creating walls or partitions from plasterboard, you need to understand that sound travels well through this material. Therefore, if you plan to install plasterboard walls, you should place mineral wool between two layers of gypsum plasterboard, which will help avoid this problem.
How can you decorate a chest of drawers?
The wardrobe serves not only the role of a storage room. It is the center of the interior and should look decent. How to decorate the finished product? The simplest option is to cover the surface of the structure with wallpaper in the color of the room’s interior. It is best to give preference to washable wallpaper. They are very practical and can withstand difficult operating conditions. You can also use liquid wallpaper for decoration. With their help, beautiful ornaments and figures can be easily created. Such decoration will never go unnoticed by guests.
The choice of type of drywall depends on the conditions of the room in which the furniture will be placed.
Depending on the planned load, the shelves are made of one or two layers of gypsum plasterboard.
If the room is small, then you can decorate and visually enlarge the space with the help of mirrors. They are attached to the surface of the sheets with glue. There is no need to save money on buying mirrors. They must be of high quality and not have any creases. However, there is one significant drawback when using mirrors - they are easy to break and get dirty. If there are small children in the house, then it is better to refuse this finishing option.
Painting the cabinet in any color, covering it with wallpaper or covering it with self-adhesive film – it doesn’t matter, the main thing is that your creation will be in a single copy.
The profiles are secured to the walls using hangers, and they are secured to each other with special screws.
Photo wallpaper can decorate a cabinet made from gypsum board sheets in an original way. They are sold with a ready-made image, or you can order unique wallpapers with a independently developed design. Photo wallpaper resembles a thin film. Their service life is practically unlimited.
We determine the thickness of the shelves, plan retractable and hanging elements, and doors.
If there are lamps in the furniture, then markings for them are carried out before installing the frame.