Home » Assembly
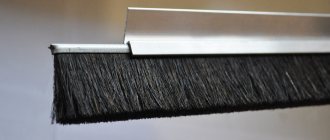
The brush-shaped Schlegel seal is a recommended accessory for every wardrobe. The brush seal is attached to the end of the compartment door. Functions as a dust cover - the pile prevents dust from penetrating into the cabinet through the working gaps. Softens the closure of the cabinet door, acting as a gasket between the profile and the body of the cabinet, thereby saving parts from wear.
- The right approach to choosing a brush seal
- Reliable adhesive composition
- Price
- Rich color palette
- Possible tape density
- How and where to glue the Schlegel seal
The right approach to choosing a brush seal
To purchase a brush seal that will be compatible with the door structure, it is important to take into account the door dimensions and operating clearance. The design of strip brushes allows you to install them horizontally, vertically, at different angles, based on the required size. Adhering to economy, connection is allowed. The height of the pile directly depends on the width of the gap.
A number of functions that the brush seal has:
- The density of the doors to the side walls of the cabinet. The design of the sliding wardrobe assumes the presence of working gaps, and there is no escape from this; the brush does an excellent job of sealing.
- The brush, together with the sealing functions, plays the role of anther. One should not overlook the fact that the pile also traps moisture, preventing it from getting inside the cabinet.
- Brushes on the end of the door facilitate its soft closing. The tape acts as a buffer and is able to absorb sharp impacts, preventing possible damage to the cabinet.
Offered range
Finding brush seals in Moscow, St. Petersburg, Krasnoyarsk and any other city where there are furniture fittings stores, such as Leroy Merlin, will not be difficult. But it’s worth knowing what they are and how they differ from each other.
The following main varieties are distinguished:
- Brush seals on the pile. The height of the latter is 6 mm, there is a self-adhesive base, the width of which is 7 mm. Usually done in black, white, milky, beige and bronze;
- Pile schlegels. Here the pile has a height of 12 mm. Self-adhesive is available with a width of 6 mm. Products are most often gray, white, beige and bronze;
- Felt-based brush seals. Height varies from 9 to 15 mm. There is no adhesive base, the width of the tape is 5 mm. Color black or gray;
- Double pile schlegel. The height is only 4 mm, there is self-adhesive, and the width of the tape is 11 mm. Usually these are black, brown and beige products.
These are just indicative parameters. Each manufacturer may use a different color. Seals are sold in the form of rolls. Buyers are supplied with tapes in the quantity required to seal a specific sliding wardrobe.
The price directly depends on the height of the brush layer and bristles. The larger they are, the more expensive the Schlegel seal will be.
Reliable adhesive composition
During the production of the tape, a special adhesive composition is used, which provides the tape with sticky properties for a long time, and even after repeated use. Adhesive testing is carried out according to the following criteria:
- Adhesive properties (parallel peel test is performed).
- Shear retention, this determines the load retention time for the vertical gluing method.
- Temperature test at which the adhesive properties begin to weaken. Can be used in cold winters, in unheated rooms.
- The glue grades comply with European requirements, this confirms reliability and instills confidence in the sealant.
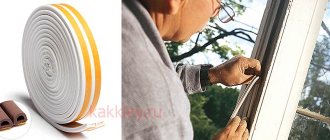
Instructions on how to apply shockproof tape to a compartment door
- If possible, remove any remaining old adhesive from the door profile. Usually, solvent 646 or similar is used for these purposes, but be careful to treat the residues spot by spot, as the solvent can remove the decorative coating/paint from the profile. In general, this item is carried out at will and opportunity.
- We treat the brush seal on the gluing side and the profile with a degreaser or alcohol (not vodka). Degreasing partially removes the old adhesive. Let the liquid ventilate for 5-10 minutes.
- Apply a thin layer of glue (for example, Anles or another from the list) evenly on both surfaces, since applying glue to the tape itself is inconvenient - apply a strip to the profile, attach the buffer tape and immediately peel it off. Be extremely careful not to stain the profile and everything around with glue. Next, leave the glue to dry without connecting the parts - a film should form that does not stick to your hands. The holding time is indicated on the glue packaging, but on average it will take 5-10 minutes. To prevent the tape from sticking while the film dries, you can throw it on a stepladder or something similar.
- Next, take a hair dryer (a household hair dryer will do) and heat the glue to 60-80 degrees - this takes on average 6-10 seconds for each area to be blown (do not increase the heating temperature or prolong the exposure time). Be careful when heating the adhesive layer on a profile in a wood laminate - the material may not withstand it and will peel off or melt. The glue must be heated on both surfaces - the profile and boot of the compartment door. Warm up sections of 10-15 cm and, pressing, glue the buffer tape to the profile, so stick all the torn bristles.
- After gluing, apply pressure with your palm over the entire glued seal.
- For high-quality adhesion, it is necessary not to impact the surfaces being glued for a day and, in particular, not to hit the wall with the buffer tape.
Rich color palette
The color range offered by manufacturers is suitable for even the most daring design solutions. Colors have a palette of shades. Metallic can be used. The composition of the paint prevents fading and even the slightest change in color during use.
Monocolor is widely popular in use - when the base of the tape has the same color as the bristles of the brush. This is especially visible in the finished product; such cabinets have an expensive look.
Possible tape density
The number of lines determines the density of the pile. The denser the brush, the stronger and more reliable it is, the longer it retains its original appearance, and its high resistance to wear. Today's market includes products with the following densities:
- 3 lines - medium density, marked as (3P)
- 4 lines - standard density is marked as (4P)
- 5 lines - super dense, and is designated as (5P)
Brushes are offered in wound coils of 150 m, 200 m and 275 m, convenient for use in production or retail sales. Basically, the standard tape has a width of 7mm, height starts from 4mm and reaches 15mm. Depending on the application of the tape, overall dimensions may vary.
How to glue buffer tape to a wardrobe
Many people try to glue the seal to the profile using second glue or another one available at home.
However, attempts usually end in failure and after the first hit of the door on the cabinet wall, the schlegel comes off again.
The base of the seal is made of polyester/polyester, the profile to which the tape is attached is painted or covered with lamination. Based on the available data, just what kind of glue will not work.
So what to look for in the store, glue for seals on sliding compartment doors:
- The simplest option is double-sided adhesive tape on a fabric basis (do not use foam tape - the foam comes off in pieces, and when you subsequently replace the seal, nothing can remove it). This double-sided tape can be 8-9 mm wide and it adheres perfectly to both bases.
- Nairite glue, for example, 88 P-1.
- Adhesives for thermoplastics and polyurethanes, for example:
- Anles polyurethane adhesive based on Desmocoll rubber,
- 88-NT,
- Desmocoll glue.
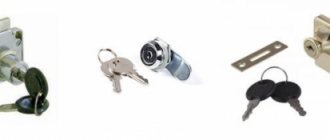
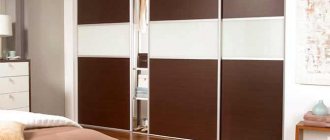
How and where to glue the Schlegel seal
Each wardrobe door has an aluminum profile frame. The end profile is equipped with a groove into which the brush seal is glued. The gluing process is quite simple. The bottom of the groove must be degreased, then remove the edge of the protective film from the adhesive side of the tape, and starting from the top edge, gradually removing the rest of the protective film, stick Schlegel to the very bottom. The edges of the tape are held in place by a special clip. There are cases when the edges lag behind and there is no clip; you can always glue the tape with regular superglue.
close ×
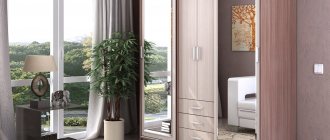
Sealant for mirrored wardrobe
If you are planning to order or purchase a wardrobe with mirrored doors and an aluminum sliding system, then you definitely need to pay attention to the silicone seal. For what? Let's look at it in this article.
Aluminum profiles have grooves 1 cm wide, and the standard thickness of mirrors is only 4 mm; the difference of 6 mm is filled with silicone sealant. To be more precise, seals are used not only for mirrors, but for any filling of doors.
If the door material has a thickness of 4 mm, like mirrors, glass, rattan and other thin panels, then a 6 mm seal is used. For thicker materials, for example, 8 mm MDF panels, a two-millimeter seal is used.
For those who have not yet become the happy owner of a wardrobe, go here https://mebeli.kiev.ua/.
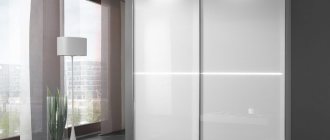
Assembling a mirror door
Now let's look at how a mirror door is assembled. They start from the end: a silicone seal is put on it, a profile is placed on top and hammered in with a rubber hammer. The same manipulations are performed on the other three sides of the mirror. Then the profiles are tightened with self-tapping screws, and a strong, reliable frame is formed on the mirror.
We check the quality
And now - what you need to pay attention to. If the door is assembled professionally, the seal around the entire perimeter will be visible as a neat, even translucent line. Slightly immersed in the profile, it does not stick out and does not bend with waves.
If vision does not allow you to see an even sealing line, you can check by touch. By running your finger along the seal, you will immediately feel if it is lying crooked. If such a fact is detected, this indicates an assembly error.
In this case, the seal is bent and does not perform its function - insulating the end of the mirror from the metal. Due to the load, the mirror may become deformed, that is, break if you abruptly close the wardrobe. But this is rare and the worst option. Most often, even a crooked seal can cope with the loads.
Looking at the corners
If the door is assembled well, the corners will have no voids, and you will also see seals there. If gaps are found, the build quality is poor. It is not worth purchasing such furniture. And the point is not that the mirror can break: the safety film protects against this, and in general the likelihood of such an outcome is low.
The thing is that these little things indicate the low quality of the wardrobe as a whole. After all, if the doors, as an element visible to the eye, are assembled without due care, what can we say about the reliability and quality of the assembly of the internal skeleton?! Be careful, happy shopping! You can choose and buy a high-quality wardrobe in Kyiv on the page https://mebeli.kiev.ua/199319-shkafy-kupe.
- Country gift
- How to find a qualified lawyer?