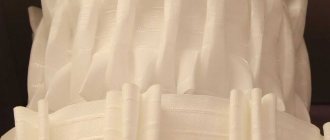
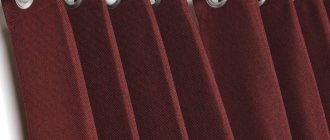
It is very important that the curtains harmoniously frame the window, and that the folds beautifully and elegantly complement the interior decor. Curtain tape is often used to create this look. This is a special fitting that is used to form folds on drapes and curtains. They can be of different widths and shapes, translucent or white.
How to use curtain tapes is a natural question that arises immediately after housewives find out what this device is.
In the center of the curtain tape there are ready-made loops sewn in, which require fastening to special hooks. Hook loops can be sewn in two or three rows. Along the width of the fittings, several threads run parallel to each other, below and above: they are intended to create drapery.
At first glance, it is not clear how using translucent tape and ribbons you can get original folds on the curtains, how to secure it and what to do next.
Main purposes and advantages of curtain tape:
- Makes it possible to elegantly and simply create drapery on fabric of any texture.
- There is no need to sew on additional loops and hooks.
- Does not shrink, which allows you to wash the product in any mode.
- Reduces sewing time.
- Quickly and easily pulled together using threads on the sides.
- It is possible to adjust and fix the width of curtains and drapes.
Once you understand the topic a little, it won’t be difficult to drape a window beautifully.
Curtain tape is a decorative soft fitting used to create folds of different widths and configurations on fabric.
What you need to know
You don’t have to turn to a designer for help to make the space in your home a little better. Curtain tape fits perfectly into the finished interior, complementing it, transforming it and adding its own minor touches. Although professionals often resort to this accessory in order to correctly place accents in those places where it is necessary.
Even the simplest curtains on curtain tape with regular braid, which is most often made of thick fabric, can transform them. The tape is an excellent solution for those whose curtain rods are not of the required length. In this case, she selects curtains and increases the light transmission through the window.
Curtain braid, varieties, description
Decorative braid is sewn on the front or back side of the product. It not only serves as a fold assembly, but also decorates the product. Original decorative braid for curtains can be sewn: on the bottom edge, along the perimeter, on the sides. It can be additionally decorated with stones, rhinestones, lurex, and beads.
Its use for window decoration has recently become very common among designers, needlewomen and curtain sewers.
Types of decorative braid:
- For buffs. This type creates a decorative drapery of a special shape. This technique looks great on plain materials, creating a corrugated effect.
- Ruffles. They are sewn onto the front side of the product. A country style curtain is the most common model using decorative fittings in the form of ruffles.
- With ornament. These are products with a variety of patterns and ethnic motifs. You can find decorative braid in Greek, Moroccan, African, English, Arabic, and Japanese styles. With the help of such a decorative detail, accents are placed and a special ethnic element in the interior is emphasized.
- With Fringe. Used in styles with lush decoration: art deco, classic, empire, Victorian, oriental style.
- Openwork with lurex. An original finish for curtains that will make the product elegant and complete.
This inconspicuous detail can turn even the most boring curtains into chic drapes.
Braid with loops
Tapes for curtains with loops are widely used; they are inexpensive and can be sewn to the back surface of curtains without much difficulty. Along the top and middle line of the product there are rows of loops for hooks. There may be several of them.
The most convenient thing about it is that it is made not of stretchy fabric, but of dense material.
- With two rows of loops. For normal hanging of curtains on hooks.
- With four rows of loops. For adjusting the length of curtains without shortening the edges.
Note! If the curtains sag, it means there are not enough curtain hooks and they are not designed correctly. The second reason: the braid is too thin and narrow.
It is easy to sew on a machine to the fabric, and the folds can be made of any density.
Braid with loops can be of two types:
- Transparent. Made from nylon, designed for light translucent fabrics: organza, veil, mesh. Such fittings will be invisible on thin and light fabric. The process of sewing transparent tape is more labor intensive and requires some experience and skill.
- Not transparent tape. Made from cotton for thick curtain fabrics. Before work, it is necessary to steam the tape to avoid unwanted shrinkage on the finished product.
Their size and quantity can be adjusted with several laces passed through the entire length of the tape.
Adhesive tape for curtains
The use of adhesive fittings for curtains is justified only if the material is light.
Curtain tape simplifies the process of sewing curtains.
The procedure for fixing the adhesive tape.
- Heat the strip with an iron; the high temperature will melt the glue on the tape to a liquid state.
- Carefully fix the tape on the curtain before the glue hardens: it is securely connected to the curtain.
It does not require sewing loops to secure the fabric to the hooks - these loops are already provided on the tape.
Curtain tapes
They are divided into two types according to the formation of types of assemblies.
- Horizontal assemblies. Used for sewing traditional curtains and lambrequins.
- Vertical assemblies. Used for sewing Roman, French and Austrian curtains with lifting mechanisms.
Curtain tape allows you to beautifully drape fabric of any density and texture.
When to use it
Surprisingly, the use of tape is not limited to just assembling the curtain at the edge of the window. Although this is logically convenient, when in order to slightly “curtain” the windows, you only need to untie the braid. You can achieve the necessary folds in several places at once and even at the very top of the curtain.
Making decorative ribbons yourself can be quite problematic, but the housewife can make the simplest options.
How to assemble and hang
The gathered ribbon is formed following the instructions:
- Before folding, the material of curtains and ribbons is ironed.
- The application and stitching of the braid on the canvas follows.
- Under the braid, 2.5 cm below the edge, strings are passed - cords. Stitching is done at the top and bottom under each cord. The cords must move freely. They are pulled out and tied at the base of the decorative strip so that there is no tightening.
- The side with the tied ends of the ropes is attached, for example, to a door handle. The fabric stretches, moving towards the fixed side. The folds are evenly distributed.
- The hanging ends of the ropes - cords - are hidden in pockets sewn on the wrong side.
- Loops are formed on the pockets of the tape. They are secured on hooks alternating 8-12 cm from each other. You cannot attach hooks to cords. Otherwise the curtains will sag.
- When the curtains are finished being assembled, they are hung on the ceiling cornice:
- The stopper is removed from the cornice. The hooks are driven into the path;
- The outermost first and second hooks are secured together with a latch to lock the edge of the canvas.
Tape size
If we need to hide the tape from view, or we have a fairly narrow cornice, then the choice should be a narrow braid. If our ribbon should emphasize the idea of the designer or housewife, and the number of fastenings to the curtain is limited, we should choose a wide option.
The curtain can be made of dense and heavy material. To avoid possible sagging over time, it is similarly better to choose a wide option.
Length calculation
When choosing curtain tape, you need to collect part of it by pulling out the ends of the cord. If it holds the shape of the folds well, then it is worth using for further work, and if the gathers are uneven, then it is better to look for another option.
The curtain tape must be sewn to the curtain for the entire width; it can significantly exceed the length of the cornice or curtain, due to the creation of decorative folds. In order to correctly calculate the required width of the material, a special coefficient is used:
- 1.5 is used when creating a simple gather on curtains or tulle;
- 2.0 is used for more complex ones, the formation of ruffles, waffles;
- 2.5 allows you to create radial and bow folds;
- 3.0 is required when laying the most complex, triple or cylindrical folds.
The length of the braid and the width of the curtains must be correctly calculated based on the size of the fastening multiplied by the coefficient necessary to create the necessary assemblies. That is, for a curtain of 3 meters when cylindrical folds are formed, 9 m of fabric and the same amount of braid will be required. If the curtain is not long enough, you will have to make assemblies much less often, as a result you will not get the expected effect.
Loops
Allows you to hang curtains directly on the curtain. Sometimes there are various options with several rows of loops. In this case, we will be able to adjust the height of the curtains.
Combined. The most common option is a combination of Velcro and loops.
Curtains with eyelets in the house
Curtains with eyelets fit into any interior. For example, Roman blinds can decorate the kitchen interior. And in the living room, classic curtains with large folds will look good.
Grommet curtains are very convenient to use. They are easy to move on the curtain rod, unlike curtains with hooks, which can interlock with each other or even fall off.
Grommet curtains require special care. It is advisable to wash them by hand, or, as a last resort, in the machine in the “Delicate Wash” mode and at minimum speed. The main condition is cool water. With intensive or hot washing, the reinforcing strip may come off or become tangled, which will require repairing the curtains.
Curtain grouping options
For almost every design option for curtains, you can find your own ribbon, which will differ in both its unique design and the function it performs.
This allows the designer or housewife to have at her disposal an incredibly large number of options to emphasize the style of a particular decor.
Types of drapery
Let's look at the most commonly used fold options:
- Pillar. The simplest, but no less elegant option. The folds are quite narrow and neat. The degree of drape depends on what material you use.
- Waffle. In this case, the drapery turns out to be uneven.
- Pencil. The implementation is described by the name itself. Narrow at the beginning and wide towards the end.
- Shot glass. The fold, which is similar to a kind of glass, tapers slightly at some stage of the drapery.
- Bow. Drapery, which, due to some flattening of the material, looks like a bow.
- Single-sided or double-sided.
- X-shaped. Drapery in which the middle of the fold is narrower than the rest of it.
- Fan. The fold resembles a woman's fan.
Tulle gathering coefficient for curtain tape: what does it mean?
This term denotes a ratio equal to the fabric to that already collected using a ribbon. It depends on the complexity of the pattern and there are such assembly coefficients:
- 1,5
- 2
- 2,5
- 3
For example, if you buy a strip with a coefficient of 2 , then from tulle 4 m wide, you will get exactly 4 meters of a beautifully draped transparent curtain. This indicator can be found on the packaging for the accessories.
Worth knowing: The assembly factor is also taken into account when purchasing the ribbon itself. After all, it is attached to a flat fabric and pulled together only before it needs to be hung.
To find out the required length, multiply the width of the cornice by the gathering factor +6 cm at the edges.
Hemming the tape
From all of the above, the question naturally arises of how to sew the ribbon to the curtain yourself. You can do this easily if you follow simple instructions in just a few steps:
The curtain tape should look harmonious with the curtain and not stand out from the overall design solution.
If the tape has non-standard or unfinished edges, it is necessary to hem them. If the braid has a ready-made appearance or was supplied with the curtains, then no processing should be done.
Fold the curtain over the same amount as your tape and either pin the result or use an iron to secure the result.
Place your ribbon on top of what you have obtained, leaving ten millimeters at the top, keeping in mind the type of folds you want to get. Refined drapery requires more space at the top.
There should be about one and a half to two centimeters left on the left and right of the curtain.
The tape is secured in any way convenient for you.
Using a sewing machine, the braid is sewn to the curtain or tulle. The number of seams will be equal to the number of strands of tape.
We process the left and right parts and remove everything that was holding our tape.
Types of curtain tapes: overview
Types of curtain tapes
Curtain tape is a fabric strip that is sewn to the back of the product. The ribbon contains cords that allow you to adjust the width of the material.
Braid can create a chic drapery on any fabric. It is also convenient that you do not need to sew additional loops for hooks. This reduces the time of sewing tulle and helps to quickly pull it together with thread on the sides. The braid allows you to adjust and fix the width of the curtain.
Designers use several types of curtain tapes. Here's their review:
- Narrow ribbon - up to 4 cm .
- Wide - up to 15 cm.
- With tucks.
- Forming bows.
- With a small number of draw-out pockets for hooks and an increased number of them.
- Different in assembly coefficient - from 1.5 to 3 . This determines how often the folds will be placed on the product.
- Sew-on - attached to the product using a seam. cars.
- Adhesive to the product with a hot iron.
- Fixed to the cornice using adhesive tape with loops.
Also, the curtain tape can come complete with the following items:
- Eyelet rings
- Special seals
- Pockets for fastening with hooks
- Cords for tie.
When selecting braid, you need to take into account its length, which depends on the size of the folds that you want to create on the product.
What other options are there?
Sometimes a situation arises when hemming curtains with tape is impossible due to some reasons. For example, having gone around all the stores, you cannot find the option you need, or the design solution requires a different execution.
Firstly, instead of tape, you can use a very dense thread, while performing all the necessary calculations yourself, such as the drapery coefficient. Based on what folds you ultimately want to get.
Secondly, having a curtain that involves the use of either rings or eyelets with them, you can sew something suitable for this format. And if it’s unlikely to be possible to handle the eyelets yourself without the proper experience and skill, then you can sew ribbons to the curtain that resemble a kind of pocket. In this case, a solution will be found.
Step-by-step instruction
The edge of the curtain is pre-treated, since after fixing the tape this will be problematic. Place two widths of tape from the seam and fold the fabric in half. Using an iron, smooth out the resulting crease. Next, put the tape into the resulting pocket with an adhesive layer to the fabric and secure it with sewing pins to avoid shifts.
Using an iron, the tape is fixed to the fabric. The temperature should be selected according to the type of textile. The iron is moved in “steps”, in no case sliding movements, applying light pressure for firm fixation and staying in one area for 8-10 seconds. Excessively long exposure to the iron or exceeding the required temperature contributes to the leakage of glue onto the front side of the fabric. It is impossible to correct such a defect.
After the tape has been glued along its entire length, its edges are trimmed and the pins are removed. If double-sided tape was used for work, remove the protective mesh from it, wrap it in cloth and iron it in the same way as described above.
At the final stage, you should additionally secure the tape using a sewing stitch. The latter is laid along the bottom of the tape at a distance of 1-2 mm from the edge.
The tape is securely fixed, now you can begin installing the eyelets.
We take proper care
As a rule, curtain and tape materials have different textures with their own properties and characteristics. With the same wash, they can react differently to it, where each material will shrink differently. To avoid this, wash the braid in the washing machine before stitching, dry it, and only then start manipulating it.
An important point will be the correct operation of the product. When forming folds, pull the threads on both sides at the same time, not just one.
Consider the material from which the tape is made. It may have its own temperature setting for the iron, and the use of the washing machine only in a gentle mode, which imposes its own characteristics when washing occurs together as a single, finished product.
Care instructions
Textiles reinforced with adhesive nylon tape should be washed by hand or on a delicate cycle. It is important to keep the washing temperature low to prevent the tape from peeling off. It is also undesirable to squeeze out compacted areas; the tape may become confused and it will be impossible to straighten it. The ironing mode is selected based on the type of drapery fabric.
Experienced craftswomen do not recommend purchasing adhesive tape for future use, since over time the glue loses its properties and can change color when melted.
Eyelet tape is a nylon adhesive strip that allows you to strengthen the fabric to obtain elastic, uniform folds. In addition, it is used to strengthen textile parts subject to intensive use. Following the technology of gluing tape and recommendations for caring for curtains will allow beautiful draperies to please the eyes of the owners for a long time.
