Installing a faucet in the kitchen is a procedure that every person faces when purchasing a new sink. But, even if the sink is not replaced, it is worth considering that the faucet is used dozens of times a day, and that is why it quickly wears out, fails and there is a need to replace it.
Of course, you can use the services of a professional plumber for this, but this entails additional costs. Therefore, it is better to try to handle the installation yourself - we will tell you today how to do it quickly and correctly.
Installing a faucet in the kitchen
Mixer installation features
First of all, you need to determine how to install the equipment. In particular, the mixer can be installed on a countertop, on the sink body or on a table. Before you cut the sink into the countertop, you need to think about all this. In addition, it is necessary to consider the location of hot and cold water supply pipes. It is very important to provide free access to the joints in case of unexpected repairs. Also, when solving the problem of how to assemble a faucet in the kitchen, you should take into account the installation of additional equipment, for example, filters for water purification. It is necessary to foresee its location in advance.
How to choose the right kitchen faucet
Almost all faucet models are used in conjunction with a sink, so when choosing and installing a faucet in the kitchen with your own hands, you need to consider the following:
- Dimensions and depth of the sink.
- Distance from the wall to the hole for the mixer.
- The diameter of the technological hole intended for installing the mixer.
- Location of the drain hole.
In addition, when installing a kitchen faucet, it is important to pay attention to the length and height of the product. The end of the spout should be in the center of the sink, and its height should allow you to place a tall pan. However, it is worth understanding that when water is supplied from a faucet that is too high, splashes will be created that will fly outside the sink.
Another important parameter is the angle of rotation of the mixer. For a sink located a short distance from the wall, it is recommended to use a faucet that rotates 900. For a sink with two bowls, it is better to purchase and install a faucet in the kitchen with a rotation angle of up to 3600.
How to work with different types of artificial stone
There is no clear definition of artificial stone, and it includes several types of material:
- porcelain stoneware;
- acrylic stone;
- agglomerates (conglomerates).
Porcelain tile is the most durable of all, not afraid of high and low temperatures, as well as minor mechanical damage. An ordinary drill “will not take it”: only a crown (Forstner cutter) or a drill with a diamond tip (or another carbide) can cope with its density.
During operation, it is necessary to periodically “cool” the surface with water, and the drill should operate at low speeds - 250-350 rpm.
Acrylic is the easiest material to work with, since its density is minimal compared to others. You can use regular drills for metal or wood with it, for example, a feather type or the same Forstner cutter. A standard 35 mm hole for the mixer must be drilled at low-medium speed (the material is indeed very pliable, and can even be cut with a jigsaw, but it is difficult for them to achieve an accurate result). A large amount of “plastic” shavings and a characteristic smell are consequences of the high plastic content.
Agglomerate is a material with medium density. It is not as difficult to work as porcelain stoneware, but requires more care than acrylic. In order to drill holes in it, it is best to take the same cutters as in the case of porcelain stoneware.
Appearance
The appearance of the faucet is of great importance when looking for solutions for how to install a faucet in the kitchen, since the plumbing equipment must be selected in accordance with the design style of the kitchen. In specialized stores, mixers are presented in a wide variety. These can be models made in loft, hi-tech, classic and minimalist styles. The shape of the faucets can be chopped or streamlined; in addition, chrome, copper or black products are produced.
As for the cost, it is important to adhere to the rule: the higher the price, the better the quality of the plumbing equipment, including faucets.
About classification
A complete list of all types of car washes produced will probably take more than one page. However, most of the market is occupied by inset and overmount sinks made of stainless steel and artificial stone. In the first case, the purchasing motive is the relatively modest price of the product; in the second - a solid appearance and the absence of noise from the water.
However, the noise problem with stainless steel can be solved by sticking a layer of any foam insulation onto the back of the bowl.
Let's look at the installation procedure for both types of sinks for a more problematic material - stainless steel. The artificial stone sink is massive and not prone to deformation, thanks to which it is securely held in the groove of the countertop by its own weight.
It is worth clarifying that all the stone and porcelain stoneware sinks the author saw were mortise. If invoices exist in nature, they are incredibly skillfully hidden.
Porcelain stoneware sink.
Design selection
Each mixer model is characterized by the presence of certain design features. Single-lever products are distinguished by their practicality. This design allows you to regulate the flow intensity and temperature using one lever. Mixers with two valves are less practical, but fit perfectly into the classic kitchen interior.
Some models are equipped with a special motion sensor; they are classified as non-contact products. When you bring your hands to the faucet, a sensor is triggered and water starts flowing. For the kitchen, this option cannot be called suitable for solving the question of how to install a faucet in the kitchen, since very often it is necessary to draw water into various containers.
The main factor influencing the cost of mixers is the alloy used and the brand of the manufacturer. The most affordable products are made of silumin and other cheap alloys. Such faucets have an attractive appearance, but quickly become unusable. This is explained by the fact that the manufacturing material itself is prone to cracking and quickly turns into crumbs.
High quality faucets are made of brass with a layer of nickel, aluminum or chrome. This increases the attractiveness of the products and makes them more resistant to wear.
Preparatory work
Before you begin to solve the problem of how to connect the kitchen faucet to the water supply, you must definitely turn off the water supply to your house or apartment. Otherwise, you may encounter serious troubles when installing the mixer. In addition, it is necessary to open the tap at the water collection point to drain the remaining liquid.
Then you can begin to prepare the necessary tools and materials. In most cases, the working set for solving the problem of how to install a faucet in the kitchen consists of the following:
- Screwdrivers of different types. Most often, the work requires a Phillips and flat-head screwdriver.
- A set of socket wrenches and an adjustable wrench.
- A self-contained lighting device, such as a flashlight.
- Sandpaper.
- Flexible hoses.
- Tow.
- A special composition WD-40, which is used to treat stuck compounds
Before assembling the faucet in the kitchen, you need to take care of the new connection to the mixer, this will ensure the tightness and durability of the connections.
Removing the old faucet
Before you start solving the question of how to install a faucet in the kitchen, you need to dismantle the old device. First of all, you need to determine the places where the mixer connects to the hot and cold water supply pipes. Then inspect the structure and find the place where the faucet is fixed on the sink. Using an adjustable wrench, the flexible connection of the mixer is disconnected from the pipe. To avoid flooding the workspace with residual water from the plumbing system, it is recommended to place a small container.
When connecting a faucet in the kitchen, a surface-mounted sink must be carefully removed, having first disconnected the lower part of the siphon. Next, the sink is turned, providing access to the place where the mixer is attached to the side of the bowl.
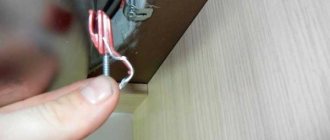
The connecting nuts are unscrewed using an adjustable wrench. First, loosen the nuts on the threaded pin a little, then use a screwdriver to unscrew the pin itself. Throughout the entire process of attaching the faucet to the sink, it is recommended to hold the mixer slightly to prevent it from falling.
In some cases, when installing a faucet in the kitchen, it is not possible to unscrew the connection nuts the first time, since rust may form in these places, and the parts being connected may stick to each other. The problem can be solved using a special WD-40 compound that is used to treat the fastener. After 10-15 minutes, you can safely begin to unscrew the connecting nuts.
Then the mixer is removed along with the clamp, and if necessary, the old hoses are replaced with new products. The hole for installing the mixer is cleaned of accumulated dirt. It is recommended to dispose of the dismantled old mixer.
Surface-mounted sink
Standard fasteners
How to install a stainless steel sink on a cabinet using a standard mount? It consists of plastic corners with inclined slots.
The procedure is as follows:
- The sink is installed on a cabinet. Fastening elements are placed on its edges from the inside.
- At the bottom point of the oblique groove of each fastener, a hole with a depth of 3/4 of the wall thickness is marked and drilled with a 3 mm drill.
Tip: to avoid drilling through the cabinet, stick a piece of electrical tape onto the drill at a distance of 12-13 mm from the edge.
- We tighten the fasteners with 4x16 mm self-tapping screws. The corner should move with little effort relative to the attachment point.
- We move the corners, pressing the sink against the cabinet.
Installation of standard fasteners.
As you can easily see, in this way a hidden overhead sink can be installed without much time and effort; however, it has a very unpleasant drawback: the fastening is not durable. Especially if the corners attract the sink only to the side walls: even with a small force, it will shift in the horizontal plane.
Alternative mount
How to install a sink on a cabinet more securely? It is enough to purchase a strip of such a cross-section that it fits tightly behind the curves of the edges of the sink, and four galvanized overhead plates or corners with holes for self-tapping screws.
Further actions:
- We cut off the strip around the perimeter of the sink.
- We soak it in drying oil and dry it. Wood should not rot.
- We lay the rail behind the bends of the stainless steel and attract it to the walls of the cabinet with linings or corners.
The photo shows exactly this method of fastening.
Installation of a new mixer
Before you begin to resolve the issue of how to properly install a faucet in the kitchen, you need to connect the product to the liner. The joints are wrapped with tow, which ensures maximum sealing of the system. Tow should be wound onto the threads of flexible hoses before connecting them to the mixer. When adding a drop of drying oil to the tow, the material does not bunch up towards the base of the thread during the tightening process.
Each mixer is equipped with an annular decorative gasket, which is a metal element with a rubber layer. Before installing the faucet on the sink, it is necessary to inspect the gasket to ensure that the rubber layer matches the designated grooves of the ring. The ring gasket is threaded through the liner and pulled to the base of the mixer.
Next, flexible hoses are inserted into the mounting hole and the mixer is pulled directly to the connection point with the sink. During the process of screwing the mixer, it is recommended to invite an assistant who will hold the device for more convenient fixation. A pressure plate is passed through the liner.
At the next stage of solving the problem of how to install a faucet on a kitchen sink, threaded pins are screwed into the base of the faucet, passing them through the pressure plate. Screw the nuts onto the pins without fully tightening them. Full tightening of the nuts is carried out using a socket wrench, having previously fixed the mixer in the working position. You can proceed to the final tightening of the nuts only with full confidence that there is no displacement of the sealing gaskets, and they are all in their place.
Next, the sink is installed in place and the connections are connected to the hot and cold water supply system. For a more airtight connection, the pipes of the water pipes are cleaned with sandpaper and a layer of flax thread or a tape of rolled waterproof sealant is wound.
The tape is wound overlapping; when using flax thread to install a faucet in the kitchen, the threads are first lubricated with sealing paste, after which the thread is wound.
The installation process is completed by connecting the siphon to the sink and testing the mixer. When supplying water, carefully inspect all connections for leaks. If defects are detected, you can try to tighten the threaded connections and retest.
How to connect filters
Using clean water for drinking and cooking is one of the ways to maintain health – for you and your loved ones. Nowadays, it is not difficult to obtain potable water in an apartment. Special filter systems will help cope with this task.
If you have already purchased a water purification kit, you will have noticed that it includes several straws, a mini-faucet and a key. Keep in mind - you will not need any sealing tapes, sealing pastes or threads.
Step-by-step instructions for connecting the filter system
- Turn off the cold water using the tap located under the sink. It is located on the pipe and a cold water supply is connected to it for supply to the mixer. Don’t confuse it with a “hot” tap - open cold water and check if it flows.
- We unscrew the hose and instead mount the tee that came with the kit, and then screw the liner to it. Open the cold water and check the tightness of the joints.
- We decide on the location of the filter installation. It is better to place it on the side wall of the cabinet. We advise you to place it in such a way that the filter that performs rough cleaning is easily accessible - you will change it more often than others. There should be at least 10 cm at the bottom so that replacement can be done without hindrance. Leave a distance of approximately 10 cm from the doors at which it cannot damage the hoses. The kit includes a template that will facilitate the fixation procedure. We screw the screws into the marked points.
- We remove the plugs and connect the tubes to the filter in accordance with the arrows indicating the correct direction in which the water should move in it. First, we insert the tube through which untreated water is supplied from the system and connect it to one of the outlets of the previously installed tee. Then insert the outlet tube into the filter with the side without the metal tip until it stops.
- We connect the faucet for drinking water from the kit or a special mixer with two spouts - one for ordinary water, the second for drinking water. Such a device allows you to avoid making additional holes in the sink or countertop, but it will cost more than the standard version. Another drawback is that if the mixer fails, you will not have a single source of water left.
A separate faucet must first be secured to the sink or work surface, and only after that the filter tube must be attached to it. To install a two-in-one faucet, you need to find out whether the design has an adapter into which you can insert a drinking water supply tube. If there is none, you will have to cut off the metal tip from the tube and put a nut on it. After this, insert the fitting and screw the nut onto the thread.
- Check the tightness of the system and rinse the filter for 4 minutes. The water may contain impurities and white foam.
Technological nuances of installation
When solving the problem of how to connect a sink faucet, some difficulties may arise that have a significant impact on the quality of the work performed. For example, the joints of flexible hoses can become very sticky, and the use of special tools does not give the desired result. In addition, sometimes the diameter of the cut-in hole may need to be adjusted or the faucet may need to be mounted on a countertop.
In this case, you can use a jigsaw and cut a new hole. In addition, it is necessary to check the condition and functionality of the water pipes and all wiring. If necessary, these elements need to be modified or completely replaced.
To independently install and connect a kitchen faucet, it is enough to study materials on the relevant topic, and professional craftsmen will help solve complex problems.
Installation recommendations
Kitchen faucets can have two types of fastening: the device is fixed with a nut or two studs. Depending on this, the installation method of the mixer is determined.
In designs with a clamping nut, the installation process is complicated by the presence of a long base, so the question of how to install a kitchen faucet is solved in the following order:
- Install the O-ring.
- Mark the mounting hole in the sink and drill it.
- Install the mixer into the prepared slot.
- Screw on the fixing nuts and tighten them using an adjustable wrench.
- Connect a hose with a short fitting.
- Next, connect a flexible hose with a long needle.
- Check the functionality of the equipment, paying attention to the formation of defects.
The second option for attaching the faucet to the sink involves the use of studs. In this case, it may be difficult to tighten the flexible hoses after installing the faucet on the sink or countertop. For this reason, it is necessary to first screw the nuts into the base of the mixer, and then install it in place. Then you should figure out how to connect the sink to the sewer so that there are no problems later.
In general, the work is carried out according to the following scheme:
- The studs are screwed into their regular places.
- Flexible plumbing hoses are installed from below the sink.
- Place the mixer in the seat.
- Fix the device using fastening pins.
In both cases, it is necessary to control the position of the sealing elements; the space between the parts must be completely filled. Even minor gaps are not allowed.
Connecting communications and checking leaks
It should be noted that if you had to dismantle the sink to install a new faucet, it should be attached to the countertop or separate cabinet using silicone sealant.
Particular attention must be paid to attaching the sink to the countertop to avoid leaks. You can read more about sink installation methods in our special article.
Fixing the sink
Now all the connections should be connected to the water supply. It is not recommended to do this too hard, because this can also damage the gaskets. It is enough to securely secure the fastenings with a key.
When connecting hoses, do not tighten the fasteners too much.
It will be much more difficult to do this work in the case of metal-plastic pipes. To begin with, you will need to prepare them, decide on the length and bend, and then secure them in the fittings.
In addition, it is necessary to connect the sink to the sewer pipe and reinstall the siphon with a corrugated pipe. Next, when connecting for the first time, you will need to carefully inspect all connections to eliminate the possibility of leakage. This happens when the installation sequence is violated.
Be sure to check the operation of the new faucet without putting the tools away
As you can see, even a novice master can cope with installing the mixer. It is only important to adhere to all points of the instructions and not to tighten the hose fastenings too tightly. In any case, upon completion of installation, it is necessary to check the functionality of the system.
Mounting the mixer on the countertop
To solve the problem of how to connect a faucet in the kitchen and install it on the countertop, you will need a similar set of tools as when installing the device in the sink. In addition, you need to prepare an electric jigsaw, drill and drill bits.
The actual installation of the mixer is carried out according to the same scheme, however, in this case, dismantling the sink is not required. For the mixer you need to make a hole in the countertop.
When choosing the location of the mounting hole and before screwing the faucet to the sink, you should listen to the advice of professional craftsmen:
- When using a mixer, water should not fall on the countertop.
- The location of levers or valves should be as convenient as possible for use.
- The faucet spout should point directly into the center of the sink.
The installation process begins with markings, using a pencil or marker to outline the contour of the base. Next, several holes are drilled with a drill and a hole of the desired size and shape is cut using an electric jigsaw. Subsequently, the liner is pulled through it and threaded pins are inserted. The cut area is treated with sandpaper and the resulting sawdust is removed.
The hole should not be too large, slightly smaller than the diameter of the pressure ring. In this case, you can expect that the entire hole will be closed. Subsequent steps when deciding how to fix the faucet on the sink are carried out according to the diagram for installing the faucet on the sink.
Possible errors and ways to prevent them
A stone sink is quite durable, but experts do not recommend starting to drill immediately after it has been brought indoors from the cold. You need to wait until it reaches the ambient temperature.
If you drill a hole in a stone sink for a faucet after installing it in the countertop, the edge will be smooth, but there is a risk of damaging the slab, scratching the surface of the table (the drill will break off), or chipping the edge. To prevent the drill from rebounding, apply a strip of paper tape to the surface.
To increase the service life of an acrylic sink, a chamfer of 1 - 1.5 mm is made around the hole circumference; inexperienced craftsmen often do not know this.
Sometimes the sink splits when the hole is formed on the back side because it is placed with the shelf down without a wooden support. It is strongly recommended to do this to reduce the risk of vibration and pressure.
Installation of wall mixers
By installing the faucet on the wall, you can make the kitchen interior more unusual and attractive. This option takes up minimal space and significantly expands the work space. To solve the problem of how to connect a faucet in the kitchen and perform installation work, technological holes of a certain size are made in the wall or tile through which the equipment is connected. The hot and cold water supply pipes remain hidden behind the wall, so the device looks quite aesthetically pleasing.
To connect the mixer to the water supply system, the corresponding elements are brought out. Connecting a faucet in the kitchen follows the same pattern, regardless of the material from which the pipes are made. The pipe can be iron, plastic, copper or metal-plastic; only the adapters and fitting elements differ. The mixer is connected to iron pipes using tees and angles; to connect to other types of water pipes, special fittings are used, their other name is water sockets.
The method of connecting a kitchen faucet to the water supply also does not depend on the type of faucet, which can be cartridge or valve. The main condition is that the design of the mixer must be suitable for installation on a wall.
Wall faucets can be installed at any height; the product spout can be flexible or rigid. In the first case, multiple variations significantly expand the range of actions in the kitchen. Faucets with a rigid spout have limited stroke and rotation angle.
Instructions for connecting the mixer
The connection begins by screwing in the eccentrics; these elements are designed to connect the mixer to the water pipes. By setting the distance between the axes to approximately 15 cm, you can achieve minimal condensation formation on the pipes. This is exactly the gap that the manufacturer sets when producing most wall mixers. To ensure a tight seal, the threads must be wrapped with linen or synthetic tow.
Then the faucet nuts are screwed onto the eccentrics and a decorative trim is installed. When fixing it, you should be careful, and the decorative element should fit snugly against the wall. If after installation the gap is more than 5 mm, then you can remove the mixer and cut the eccentrics to the required length. The decorative overlay should hide all the imperfections of the wall that are formed during the installation of the wall mixer.
At the next stage, gaskets are installed, which are equipped with almost every mixer. This element can be silicone, paronite, rubber or made of another polymer material. The gasket is inserted into the housing nuts, which allows for a tighter fit to the eccentrics. To ensure maximum tightness, the eccentrics must be checked for cracks. Uneven cuts can be processed with sandpaper.
The final step is to tighten the nuts, first tighten them by hand and then tighten them with an adjustable wrench. During the tightening process, it is not recommended to use much force to avoid stripping the threads on the nuts.
Installing plumbing equipment in the kitchen and connecting the faucet to the sink cannot be called a difficult job, so a simple home craftsman can easily install the product. To perform installation work efficiently, you must have a set of necessary tools and materials on hand, follow the recommendations of professional craftsmen and follow safety regulations.