- January 9, 2021
- Repair Tips
- Ivan Gresko
In the production of cabinet furniture, some manufacturers use nails to fasten parts together. Their disadvantage is that they cannot provide repeated assembly and disassembly. In this regard, it is much more convenient to use self-tapping screws. However, they destroy the texture of the workpiece. This is especially noticeable when using fiberboard and chipboard.
Therefore, many craftsmen prefer traditional bolts and nuts. At one time, these furniture fittings provided high strength joints. However, it cannot be called ideal. The fact is that bolts and nuts worsen the appearance of the structure.
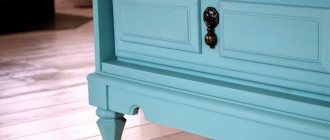
According to experts, the furniture eccentric screed is considered the most reliable. Despite the fact that furniture production is a complex technological process, it can be assembled at home. For this reason, many novice craftsmen are interested in the question of how to tighten the eccentric. This fastening method is considered the most reliable. Therefore, many try to use it. How to tighten the eccentric correctly? What are the pros and cons of this type of fastening? The answers to these questions are in the article presented to your attention.
Description of fastening method
Before wondering how to tighten the eccentric, you need to familiarize yourself with the device of the eccentric coupler. In general, it consists of two components. This is an eccentric and a rod. The first is on one piece of furniture, and the second is on another.
The connection of furniture parts is carried out by turning the eccentric in the rod. The sizes of these parts can be very different, for example, 34, 26 or 10 mm. The most common is the 15mm eccentric. The size depends on the dimensions and purpose of the furniture that is assembled. For example, for small shelves a 10mm cam is suitable. To connect parts in cabinet furniture, you will need large parts (34 and 26 mm).
Composition and varieties
Modern manufacturing companies sell many types of eccentric fasteners, which necessarily consist of the following parts:
- Rack;
- Futorka (analogous to a regular nut);
- Eccentric;
- Sleeve made of plastic or metal (stainless steel);
- Plugs.
To choose a suitable mount, you need to pay attention to several criteria:
- Eccentric dimensions;
- Type of stand (double-sided, short – 4 centimeters, long – up to 6 centimeters);
- Method of securing the stand.
When going to the store, you can prepare the necessary photos of the furniture eccentric in advance. Based on them, the sales consultant will immediately select suitable fasteners.
All such parts are ideal for creating products from chipboard, chipboard and even natural wood. Fasteners connect elements in hidden places where they are almost impossible to notice.
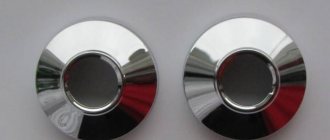
The eccentric can only be viewed from the inside. To give the furniture a more attractive and neat look, the fastening is additionally covered with a special plug.
Advantages of an eccentric coupler
Judging by the reviews, many craftsmen prefer this method of fastening. The high popularity of connecting furniture structural elements using eccentrics is explained by the fact that the parts can be assembled and disassembled repeatedly. It is noteworthy that this is done quickly. Great physical effort is not required. In addition, the craftsman has the opportunity to connect products at a variety of angles.
This is also possible with confirmations. However, after the next disassembly and reassembly, the material loses its rigidity. It is worth noting that this method not only ensures the reliability and strength of the fasteners, but also does not spoil the appearance of the furniture. Euroscrew (as furniture makers also call eccentric) is not very expensive, has a long service life and is able to withstand impressive loads.
Corner
The appearance of this screed fully corresponds to its name. When assembling furniture, two types of corners are used:
- plastic;
- metal.
The second ones are a metal element that is bent at an angle of 90 degrees. Each part has one or more holes through which screws are screwed. Plastic corners are a closed structure, similar to a pyramid. An example can be seen in the photo below.
As you can see, the screws are hidden under a small plastic cap, which is very convenient. In the professional field, such a screed is used quite rarely, because it has low strength. Sometimes they are used to assemble parts of the base element of a cabinet. In some cases, a tabletop can be attached to a furniture corner if the table is not expected to be moved. It is better to use rastex instead of a corner.
Weak sides
Despite the presence of undeniable advantages, the eccentric coupler is not without some disadvantages. Weaknesses include:
- The need for accurate calculations. It is important to correctly mark the holes for mounting hardware. Otherwise, the furniture pieces will be fastened crookedly.
- Labor intensity. Due to its complexity, this installation technology is only available to experienced craftsmen.
- If we compare eccentrics with confirmed ones, they are somewhat more expensive.
What you need for work
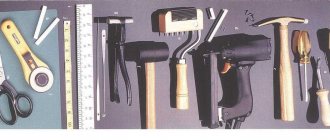
Before tightening the furniture eccentric, prepare the following tools:
- Screwdriver.
- Screwdriver.
- Ruler and pencil. Many home craftsmen use a template. You can make it yourself or get a ready-made one.
- Drill. They should have a diameter of 8 and 5 mm.
- Milling cutter. Some people call this tool a Forstner drill.
When everything you need is available, you can start doing the work. Let's take a closer look at how to tighten the eccentric in furniture.
Confirmat
The most common type of fastener is confirmat. At the same time the easiest to use. With its help, assembling furniture is easier and faster than using other types of furniture screed. Especially if during assembly you have to drill holes for fasteners yourself. Using a confirmat, two parts are connected at an angle of 90 degrees.
Fig.1.
Confirmat - used to connect parts at an angle of 90 degrees. The two parts are connected with 2 confirmed screws. The confirmat is installed at a distance of 3-7 cm from the end of the parts to be connected. To install 1 confirmation screw, you must first drill 2 holes in the parts to be joined: in the end of the first part for threads (drill diameter 5 mm), in the second part for the head (drill diameter 6 mm).
In order to tighten the two parts, you need to drill two holes. One in one part, with a diameter equal to the diameter of the confirmator head, the other, at the end of the second part, with a smaller diameter equal to the diameter of the threaded part.
As a rule, drills with a diameter of 6 and 5 mm are used for this, respectively. However, there is a combination drill available for drilling holes at the same time. It is very comfortable. There is no need to constantly rearrange drill bits or use two drills at the same time.
Fig.2.
Drill for confirmation. Allows you to make a hole for 1 confirmat screw in two parts at once, and also forms a recess for the confirmat head. Increases the speed of furniture assembly by at least 50%.
Confirmat is a universal fastener, but it has some disadvantages and application features.
Confirmat should be used simultaneously with the use of dowels. A dowel is a wooden rod with a diameter of 6-8 mm and a length of 20-30 mm (in the photo below, next to the confirmation). The dowel acts as a guide and does not allow parts to move during tightening.
Fig.3.
Connecting the parts using a dowel with a diameter of 6-8 mm and a confirmat. This joining method is used in factory furniture, for example furniture from IKEA. Provides high accuracy of joining parts.
Despite the fact that furniture assembled using confiramate can be assembled or disassembled, furniture made from laminated chipboard does not tolerate this very well. As a rule, after one disassembly, the furniture screed no longer holds well.
The confirmation should be wrapped carefully. The best option is by hand or with a screwdriver at low speed.
Otherwise, the confirmation thread turns into a drill, which breaks the hole.
Fig.4.
Tightening of parts with confirmation. The tie is performed with a hand wrench or a screwdriver with a low rotation speed of the chuck. The screwdriver must have the correct tightening torque to prevent thread stripping.
In order to recess the head into the body of the furniture part, you should use a wrench and do it carefully, otherwise there is a possibility of the thread breaking. Sometimes it is necessary to pre-calculate
Con fasteners. Those. Unlike other types of fasteners, it remains visible, so it is necessary to use special plugs or stickers to hide the fasteners.
Fig.5.
Plastic plugs (linings). Used to hide the confirmat's cap. They are attached to the confirmation cap in the key groove and are held in place by a specially shaped core. Available in various colors.
Fig.6.
Self-adhesive overlays for confirmat. Designed to hide the cap. They have a wide range of colors, completely identical to chipboard panels. Almost invisible on furniture.
Where to begin
First of all, you need to do the marking. Using a ruler and a pencil or a template, clearly define the places where the holes will be. Check again whether you have marked them correctly, since further assembly and the final result depend on accuracy. To reliably and efficiently tighten the eccentric, you next need to do the following:
- Carefully drill a hole for the groove in which the rod will be located. To avoid damaging the workpiece, use a limiter at this stage.
- When the hole is ready, insert the rod. It is desirable that it protrudes above the canvas by about 0.6 cm.
Installation of the second connection part
Before installing the eccentric, you need to prepare a groove for it. Drill it out using a Forstner bit. According to experts, depth is important for the groove for the eccentric. In general, you can limit yourself to a 15mm hole.
It should be noted that the groove cannot be made through. The eccentric must fit into it completely to its full height and at the same time be flush with the workpiece blade.
To avoid making a mistake with the location for the hole, use a template or ruler. Step back 34 mm from the bottom edge, and 5 mm from the side end. The center of the hole for the eccentric groove will be at the intersection point.
Making a passage for the rod
When the holes for the fasteners are made, begin preparing the passage for the rod. It is performed on the surface of the workpiece where the eccentric is located. The passage for the rod should be located on the end side. To perform this step you will need an 8mm drill bit. It is important that the passage is centered relative to the eccentric groove.
Therefore, at this stage, use a ruler, tape measure or template. If this recommendation is neglected, the prepared grooves may not match. As a result, the furniture will be assembled crookedly.
Scope of application
This type of fastening, such as minifixes, is used when it is necessary to hide fastening elements, for example, on a furniture facade. Due to the peculiarities of drilling grooves for screws and eccentrics, this method is common mainly for factory installation of furniture. But knowledge of the basic principles, the availability of specialized equipment and a little skill will allow a novice home craftsman to master this type of fastening.
The main purpose of an eccentric coupler is to connect parts at right angles. This connection happens:
- L-shaped;
- T-shaped.
The mechanism for connecting furniture elements using a minifix without a sleeve is as follows:
- A screw is screwed into a hole with a diameter of 5 mm on the surface of one of the elements being connected.
- The second element is put on the screw with a hole measuring 8 mm located in the end part.
- An eccentric is inserted into a groove on the surface of the second element, 15 mm in diameter.
- Using a screwdriver, the eccentric is rotated 180 degrees in a clockwise direction, securing the connection. A simple screwdriver, flathead or Phillips, or a hex wrench can be used.
The principle of fastening parts with a tie to a sleeve is similar. The difference is that the hole for the base of the screw is made with a 10 mm drill, in which a plastic sleeve is attached to PVA glue, into which the screw is screwed. The remaining steps are the same as when using a minifix without a sleeve.
Assembling furniture using this method, if you have experience in such work, is simple and quick.
Let's look at how this type of fastening works using the example of assembling a chest of drawers and the chest of drawers itself.
Final stage
Now you can connect the parts of the furniture structure. For this purpose, attach the workpieces so that the rod is in the passage. How to tighten eccentrics? This is quite easy to do. First, insert the eccentric into the groove, and then carefully tighten it using a Phillips screwdriver.
As a result, the furniture elements will be securely fastened to each other.
Photo of the furniture eccentric installation process
Read here: How to make a chair - a step-by-step description of how to make stylish chairs with your own hands (105 photos)
What to pay attention to
To properly tighten the eccentric, experts recommend positioning the rod correctly. It should not be twisted too much. Otherwise, the eccentric will not rotate 180 degrees. Then you will not be able to secure the connection. If the rod is not fully tightened, then the parts in the furniture structure will not be connected tightly enough. Which drill bit to choose for an eccentric tie depends on the size of the rod. The hole through which it will be connected to the eccentric is most often made with a diameter of 8 mm.
Advantages and disadvantages
Furniture eccentrics are quite popular among both furniture manufacturers and home craftsmen. And there is nothing surprising here. This part has many advantages:
- Ability to withstand heavy loads. The fastening has a high level of reliability. It tolerates repeated assembly/disassembly of structures without deterioration in quality;
- Long period of operation;
- Increasing the rigidity of assembled furniture.
- Easy installation of a furniture eccentric. Almost every person without experience or construction skills will be able to carry out the installation independently. This work will not take much time. To do this, an ordinary screwdriver is enough (provided that the holes have already been made in the furniture).
Please note that fastening does not impair the aesthetics of the finished product. The eccentric is not visible after installation. It does not leave noticeable damage or defects. It has no serious shortcomings, but we will still highlight a few disadvantages.
- Firstly, the relatively high cost. If we compare a furniture eccentric with other similar connections, its purchase will cost much more. If the manufacture of furniture requires a large volume of such eccentrics, then the final price of the product will seriously hit your pocket.
- Secondly, the connection is demanding in terms of marking accuracy. Without this, it will not be possible to qualitatively connect all the parts. Therefore, you need to approach your work responsibly. Don't do anything by eye! Otherwise, there is a high probability of simply ruining the product.
Practice shows that with constant use, the level of the screed gradually weakens. But this cannot be called a problem. If the fastener gets a little loose, you can take a screwdriver and tighten it well.
In general, the furniture eccentric is a reliable, durable and high-quality item. Home craftsmen certainly need to take it into service and use it during assembly.
- DIY cornice: a detailed description of how to design and decorate a stylish interior element (80 photos)
DIY folding chair: 110 photos, drawings, diagrams and sketches of convenient and easy options for creating portable chairs
- Do-it-yourself pouf: step-by-step instructions on how to build a stylish and original interior element with your own hands (105 photos)
To technically correctly assemble cabinet furniture and figure out how to install an eccentric with your own hands, you can use video lessons and other educational materials presented on the Internet. In addition, detailed instructions are included with each mount.