Over time, any furniture ceases to be liked and becomes boring to look at, even if it remains durable and copes with its functional responsibilities perfectly. Sometimes it simply stops matching the interior. This most often happens with cabinets and wardrobes - it seems to be strong and lasts a long time, but the appearance is no longer pleasing. The appearance of cracks and faded paint make it unattractive, it goes out of fashion and looks out of date. The closet seems tasteless and bulky and gets in your way. And yet, how can you update a Soviet wardrobe? There are at least two solutions to this situation:
- Buy a new wardrobe;
- Update an existing one.
Now furniture showrooms offer a huge selection of all kinds of wardrobes, wardrobes, chests of drawers, racks, hanging shelves, multifunctional drawers for clothes and personal items. But, if for some reason, you consider searching for a new cabinet to be inappropriate. Or you decide to plunge into the creative process, then with the help of the following techniques you will learn: how to update a Soviet wardrobe with your own hands beyond recognition. And, as a result, you will receive a completely exclusive sample, thereby giving the room a unique style.
An old table can still serve! 7 ways to restore an old table that will save your budget!
With your own hands you can give a Soviet wardrobe a new life, turn it into a unique one-piece piece, while saving a large amount of money.
Antique products
Not everyone can afford to buy real antiques. In this case, you can choose so-called antique furniture. It is made in modern conditions, but according to ancient samples, processed in a special way. The interior with artificially aged furniture looks very respectable, and the cost of the products is significantly lower than that of the original.
To make a completely new piece of decor look like an antique, it can be artificially aged. For this purpose, the product is painted in a special way, varnished with a craquelure effect, corners are chipped, edges are made uneven, metal parts are subjected to corrosion, and a patina is applied to the wood. Brushed furniture acquires a roughness characteristic of natural aging of wood. By rubbing, a brighter and deeper texture is achieved. To make things more believable, the items are made from old wood.
Currently, there are several design trends that allow you to decorate an antique interior. These include:
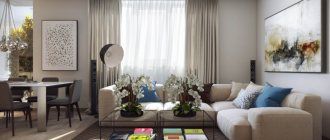
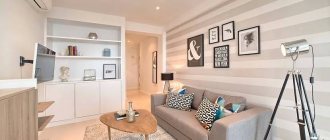
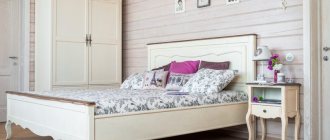
- Provence. The furniture is distinguished by emphasized simplicity. Pastel colors, ruffles, floral patterns on the upholstery of sofas and armchairs - the so-called provincial theme - create a cozy atmosphere. Aged furniture, made in Provence style, is one of the frequently used elements in modern design.
- Shabby chic decor. It is distinguished by the use of vintage elements with characteristic abrasions in the interior. It is not necessary to look for an antique piece of furniture; you can use artificially aged ones.
- Old Russian style. Tables, chairs, and stools made of natural wood decorated with artistic painting and carvings are actively used. The characteristic features of furniture in the Old Russian style are massiveness and good quality.
- Interior in Scandinavian style. The idea of decorating the room is based on the traditions of the Mediterranean countries and fully conveys the Scandinavian flavor. In a room furnished in this direction, light colors predominate. The furniture is simple, uncomplicated, made of natural wood. Preference is given to pine, birch, and beech.
ProvenceShabby chic
Old RussianScandinavian
History of Soviet furniture
Typical examples of furniture from the times of the USSR
Furniture made during the USSR is most accurately characterized by the word “indestructible.” The elements of the surroundings were made durable so that workers and peasants, having once arranged their lives, would not return to this issue for decades.
Of course, cabinets, cabinets, tables and chairs of that time wore out during use and lost their original luster, but their functionality did not suffer from this. Moreover, these products remain just as durable and reliable to this day.
How diverse was the range of furniture under the USSR? There was no variety in the modern sense; there was standard furniture designed to fit the dimensions and configuration of standard apartments.
What style distinguished the furniture assembled during the USSR? It would be correct to classify Soviet furniture not by style, but by time period, or more precisely, by the secretary general of a particular time.
| Illustrations | Description of furniture characteristic of the era |
| Stalin's Empire style . The furniture of that time was solid, fundamental and at the same time not devoid of some chic characteristic of the late Empire style. Of course, all elements of the surroundings made until the second half of the fifties of the last century were solid wood. Such furniture fits perfectly into classically decorated spacious rooms with high ceilings. | |
| Khrushchev's thaw . Starting from the second half of the fifties, Soviet furniture became more utilitarian, but at the same time more accessible to the average buyer. Despite the availability, the quality of cabinets, sideboards and other elements of the surroundings still remains very high. | |
| Brezhnev era . Furniture is becoming more angular and more utilitarian. Functionally oriented sets appear - wall, hallway and kitchen. Along with solid wood structures, products assembled from plywood and particle boards appear on sale. True, at that time particle boards were covered with high-quality veneer, which was difficult to distinguish from natural wood. | |
| Perestroika Gorbachev interiors . The era of Gorbachev's rule was marked by a shortage and a decrease in the quality of manufactured furniture. Very few cabinets of this era were made from solid wood or even multi-layer plywood. The walls of that time were assembled from laminated chipboard and therefore the cabinets of the late eighties and early nineties today do not impress with their good state of preservation. Such furniture was afraid of temperature fluctuations, humid air and required careful handling. |
So, you were lucky enough to become the owner of a Soviet wardrobe and now you can determine what era it belongs to. What's next? Try to restore it or even transform it. For this purpose, use a fashionable decoration method - decoupage.
DIY cabinet decoupage process
Redesign of an old bulky wardrobe - now it is fashionable furniture made in Provence style
During decoupage, the surface of the furniture is properly prepared and then covered with certain materials. The final stage is the application of decorative and protective varnish, after which the restored furniture can be used for its intended purpose.
Considering the widespread popularity of decoupage and handmade crafts, the restored cabinet will harmoniously fit into both a classic setting and the interior of a modern apartment.
Preparation of tools and materials
| Illustrations | Tools and their description |
| Scissors . During decoupage you will have to cut fabric and paper. To do this, you will need medium-sized stationery and manicure scissors. | |
| Scalpel (inlay knife). A sharp scalpel is useful for cutting small but complex patterns on both paper and fabric. | |
| Brushes. You will need several brushes: large, flat, medium round, thin. Large brushes are used to apply the base layer of paint, smaller brushes are used to apply glue, draw the outline of the pattern, etc. | |
| Sponges. Foam sponges are used as an alternative to brushes and for blotting excess glue along the contour of glued paper patterns. | |
| Rollers . Foam rollers are used to apply a primer or base coat of paint, which is important when working with large surfaces, such as cabinet doors. A roller is also indispensable when rolling out paper or fabric decor. | |
| Sandpaper . To pre-treat the surface to be decorated, you will need sandpaper with several degrees of abrasiveness. | |
| Spatulas . If you intend to restore chips and dents with putty, you will need a narrow spatula. |
| Illustrations | Materials and their description |
| Fabrics and paper . Depending on the chosen decoration method, multi-layer napkins, decoupage cards of different densities, paper for cutting stencils, fabrics with different prints, etc. are purchased. | |
paints and varnishes. To work, you will need white acrylic paint and fixing varnish (glossy and matte).
| |
| Structural paint and putty . This is an additional category of materials with which the surface can not only be painted, but also textured. | |
Glue. Purchasing special glue for decoupage is not cheap, so we will limit ourselves to purchasing PVA glue.
. |
Preparatory stage
At the preparatory stage, the surface of the cabinet is cleaned of dirt. If necessary, repairs are carried out - damage is repaired with putty and leveled.
If the furniture is varnished, it will be correct to sand the surface to a matte texture. A surface prepared in this way will better retain paint and varnish coatings.
The same three-door wardrobe after rough painting
After the surface has been sanded, a layer of primer is applied to it, and after the primer has completely dried, a base coat of paint is applied. After the base coat of paint has dried, the furniture is ready to begin decoupage.
The decoupage itself
Doors decorated with wallpaper inserts
During decoupage, the prepared surface is pasted over with certain materials. The pasted decor is secured with a layer of transparent varnish.
Let's take a closer look at the different methods of furniture decoupage.
Decorating with napkins
Step-by-step work with three-layer napkins
For decoupage, three-layer napkins with a large pattern are used. Before gluing, a fragment with the selected pattern is cut out of a napkin. We try to cut out the design so that as little white space as possible remains along its contour.
Then we separate the top layer from the napkin, the one with the pattern and which will be used for decoration.
Wardrobe at the end of decoupage
Gluing the pattern is done by first applying glue to the surface of the cabinet. The glued pattern is carefully smoothed out so that there are no folds or bubbles.
We remember that a wet wipe is fragile and try not to tear it.
We apply several layers of varnish on top of the glued napkin, taking a break to allow the previously applied layer to dry. After the varnish has dried, the surface is sanded to ensure complete leveling.
Decorating with fabric
| Illustrations | Step by step description |
| Surface measurements and decor preparation . At this stage, the surface that will be covered with fabric is measured. In accordance with the measurements, the fabric is cut into pieces. | |
| Applying glue . Apply PVA glue with a roller to the surface to be covered. Apply the glue in a thin layer, but do not leave any dry gaps. | |
| Gluing the fabric pattern . A piece of prepared fabric is applied to a surface coated with glue and smoothed out. For smoothing, it is advisable to use a foam roller, which will make it easier to disperse the glue. |
The result of painting furniture using a lace stencil
Another interesting option for decorating with fabric is painting the surface through lace.
An unnecessary lace curtain is applied to the surface of the closet. A layer of paint is sprayed on top of the attached fabric. The fabric is carefully removed and a lace imprint remains on the furniture.
Decorating with wallpaper
Wall cabinet covered with wallpaper
As with regular decoupage, the furniture is painted with base paint, after which pre-prepared wallpaper fragments are glued. Cabinets can be covered completely or partially. The choice of decoration technology is determined by the condition of the set and your aesthetic preferences.
Decorating with self-adhesive film
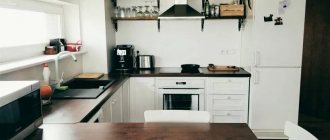
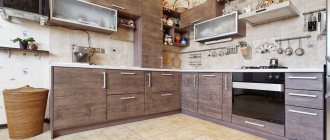
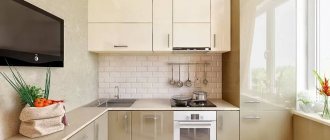
An example of how you can inexpensively remake kitchen furniture by covering it with vinyl film
Pasting furniture with self-adhesive is not quite decoupage, but nevertheless the result is excellent. Vinyl film is characterized by zero absorbency, and therefore it is preferable to cover furniture with this material in rooms with high humidity levels, for example, in the kitchen.
Pasting the facade of a kitchen cabinet
To cover a cabinet with vinyl, you need to disassemble it. The pasting is done on the facade of the furniture, since this is the part that is most noticeable.
The quality of vinyl decoration is largely determined by how the surface is prepared, since irregularities will be noticeable under the film. If the surface of the furniture is not perfectly smooth, I recommend using a film with a fine pattern.
From an old sideboard - an “antique” sideboard
Antique furniture is always in fashion - it adds an aristocratic touch to the entire interior. It’s nice that this technique can be done with your own hands, which means it’s cheap. There are several techniques for artificial aging, choose the one that suits you best.
Method 1 – craquelure varnish
Additionally, you should purchase craquelure varnish in specialized stores; all other materials were described above.
Description of works:
- After removing the old coating and sanding with sandpaper, apply a special craquelure varnish to the surface. It has the ability to transform the entire surface into a canvas cracked, as if from old age;
- After the previous composition has dried, you need to apply paint or clear varnish to the surface of the sideboard.
After all the procedures, you will receive an “antique” sideboard in a surprisingly short time. It should be noted that using paint in this method is more preferable - the effect will be brighter.
Method 2 – mechanical aging
For this method, you need to prepare two stains on different bases, a shellac primer and restoration wax.
Description of works:
- after cleaning the old varnish or paint, apply water-based stain as a base;
- lighten with a moistened sponge those places that are more visible;
- after drying, you need to sand the areas that will be darker;
- now apply the stain again with a different base;
- After the second layer of stain has dried, fill all places with shellac primer using a brush;
- using a wire brush, rub in the restoration wax, moving it along the fiber;
- After the wax has dried, wipe the sideboard with a soft cloth;
In fact, there are many more ways to age. Uniquely beautiful masterpieces are created using the “shashel” method, but this can be done by those who are familiar with carpentry.
Buy an antique buffet
You can buy an antique sideboard with good restoration, delivery and a 3-year guarantee in our restoration workshop. In our workshop you can restore antique, antique and vintage furniture from the 50s and 60s.
The problem with an antique sideboard is the ineradicable smell of old furniture inside the drawers and cavities closed with doors. Food, butter, jam, spices and medicines stored inside cupboards leave a trace of an unpleasant odor for a long time. The only way to get rid of it is to completely remove the old coating, sand the surface down to bare wood and apply a fresh coat of paint. Such work can only be done in a specially equipped workshop.
You can buy an inexpensive old or antique buffet on AVITO. Expensive furniture with carvings, stained glass and marquetry - at antique auctions, in salons, shops. Not necessarily, a worthy item will be expensive or a simple sideboard in poor condition will be cheap. When purchasing, it is important to take your time, understand how much this particular item is needed and how much money it will require to put it in order, in other words, how much it costs to restore a sideboard.
You can get advice from a restorer about the cost of restoring a wooden sideboard, determining the style and age of the item, its condition, the cost of repairing locks, glass, stained glass, delivery, guarantees, by calling via Whatsapp on the same phone number or our email
Sincerely, Elena Zhilina.
Restoration of paintwork
| Finishing | RUB/sq. meter |
| Waxing | 500 |
| Polishing | 1500 |
| Shellac | 2000 |
| Gilding | 3000 |
Restoration of decorative coating
| Finishing | RUB/sq. dm |
| Patination | 50 |
| painting | 200 |
| Marquetry | 500 |
| Mosaic | 1000 |
Feedback form
By sending us a completed form with photographs, as well as asking a question, you will receive complete information about the item (what it is, material, age) and the cost of restoration work. Next, the restorer will come to the site, inspect it, and determine the final price of the restoration.
The final price will not change. Departure is free.
News from Elena Zhilina's Workshop
11/15/21 A story about the profession of a modern restorer was filmed in our workshop; the program will be shown on November 24 at 18.24 on the Moscow 24
10/23/21 The workshop participates in the 47th Antique Salon
, which will take place from November 23 to 28 in Gostinny Dvor
05/17/21 In the workshop on May 31, 2022. There will be an open day
. We invite specialists and lovers of antique furniture restoration. The program includes a discussion of the problem of modern furniture restoration and exchange of experience
11/15/20 Our workshop has moved to a new address, st. Rabochaya 84 building 1, Tagansky district, near the Rimskaya metro station
Expert advice
Many people very often believe that to embody a vintage or retro style it is worth using antique wallpaper, which, due to its age and unusual patterns, can be called vintage. However, professionals do not recommend doing this, since these are building materials whose service life may be limited.
If you find old, but beautiful wallpaper from your grandmothers' time, this is far from a guarantee that it will serve you for a long time. Nevertheless, sometimes the designers themselves choose such building materials for non-standard wall decoration.
To be sure to choose the right design for decorating the walls in your home, it is best to use the services of specialists, since vintage and retro styles are not as simple as it might seem at first glance.
It is also best to give preference only to trusted brands and brands that produce decent wallpaper products. And excellent manufacturers of such building materials are not only foreign, but also domestic.
Video description
The video shows how to apply large posters to wardrobe doors:
Method three - stained glass
It is easy to remove the doors and replace them with stained glass windows made in specialized workshops. Only wealthy people can do this. But even here, if you wish, it is not difficult to save money by choosing translucent stained glass film instead of stained glass finishing. It is also allowed to be used if the doors have a mirror surface.
Bright stained glass film for a closet in the living room Source maksdecor.ru
The film has a translucent base. It lets light through. It is reflected from the mirror and comes back. In this way, a glow effect is formed, similar to the reflection of colored glass. The film is applied in the same way as a vinyl sticker. The following photo allows you to evaluate the result.
Bright stained glass films Source i.ytimg.com
Necessary tools for restoring old furniture
Sandpaper of different densities
Types of solvents for cleaning surfaces
Any old piece of furniture is first of all covered with a factory layer of paint and varnish; it is possible that earlier they also tried to change or restore it. Therefore, it is necessary to rid the buffet of any old covering. Coarse sandpaper is needed for sanding and cleaning all surfaces. It’s easy to ruin wood by simply trying to peel off the top layers with sandpaper, which is why a solvent is needed, acetone is ideal
It is applied with a brush over the entire surface, special attention should be paid to the carved parts. Another way is to soak a rag or cloth and cover the sideboard for a few minutes.
The layer of old coating will come off on its own, and the buffet can be cleaned with a simple cloth.
Tools
Multifunctional Household Hand Tool Set
It is better to process furniture in a disassembled state, so you will need a lot of tools. It is possible that the buffet will only require cosmetic repairs. But sometimes you may need to tighten loose doors or secure legs. You need to have a set of screwdrivers and wrenches, a hammer, etc. on hand.
Accessories
Antique furniture fittings for an updated buffet
Updating the sideboard will also entail installing new fittings - handles, fasteners, etc. All this can be easily found in specialized stores or made to order in workshops.
- Additional materials: wax and putty to remove unevenness; primer for surface treatment.
- Brushes, sponges and rollers for painting.
- Paints and varnishes (acrylic and oil paints, varnish, stain).
- Masking tape, PVA glue.
Additional materials for do-it-yourself buffet restoration
The doors of an old cupboard are often glazed, so you will need tape to protect them from paint. You will need glue if the furniture has already begun to delaminate.
Short course of rehabilitation
It happens that we inherit old cabinets from our grandparents. They are very strong, made not from MDF or chipboard, but from solid wood. Which in itself is valuable. But the appearance of such products does not always meet the requirements of modern design. Therefore, it is a pity to throw away old furniture and cannot be used. Restoration helps correct the situation. There are expensive, there are budget options and techniques. A detailed review will help you find out how to decorate your closet. But first you need to find out how to prepare for work.
An easy way to restore a cabinet Source avatars.mds.yandex.net
Restoration must begin with an inspection of the object. Then dismantling is carried out. You need to remove the doors and shelves, disassemble the box, replace fasteners and fittings. If this is not possible, you should clean the removed metal parts from corrosion with sandpaper. Afterwards, the dirt is cleaned and the old coating is removed.
It all starts with preparation for restoration Source avatars.mds.yandex.net
To do this, first, the disassembled elements are thoroughly washed with water, then they are dried for at least two days. The next stage is sealing defects. Construction stores sell special putties for wood. They are suitable for filling large cracks, holes left by nails, and scratches.
Putty is a quick way to eliminate minor defects Source www.woodguide.org
The mixture is applied in several layers. A new layer is applied to the well-dried previous layer. Minor defects can be removed with furniture wax. You can start decorating the old cabinet only after the preliminary work has been completely completed. The following solutions are suitable for this.
Gluing wallpaper
It is better to use vinyl rolls and special glue. They are glued to the furniture point by point. You can use them to decorate all external and internal parts of parts. In both the first and second cases, drawings and patterns are first made, with the help of them pieces are cut out from the rolls, and they are already glued to the surface of the cabinet, smoothed with a dry cloth or a soft rubber roller. Once reassembled, the result is fun furniture.
Wardrobe decor with wallpaper Source img.superdom.ua
Decor with wallpaper in Shabby Chic style Source i.pinimg.com
Wallpaper and painting of an old shelving Source kakpostroit.su
Applying a three-dimensional drawing
You can decorate the cabinet using textured plaster. Using it, a three-dimensional pattern is applied to defective areas. To work you need the mixture itself, a spatula and a stencil. It is prepared in advance according to drawn sketches or purchased at a hardware store.
Putty using a finished stencil Source stroyfora.ru
The stencil is glued to the surface of the furniture with tape. Using a spatula, decorative plaster is applied directly on top of it. After it sets slightly, the stencil is removed. The drawing is thoroughly dried. At the final stage, it is coated with acrylic varnish. The result is an ornament that looks very interesting, and this is once again proven by the following photo.
Drawing created on a wooden base using textured plaster Source ckbo1.com
If you want to decorate old furniture using painting or stenciling, you should choose no more than three colors to create them. It’s good if they match the colors of the decoration or textiles. In such a situation, the restored cabinet will become part of the interior and will not look like an alien object.
Using putty you can create even complex bas-reliefs Source avatars.mds.yandex.net
We cover it with fabric
Another original, affordable way to restore a cabinet is to cover it with fabric. You will need cotton material of a suitable color and pattern, PVA glue, acrylic paints and acrylic varnish. When everything is assembled, proceed as follows:
- carefully coat the surface of the wooden elements with glue;
- carefully apply the pre-made fabric blanks;
- use a roller to smooth out the formation of bubbles and wrinkles;
- Apply a second layer of glue on top;
- we apply additional decor (buttons, beads), apply braid (to secure it all well, it’s worth putting everything on Moment glue);
- thoroughly dry the surfaces;
- Cover with a layer of acrylic varnish (twice).
It is better to cover doors and sides of cabinets with fabric.
Wardrobe trimmed with fabric Source www.bestfurniture-bg.com Restoration of furniture with fabric Source magazin-mebeli-spb.ru
See also: Catalog of house projects with second light and a fireplace.
Mastering decoupage
A beautiful wardrobe decor is achieved by making an applique on wood. Art stores sell ready-made kits that contain everything: PVA glue, paints, fixatives, paper napkins with a pattern. The technique for creating decoupage is extremely simple:
- the surface of the cabinet is first cleaned of the old coating;
- then degreased with white alcohol;
- after the base has dried well, it is coated with glue;
- carefully remove the top layer on which the design is printed from the paper napkin;
- it is applied to a surface coated with glue and gently stretched on it;
- another layer of PVA glue is applied on top;
- when the drawing dries well, it can be further refined with paints and brushes, draw an outline, create shadows;
- At the final stage, the cabinet is completely coated with acrylic varnish in two layers.
Decoupage is a simple restoration technique Source modernplace.ru One technique in the design of different pieces of furniture Source pbs.twimg.com
The decoupage technique is not difficult to master; it helps to significantly transform the appearance of furniture. Many designers use this decoration technique and deliberately age new interior items. In this way, they emphasize the chosen style and create a cozy, homely, warm living space.
Decoupage in Provence style Source avatars.mds.yandex.net
Decoupage of an antique cabinet Source vseme.ru
We paint old furniture
Experts, talking about how to update an old wardrobe, advise conducting “experiments” with paints. To do this, you need to buy paints of dark and light shades, two or three bright colors, transparent acrylic varnish and shellac, furniture wax and fine-grained sandpaper.
Painting and decoupage of an old cabinet Source avatars.mds.yandex.net Transformation of an old cabinet with paint Source i.pinimg.com
See also: Catalog of companies that specialize in finishing materials and lighting.
Using all this, you can restore furniture, emphasizing the effect of its wear. It is formed as follows:
- the thoroughly pre-cleaned surface is covered with dark paint;
- after it has completely dried, a layer of light paint is applied on top;
- The surface is fragmentarily cleaned with sandpaper and abrasion is imitated;
- The painting is manually applied with bright colors (you can also use a stencil);
- after drying, the pattern is treated with furniture wax, it is rubbed thoroughly with a brush, the ornament is completely covered with wax (it is important to achieve a uniform shade);
- After twenty-four hours the cabinet is varnished in two layers.
If you then attach new fittings to it, the restored furniture will look more presentable.
Paint can completely change the appearance of old furniture Source remont-samomy.ru Old and new version Source i.pinimg.com Tulle instead of stencil Source i.pinimg.com
Making craquelure
There are compositions on sale that help turn old cabinets into antique pieces of furniture. To create this, you need to buy two-phase craquelure varnish, acrylic varnish with a mat texture, gold powder (it is made from fine powder of non-ferrous metals - bronze, aluminum, copper), and then perform the following procedure:
- apply craquelure varnish in one layer to the cleaned surface of the cabinet, wait until it sets, but does not completely dry;
- apply a second layer of craquelure varnish;
- We wait until characteristic cracks appear and dry well;
- dip a soft sponge into gold powder and rub the cracks with it;
- We cover the top of the product with acrylic varnish.
Craquelure paint and old patina bring out the design on the cabinet in a special way Source berkem.ru Craquelure paint for furniture Source mebburo.ru Patination of craquelure in restoration Source deko-kom.ru
Anyone who doesn’t know how to decorate an old cabinet can watch a master class. It describes in detail each stage of working with special compounds. Instead of gold powder, sometimes specialists use bitumen wax or “dry pastel”. These are special compositions used by furniture manufacturers to create special decorative effects.
How to make a wardrobe or chest of drawers from a sideboard
The difference between a wardrobe and a sideboard is, perhaps, not so much external as functional.
A sideboard is usually understood as a cabinet in which dishes and kitchen textiles are stored. Personal belongings are stored in the closet. The top doors of sideboards traditionally have glass. The bottom of this piece of furniture consists of drawers. Cabinets are often made entirely of wood, although glass and stained glass are also used here.
- If you need to convert a sideboard into a cabinet, you can replace some of the glass elements with wood, or made of plywood, chipboard, etc.
- Another option is to transform the glass from transparent to colored and non-translucent using a special film.
- Also, most likely, you will have to change the color of the sideboard so that it fits seamlessly into the living room.
- It’s not uncommon lately to see master classes on converting old unnecessary sideboards from the Soviet era into multi-colored cabinets for children’s games.
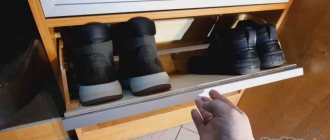
- The chest of drawers is a vertical series of drawers. It is installed in bedrooms and living rooms, allowing you to store personal items and clothing out of prying eyes. If the lower part of the sideboard consists of drawers, depriving this item of the top, you can get a chest of drawers. In some furniture models, individual elements can be detached from the overall structure without problems, in other pieces you will have to use a saw.
So, as you can see, there are many ways to give old furniture a second life. The main thing is to have a desire to work with your hands, as well as a good imagination.
Are you wondering how to make a cabinet out of a sideboard? Then watch the following video, where a wardrobe will be made using the example of an old sideboard-chest of drawers:
Restoring vintage items is the best way to restore their attractive appearance. As a result of the restoration of the sideboard, it is possible to change its design and realize many creative ideas. Processing a sideboard is easy to do even without practical experience.
“Do you still have a sideboard? And we bought a wall!” — Furniture USSR
“What absurdities our ancestors reached! They agonized over every architectural project... And now in all cities they are building standard cinemas, standard multi-storey buildings... Identical staircases, painted in a standard pleasant color, standard apartments furnished with standard furniture, standard locks cut into the doors...” - this is how the famous Soviet comedy begins "Irony of Fate or Enjoy Your Bath!".
These words accurately convey the environment in which Soviet people lived. When people began to move from communal apartments to Khrushchevkas in order to meet communism in a separate apartment in 1980, the need arose to improve their private life.
Then a state, strictly centralized structure was created, regulating the relationship of a person with the objects around him. In 1962, by Decree of the Council of Ministers of the USSR No. 349 “On improving the quality of mechanical engineering products and cultural and household goods through the introduction of artistic design methods,” the All-Union Scientific Research Institute of Technical Aesthetics (VNIITE) was established with branches in the capitals of the union republics and in large industrial areas. This institution developed such branches of design science as rhythmics, modern color science, ergodesign, beauty economics, design programming, futuro design and many others.
The All-Union Furniture Design and Technology Institute (VPKTIM), created in 1962, was also involved in furniture design, where the masters of furniture design of the 1960s and early 1970s worked: Yu. V. Sluchevsky, K. K. Blomerius, E. S. Bocharova , E. Velbri et al. However, the standard Soviet furniture that filled the standard housing was simple, without unnecessary decor, economically and structurally rational. Elements and parts are unified; varnished fiberboard, chipboard, and plastic are used instead of wood. Excessive decoration and stylization slowed down mass production. Designers were in search of constructivism in the 20s and 30s.
One of the main pieces of furniture in the now defunct Soviet Union was the sideboard.
A sideboard is a low buffet consisting of two parts. The lower part is a cabinet, and the upper part is an extension, it looks like a smaller cabinet. Most often, the superstructure of the sideboard is glazed. It can be collapsible or non-collapsible. The height of the sideboard is usually small. There are often models with a wooden bottom, some of which have space for a small minibar.
Initially, the sideboard was intended to store dishes. Tea and coffee sets, sets of glasses and glasses, crystal sets, glass figurines and other little things were carefully and carefully arranged in it. The sets were very rarely used, or not used at all. All this could be stored unchanged for years. It was prestigious to have a sideboard in the house.
In the early 70s, the era of panel furniture began, typological diversity disappeared, it was made “one for all.” And ultimately, all types of furniture were replaced by a “wall”.
“Wall” is a multifunctional object, filled with various equipment and devices with a complicated internal structure and composition: alternating open and closed tiers with free placement of open niches. In the “wall” there is an intensified desire to emphasize and reveal the vertical divisions of cabinet products, to saturate the front surfaces with decorative means.”
A “wall” could take up half a room in a tiny apartment, but it was impossible not to have it. It was not just a household item, but an object of prestige. “The Wall” also gave impetus to the emerging fashion for collecting crystal, books, etc. It was necessary to fill the shelves with beautiful glass doors with something.
They saved up for the “wall” for a long time, signed up for a queue, waited a long time and finally found the coveted “GDR”, Czech or Romanian headsets. It must be said that their prices were quite impressive and reached 1000 rubles, with the average salary of an engineer being 180-200 rubles. In many families, buying imported furniture was considered a very good and practical investment; they bought it as an inheritance for children, that is, for centuries.
One of my friends’ parents couldn’t afford a wall at that time and bought an excellent polished sideboard, and another, I remember, had a wall with not a square, but a round glass opening. It seemed very modern and beautiful, as much as I could appreciate furniture as a child. In our home, as throughout the country, one piece of furniture was replaced by another, depending on “modern” trends and the possibilities of obtaining this or that item. We had a sideboard, then a wall appeared and after some time was replaced by another, more expensive at that time. This did not make an impression on me, since the children had completely different concerns and interests, except that I could distinguish monotonous squares from a door with a round window, which I wrote about above.
So, a typical apartment of the 70s consisted of a sofa and a “wall”, a polished table, two armchairs and a coffee table. The furniture arrangement was the same for everyone, because... the layout left no room for imagination. The home was furnished based on one principle - “it would fit!”
Transformable furniture with multiple functions was very popular.
Most often, beds underwent transformation, which could turn into chairs, beds, sofa beds, as well as tables (bedside table, sideboard table, dressing tables, etc.)
For many families this was a salvation. Sometimes, the only room in the evening turned into one large sleeping place: a sofa bed, chair beds, folding beds, mattresses on the floor. At 7 a.m., the folding beds disappeared, the beds turned into sofas and armchairs, and the trendy floor lamp and coffee table took their original places. During the day, the room again turned into a living room.
living room during the day
bedroom at night
Everyday sports exercises with furniture (first until you click from yourself, then with force on yourself, then vice versa) were performed by the majority of Soviet citizens, since beds were not so popular and were even considered something indecent after the recent torment on spring nets with pyramids of pillows on them. them.
The sofa, another item of Soviet housing, could also be turned into a sleeping place through simple manipulations, but had a significant drawback. After 5-6 years of use, the foam rubber in the pillow turned into dust. The owner of the sofa had two options: stuffing and upholstery or a cotton blanket over hard wire ribs.
Linen cabinets and chests of drawers were, after all, luxury items. Usually they stood in bedrooms and indicated that there was a real bedroom in the apartment.
Also a mandatory item in a Soviet apartment are trellises and mirrors with a bedside table. Where to install this source of pride was decided by the owners themselves.
We didn’t have a trellis at home, but a friend had one. It stood in the living room, although we didn’t know the word “living room” and always spoke more simply - a large room. We had fun looking at ourselves in it from three sides at once. My parents have a mirror with a cabinet in their bedroom, and another friend had it in the hallway.
The chairs were generally quite good - comfortable, with varied upholstery, pleasing to the eye and creating comfort.
We've had them in our house for as long as I can remember. Initially soft, but with wooden handles, but then there was a change to completely soft imported ones. The parents also bought chairs with wooden handles from their friends; all the furniture differed only slightly in size and color of the upholstery.
Another must-have piece of furniture is an extendable polished table.
This piece of furniture always seemed superfluous to me because of its bulkiness, when I wanted to play and run around the house, but it was useful. As a child, I drew with pleasure behind it, and the pencils did not fall anywhere, rolling across the entire area of the table.
A floor lamp in the house is the dream of every housewife, a sign of prosperity.
There was more than one floor lamp in our house. Few people could pass by such a thing in a store, and the most interesting thing is that I don’t remember how we used them, and where they then disappeared.
The pendants in the doorway were either bought ready-made, but these were in short supply and a little expensive, or they were made themselves, from candy wrappers or postcards.
Our house had bamboo curtains with an exotic pattern. I liked them, but there was one minus - they rattled, and this was entertaining only at the very beginning, and then a new game appeared - go through bamboo sticks so that they don’t rattle.
Invariable attributes of the living room: a three-tier chandelier with plastic pendants.
This is a classic example of the “crystal – the bigger the better” fashion trend. Few could afford a crystal or glass chandelier, and as many could afford an imitation plastic one. Everyone had such a chandelier, the most tedious moment was washing each individual “icicle”. With what relief they were removed from their ceilings.
Of course, carpets were part of the interior of a Soviet apartment. It seems that no one needs them, but without them there is no way. Well, that is, not at all! There is a suspicion that they were included in the construction documentation when designing “Brezhnevka” and “Khrushchev” buildings.
Carpets in the USSR had a double meaning: as a household item and as a work of art.
They were an inseparable pair with crystal. Crystal was the best gift, especially vases. Probably, almost every family still has crystal from the USSR. If there was a carpet on the floor or on the wall, and the varnished “wall” was bursting with crystal vases and candy bowls, then life was a success and had entered the mainstream of prosperity. Even the poorest family had to have at least one carpet. People walked on tiptoes on the painted floors, but the “periodic deficit” was firmly entrenched on the walls of the houses. The lucky ones allowed themselves to have a carpet in each room.
Turkmen, Azerbaijani, Georgian, Armenian and Dagestan carpets were considered the best. Exhibitions were organized annually, catalogs and art albums of carpets were published.
But the art of carpet weaving was of little interest to the ordinary Soviet citizen, hurrying through the first snow with a rolled-up carpet to knock out months of dust from it. It was the carpet that gave birth to such an important household item as the red plastic beater. Many probably remember how they woke up on Sunday to the rhythmic clapping of the carpet being knocked out by their neighbors.
In addition to aesthetic value, the carpet on the wall also had a practical value. The thin walls of the Khrushchev buildings were not able to protect against the sounds of neighboring life, and it served as sound insulation, and in some cases also covered wall defects.
There were a lot of carpets in our house: two in each room. I cannot say where they came from and in what ways they were “obtained”. As children, we took everything for granted. We moved to a new city, hung carpets, mom sewed carpet rings, dad drove nails into the wall. Each person had their own carpet over their bed. I saw the same thing with my friends, patterns and colors changed, but the furnishings and style of the Soviet home did not change.
Today, opinions about Soviet furniture are mixed, although many continue to use sideboards, cabinets and shelves made in the USSR. Some talk about high quality and ergonomics, others talk about rough execution and an absolute lack of aesthetic qualities. But the Soviet Union is our past, which will remain unchanged no matter how we treat it today. This is part of the evolution of human tastes and preferences, and we had to go through this stage in order to appreciate today, today's opportunities and offers. And in fifty years, our current houses will also be an object of curiosity for future generations, with the inevitable assessment of pros and cons. We will go through plastic windows, Chinese lamps and microwave ovens and come to something else. But this stage is necessary for our future, just as the past aesthetics of the Soviet apartment was necessary for the perception of our present.
Several options for remaking Soviet furniture:
Source
Finishing of main surfaces
Ceiling
The ceiling, as a rule, is simply painted white. There is no place for stretched canvases or spotlights. However, you can “outwit” the composition with matte materials and appropriate lamp design. But stucco remains more appropriate.
Floor
Traditionally, the floor is laid with wooden planks in simpler interiors, parquet in noble premises, tiles in the kitchen, bathrooms, and hallways. Modern parquet can look quite varied, but it always looks expensive. But you need to choose boards that are worn.
Walls
Walls can be varied. Most often they are covered with wallpaper. But if in the aristocratic version of the vintage style these are textile materials, then in a simpler interior ordinary paper strips are used. The pattern of these imitates brickwork, whitewash, the texture of stone or wood. You can choose a small floral pattern or a large classic ornament.
The walls can be painted or paneled at the bottom, leaving wallpaper or paint on top. It all depends on the character and mood of the situation.
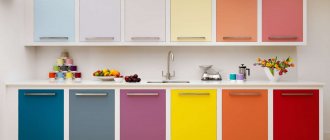
The choice of color and pattern depends on many factors. For example, in the Provence style, the wallpaper will be exclusively pastel in color and with small flowers. The interior is closer to classical and baroque and can use large floral or ornate patterns, as well as stripes. The design of the mid-20th century will “prefer” graphic contrasting solutions - black and white tiles, or rather its imitation, geometric patterns. An industrial loft can also be vintage, in which case the brick walls will remain. But most often vintage is wallpaper with flowers or stripes.
Slide with glass
The first slides were open - just shelves on which dishes were placed. At the bottom is the chassis, at the top is beautiful and expensive. The shelves are wide at the bottom and narrow at the top. The dishes were piled up. Hence the name. If the buffet and the stand are furniture for the kitchen, then the cabinet is furniture for the dining room (if there are dishes in it) or the living room, if it is intended for storing and displaying antique sets, silverware and magnificent glass to guests. The bottom of the slide is deaf. The top is glazed on three sides. Sometimes the slide is called a showcase. But the display case, unlike the slide, does not have lower blind compartments in the form of a cabinet with doors or drawers. In the second half of the 19th century, the slide glass on the facade was made bent. The slide has always been a luxury item. It’s rare for anyone to be able to buy an antique slide cheaply.
painting
Having the proper skills, you can start painting on wood. For painting, it is enough to use brushes of the appropriate size and paint of the desired color.
Varnish
Applying varnish to a wooden surface not only transforms the appearance and changes the visual perception, but also protects the sideboard from external influences. Wooden furniture elements can be varnished immediately after processing or after painting.
Antique finish
A special type of finishing helps to restore a sideboard and at the same time preserve its ancient appearance. To add antiquity, you can use several techniques.
Craquelure varnish
When starting to restore a sideboard, craquelure varnish is applied between layers of acrylic paint and left for 35-40 minutes. After drying, the varnish creates a cracking effect on the entire surface of the applied paint layer.
Mechanical aging
For mechanical aging of a wooden surface, you need to use a stiff brush, with which some of the fibers are removed. The created relief can be restored with paint and varnish to emphasize the structure. The final result depends on the degree of surface treatment with a brush.
Gold plated paint
You can paint a Soviet sideboard gold using materials created from artificial components. The most common option is decorative acrylic paints that imitate gold color. To apply the material, it is allowed to use foam rollers, a spray gun and brushes.
Planning an interior design in an antique style
Before you start work, you should carefully consider the design of the future room. You need to make a list of all the Soviet period items that are available.
It is welcome to draw up a drawing of each room, where you can draw a diagram of the arrangement of objects. This approach will allow you to:
- Make a list of required materials.
- Get an accurate idea of what the result will be.
- Purchase the necessary funds in sufficient quantities.
Pre-planning allows you to speed up the work process. You can purchase everything you need in advance to get started. Don't be afraid to show your imagination. Vintage items will allow you to enjoy creativity.
Using Soviet furniture you can decorate a room in a retro style
The result will give you pleasure. Your apartment will turn into a cozy nest, designed for a comfortable stay.
Unnecessary junk or luxury item
Many people try to immediately get rid of old furniture as soon as the opportunity arises. Yes, of course, a new modern interior is wonderful, but few people will be surprised by it now. Therefore, think before you take the old sideboard that you inherited from your grandmother to the landfill; perhaps it will become the main decoration in the interior of your home. This is especially true for furniture from the beginning of the last century; today, it is a real rarity into which you can breathe new life.
It is important to understand that restoring a sideboard with your own hands is not such a difficult task, but it will require some time and skills. You can contact restoration specialists, they will be happy to get to work and do everything you need, just call them. But such a pleasure will be very expensive, and the process of professional restoration itself is quite time-consuming
Advice, roll up your sleeves and try to do this work yourself. This will not only cost you much less, but it can become a very exciting activity, help you master some of the skills of a restoration artist and enrich you spiritually
But such pleasure will be very expensive, and the process of professional restoration itself is quite time-consuming. Advice, roll up your sleeves and try to do this work yourself. This will not only cost you much less, but it can become a very exciting activity, help you master some of the skills of a restoration artist and enrich you spiritually.
Where does the process of restoring old furniture begin?
Restoring an old sideboard requires studying some issues related to the history of the product, especially if it is antique. You should first try to determine in what time, era it was made, from what materials, conduct an examination for damage, possible loss of some elements, in a word, look at the future masterpiece with passion.
You may need to order the manufacture of some parts from wood craftsmen, but it is worth paying attention to one fact. Restoring a Soviet sideboard will not require any deep knowledge or special skills from you; there can be many design solutions; sometimes it’s enough to change the color of the product and buy vintage handles, and the thing will sparkle with new colors. When we are talking about truly unique antique furniture from a famous master, made from valuable types of wood with special virtuoso execution, then it is still better to give it to specialists for restoration, since without any knowledge you can simply ruin an expensive thing. If you decide to breathe new life into an old sideboard yourself, you need to properly prepare for this
Perhaps the restoration requires some non-standard solutions, parts made from special valuable types of wood, the advice of a knowledgeable, reputable cabinetmaker will not hurt you
If you decide to breathe new life into an old sideboard yourself, you need to properly prepare for this. Perhaps the restoration requires some non-standard solutions, parts made from special valuable types of wood, the advice of a knowledgeable, reputable cabinetmaker will not hurt you.
Buffet as a designer find
In order to make a unique, inimitable piece of furniture from an old sideboard, you need the eye of an artist - a designer and hands that grow from where it is needed. There are a huge number of techniques for restoring old furniture, ranging from partial restoration and refreshing the color to completely changing the appearance. The method of decoupage, painting, mechanical aging, varnishing, gilding, and many other methods that entirely depend on your taste preferences can be used here.
Many designers, taking antique pieces of furniture to remodel, completely change the color scheme, adjusting it to the overall look of the room, using new handles, inserts, adding details and all kinds of decorations. The main thing here is not to overdo it and not slip into bad taste, which is the sin of many amateur craftsmen when they first turn to this activity.
Necessary tools for restoring old furniture
- Sandpaper and solvent
Sandpaper of different densities
Any old piece of furniture is first of all covered with a factory layer of paint and varnish; it is possible that earlier they also tried to change or restore it. Therefore, it is necessary to rid the buffet of any old covering. Coarse sandpaper is needed for sanding and cleaning all surfaces. It’s easy to ruin wood by simply trying to peel off the top layers with sandpaper, which is why a solvent is needed, acetone is ideal
It is applied with a brush over the entire surface, special attention should be paid to the carved parts. Another way is to soak a rag or cloth and cover the sideboard for a few minutes. The layer of old coating will come off on its own, and the buffet can be cleaned with a simple cloth.
The layer of old coating will come off on its own, and the buffet can be cleaned with a simple cloth.
Multifunctional Household Hand Tool Set
It is better to process furniture in a disassembled state, so you will need a lot of tools. It is possible that the buffet will only require cosmetic repairs. But sometimes you may need to tighten loose doors or secure legs. You need to have a set of screwdrivers and wrenches, a hammer, etc. on hand.
Antique furniture fittings for an updated buffet
Updating the sideboard will also entail installing new fittings - handles, fasteners, etc. All this can be easily found in specialized stores or made to order in workshops.
- Additional materials: wax and putty to remove unevenness; primer for surface treatment.
- Brushes, sponges and rollers for painting.
- Paints and varnishes (acrylic and oil paints, varnish, stain).
- Masking tape, PVA glue.
Additional materials for do-it-yourself buffet restoration
The doors of an old cupboard are often glazed, so you will need tape to protect them from paint. You will need glue if the furniture has already begun to delaminate.
Look at junk with an artist's eye
You may not find a stunning buffet in your attic. But you will collect a whole dump truck of broken chairs, faded masterpieces by unknown artists in carved frames, lace curtains covered with who knows what... Examine the finds carefully: an object can sparkle if you rid it of excess and spoilage. Feel free to be a cool-headed auditor. Take the beautiful parts, get rid of the old ones.
You can cut handmade lace from holey curtains and sew it onto new curtains for the kitchen. Or place the lace in a beautiful frame under glass...
Saw off the twisted legs from the rickety table, place them under the new tabletop - you will get an elegant coffee table. Or, conversely, use only the countertop.
A cloudy picture or an old cabinet door is not at all pleasing to the eye, but a mirror in such an authentic frame just begs to be added to a modern apartment.
Antique furniture
Antique interior items must fit into the overall style of the room, they must have an appropriate environment. An exquisite and beautiful antique wardrobe will certainly look very incongruous among modern furnishings with a stylish design. This will become a real bad manners in design. It is necessary to think in advance and plan your interior correctly.
It's best to start by choosing the style of the entire room. There must be a unified concept throughout. There are several main directions in the interior where antiques can optimally fit:
- This interior style, such as historical, goes perfectly with antique furniture. Trying to recreate the era of chic baroque in your own apartment or house or convey the restrained style of the classics of antiquity is not an easy, but worthy task. You can easily cope with it if you know the main points of this direction. You should know that such a piece of furniture as a wardrobe always looks different. For example, the luxurious antique style is expressed in particular severity and clarity of lines, and baroque becomes the embodiment of all the splendor of the theater with its original and fancy decor.
- An antique cabinet sometimes becomes appropriate for a modern interior. This will come as a surprise to many. Many creative people choose this style as the not very common boho. It is quite colorful and original in its own way. Grandma's antique buffet, which we inherited, can fit perfectly into a free country style.
Antique furniture can decorate many rooms. To create an original and beautiful environment, you must follow the following recommendations:
- When choosing a historical style, be sure to adhere to all the correspondences of a given era, never place an antique wardrobe and a modern bedside table next to each other;
- Often, antique furniture is large in size, and if in a small room the closet is in the center and occupies a fairly large space, then there should be a minimum of other interior items so that the room does not look cluttered;
- Antique items often stand out for their original decor, natural materials or masterful carvings, so it is imperative to provide high-quality lighting in the room so that you can admire all this beauty.
There are different types of antique furniture, and you should find the optimal model for your chosen interior. Consider all the nuances when choosing furniture.
The uniqueness of antique furniture
Antique wooden furniture has remained popular for several years now. This can be explained by the many advantages it has:
- It harmonizes perfectly with different colors and textures in the interior.
- Can be used for any style.
- Creates a cozy atmosphere in the room.
- Excellent workmanship.
There are several solutions:
- Buying furniture from an antique store is an option for those with an unlimited budget. This fact can be explained by the fact that genuine antique furniture or restored compositions are very expensive due to exclusivity.
- Purchasing modern furniture that has been artificially aged. But even for this you will have to spend money.
- Aging furniture with your own hands. To do this, use what you have at your dacha or in the house. This approach will be a solution for those who have creative abilities and good imagination. Next, we will tell you how to age furniture with your own hands.
Upgrade techniques
There are several simple techniques that allow you to update an old cabinet with your own hands:
- Covering with colored film.
- Photo printing
- Pasting with photo wallpapers
- Stained glass film
- Vinyl and paper wallpapering
- Decor with fabric
- Painting
- Artificial aging
- Decoupage
- painting
- Mirror doors
- Replacement of accessories
- Decorative elements.
Pasting with colored film or stickers
To make the old cabinet harmonize with the updated interior of the room, you can add various details. An unusual geometric design created using self-adhesive film will breathe new life into old-fashioned furniture. There are two types of self-adhesive film:
- standard (matte or glossy surface with a variety of patterns and colors);
- furniture for the facade, with a touch of wood or metal
Self-adhesive film will breathe new life into an old Soviet cabinet
Step-by-step instructions for covering a cabinet with self-adhesive film
- Preparing the facade: it is necessary to clean it from dirt and degrease it with chemicals. The film will adhere much better to a de-greased surface.
- Treat the surface with a primer.
- If you need to level the surface, you can “walk” over it with plaster.
- Measure the required piece of film from the wrong side, remembering to take into account the allowances. As a rule, there are special markings on the reverse side.
- Remove the protective layer from the inside by 2-4 centimeters.
- Adhesive to the cabinet.
- Use a rag or spatula to smooth the surface.
- Make sure no bubbles form.
- To avoid bubbles, attach the sticker carefully, straightening the film.
Tip: If the bubbles that appear do not smooth out, pierce them with a needle.
Enjoy the result of the work done!!!
Photo printing and photo wallpaper
This method is ideal for updating a kitchen set. Repair stores always have a large selection of photo wallpapers of various quality and sizes. Thanks to the variety of images, you will definitely be able to find your own option for every taste. If you still haven’t been able to find an option that suits you, then you can make photo wallpaper with any image to order. Complete exclusivity will not leave anyone indifferent. Almost any printing center will be able to make your dream come true: make wallpaper from your photo, enlarge the image without losing the quality of the picture; make a collage of several photos or pictures; apply an image to a film for gluing to a specific type of surface.
Original design for updating an old Soviet wardrobe
Before sticking photo wallpaper, you need to clean the doors and facade of the old coating using a spatula. Level the surface using sanding and priming. Paste the wallpaper. To secure the result, coat with clear or tinted varnish.
Tired of your old closet but don't have the money for a new one? 5 ways to freshen up his appearance!
Vinyl and paper wallpapering
The renovation is over, but the wallpaper remains? Don't rush to throw them in the trash! Wallpaper glued to the facade of a Soviet cabinet will give it new life! A built-in wardrobe decorated with wallpaper will visually merge with the wall. Moreover, simple paper wallpaper is very easy to glue. Their advantages include low price; a light weight; The disadvantages are low strength compared to non-woven and vinyl wallpaper. Do you have any floral wallpaper left? With their help, a bulky Soviet wardrobe will be transformed into a wardrobe in the now fashionable Provence style.
Wallpaper is the most budget option for updating old furniture with your own hands. No special skills are needed here. With the help of wallpaper you can turn an outdated product into a modern art object.
The most budget-friendly upgrade option is wallpaper.
Overlay decorative elements
So, the moment came when the buffet began to take on a new look. For this stage I needed:
- mounting adhesive Moment Installation Instant grip MP-90;
- super-strong assembly adhesive Titeseal;
- screws;
- screwdriver
I wanted to decorate it with carved elements and paint it with chalk paint. I already had some elements in my stash, but some had to be made to order. The ones I had were made of oak, so I had to order the missing elements also from oak, although it turned out to be a little expensive. But what can you do for your “beloved child,” and the buffet has already become my brainchild, with which I not only managed to become close, but also fell in love with it. ))) I glued the decor using two types of glue: Glue Moment Installation Instant Grip MP-90 I really liked. It is quite thick and it is enough to apply it only in a few places on the decorative element. This is a very strong adhesive and immediately holds the glued object in place well. Small objects were glued with one glue, but large objects were glued with two glues and also secured with screws. For example, on elements such as “grape leaves” I first applied Moment Installation Instant Grip MP-90 in several places in order to fix them well on the door, in other places I applied Titeseal glue using a gun - it is more liquid and easier to apply. thin curls of a decorative element. Then I additionally fixed them on the inside of the door with three screws each. The size of the screws was selected taking into account the thickness of the door and the cover element. The glue that came out around the edges was removed with a toothpick and a knife. The doors of the chest of drawers are decorated with decorative elements. Photo 57
Photo 58