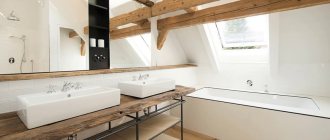
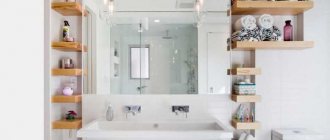
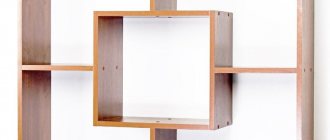
A bathroom shelf is an important and functional element of the interior. It is used to store various detergents, shampoos, and cosmetics. That is why it is important to choose the most convenient location for the structure - so that all items are at hand.
Shelf in the bathroom
In this case, any shelf can be purchased at a furniture store or made with your own hands. If you choose the second option, you will be able to get the product according to your personal preferences. Below we will tell you more about what bathroom wall shelves are available and how to make them yourself.
DIY wall shelves
What types of shelves are there?
There are various configurations of bathroom shelves, so craftsmen are not limited to any shapes and create unique models of decorative products. It is important to note that the design should be as functional as possible.
Table No. 1. Types of shelves for the bathroom.
| View, illustration | Application |
| Removable | The shelf is installed on the wall using special suction cups. The main advantage is that it can be removed at any time, so such products are suitable for people who like frequent redevelopment or periodically move. |
| Mounted | Its design is no different from the previous version, but this shelf is more securely mounted on the wall. It can only be removed using special tools. |
| Corner | Such products are great for small bathrooms, where it is important to save any available space. |
| Built-in | This product is a niche in the wall. It looks stylish and aesthetically pleasing, but the design is quite difficult to make yourself - you will need the help of a professional. |
| Hanging | Most often, such products have an unusual decorative appearance, but are suitable only for spacious rooms. |
| Floor | This shelf is installed on the floor and is a separate piece of furniture, so the design is only suitable for large rooms. |
Preparatory work
A plasterboard shelf can be of such a configuration that your imagination allows you to create it.
For proper design, you need to know exactly how your planned shelf should look. Drywall shelves can be straight, angular, semicircular, curved, protruding or recessed into the wall surface.
- We make a detailed drawing, marking on the drawing where measurements need to be taken.
- After we take measurements, we measure out the section of the wall on which the future plasterboard shelf will be located. We show maximum accuracy, otherwise problems with fastening may arise later.
USEFUL INFORMATION: Why do you need crabs for drywall: method of attachment to the profile, types, application
Using a detailed drawing, you can calculate the required materials. During manufacture and installation you will need:
- moisture-resistant drywall;
- guide and load-bearing profile (UD and CD, size 25 × 50 will be sufficient), for a curved shelf design - arched;
- self-tapping screws for plasterboard 25 mm, dowels;
- serpyanka mesh;
- primer;
- putty.
Important! To create a shelf, it is better to choose thick drywall, 15–18 mm thick, or lay plasterboard in two layers. When using sheets of standard thickness - 12.5 mm - you need to take care of the reliability of the frame: load-bearing profiles should be spaced frequently.
Shelves made of plasterboard make the interior unique, beautiful and functional.
Materials for making shelves
In hardware stores you can purchase various materials intended for making shelves. It is important to consider that not every one of them is suitable. There is always high air humidity in the bathroom, which is why some wooden products can quickly become deformed. In any case, it is necessary to evaluate in advance the advantages and disadvantages of each material, and only then begin making the shelf.
Table No. 2. Materials for making shelves.
| View | Description |
| Plastic | It is the most practical material, which is often used in the manufacture of various designs for the bathroom. Another advantage of plastic is the variety of colors. It does not absorb moisture and is easy to wash. Typically, such products last for many years. |
| Metal | As in the previous case, this material can be called quite practical. Such structures can withstand a lot of weight. It should be borne in mind that not every craftsman without special skills can cope with the manufacture of metal shelves. In addition, over time, rust may appear on the surface, so such products should be protected from constant contact with water. |
| Glass | This is a fairly practical option for making a bath shelf. The main disadvantage of the material is fragility, and due to large overloads, cracks may appear on the surface. Therefore, experts recommend choosing durable glass options for such purposes. |
| Tree | When installing any wooden products in the bathroom, it is important to ensure proper operation of the ventilation system. Of all the options presented, this option is less practical; it quickly deforms when in contact with moisture. Special treatment of wood with moisture-repellent agents will help to avoid such problems. At the same time, wood is often used to make shelves at home. |
| Drywall | Making shelves from plasterboard has become very popular. This material has an aesthetic appearance, but is also quite durable. |
| Fiberboard and MDF | As in the case of wood, shelves made of this material are subject to deformation due to moisture accumulation, so it also requires special treatment. |
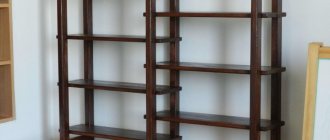
Bathroom rack
How to make a multi-tiered structure for decorating a bathroom interior? The following master class will help you cope with this task.
To implement the project you will need:
- Chipboard;
- Self-tapping screws;
- Screwdriver;
- Building level;
- Simple pencil;
- Jigsaw;
- Metal corners;
- Furniture varnish;
- Brush for applying the composition.
The height of the structure will be 110 cm, and the width will be 90 cm. To do this, we cut out 4 parts from the chipboard, 110 cm high. The width of the elements will be 35 cm. We fix them to each other using metal corners, a screwdriver and self-tapping screws. As a result, we should end up with a rectangle, the inside of which will be decorated with shelves.
- Now we divide the rack blank into three parts. As a result, each section will be equal to 30 cm.
- Next, we move on to creating shelves. The width of each part will be 30 cm.
- We choose the height for the position of the elements independently based on the drawing.
- For example, the distance between two shelves can be 30-40 cm; in the second compartment you can make 3 shelves.
- In the third, we will create a spacious storage system, which includes from 5 to 6 compartments, allowing you to store towels and various small items.
- Such bathroom racks help to place all the necessary things in one place.
- Now there is absolutely no need to search for a long time for any little thing or face and body care products.
To prevent the parts from moving, use metal corners. Self-tapping screws will help secure them. When choosing consumables, it is necessary to take into account the thickness of the wooden base so that sharp elements do not form on the surface.
At the bottom you can attach wheels for mobility of the rack. Thanks to them, you can move the structure without much effort. Such product models are found in modern bathtubs.
The concept of these styles is based on the use of a minimum number of decorations. Particular attention should be paid to the color palette. Professional designers recommend painting finished products in the same shades.
When the structure is fully assembled and ready for use, it is necessary to coat its surface with a protective varnish. This way the wood will not deform when exposed to high humidity.
This model of shelving is suitable for spacious and small spaces. In large bathrooms, flooring products are used to zone the area.
Choosing a shelf mounting location
Most often, they prefer to mount shelves on the bathroom wall. For such purposes, the following fasteners are used:
- self-tapping screws;
- dowels;
- suckers.
The latter option is used only in rare cases, because the suction cups can become detached at any time, causing the shelf to collapse.
Suckers
To save space, a shelf made of wood or plastic can even be mounted on a door. To make it look aesthetically pleasing, the product can be decorated in the same color.
For a very small bathroom, built-in shelves are most relevant. The presence of a niche allows you to get additional space for storing various small items. Moreover, this method requires extensive work and redevelopment, which is not at all relevant for many people.
Options for shelves and door pockets
Tools and materials for work
Let's consider the material that is useful for making the stand:
- Slats for the production of crossbars and planks;
- A block used as a temporary support;
- Shelves can be MDF boards or chipboard, or you can also use plywood;
- Dowels, as well as screws;
- Electric screwdriver, you can also use a screwdriver;
- Level;
- Tape measure or measuring tape;
- Chalk.
If it has been decided to use a sheet of chipboard or MDF, then it is necessary to first ensure that they are cut to certain sizes. Often such services are provided in special departments of stores.
How to make a shelf with your own hands?
You can make shelves with your own hands in the following ways:
- purchase materials and then cut out design parts from them;
- buy ready-made shelf elements and then assemble them. You can buy ready-made panels for assembling a shelf
We will look at the most optimal ways to create shelves with your own hands from various materials.
Glass shelf
A distinctive feature of glass shelves is their easy installation. Typically, such structures are mounted on special holders.
To make a shelf you will need the following:
- glass with a thickness of at least 4-5 millimeters;
- dowels;
- fasteners;
- installation tools. Only durable glass may be used
Video - A simple way to make a glass shelf
Step-by-step instruction
Step 1. It is necessary to cut out the base of the structure according to the template. To do this, you will have to first measure the distance on the wall so that the shelf fits there without any problems.
It is necessary to cut out the base of the structure according to the template
Step 2. After which you will need to cut out the glass and carefully process its sharp edges. If you do not have the skills to work with this material, it is better to order parts from a specialist.
Sharp glass edges need to be processed
Step 3. It is necessary to mark the place where the shelf is attached to the wall. It is important to correctly determine the height of the structure. Usually the shelf is hung at a distance inaccessible to small children. In addition, it should be remembered that the structure is installed only in a horizontal position.
Determining the height of the structure
Step 4. The next step will be installing the fasteners. Typically, part of the holder is mounted into the wall, and the other is fixed to the shelf. All this work is carried out using dowels and a building level. For a small shelf you only need a couple of holders. While a large product will have to be secured to several such elements for greater reliability.
Installing fasteners using dowels
Step 5. The final step is to install the glass shelf on the holders. These are the simplest actions that do not require professionalism.
Installing a glass shelf
Plasterboard shelf
An equally simple but popular method is to make shelves from plasterboard. This material allows you to create products of various configurations.
Advantages of plasterboard shelves
To make the structure you will need the following materials and tools:
- profiles: carrier (PN) and guide (PP);
- dowels;
- slats;
- self-tapping screws;
- plasterboard panels;
- primer;
- set of tools for installation;
- emery cloth;
- brushes and spatulas. Materials and tools for work
Step-by-step instruction.
Step 1. Based on preliminary markings, holes should be made in the wall where the dowels will be fixed. Their diameter should be 10-15 millimeters larger than the dowels. In this case, it is necessary to leave a distance of about 100-150 millimeters between them.
Holes for dowels
Step 2. Next, place dowels in the prepared holes and hammer them into the wall. Then you need to adjust the PP profile to size by attaching it to the wall according to the markings of the fasteners. Then the self-tapping screw with a washer should be inserted into the profile hole and secured tightly to the dowel itself. The same actions must be done with other fastening points. You can check the correctness of the profile fastening using a building level.
It is necessary to adjust the profile to size by attaching it to the wall
Step 3. The PP profile acts as a fastener and guides the entire structure. It is fixed to two walls at once, where an angle is formed, which is fixed with self-tapping screws. The PN profile will need to be pre-cut to obtain two longitudinal parts and four cross members (the length of the shelf will be 12 centimeters, and they are fixed every 4 centimeters).
The profile must be fixed on two walls
Step between profiles
Step 4. Longitudinal slats are placed in the PP profile. In this case, one of them is laid with the viewing side outward, and the other inward. Then they should be fixed in this position with self-tapping screws. It should be borne in mind that this design is not durable, so it is further reinforced.
Longitudinal slats in the profile
Step 5. Following from the edge, additional strips must be installed along the entire wall every 400 millimeters (they are held in place by fastening with self-tapping screws and dowels). Their dimensions will differ depending on the size of the shelf itself (the size must match). Then you will need to secure the lower points of the planks with the outer parts of the longitudinal ones. This can be done using a PN profile, the size of which is determined by calculations.
Attaching additional strips
Step 6. The ends of the PN profile must be connected to reinforcing slats and inserted under the front part of the longitudinal strip. Thus, the profile should be fixed at four points on all sides. Thanks to this fastening, the shelves will withstand even heavy loads.
Due to fastening, the profile can withstand large loads
Step 7. Then you will need to cut sheets of moisture-resistant drywall to the dimensions of the resulting frame. To cover the structure you will need to prepare 5 parts. First, fix the bottom one, and then form a common box. In addition, it is necessary to make shaped grooves under the fixing slats, and only then secure the drywall using self-tapping screws.
Formation of a common box
Step 8. Make the overlays on the sides in the same way. In order to secure them you will need to use 4 self-tapping screws. Finally, the top sheet of drywall is installed, after which the product takes on a normal appearance. Some craftsmen also cover the retaining strips with plasterboard or paint over them.
Fixing the side panels with self-tapping screws
Step 9. The finished structure requires further finishing. First of all, you will need to cover all the joints of the drywall.
Finishing the finished structure
Finishing a plasterboard shelf.
Step-by-step instructions for finishing a plasterboard shelf:
Step 1. The finished structure should be coated with several layers of primer.
Primer coating
Step 2. Carefully mask all joints. This must be done especially carefully, otherwise cracks may appear.
Masking joints
Step 3. You need to install perforated corners in the corners and then secure them with plaster. For various shaped structures, you can purchase special flexible arched corners (they bend along sections without any problems).
Perforated corner
Step 4. Then you need to putty the entire structure and leave it until completely dry. A day later, carefully seal the shelves on all sides again.
Putty construction
Step 5. After the last layer has dried, you need to go over the entire structure with sandpaper.
It is necessary to walk with sandpaper on the dry surface.
Step 6: Apply a coat of primer to the sanded shelves.
Shelves need to be primed
Step 7. Cover the shelves with decorative plaster, and then paint them in any color of your choice.
Decorative plaster
Corner shelf made of MDF
To make a corner shelf you will need to prepare the following:
- MDF sheets;
- electric jigsaw;
- screwdriver;
- set of tools;
- sandpaper;
- building level;
- screws;
- dowels;
- pencil;
- construction compass;
- putty knife;
- primer;
- paint.
Important! If wood is used instead of MDF to make the structure, then it must be pre-treated (dried and planed).
Table No. 3. Sequence of making a corner shelf.
| Illustration | Description |
| It is necessary to calculate and mark the structure on an MDF sheet. To do this, use a construction compass or a pencil with a rope. You will need to draw a circle according to the selected parameters, which will be divided into 4 parts. | |
| We cut MDF sheets using an electric jigsaw. This must be done very carefully, following exactly the markings, otherwise the shelf will be crooked. The edges of future shelves at this stage have irregularities that should be sanded with sandpaper. | |
| Next we have to assemble the entire corner structure. For such purposes, horizontal and vertical elements are used, and their end part must be rectangular. | |
| You should once again make sure that the geometry of the structure is correct using a level, and only then make holes for the fasteners. | |
| You will need to tighten the screws on the sides of the workpieces. Then connect all these parts, securing the bottom and side elements. The correctness of their location can be checked again using a building level. | |
| Finished shelves can be coated with moisture-resistant paint or covered with a special polymer film. | |
| Then all that remains is to make holes in the wall, secure the dowels and the shelf itself. |
Detailed diagram for making a corner shelf
Video - How to hang a corner shelf in the bathroom
Bathroom shelf made of wooden pallet
When choosing a wooden shelf option for your bathroom, you shouldn’t settle for typical box-shaped designs. Currently, there are a huge number of different design solutions. An unusual shelf, which has a decorative appearance, can even be made from a pallet.
To do this you will need the following:
- wooden pallet;
- fasteners;
- circular or hand saw;
- dye;
- brushes
Step-by-step instruction.
Step 1. It is necessary to disassemble the pallet into parts.
Wooden pallet
Step 2. Next, use a saw to cut the stand with dense blocks of wood. As a result, there will be a plank at each end.
Cutting off a piece with a saw
Step 3. Next, you will need to cut out any of the remaining blocks to use for installing the shelves.
Need to cut a block of wood
Step 4. You can use a single board from a pallet to make shelving, dividing it in half. The remaining part is used for the middle shelf.
Fastening shelves to boards
Step 5. Next, you need to attach the shelf to the wall without fastenings to see how it will look in the end.
Shelf on the wall
Step 6. Then you should paint the structure with moisture-resistant paint in several layers.
Moisture-resistant paint treatment
Step 7. After which the shelf should be screwed onto the support block.
Securing the shelf with screws
Step 8: Place various accessories on the shelf to test its strength.
It is necessary to check the strength of the shelf
Important! Any wooden shelf can be covered with stain and then several layers of varnish. This treatment will reliably protect the structure from moisture.
Pipe rack
This is a fairly simple design; to make it you will need to prepare:
- grinder;
- locksmith tools;
- pipes: 30, 26, 46.70 centimeters;
- cross pipes (20 centimeters);
- tees;
- knee;
- flanges;
- plywood sheet;
- paint.
Step-by-step instruction.
Step 1. First, you need to prepare the parts for future shelves, which are cut from plywood to size.
It is necessary to cut parts from plywood
Step 2. You need to make holes in the shelves for the pipes, and then carefully sand them and paint them.
Need to make holes for pipes
Step 3. Flanges should be installed at the ends of the pipes, then tees, and then a transverse pipe with an elbow.
Pipe fastenings
Step 4. Attach another part of the pipe on top, and then install the shelf. The remaining parts of the rack should be assembled in the same way, fixing the flanges to the upper ends.
Shelf installation
Step 5. The correct location of all structural elements can be checked using a level.
Level
Example of a finished design
Design, construction and mounting methods
Before you start creating a rack, you need to decide what the shelves in the pantry and the structure itself will look like, as well as what fastenings to connect the shelves to the wall.
There are only two options for how to make a rack, namely, make a free-standing shelf, or simply attach the boards directly to the wall.
First, you should draw the idea on paper. This will allow you to visualize the desired rack, take measurements and most successfully place it, taking into account the wishes and intended storage items.
In order for a pantry to be equipped with shelving, it must have enough space.
It must be taken into account that the shelves should be positioned in width from bottom to top, that is, the bottom shelf will be the widest, and the top, accordingly, the narrowest. This is due to the fact that the largest items will be stored on the lower shelves, which are inconvenient and impractical to lift upstairs.
It is necessary to carefully consider the distance between the shelves and correlate it with the items that you plan to store.
Depending on the wishes of the owners, the racks can have any shape that the location chosen for attaching the structure will allow.
You need to consider the amount of free space - if the racks take up too much space, then it will be uncomfortable for you to walk in the pantry.
More often, U-shaped and L-shaped shapes are chosen; this type of shelves is the most practical. For installation, it is better to prefer metal brackets and fasteners; they are the most durable and will withstand any weight on the shelves.
Choose any option that suits you.
Universal tips for making shelves with your own hands
Beginning craftsmen should familiarize themselves with some recommendations that will simplify the process of making shelves from wood or MDF:
- It is necessary to carefully inspect the material before purchasing - there should be no cracks or various chips on the surface of the bars. In addition, they require preliminary grinding in order to remove all burrs.
- To install a self-tapping screw, it is better to first drill a hole of a smaller diameter and then widen it. Otherwise, a crack may appear that will be difficult to repair. Some experts even recommend replacing the usual self-tapping screws with special confirmants - they greatly facilitate the assembly process.
- Wooden elements can be easily fixed into a single structure using shaped protrusions - choppers and glue. It is recommended to use only durable types of wood - oak, birch, etc.
- Self-tapping screws are not always easily screwed into wood (especially hard wood). Therefore, experienced craftsmen recommend using soap for such purposes. You just need to rub the screw with a small piece. Fasteners
Before starting work on the manufacture of the shelf, you should prepare all the tools and make a preliminary drawing of the parts. In addition, it is not always necessary to purchase material in a store, because the structure can be built even from old boxes or a TV case.
You can read about how to make shelf fasteners with your own hands in our article.
Installation of a shelf under the bathroom
The open space under the bathtub does not decorate the bathroom. Especially if things are stored there that are on display for guests. Therefore, this space also needs decent design.
Typically, do-it-yourself shelves under the bathroom are limited to installing a screen. If the device has a purely cosmetic effect, it can be made solid. However, such a solution will complicate access to plumbing elements, which will complicate the replacement or repair of parts.
The choice often falls on a sliding structure, which consists of a profile mounted around the perimeter and sliding doors. In a more complex version, the screen can be supplemented with pull-out shelves.
Therefore, making simple bathroom shelf models is a feasible task even for a novice craftsman. And to successfully complete the work, it is important to take care of choosing a model that matches the purpose and conditions in the room, and to have the necessary set of materials on hand. And have enough skills to bring the project to successful completion.
The benefits of making shelves yourself
Self-made furniture production has long been no longer just a goal of saving money - it is an excellent opportunity to show your creative abilities. Today, designers are developing various models of decorative shelves that can be inspired by.
The main advantages of self-manufacturing of the structure are highlighted:
- Taking into account all, even the smallest requirements. Only by making furniture yourself can you do it exactly according to your preferences. After all, not every master can correctly understand an idea and then implement it.
- Saving money. When ordering furniture, you will have to spend money not only on purchasing materials, but also on the work of the craftsman. Not every person can find the extra amount to pay for such services. Therefore, you can try to build the structure yourself. This is especially true in cases where it is necessary to produce a large amount of furniture.
- Save time. Typically, experienced specialists have a long queue, which is why you will have to wait for your order for several weeks, or even months. While making furniture yourself will take much less time (even for beginners).
- Simplicity of the process. For some, it may seem that making shelves is a labor-intensive process, but this is far from the case. Following step-by-step instructions, anyone can cope with such actions. In this case, it is important to take correct measurements and place marks. In addition, the work uses a standard set of tools that can be found in every person’s home.
- Experience. Shelves are exactly the element of the interior with which you should start making furniture. Thanks to this, you can easily master the creation of other more complex structures. For some people, a craft can be turned into a business. It is worth noting that all family members can be involved in such simple work.
A simple version of functional shelves
Recommendations for placing shelving
Installation of stationary shelving can be done in the kitchen, pantry or garage. Large open shelves provide great visibility. In this case, all items are easily obtained and just as easily returned to their place. It is better to install a closed shelving unit in a children's room or living room. For example, you can store a large number of books or toys there. The baby will be able to store his things in such a rack.
Kitchen shelving
Rack partition
If we talk about the rotating structure, then it can be installed almost anywhere, be it a children's room, a garage or a living room. The rack is more complex to make, and you also need to learn how to decorate it, because if you install the product in the middle of the living room, it will always be in sight of guests.
Finishing and filling
After the structure was assembled, we sanded all the wooden parts to achieve a smooth surface.
My husband entrusted me with priming and painting the whatnot, which I did with pleasure. The first layer was acrylic primer, which closed all the pores of the wood and prepared the surface for painting. Our bathroom needed a shelf in a neutral color scheme, so I chose milky acrylic paint. The finishing layer was applied with a semi-matte varnish.
The finished shelving unit took its place, fitting perfectly into the small space between the sinks. Now it reliably “stores” shampoos, aromatic sachets, bath towels, and there is a nice decor on the top shelf.
We really like this ladder, at first I was happy to show our creation to close friends, and even gave some of them advice on creating similar projects. I hope you find the detailed story about designing such a shelving unit useful and you can assemble it for your home.
Found a violation? Report content
Boxes
We planned for the boxes to be mounted at the same level along the back of the structure. Before assembling the shelves, we marked the mounting height of each box.
Negative aspects of a stress-free life have been discovered
Lukoil spoke about the scheme of Internet scammers who offer discounts at gas stations
It’s easy to make a convenient organizer for small toys: an economical way
We needed trays with certain parameters and taking into account the fact that their size would gradually decrease. For calculations, you need the basic dimensions of the bottom row.
To get them, lay the frame horizontally in the plane of the lower legs and measure the distance between the back and front legs, as well as the width of the spread of the supports. Having the initial data, we noted the height of the boxes:
- The second shelf from the bottom will be mounted at a height of 490 mm.
- The third shelf has a height of 851 mm.
- The highest level of shelves is 1207 mm.
The shelves can be exactly the same size, which will greatly simplify cutting plywood and boards for drawers. If you need shelves of different sizes, then take into account the same step when reducing them, for example, 5 or 10 cm in depth.
How to restore trust in the family: four tips
Food for the mind: soy and 4 other foods to improve brain function
Stress has a bad effect on brain function. How to help your body with nutrition
In accordance with the chosen concept, cut the plywood and wooden boards. Having received the blanks, assemble the boxes, fastening them with nails. The trays are installed on the frame using self-tapping screws.
Installation of boxes and shelves
At this stage, the rack can be covered with pre-prepared sheets of chipboard or MDF; they are attached to the beams at the bottom, top, and also on the sides. The result of the activity will be a box made with a missing back wall.
However, if you wish, you can make a structure with a wall; everything will depend on personal preferences. If we consider the simplest option, then in general the structure can consist of bars and shelves. They can be painted if desired.
- The standard height of the room makes it possible to practically install 6 shelves.
- Height can be measured without the help of others.
- Currently, racks with asymmetrical shelf arrangements are popular.
- The middle shelf is subject to maximum overload, for this reason it must be especially strong.
- To best strengthen the racks, it is necessary to use metal corners.
Another significant factor is that the thickness of the shelves should be 5 mm less than the length of the screw that connects the shelf to the beam.
The system will also tolerate large overloads if the corners are thoroughly secured. For the best results in building a rack, it is important to control the level of any shelf before firmly securing it. Attaching the corners should be clearly at an angle of 90 degrees.
Attaching external panels
When the rack is sheathed with MDF or chipboard sheets, then upon completion of the sheathing it is necessary to glue all the ends of the elements without exception, a special melamine edging.
- This action can be carried out with the support of a regular iron.
- The edge is laid out on the cut sanded and smoothed with a very hot iron.
- Unnecessary sides are cut off with a stationery knife.
Certain shelving can be covered by attaching elegant doors to them.
This type of shelving can be used every day, and its neat appearance will be successful, as well as a unique decoration for each apartment room.
Step-by-step instructions for creating a base for a shelving unit
The first thing you need to do before moving on to the construction of each rack is to mark the wall. Wood beams are generally better suited for the construction of load-bearing supports. A strong foundation will be considered a successful shelving installation.
- When the rack is not designed to cover the entire height of the room, it is best to attach the rack to the floor, as well as to the ceiling. Considering wood beams, we can assume that they can be square or rectangular in shape. Here everything depends on the volume of the finished system, the depth, and also the width of the racks.
- The base should be secured with self-tapping screws, and the corners should be secured with prepared strips. It would be great if the base could be fixed to the wall, the rack would be more stable, but in this case it would be impossible to install the back wall on the rack itself.
It is very important to ensure that during installation the load-bearing supports are always in a vertical position. On the sides, transverse braces guarantee significant safety of the rack and make the structure more rigid.
It is especially important to take into account these conditions if the structure will accept a large number of objects for storage.
Laying tiles in the bathroom on drywall
Before laying bathroom tiles on drywall, you should prepare the surface. It is pre-primed in 2 layers. Next, all joints are puttied using reinforced tape, which will prevent the formation of cracks in the future. The finished surface is primed again in 2 layers.
When finishing a plasterboard structure with ceramic tiles, you should approach the choice of adhesive composition with particular responsibility. The best option is flexible tile adhesive. The material is available in the form of dry powder or ready-made mixture. It provides reliable adhesion of the surface to the tile, which will not fall off over time. The most convenient to use is the modern composition in the form of liquid nails, which is produced in plastic bottles. To work with it you will need a special gun.
The plasterboard partition is lined with tiles and complemented by wooden shelves
The tiles on the plasterboard in the bathtub are laid out according to the chosen pattern. You should start from the place that is most visible. Each tile is pre-wetted. The adhesive composition is applied to the plasterboard surface and the back side of the finishing material using a notched trowel. The correct position of the product is checked with a level. The next tile is laid in a similar way.
Helpful advice! Laying tiles begins from the edge of the structure if there is a gap at the end of the row measuring more than half the width of the tile, or from the center to the edges when the gap is less than half the width of the tile.
Crosses are placed between the elements in order to form a smooth and neat joint. The final stage of making a bathroom shelf from plasterboard and tiles is to grout the gaps between the finishing elements.
Mosaic tiling of plasterboard shelves in the bathroom
Plasterboard shelves finished with mosaics look beautiful and organic. This facing material consists of small rectangles or squares. There are also other shapes of fragments in the form of an oval, diamond, honeycomb or circle.
The shelf in the bathroom is lined with mosaics
Mosaics can be pieced or assembled on a paper, polymer or silicone base, which greatly simplifies the process of laying the material on the surface. The tiles are available in different designs. Ceramic options are the most popular. Products can have a glossy or matte surface, contain a pattern, and be in different colors.
Surfaces decorated with glass mosaics look impressive. Shelves decorated with mirror puzzles will become an elegant decoration of the room, contributing to the visual expansion of the space. Salt mosaic in the form of opaque glass has a special property of refracting light. Thanks to this finish, a tiled bathroom shelf can become an accent element of the room.
Due to the flexibility of the material substrate, the mosaic can be laid on a surface of any configuration. It will completely follow the contour and bend of the product, so this finishing option is ideal for curved structures. Interesting design solutions are shown in the photo of shelves in the bathroom made of plasterboard and mosaic.
Important! Before laying mosaic tiles on drywall in the bathroom, you should perfectly level the surface, otherwise all its defects and flaws will be visible.
Laying the modules is carried out according to the same principle as when using ceramic tiles. Products on a mesh base are attached with the mosaic on the outside, and the module on paper – with the mosaic on the inside. After laying, the paper is removed from the surface. The modules should be leveled using a rubber roller. Grouting of joints is carried out 1-2 days after laying the tiles.
The back wall of the niche in the bathroom is lined with mosaics