The kitchen faucet is the most commonly used plumbing fixture in the home. Therefore, breakdowns cannot be avoided, regardless of its price and quality. The causes of malfunctions are completely different. Sometimes, due to constant exposure to water, the body of the product becomes unusable. The threads in the valve sockets may become worn out and the protective coating may wear off.
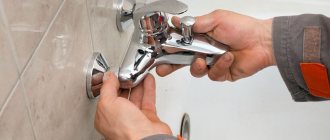
To replace a device that has become unusable, it is not necessary to call a plumber. You can easily change the faucet in the kitchen with your own hands if you do everything correctly.
When to replace a kitchen faucet
A mixer is a piece of equipment that can work properly for many years. Faucet breakdowns and malfunctions are the result of many years of exposure to moisture and water impurities on the components of the water supply system and faucet. Here is a list of malfunctions for which replacement of the mixer is necessary:
- Rust has appeared in the area where the faucet and sink meet. Further corrosion of the material will lead to water leakage through the resulting cracks in the sink and the appearance of mold;
- The water does not completely shut off after work is completed. Here the problem lies in the breakdown of the components of the mixer such as the spout, valve or faucet;
- Rust formation at the junction of the spout and the body;
- Problems along the water supply hoses. Often the breakdown is localized at the junction of the hose with the faucet mounting elements, as well as in the area of adapters, if any.
The question “how to change a kitchen faucet” may arise during a renovation, when the selected project requires the installation of a new faucet in the kitchen.
Rust and scale are the first signs of faucet replacement. Metal corrosion processes lead to leaks and disrupt the flow of water
Water pipes: what you need to know
Water can be supplied to plumbing equipment through pipes made of different materials. Most often, in our time, steel or polypropylene lines are laid for water supply in multi-story and low-rise buildings. In the latter case, replacing the faucet in the sink in the bathroom or kitchen should be done as carefully as possible. Unfortunately, polypropylene lines are not very resistant to mechanical stress and pressure. When unscrewing/tightening the tap nuts, such pipes must be held by the adapter with a wrench. In any case, it is impossible to twist polypropylene when performing work.
Steel, as a much stronger material, can be handled less carefully. But still, in this case, too much effort should not be applied when tightening/unscrewing the nuts.
Types of kitchen taps
There are 3 main types of faucets that can be seen in the kitchen:
- Two-valve;
- Single lever;
- Contactless.
- Two-valve mixers have been familiar since the times of the USSR. Easy to use, such taps can often be found in the kitchens of most Khrushchev and inexpensive apartments. The operation of a two-valve faucet is based on the operation of a two-piece axle-box faucet for hot and cold water, respectively. When the valve turns, the faucet opens or, conversely, shuts off the flow of water to the faucet spout.
- Single-lever faucets have become popular due to their ease of operation and sleek design. The main difference is the replacement of two axle-box taps with one cartridge with holes that ensure the flow of hot, cold water, as well as mixed water into the spout. With the use of a cartridge, the external structure of the faucet has also changed: now, instead of two valves, one lever is used to regulate the flow of water, which rotates in two planes.
- Touchless faucets are rarely found in residential kitchens.
The peculiarity of the operation of such a tap is to pre-set the water temperature on a special control panel or using an adjustment valve. To turn on the water supply in touchless faucets, simply bring an object to the sensor built into the body. The electromagnetic signal that is generated in this case activates the operation of the solenoid valve, which regulates the water supply to the spout. The tap stops operating a few seconds after the object is removed from the sensor.
Crane axle boxes come in two types: screw and ceramic crane axle boxes. The latter are found in modern models, when screw ones are the lot of USSR times
Cheap single-lever models often use cartridges that incorrectly regulate the supply of hot and cold water. To avoid discomfort when operating such a crane, you should not save when purchasing
The price of touchless faucets is very high due to the additional electronics. Such tap options are often found in cafes, restaurants and other service places
Necessary tools for work
Here is a list of necessary things that you should acquire before starting installation work:
- Adjustable wrench, as well as wrenches in sizes 10, 11, 22 and 24;
- Hoses for connecting the tap to the water supply. Such hoses are sold complete with the mixer, and they can also be found over the counter in a plumbing store;
- Sandpaper for adjusting some elements;
- Screwdriver Set;
- Pliers;
- An electric drill with the necessary bit, if you need to make an inlet hole in the sink for the faucet;
- Kerosene or special lubricant for plumbing. Such compositions are useful in cases of rust accumulation and “sticking” of the faucet to the sink in order to facilitate dismantling.
This simple set of tools should be in every apartment. The only thing is that you will have to buy lubricant or kerasin at a plumbing store
Methods for unscrewing plumbing nuts
This procedure, as already mentioned, should be carried out as carefully as possible so as not to damage the pipes. The easiest way to unscrew rusted nuts is, of course, to use a special liquid. But what to do if such a remedy is not at hand?
If necessary, you can replace purchased scale softening liquid with:
- kerosene;
- vinegar and soda.
When using such products, you must first thoroughly clean the problematic joint with a wire brush, trying to remove all rust and dirt. Next, you should take vinegar or kerosene into a syringe and inject it under the nut from all sides.
The next step is to wait two hours, leaving the kitchen tap alone. During this time, the chosen home remedy will eat away the rust and soften it. Thanks to this, the nut will most likely unscrew quite easily in the future. If the problem area was treated with vinegar, all parts should be wiped with a soda solution at the final stage.
Material for making faucets and hoses
The mixer can be made from the following materials:
- Metal alloys based on brass, steel or bronze. These mixers have a number of positive properties: wear resistance, long service life, presentable appearance. Of the shortcomings, only one can be highlighted - the high price;
- Plastic. Plastic faucets are inexpensive, have low thermal conductivity and are not susceptible to chemicals. The plastic faucet is very lightweight and resistant to dirt. The disadvantage of such a mixer is its susceptibility to mechanical damage;
- Ceramics are used more for the manufacture of internal parts of the faucet, for example, axle boxes or even a filter. There are completely ceramic faucets, but practice shows their low wear resistance;
- Enameled and chrome-plated faucets are almost no different from those made of metal. Brass and steel are coated with a small layer of enamel or chrome, which gives shine and a metallic color to the product. Beautiful appearance is the main reason for purchasing.
An important property of a plastic mixer is low thermal conductivity. This is relevant in conditions of constant overheating of the tap during a long supply of hot water.
Plumbing hoses also differ in the quality of the material. Among them:
- Bellows hoses. Here the base is a rubber insert, covered on top with a corrugated layer of metal. Such conductors are durable, reliable in operation and easy to install. Low noise insulation is their main drawback;
- Reinforced hoses. They have a rubber gasket that is adjacent to a layer of metal mesh on top. These hoses are easy to bend, resistant to water changes and can be installed without problems. Disadvantages include rapid wear of the fastening nuts and compression of the gasket;
- Stainless steel hoses or nylon hoses. This is probably the most reliable option of all. They are not easy to install, but retain their shape even after the work is completed;
- Aluminum hoses. This option is short-lived, but its components are elastic and pliable;
- Steel hoses. This is a temporary option when installing a mixer, which will soon be replaced by other types of hoses. Steel hoses last no more than one year, and then they leak or completely fail.
They often sell hoses that are too short. Make sure that the hoses you purchase are long enough without tension along their entire length.
It is important that the hose fittings are of different lengths, which will simplify the installation process. The fitting is the end part of the hose that connects to the mixer body
Instructions for replacing the faucet
Now we have come to the solution to the question: how to replace a faucet in the kitchen. The process can be divided into several stages, which include dismantling the old tap, assembling a new one, installation and connection to the water supply.
Dismantling
What needs to be done before starting work?
- Turn off the water;
- Open the cold and hot water taps to equalize the pressure in the conductive system.
Our advice: remove the sink and faucet. This way the work will be much easier, because the need to crawl into hard-to-reach places will automatically disappear.
To do this you need in advance:
- Disconnect the water supply hoses from the water supply;
- Disconnect the siphon from the sink.
To create a new inlet hole for the faucet in the sink, you will need a drill and a crown of the required diameter. It is important when working not to damage the main part of the sink, preventing the formation of cracks
There may be water left inside the siphon or hoses, which should be drained into a previously prepared container. Now you can start dismantling the sink, and then the faucet itself.
From the back of the sink we begin to disconnect the faucet mount. This may be the first problem - the formation of rust, sticking of the faucet body to the sink. In this case, treat the surface with kerosene or plumbing lubricant, then wait about half an hour and continue working.
In “particularly severe” cases, the use of a grinder will be required. At the same time, try not to damage the water supply connections that are untouched by rust, as well as the sink at the junction with the mixer body
After disconnecting the tap, dismantling ends. Check the condition of the threaded surface of the water supply line to which the new hose is connected. It may be necessary to replace it by installing new extension cords with high-quality threads. Also process the inlet hole in the sink for the new part.
Assembling a new crane
Assembling the mixer consists of connecting the spout to the main body. To do this, using a screwing motion, insert the spout into the corresponding hole in the faucet body until it stops. The connection should be strong, but it is important not to tighten it tightly: this will cause damage in the future.
There are a few more nuances before installing the faucet. For example, check for cracks and other mechanical damage, and also find the hoses for connecting to the water supply, which are included in the kit.
Installation
Faucet fasteners are always included additionally when purchasing, so check their availability. There are two options: mounting with nuts or mounting with studs.
Installing a nut-mounted mixer
The bottom of the faucet should have a cylindrical metal piece whose diameter matches the hole in the sink. It is the basis for fastening. We start with actually attaching the faucet to the sink.
The gasket has the shape of a ring. Make sure that during installation it does not fall out of the cavity, otherwise the tightness of the joint between the sink and the mixer in the area of the inlet will be compromised
- The mixer kit comes with a rubber gasket, which must be inserted into the corresponding slot on the body;
- We insert the cylinder into the mounting hole with the threaded side down, after which we need to gain access to the back of the sink for further measures;
- Next you need to secure the faucet. To do this, we place a rubber plate on the cylindrical part of the faucet, again for tightness, and press it against the lower surface of the sink. We tighten the top with a brass nut, which has a peculiar skirt shape - another solution in favor of tightness;
- Having installed the faucet correctly relative to the sink, we continue the installation by connecting the hoses. You need to start with a short fitting that screws into one of the holes in the cylinder. Then we work in exactly the same way with a hose that has a long fitting.
It is necessary to tighten the nut until the tap is completely immobile. Think in advance about how the mixer will be positioned relative to the sink. If you secure it unsuccessfully, you can always unscrew the nut and turn the tap in the desired direction
Installing a faucet with stud mounting
The difference from the previous installation scheme is the connection of the hoses before attaching the faucet to the sink hole. The fact is that the structural features of the studs will not allow the fittings to be properly fixed when the mixer is already installed.
- First, check the presence of studs in the kit. There may be two of them, or maybe one, depending on the crane model. Also included with each stud is a brass nut of the appropriate diameter;
- Unscrew the nuts and insert the studs into the holes on the underside of the mixer body. You can use screwdrivers, but it will be easier to tighten the studs by hand. Tighten until you feel the fastening is secure without swaying;
- We check for the presence of an o-ring, which is also located in its own notch on the base of the body; We pass the hoses through the hole in the sink, and then attach them to the faucet body. The sequence is the same: first we work with the short fitting, and then with the long one;
- After checking the reliability of fastening, insert the lower part of the part body into the hole in the sink or countertop. On the back of the sink we put on a rubber gasket, on top of which there is a crescent-shaped brass pressure plate. This plate must be included with the tap;
- After applying the metal plate, we tighten the studs using brass nuts, which were previously unscrewed at the beginning of installation.
That's it, installation of the mixer on the studs is complete.
Do not overtighten the hoses at the connection points with the tap and water supply; usually 1-2 turns of the wrench are enough. Otherwise there is a risk of leakage
It is important to check the entire structure for leaks, because When installing the mixer on studs, it is easy to miss the gaps between the rubber and metal plate. The studs may be screwed in at an angle
Connecting to the water supply and checking
We start by returning the sink to its original place with a built-in mixer. To connect the sink to the table surface, it is necessary to treat the edges with sealants, and then press the edges of the metal case tightly. Next, connect the hoses to the water supply. Don't forget that the cold water pipe is usually located on the right, and the hot water pipe on the left.
The final stage of replacing the faucet is connecting the siphon to the sink.
Before supplying water, disconnect the aerator from the spout. Accumulated particles that enter the water supply during installation can clog the small pores of the aerator and lead to its breakdown.
DIY repair
Mixers can have different designs. We will analyze the repair of each type of faucet separately.
Single lever
Eliminating leakage from these types of taps requires their complete disassembly.
According to tradition, before starting work, we turn off the water and drain the remaining water.
- Remove the plug using a knife and unscrew the screw hidden behind it.
- Completely remove the lever and cap.
- Then we take out the cartridge and inspect it for signs of obvious defects.
- We check all the remaining small details of our design. We clean the rubber seals, gasket, and spring from accumulated deposits. If we find a broken part, we replace it with a new one.
If the problem was in the cartridge itself, then it should be replaced with a new one.
It is important to buy a similar part so that all the recesses and holes match. In cases where the cause of the faucet leakage is wear of the gasket, it should be replaced with a new one in the same way
Please note that the diameter of the gasket must be selected so that it is slightly larger than the socket.
In cases where water flows out directly under the spout, you need to pay attention to the O-rings. They are most likely the cause of this breakdown.
Two-valve (classic).
Two-valve faucets are the most common. Here is the order of their repair work:
- First of all, turn off the water.
- In order to relieve the tap from strong pressure, turn the valve to the on state.
- Remove the caps and unscrew the screw securing the flywheel.
- Unscrew the securing nut and remove the neck.
If the problem lies in the valve head of the faucet itself, replace it with exactly the same new one, or of a similar size.
Features of installation work with other types of mixers
Mixer tap with two spouts and filter. A special feature of this faucet is an additional spout for supplying purified drinking water. The installation of the faucet differs only in that it is necessary to connect not two hoses to the base of the body, but three (a water supply from the filter is added).
- Wall-mounted faucets Replacing a wall-mounted faucet is easy. Here you just need to unscrew the nuts that secure the faucet to the wall surface, and then carefully disconnect it from the end section of the water supply. A new mixer is installed along the same path, only in reverse.
- Sensor/Thermostat Faucets These kitchen faucet options are more of a luxury item that you don't see very often. To install or replace a faucet, you need to have an understanding of the electrical conductors that are separately connected to the faucet to provide additional functions: heating water or recognizing objects at a distance. Otherwise, it is better to contact specialists.
Apply the new wall-mounted faucet to the outlet pipes before installation. If the plumbing holes and the parts do not match, use adapters. Usually adapters are included immediately
Tips and tricks
- Replacing the faucet should be accompanied by installing new hoses and a sink. Complete renewal of parts of the water supply system will increase the service life of the equipment, providing peace of mind for the owners for many years;
- Metal-plastic hoses are an alternative to flexible bellows and reinforced counterparts. The rigidity of the structure and the need to purchase fittings for metal plastic complicate installation, but in the future you will not need to worry about this section of the water supply;
- When dismantling and installing a new faucet, it is not necessary to remove the sink. However, practice shows that working with a fixed sink is inconvenient: you have to spend a long time in unimaginable positions, trying to get to all the nuts and connections;
- When connecting the siphon to the pipe, tighten the nuts without using keys. This way you will definitely not damage the plastic parts;
- Just in case, it’s worth purchasing fum tape or a sealant paste of your choice, because if a leak occurs, they will help create an additional seal and save weak water supply connections.
Replacing the faucet yourself will not be difficult if you follow simple rules and pay attention to some subtleties in the work. There is no need to be afraid of breaking or damaging something, because this will not happen if you have a competent approach and have the slightest idea about installing and replacing a faucet in the kitchen.
How to avoid breakdowns
To make the mixer last longer, you must:
- take care of water quality by installing purification filters;
- carefully open and close valves, raise, lower and turn the lever.
The service life depends on the original quality of the device, and it is largely determined by the price of the mixer purchased as a replacement. Purchasing an expensive, massive device usually guarantees its long-term service without breakdowns or the need for replacement.


