The sink is a functional element in the kitchen that is used every day, so its installation should be given special attention to avoid further problems with leaks.
In addition, the attachment of the sink to the countertop (from below or from above) must be reliable so that it does not fall down along with the dishes or water. Today we will look at detailed methods for installing various types of sinks to the countertop. Let's begin!
Attaching the sink to the countertop
Design features of sinks
The sink installation technology has a certain sequence. So, the installation method will differ depending on the type of structure.
Table No. 1. The most popular sink designs
| View, illustration | Description |
| Invoice | This is the most affordable option for the majority of the population. The installation principle is that the sink is attached to a free-standing cabinet, which continues the countertop. This design has an obvious drawback - the insignificant thickness of the sink, which creates a space at the junction with the countertop. This in turn causes inconvenience in operation. |
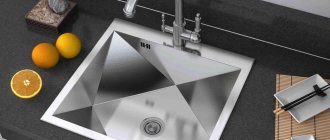
| Mortise | Such models are installed directly into the tabletop itself, in which a special hole is made. The structure is fixed at the bottom of the tabletop using clamps and brackets. Typically, such products look aesthetically pleasing, they are easy to use, and therefore have gained great popularity. The only downside is the higher cost, but experts advise choosing this type of sink. After all, this installation option practically eliminates the possibility of liquid accumulation between the pipes. |
| Podstolnaya | These are more modern sink models that are quite expensive. Installation of the structure involves fastening it slightly below the tabletop level, which allows you to achieve an aesthetic appearance. Experts are convinced that these products are distinguished by their durability and ease of use. |
In addition to differences in installation, there are differences in the configuration of the sinks themselves. Let's take a closer look at them.
Table No. 2. Various product configurations
| Configuration | Description |
| Square | The most common form, therefore such sinks are often used for installation in standard countertops. The corners of the structures can be either straight or round. The second option is considered more convenient to use. |
| Round | On average, the diameter of such a sink is about 450 millimeters. Compared to the previous type, it takes up much less space on the countertop. Usually the product looks compact, so it is often used for installation in a corner. |
| Rectangular | This is the most popular form of sink, which allows you to install additional wings on the countertop. |
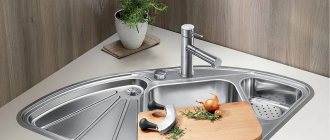
| Corner | A sink of this shape fits perfectly into a corner countertop. As in the previous case, it allows you to install various additional elements. This design is ideal for a small kitchen where it is impossible to place too large a set. One of the disadvantages is that such products often have a higher cost. |
Rules for choosing a kitchen sink
Corner sink
Marking
This is the most responsible procedure during which mistakes cannot be made. Basic rules must be followed:
- the distance from the socket to the edges of the tabletop should not be less than 50 mm;
- the overall size of the nest must be at least 5 mm smaller than the shell on each side;
- it is necessary to ensure a convenient and free supply of water supply pipelines, and also to leave enough space for installing the mixer.
Many sink models are equipped with special templates for marking holes. This is the best option. If there is no template, you will have to mark the nest, taking into account the shape of the bowl. For simpler models, you can simply attach the sink to the countertop and trace its outline with a pencil, then inside the resulting figure draw the nest itself, the size of which is smaller by a given amount. There are a lot of models, so the markings for each of them are done individually. If in doubt, you can prepare the nest on a test piece of fiberboard and then transfer it to the countertop. This is the most effective way to avoid mistakes and keep the countertop in good condition.
Sink with “wings”: pros and cons
“Wings” are usually called additional surfaces that form part of the sink or are mounted separately.
Side wing design
This design is often used for drying dishes after washing, but if there is no urgent need for this, then “wings” do not need to be installed. In addition, such options are only suitable for large sets with wide countertops.
You can read about how to make a kitchen set with your own hands in our article.
At the same time, the presence of “wings” allows you to protect the surface of the table from scratches, because you will not have to constantly place dishes, heavy frying pans, or cutting objects on it.
Where is the best place to place the sink?
The choice of location for installing the sink is determined by several factors:
- kitchen set configuration;
- location of the water supply network and sewerage system;
- owner's own preferences.
First of all, you have to be guided by the design of the headset. The sink is placed in close proximity to the compartments for installing the dryer - this is convenient and greatly facilitates the work when washing dishes.
In addition, experts recommend choosing a location on the water supply and sewer line. This is an important point, since excessive rotation of the sewer pipe will cause frequent blockages. They always appear at the wrong time and require specialized actions.
What material are sinks made from?
Quite often, choosing a kitchen sink becomes a difficult task. Errors in operation lead to the fact that products have to be constantly changed, so it is necessary to familiarize yourself in advance with some of the features of each material.
Table No. 3. Materials for making modern sinks
| View, illustration | Description |
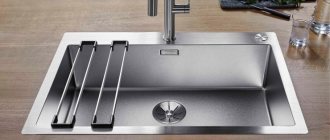
| Stainless steel | Often used in the production of sinks. Products come with a rough, matte and glossy texture. The main advantage of the material is its low price. In addition, even a beginner can handle installing such a sink without fear of damaging the surface. Metal products have an aesthetic appearance, thanks to which they fit perfectly into the interior of various kitchens. In addition, stainless steel does not suffer from exposure to various chemicals. The only disadvantages that can be highlighted are the possibility of scratches and dents. |
| Ceramics | Washbasins of various types are often made from this material. At the same time, the main advantage of ceramic products is their attractive appearance. Such designs are especially suitable for kitchens of classic design. In addition, such a surface is not damaged when exposed to hot water or aggressive alkali, and there are very rarely scratches on it. Another clear advantage is the ability to install the sink yourself without the help of a specialist. One of the disadvantages is the fragility of ceramics - this means that the sink can break with a strong impact. |
| Fake diamond | This is the most modern material that is actively used for the manufacture of sinks. It is based on natural and synthetic components. The first option has a higher cost, it is resistant to various damages and chemicals. The main advantages include a variety of colors. |
Built-in sinks: what are they?
Built-in sinks are those that form a single whole with the countertop. Based on the type of installation, they can be divided into two groups. The first category includes the so-called overhead or top-mounted devices.
During installation, they rest with small sides on the edge of the installation hole cut in the tabletop. As a result, a noticeable seam is formed, which requires special attention, since if not properly cared for, mold or mildew can form here
If installed incorrectly, moisture may enter the tabletop through this seam, which will lead to rapid destruction of the base. At the same time, overhead models are easy to install and relatively low cost.
The second group - integrated (or built-in from below) models - are inserted into the base and secured from the inside with special fasteners. They become a kind of continuation of the tabletop. This is a more aesthetic option, however, its installation is a little more complicated and the cost is higher.
When purchasing a sink mounted into a bathroom countertop, you must pay attention to what material it is made of, since its performance characteristics and installation method will depend on this. Let's consider what material is used for the production of plumbing fixtures.
Ceramics
The material is baked clay. You need to know that, depending on the manufacturing method, a ceramic sink can be porcelain or earthenware. The first option is more fragile.
At the same time, it is distinguished by greater uniformity and density than earthenware. Porcelain is easy to clean, dirt does not stick to it and it is more beautiful. Its cost is slightly higher.
Porcelain shells are sometimes painted with colored paints, photo printing or ornamentation. The result is a unique bathroom decoration
Budget sink models are made from faience. This is a relatively inexpensive material that is more durable than porcelain. The main disadvantage of earthenware is its high porosity. Pollution easily penetrates the pores and lingers in them, so it is quite difficult to care for the material.
In addition, over time, small cracks may appear on the earthenware, which gives it a vintage look, but affects its strength.
Metal
The traditional material for making sinks is stainless steel. However, such products are usually not chosen for the bathroom, unless they are selected to match the tray in the shower stall or bathtub.
Sinks made of non-ferrous metal, simulating copper or bronze, will be more appropriate in the bathroom. Such models will fit perfectly into a Mediterranean or rustic style.
A metal built-in sink is an excellent solution for bathrooms designed in techno, hi-tech, loft or even modern style
Metal sinks have many advantages. They are strong and durable, quite resistant to various mechanical damage. Their weight is relatively light, so installation is not difficult. At the same time, the products have a very attractive appearance, especially antique-style models. Disadvantages include difficult care and high cost.
Natural and artificial stone
Natural materials most often used are marble, basalt, travertine, granite or onyx. All stone sinks are very beautiful, durable and environmentally friendly. However, the cost of such products is high. This is due not only to the price of raw materials, but also to the complexity and labor-intensive process of processing natural stone.
The sinks are very massive, which makes installation much more difficult. The material has a high density, so dirt is not absorbed into its surface
Only special products can be used to care for products; acids and abrasives can damage them.
Artificial material has all the advantages of natural material and even surpasses it in strength. It consists of about 80% stone chips, which are bound by a special polymer. The result is very strong and durable products that are also easy to maintain. Their prices are more affordable.
Glass
The products are made from special tempered glass, the strength of which is sufficient for trouble-free use of such a sink. The glass surface of the equipment is resistant to mechanical damage and is almost impossible to scratch.
In addition, the high density of glass prevents dirt from being absorbed into the surface. The products are insensitive to temperature changes and aggressive chemicals.
Glass built-in sinks are very beautiful. They can be transparent or tinted. Colored glass embedded in a transparent tabletop looks especially good
Glass sinks are very attractive in appearance. They can be produced in a variety of colors, transparent or tinted. The shape of the product can also be any, even the most unexpected.
The owner can be inconvenienced by stains and water marks remaining on the glass, but the use of special cleaning products easily solves this problem. For transparent sinks, special chrome-plated components are used.
Built-in sink: installation process
Let's consider a method for installing a mortise-type sink into a countertop made of chipboard with a protective polymer coating.
Video - Installation of a sink in a countertop, fasteners
Tools and materials
Before starting installation work, it is necessary to prepare the following materials and tools:
- fastening elements: clips that are attached to the bottom of the sink and to the inside of the countertop, a seal that performs the function of sealing the joints (usually the fasteners are included with the sink);
- electric jigsaw or hand saw;
- drill;
- drill;
- self-tapping screws;
- measuring instruments: tape measure, building level, corner, screwdriver, knife, pencil and ruler;
- silicone sealant.
Step-by-step instruction
Step 1. Make the markings. In this case, we will install a standard rectangular sink. To do this, you will need to apply markings to the surface of the countertop using a simple pencil. It is necessary to mark all perpendicular lines at the intersection of which the drain hole will be located.
Then you need to turn the sink over, place it on the countertop and align the previously marked marks. The sink should not create an obstacle to the door, so it is secured by stepping back a few centimeters from the edge.
It is convenient to take measurements with a water felt-tip pen
Then you need to measure the width of the sides of the sink in order to mark the cutting lines. This value may vary depending on the type of product, but on average it is about 1.2 centimeters.
Step 2. Cut a hole in the tabletop. It is necessary to make a hole in the corner parts of the internal markings using an electric jigsaw or a hand saw. In order to avoid the appearance of various chips and scratches, you should cut only from the front side. This will allow you to control the progress of work.
After the corner holes are ready, you should make a cut along the inside line. The cut-out tabletop must be screwed onto the screws so that it does not fall. Upon completion of all work, it is necessary to remove the screws along with a fragment of the table top and thoroughly clean the cut from any remaining dust. Then you will need to try the sink on this hole to eliminate mistakes.
Fitting
The sink should fit into the prepared hole without any obstacles. If this does not happen, then you should again process the edges with a jigsaw.
Step 3. Process the cut. In the process of preparing the hole for attaching the sink, various chips and cut damage often remain. This is why additional treatment is required, because the lack of normal sealing leads to water getting into the cut of the countertop, which is why fungi begin to form on its surface. Over time, the wood will rot and then become brittle, which will undoubtedly affect the stability of the sink.
You can avoid such consequences by sanding the edge of the cut with sandpaper, and then carefully treating it with a special sealant for plumbing. It is advisable to use a spatula for such purposes, but if you don’t have one, you can do this with your hands (wearing rubber gloves). Such measures help prevent deformation of the tabletop.
Treatment with PVA glue
There is another equally effective way to process a cut - using PVA glue. It must be applied to the prepared cut surface and left for several hours.
Next you need to glue the seal. It should be applied along the edges of the sink, and the residue can be removed with a knife. If you skip this preparation step, water will leak into the hole, causing the wood to quickly swell. For such purposes, you can use a sealant in a tube, which is foamed polyethylene.
Some craftsmen prefer to stick a tape seal along the sides of the sink
Step 4. Attach the sink to the countertop from below. A mortise sink is attached to a hole in the countertop; its dimensions should be 1.2-1.4 centimeters smaller than the structure itself. This indentation is necessary because there are special protrusions on the bottom side of the sink, which act as fasteners.
Fasteners should be located on all sides of the sink at an equal distance from each other. During the process of tightening the fasteners on the screws, it is necessary to constantly monitor the position of the sink relative to the markings. For such purposes, it is better to use a screwdriver, otherwise the screwdriver can damage the plastic surface. In order for the fastening spikes to tightly connect to the surface, they can be pre-sharpened.
Once installation is complete, remove any remaining sealant.
Step 5. Connecting communications. To do this, hoses with hot and cold water should be connected to the water supply system using seals.
Installation of seals
Step 6. Next, you need to insert the siphon outlet into the sink, adding a pipe to it, after which it will need to be discharged into the sewer. Finally, you should once again check the strength of all fasteners.
Siphon connection
Collection of communication pipes
Video - Installing a mixer
general information
An inset sink is the main type of installation used when installing most kitchen units. If the sink is installed in its own cabinet, the hole for it can be made at the factory. However, if a common tabletop is used for the entire length of the lower tier, the nest must be made directly on site. Often the procedure is performed by replacing the countertop while preserving the old set, which is somewhat faster and easier. This work is often done independently, since finding qualified specialists can take a long time, and the work is quite expensive. Therefore, owners who have the skills to work with tools prefer to do the installation themselves .
The whole procedure consists of several stages:
- choice of sink;
- marking and making a nest for a sink;
- processing the edge of the hole with silicone;
- installing adhesive tape and applying a silicone seal to the back of the sink;
- adjusting fasteners, adjusting position, cleaning with rags.
The kitchen sink installation process consists of several stages.
Note ! In some cases, installation is performed using other operations. As a rule, detailed instructions are included with the sink. It must be carefully studied and the manufacturer’s requirements strictly followed.
Method of attaching an overhead sink
The peculiarity of an overhead sink is that it is not fixed to the countertop, but is placed on a cabinet of the appropriate size. If you pay attention to the inside of the sink, you will see that the structure has the appearance of a rack profile - it is to this that you will have to attach the fasteners.
Fastening elements for overhead sinks
Step-by-step instruction
Step 1. It is necessary to make preliminary markings for fasteners on all four sides.
Marking fasteners
Step 2. From below, the edge of the fastening element is attached to the wall of the cabinet using screws. At this stage it is important to ensure that they do not stick out.
Installation of fasteners
Next, you will need to install fasteners on all sides and make sure they are strong. In addition, you should attach the faucet to the sink.
Why choose a countertop sink?
The sink built into the countertop is very practical. This option for arranging a plumbing fixture has many advantages. First of all, an equipped countertop or cabinet with a sink helps to properly organize the space of the bathroom.
The cabinet into which the sink is built can be either straight or angular. The latter option allows you to save as much free space as possible in the room.
A built-in sink with a cabinet helps organize the bathroom space. The drawers located in the cabinet are very convenient for storing necessary things
The “working” area of the sink, thanks to the countertop, increases significantly, which allows you to store all hygiene items directly on it, without cluttering the wall with shelves.
Engineering communications are securely hidden inside the cabinet on which the tabletop rests. As a result, another storage space appears in which it is convenient to keep washing powders, stain removers and any other products.
A built-in sink is more durable than its wall-mounted counterparts. This is explained by the fact that the bowl rests on the walls of the base along its entire perimeter, so it can, if necessary, withstand heavy loads.
This is what a built-in overhead sink looks like, resting its sides on the countertop. It is better to fill the gap between the plumbing fixture and the countertop with sealant
The installation method of such equipment requires greater tightness. If the device is installed correctly, water when washing does not get inside the base and cabinet, as well as onto the floor. The latter is ensured by the fairly wide edges of the tabletop.
Perhaps, externally, designs with a built-in sink may seem cumbersome. It all depends on the chosen model, area and style in which the bathroom is decorated. In any case, you should select the size and design of the sink and base, guided by the design of the room.
Method of attaching an undermount sink
Sinks of this type are installed below the table through a seal. On one side, the fastening element grips the countertop, and on the other, the edge of the sink itself.
The structure is securely fixed thanks to screws that are attached to the inside of the sink. For a table made of wood it should be a screw, for stone it should be a screw and a dowel.
Under-table sink mounting diagram
Mixer installation
It is better to install the faucet on the sink on a non-built-in sink. The sequence of work is as follows:
- If the sink does not have holes for the faucet, use the template provided to draw a hole and drill it.
- Insert the ends of the eyeliners into the mounting hole.
- Install the mixer.
- Wrap the eyeliner with FUM tape and place a second rubber pressure washer on it.
- Secure the horseshoe-shaped metal washer.
Before connecting the faucet, do not forget to turn off the water. Consider in advance which side of the countertop you will make the hole on.
Features of installing stone sinks
Typically, holes for installing a sink are provided in advance when ordering countertops made of artificial stone. This does not exclude situations where there are no openings. In this case, it is better to turn to professional craftsmen who have a whole arsenal of tools for working with stone, thanks to which you can get a tabletop with a perfectly even cut.
Holes in stone countertop
Still, some people prefer to perform such actions on their own. In order to carry out such work, instead of a jigsaw, you will have to use an angle grinder. In this case, it is necessary to install a special disk for cutting stone.
Tools and materials
To install a sink you will need the following tools:
- electric drill with a set of drills;
- jigsaw;
- ruler, square;
- Phillips and straight screwdrivers;
- sharp knife (stationery or for cutting linoleum);
- silicone sealant and a special gun for it;
- adhesive tape (double-sided tape);
- glue for fixing the sink in the slot (used for some types of sinks).
What you need to install a sink in a countertop
Expert opinion
Mezentsev Sergey Petrovich
Residential renovation and finishing specialist
Other accessories may be required during installation. In addition, the above list deliberately does not include such details as a siphon with outlet fittings and a mixer - these elements, although they are connected directly to the sink, belong to other systems and require separate consideration.
Features of installation of structures of various configurations
Since the shapes of sinks differ from each other, it is necessary to take into account some features when installing them:
- When fixing an oval sink, experts recommend first making several openings along the entire section with an interval of 70-100 millimeters. When the set does not include a template for a cutout, it is recommended to make it yourself.
- In the case of corner structures, there will be an atypical rotary cut angle, therefore, in order to prevent the formation of obstacles, when cutting, indentations should be made along the cut line (at the resulting corner of the lines and 0.3 centimeters from it).
- The main feature of a stone sink is that it does not include holes for the drain and tap, so you will have to make them yourself using an electric drill with a special tip. However, such actions should be performed with extreme caution, because the stone is easily damaged.
Get the job done better with high-quality professional tools
Making a hole
When the marking is completed, it is necessary to cut out the nest. To do this, you will need an electric drill with a drill with a diameter of 8-10 mm and a jigsaw. Drill holes in the corners of the drawn nest and cut it out with a jigsaw. During this, you need to remember that the tabletop is quite thick and heavy. When the cut comes to an end, it can break off and ruin the laminated surface. To prevent this from happening, you need to support the part being cut off from below - install clamps or substitute some kind of support.
On a note ! After the nest is cut out, you need to insert the sink and check the accuracy of its fit to the countertop. Immediately install the mixer to check whether the walls of the nest are in the way. In addition, you need to check if there are any obstacles to installing the overflow tube.
If no flaws are found, the cut ends of the tabletop are processed. This is a mandatory procedure, since moisture will in any case gradually penetrate under the sink and wet the material. The consequence of this will be premature failure of the countertop. Silicone protection is applied to the ends and, using a spatula (you can use any piece of fiberboard, plastic or other materials), it is evenly distributed over the entire cut area.
Important nuances when installing a sink
When installing the sink, you should adhere to some important rules:
- According to the rules for placing equipment in the kitchen, it is not recommended to install a sink near a gas stove or refrigerator.
- The sink should be located near the place where you plan to cut food.
- Usually the sink is installed in the middle of the kitchen, thereby dividing the space into two zones.
- Instead of rubber seals, it is better to use sealant in a tube. Otherwise, the rubber will quickly become unusable, and the silicone sealant will cover all the irregularities.
- It is better to connect fragile structures together, because if they fall, such a sink will quickly break.
- The sealant should be applied not only to the cut, but also to the tabletop itself by 0.5 centimeters around the entire perimeter - this will protect it from fungi.
- During installation, sealant leaks form at the junction between the countertop and the sink; they must be removed immediately. For such purposes, it is best to use a rag soaked in vinegar.
- Before cutting a hole in the table, you need to seal the opening with double-sided tape around the entire perimeter, otherwise you can stain the edge of the tabletop with a jigsaw.
- When cutting the tabletop, it is not recommended to press too hard on the jigsaw. Otherwise, the thin blade may bend, causing the surface to deform.
Upon completion of installation, check the fastenings several times
However, the exact location of the structure depends on individual preferences. Thus, technology allows you to install a sink in any convenient place, even near a window.
Recommendations from experts
The sink should not be placed near the stove or next to the refrigerator . In the first case, the material of the bowl will be subject to temperature changes, in the second, the splashes will damage the walls of the refrigeration unit.
Additional lighting is installed above the sink . When choosing, preference is given to deep sinks, because shallow sinks are inconvenient for washing large dishes and a lot of splashes fly around.
stainless steel sink or “propeller”. The metal thickness should be from 0.8 mm. There is a soundproofing gasket on the bottom surface.
What to look for when choosing a sink?
In order to choose the optimal washing option, you should pay attention to the following criteria:
- Functionality. The presence of additional design elements allows you to simplify the process of manipulation during cooking.
- Size. Here you need to consider how many dishes will be in the sink every day.
- Combination with the overall design of the room. It is important to choose not only a model that matches the color, but also the texture, then the sink will be in harmony with all the interior items.
In addition, modern models include such additions as drain adjustment and dishwasher outlets.
The size of the sink must correspond to the dimensions of the countertop
Material for the production of washbasins
Despite the constant search by designers for new ideas and materials for production, washbasins made of sanitary porcelain and sanitary ware remain the most popular. This material is resistant to scratches and cracks, and does not collapse under the influence of temperature changes.
And although they can split from an impact, this still happens quite rarely. The traditional white color of the material will suit almost any design.
Glass sinks look airy and elegant. The disadvantage of such washbasins becomes obvious after you start using them - every drop of water, when dried, leaves a mark. Since it is unlikely that anyone will wipe it after each use, such a washbasin does not look very neat. From this point of view, frosted glass behaves much better.
Natural or artificial stone sinks can be made from marble, stone chips, sand and a binder. It would seem that this is a very durable material, but even with stone products problems can arise if used incorrectly - small cracks appear, or even completely split.
The manufacturer describes how to properly care for such plumbing fixtures in the product instructions. Most often, there are recommendations to wipe them dry and not to use too hot water.
Like any product made from natural material, a countertop sink made of stone always looks expensive and elegant.
Wood sinks are also produced, using hardwood with a beautiful texture. Washbasins arouse interest simply by the choice of material, and in combination with a successful design they can become a real decoration of the bathroom.
The wood from which plumbing fixtures are made is treated with special oils that prevent water from penetrating into its pores. Caring for such a sink is quite difficult. It cannot be cleaned with detergents containing high acids or alkalis, or with abrasive substances.
To produce sinks from natural wood, oak, teak, and bamboo are used. Some of them require periodic treatment with special oils
They also produce overhead sinks made of acrylic. The material is more familiar in connection with the production of bathtubs, but washbasins made from it are also deservedly popular. Strength, lightness, resistance to temperature changes, ease of maintenance, as well as the ability to create the most incredible design solutions make acrylic attractive to both buyers and manufacturers.
What you need for work
You should choose a convenient and practical pistol. Skeletal type or models with a semi-closed cylinder are suitable. Such devices are used for tubes with a built-in nozzle.
When installing a sink in the kitchen, it is recommended to stock up on the following tools and equipment:
- electric drill, a set of drills of various diameters;
- jigsaw;
- several screwdrivers or drill attachments with a screwdriver function;
- building level;
- marker;
- metal measuring angle;
- stationery/construction knife.
The mixer is connected to the water supply using flexible hoses. The nuts and couplings must be tightened with a wrench/adjustable wrench. The thread is sealed with FUM tape.
If the basic sink brackets are too flimsy or do not fit properly, you will need to purchase additional hardware. This will ensure stability and extend the service life of the sink, and the absence of backlash will prevent premature destruction of the sealing seam.
