The one that is most memorable is the poorly designed dining table. One that is too low or too high, one that does not have enough legroom underneath, one that has too little space. To help you design a table that will be remembered only for its attractive appearance, we will provide basic standards here.
TABLE HEIGHT.
Distance from the floor to the top surface of the lid. Usually it is 68–76 cm.
SPACE ABOVE LEGS
. The distance from the floor to the bottom edge of the drawer is the vertical space for the legs. The minimum distance is 60 cm.
KNEEL ROOM
. The distance from the edge of the table to the leg is the space for your knees when the chair is pulled up to the table. The minimum distance is from 36 to 40 cm, the optimal distance is 36–46 cm.
SPACE ABOVE HIPS
. The distance from the seat to the lower edge of the drawer is the vertical space for the hips when a person sits on this chair, pushed towards the table. Minimum – 15 cm.
ELBOW ROOM
. Side space on the table for each person sitting. The minimum is 60 cm, but 75 cm is much better.
HAND DEPTH
. Front space on the table for each person seated. Less than 30 cm will not be enough, and more than 45 cm will be too much.
SPACE FOR A CHAIR
. The distance from the edge of the tabletop to the wall is sufficient to move the chair away when getting up from the table. Architects claim that a minimum of 90 cm is needed, and 110 cm would be the best option.
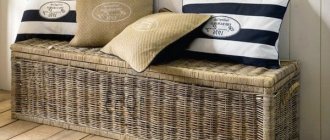
Table with king belt
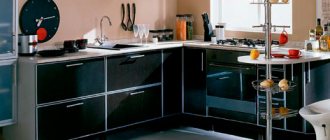
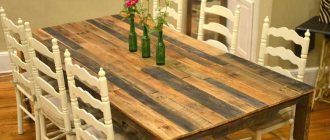
When you hear the word "table", don't you think of a flat panel with four legs? Don't you think of just such a table as the one pictured here? Yes, this design is the most original of the original ones. In the simplest version, the table - a typical design - consists of only three types of parts: legs, drawers and a lid (table top). The legs and tsar belt form a strong, yet open, support structure. In a structural sense, many tables are tsar tables, although we rarely call them that. Much more often they are called by their functional purpose or location: dining table, kitchen table, bedside table, desk. As you look further through the book, you will come across the original designs of different tables, and many of them will return to this “basic” table. This type of table can usually be found in the kitchen or dining room. Its massiveness creates the impression of strength. Although the legs are quite massive, the chiseled profile visually reduces their massiveness. In addition, the reasonable dimensions of the legs make them ideal for strong carpentry joints. Despite the simplicity of the design of a table with a tsar belt, many variations are possible. The table can be round, square, oval, rectangular. Its legs can be square, turned, tapered or carved. Even the drawers can influence the appearance of the table.
Design options
For example, a round table with the same turned legs as the base table looks completely different. The square tsar belt with the round lid gives it this distinct look. Despite the elegant cabriole legs of the table in the Queen Anne style, the massive drawers make it a work desk. The cut-out drawers at the third table make a significant visual and practical difference, making the table appear lighter and taller and creating more hip room for the occupant.
Table drawing
Table drawing
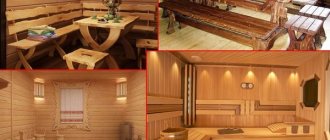
Country style table
This table is called by different names - country style table, retro style table, bar table - and presented in different ways. Furniture researchers usually describe it as a simple, low, oblong table on a massive base with turned legs and legs. This characterizes it quite accurately: a table with a drawstring belt and legs. Legs, especially those as strong as in the picture, significantly increase the durability and rigidity of the structure. With intensive daily use, the legs can increase the service life of the table by years. The terms "country" and "bar" are definitely associated with the 17th and 18th centuries, when such tables were widely used in hotels, taverns and bars in rural areas and towns. Surviving examples of such tables actually have massive legs - although they are heavily worn out by many feet. The table shown here is equipped with one middle leg instead of two longitudinal ones, to make it more comfortable to sit at the table. However, many early tables had pro-legs around the perimeter. The design is simple. The drawbars and legs are cut into the legs with spikes and reinforced with wedges, dowels, etc. The table cover is a wide panel “at the tip”.
Design options
The easiest way to change the design of a table is to change the legs. Our “original” table has round legs - turned - and the shape of the turning can be changed endlessly. Just remember that you will need a flat, rectangular surface for the frame-to-leg joints. On a country-style table, you can also change the legs - both in appearance and in their configuration, as shown in the figure below.
Varieties
In the same way, using step-by-step instructions, you can assemble beautiful kitchen tables with your own hands.
In fact, everything is extremely simple if you listen to some tips:
- it is necessary to carefully select the material, it must be dry, smooth and without knots;
- you should use a serviceable tool with well-sharpened working elements;
- It is important to strictly follow the assembly instructions for the selected structure.
With appropriate effort, the desired result will not be long in coming.
Check it out here too!
DIY furniture made of wood: the best photos of solid wood furniture! The process of making wooden furniture: drawings, diagrams, furniture assembly- How to make book shelves with your own hands: drawings and step-by-step photos. Wall shelves, floor standing, portable, Montessori book shelf
We make a kitchen countertop with our own hands: design, methods of application, design options and decor ideas (135 photos and videos)
Don't be afraid of your capabilities. Enjoy the work process and the expected result. Enjoy the fruits of your labor!
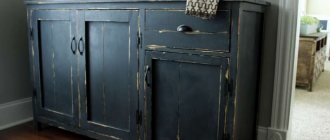
Table with drawer and drawer
The name “table with a tsar belt” refers not to the style, but to the design. This type of table is the base for kitchen tables, library tables, desks, etc. Even a workbench. A drawer or two increases the functionality of the table as the tools that go into using it can be stored in these drawers. In some cases, a small box is enough, while in others you need the largest one possible. There are only a couple of ways to incorporate such a box into the design. The simplest approach is to simply cut out a drawer opening in the drawer frame. For a relatively small box and a fairly massive drawer, it is quite suitable. If the opening turns out to be so large that it creates a danger of destruction of the board, then it is better to replace the drawer with box bars. The bars can be rotated 90° so that their width matches the thickness of the leg. Tenon joints provide rigidity. A design with two bars - supraglottic and subgular - is preferable, since the upper bar will prevent the legs from moving inward.
Design options
Installing a drawer in a round table is quite possible. But if the drawer belt has a square or rectangular shape, then you must be prepared that access to the inside of the box will be limited. If the drawer belt is rounded, then the front panel of the drawer should be made in such a way (for example, a layered bent or block-glued structure) so that its shape matches the shape of the drawer.
Table drawing
Table drawing
Design
Before starting production, you should read the instructions on how to properly make a kitchen table. For this you will need:
- decide how many people the table should be and where it will stand;
- calculate its dimensions, design features, functionality;
- According to your budget, select the material to be used;
- prepare the necessary tools.
At this stage, we can consider that the work on designing the structure is completed.
Check it out here too!
- How to make a bench from pallets: do-it-yourself bench from pallets
Instructions on how to make a table with your own hands: step-by-step photo instructions, drawings, assembly diagrams for tables of different types for the garden and at home
How to make a hanging chair with your own hands - 100 photo ideas for chair design, instructions for their implementation. Creating the perfect vacation spot
Table on one support
Single Leg Table
An alternative to a table with a leg at each corner is a table with one central leg. Its tabletop is attached to a central post mounted on low legs that diverge to the sides. Here, drawers are not structurally required, but some single-support tables have them. At first glance, a table without legs and drawers gives unlimited legroom. However, while it does have plenty of knee and hip room, its "creepy" legs tend to get in the way of the sitter's feet. This is the price of stability: the projection of the tabletop should not exceed the support area by more than 15 cm. A little more and you risk knocking over the table by leaning on the edge. Critical to this design is the strength of the center post and its connection to the base or legs. The table shown here has an oval tabletop and - in accordance with the major and minor axis of the oval - two pairs of legs of different lengths. The legs are connected to the racks that taper downwards, and the racks are connected to the tabletop brackets with double tenons into the lugs. These intermediate assemblies are in turn glued onto a square core lath to form a central support that flares upward.
The pedestal table appeared in the 18th century as a small coffee table with a three-legged base. To make a dining table, carpenters combined two single-legged tables or placed an oblong tabletop on two three-legged supports. Modern models range from the simplest utilitarian to multi-rack. The structural advantage of multi-post supports is their increased resistance to tilting. Although the support area may be noticeably smaller than the projection of the table top, a large table with this type of support can be quite stable due to the mass of the support.
Table drawing
Table drawing
Step-by-step DIY manufacturing algorithm
Add to cart All actions are carried out in accordance with step-by-step instructions:
- The base of the round product and all the necessary elements used in the drawing are cut out of the selected material.
- The sliding circle is cut in half, and the surface of the elements is precisely ground.
- The parts are fixed with glue and, after drying, with self-tapping screws.
- Table legs are most easily made from timber; you can buy ready-made metal ones.
- A mechanism is attached to the central part so that the semicircular parts can be moved apart and the area of the table top can be increased.
- The table turns over by touch, the legs are screwed in and secured with hinges.
- The product is varnished. When using pre-construction paints, Treat with putty, paying special attention to the joints.
The table has served for a long time, it must be kept clean. For frequent use, the folding model is covered with oilcloth or tablecloth.
For beginners, it will be easiest to make a table from wooden parts. The material attracts attention and does not cause problems with cutting and alignment.
The base of the round product and all the necessary elements obtained in the drawing are cut out of the selected material. The expanding circle is cut in half, the surface of the elements is precisely ground.
A mechanism is attached to the initial part so that the semicircular parts can be moved apart and the area of the table top can be increased. The table is turned over by touch, the legs are screwed in with screws and secured with hinges.
The product is varnished. When Using Paint, the Construction is Pre-Treated with Putty, with special attention to the joints
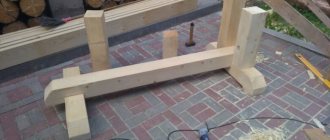
trestle table
Table on trestles
Place a wide board on trestles and you have a table. This is the ancestor of the trestle table, which is perhaps the very first type of table. Since ancient times, its form has been significantly improved, but it remains an easy-to-make collapsible table. Its elementary form remains a panel or sheet of plywood on free-standing trestles. And when the trestles are no longer free-standing, that's when the assembly becomes a table, because they must be connected to each other, to the tabletop, or both. In the table shown here, each half of the trestle consists of a fairly wide stand, embedded at the bottom into the leg, and at the top into the tabletop bracket. The wider the trestles, the better the table resists swaying from side to side. There is a long, massive rod embedded in the racks. The tabletop is attached with screws to the trestles, and the structure becomes one whole. Although there is enough space for your feet under the tabletop, you should not forget about the footrest so that when sitting at the table you do not get bumps on your shins. Also, the ends of the tabletop should protrude beyond the trestle by 35–45 cm to provide sufficient space for those sitting there. Many trestle tables are designed to be collapsible. Common methods of fastening parts of a collapsible table are shown on the next page.
Design options
Thinking about the shape of the trestle posts and legs is the easiest way to change the appearance of this table. Several examples are shown here. The original sawhorses were similar to sawhorses, and the X-shape was quite popular in medieval Europe. Pennsylvania Germans and other Germanic settlers brought this form to America, and it is still often found around picnic tables. Today the most common is the H-shape. Shakers (sectarian shakers), who made many trestle tables, usually used graceful legs with “high rise”
Table drawing
Table drawing
Assembly Guide: Tabletop Requirements
What kind of tabletop can there be?
As for the tabletop, it is important to decide whether it will be sliding or not. For example, when assembled, the table can be used for preparing food, and when extended, it can be used as a means of eating.
The countertop should not absorb odors and grease. Consider practicality too.
A good countertop should not absorb moisture or withstand strong impacts. The table surface should not be afraid of steam, condensation and high temperature. All these requirements are met by a countertop made of natural and artificial stone or covered with ceramic tiles. But it should be noted that such a table will look only in an Art Nouveau style interior.
Coating with ceramic tiles
One of the most common types of countertops is chipboard, laminated with film or covered with plastic. The price of chipboard slabs is affordable for many. Moreover, this material is the easiest to work with. Some may deny that chipboard countertops are practical. This is partly true, but if it is treated correctly it will last for more than one year. Here are some recommendations and tips for working with chipboard countertops:
- The film or plastic should be rounded at the ends of the chipboard.
- Each 90° rounded end is treated with silicone.
- However, in this position the end is vulnerable to moisture, so it is better to turn the end 180°.
You should be objective and mention the disadvantages of such a tabletop. If the chipboard swells, then there is no way to fix this problem. As a result, you will have to make a new table or at least a tabletop. But, on the other hand, such a surface is resistant to aggressive detergents and mechanical stress.
Tabletop made of chipboard
Of course, if we talk about the most ideal and environmentally friendly option, then wood rightfully comes first.
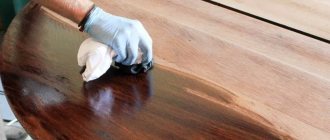
But such a surface is more capricious in care. Do not allow moisture to penetrate into the wood, scratches or other damage. Microbes can settle and multiply inside them, which negatively affect the mechanical strength of wood. Therefore, from time to time, wooden countertops need to be varnished, cleaned, and covered with a layer of wax. Making a wooden tabletop
Extendable table
Extendable table
The familiar dining table can be expanded by adding an additional cover board. Then an ordinary table for a family can be enlarged to accommodate guests. At first glance, it may not be noticeable that this is a standard table with a drawstring belt, cut into two parts and reconnected using special runners. The runners can be bought ready-made or made together with the table. Each table cover must be at least 60 cm - the optimal space for one seated person.
Design options
The design of an extendable table can vary, as usual, by changing the legs and drawers. The shape of the drawers and table top has virtually no effect on the overall design. If we are talking about a table with drawers, then with the sliding version they work as usual. As the extension range increases, it may be necessary to add an additional leg to support the middle section. And don’t forget about the importance of small details - for example, attaching drawers to the table top
Table drawing
Table drawing
Extendable table on one support
Extendable table on one support
A table on one support is a basic form of table that has some advantages over a table with a drawer belt. If you need a folding table, do not forget to consider this form. Such a table can easily have a sliding, folding, or hinged lid, which will expand it. The most common option is a sliding lid with an insert section. As shown on the next page, the lid is divided into two and its halves are connected by special sliding runners. Thus, these two lid panels can be pulled apart and an additional board inserted between them. What to do with the support is a key question for the master. For the table to be stable, the size of the lid and the support area must be close. In the example shown, the support is vertically divided into two parts, each of which is attached to a corresponding cover panel. When the lid is pulled apart, the support also separates.
Design options
The basic form has a support that separates when the table is extended. This is not the only option. If a relatively small expansion, say 30–40 cm, is acceptable, then the extendable table can be made on a non-dividing support. Another option is to make a table on two supports. A table with a support for each sliding half can expand by 90–120 cm.
Table drawing
Table drawing
Table with extendable tabletop sections
Table with retractable tabletop sections
When choosing one of the types of folding tables, one of the most interesting designs is a system with retractable sections. It is easy to make and use. There is nothing unusual about the basic structure of the table. The only difference from the usual underframe made of drawers and legs is the presence of slots in the end drawers. The difference lies on top of the drawer and legs. Instead of attaching the table top to the drawer belt, its side sections, attached to long tapered runners, are laid on the drawer leg assembly. The runners correspond to the slots in the drawers. The existing central board separating the side sections is secured with screws to the frames. The table cover is placed on top of the central board and side sections, but is not firmly secured. When unfolding the table, the side section simply slides out from under the lid. The skids have stops that prevent the section from being pulled out too far. When pulled out, the lid will tilt slightly at first, but when fully unfolded it will be flush with the side section. Since the pull-out sections are part of the design, you won’t have to search through closets and storage rooms for them when you need to lay out the table before guests arrive. You simply pull out a section or two – even if the table is already set.
Design options
The system with retractable sections is compatible with any type of table support, provided that drawers are available. Thus, a trestle table or a two-legged table (as in the picture on the right), equipped with drawers, can have pull-out sections to increase the number of seats. However, the system is not well suited for countertops with shapes other than rectilinear. When folded, the side section is retracted under the lid and its edges remain (or should remain) visible. If the shape is different from the shape of the lid, then the table will probably look quite strange when folded. For example, a semicircular side section located under a square or rectangular lid will create a gap between the lid and the drawers.
Double-support table with extendable sections
Table drawing
Table drawing
Table with sliding folding lid
Table with a sliding folding lid
A table with a sliding folding lid (tabletop) is relatively rare. Despite its low prevalence, this is an excellent system. The table has one additional section - a duplicate of the “main” lid; this section is connected to the lid using hinges and, when folded, lies on the main section (lid). To unfold the table, the “double” tabletop is moved to its extreme position (up to half of the underframe), and then the additional section is folded back onto the underframe. The upper edges of the drawers should be covered with felt or felt to facilitate the sliding of the lid. Making a sliding mechanism is not difficult. Each runner has a ridge that fits into a groove in its guide. The disadvantage is that during periods of high humidity the ridges may become stuck in the grooves. The basic version is usually configured as a side table. When unfolded, the edges of the tabletop are quite far from the tabletop, which creates sufficient space for people to sit under the table. The Y-shape of the legs will provide sufficient space for the legs of those sitting at the ends of the table.
Design options
When folded, this table looks like a somewhat strange dining table. To limit the overhang of the tabletop over the underframe (ensuring stability), the size of the base part should be close to the size of the folded tabletop. Therefore, a folding tabletop should be used on a type of table that does not look strange with a small tabletop overhang. Good options for this use include a side table (as a base table), a sofa table (shown here), and other specialty tables and tables. When folded, these tables can be placed close to the wall. Folding tops are commonly used in traditional card tables, but without a sliding mechanism. However, the sliding mechanism will work here too.
Table drawing
Table drawing
Product coating
Paint or varnish is used for coating. You can also apply stain, thereby giving the product the desired color. The wood is not just painted, but rather impregnated with liquid.
Before you start staining, to make sure you choose the color, you should try it on a trial product, because each type of wood has a different structure and shade, and the color may not come out as planned.
Table with folding boards and extendable arms
A table with folding boards and retractable brackets
A table with a folding board (or boards) is practically the “generic” name for all tables in which sections of the table top are connected to each other by hinges. It is a common species and has been present throughout American history. In any style of furniture, from William and Mary style to modern, you will find a table with a folding board. This table has folding boards as part of the design. When not in use, they can be lowered into a vertical position, saving space in the room. There are many ways to keep the folding sections in the raised position. The example shown here uses pull-out holders - you lift the board and slide out the support brackets from underneath it (much like a drawer). For some other support systems, see a table with swivel frame supports, a table with swivel legs, a book table, and several card tables. The main thing to think about for this type of table is the width of the folding boards, which can be optimally supported by retractable or swivel/hinge arms. Make the folding boards relatively narrow - say, no wider than 38 cm. For wider sections, see options with swivel frame supports or swivel legs. A long folding board, like the example shown here, will require more than one bracket. Incidentally, this example received an interesting name in the 20th century, which applies to a relatively long, utilitarian table with hinged lids. This name, which can be translated as “suffering,” creates in the conscious mind a picture of a large table laid out,” laden with food for hungry seasonal agricultural workers during the harvest season. Regardless of what we call it now, the people who sat at such a table in 1840 or 1880 probably called it a clapper table or a folding table.
Design options
While a basic dining table is quite long and relatively narrow, with a rectangular top with sharp corners, a drop-board table can be of almost any size, proportion and shape. The table top (tabletop) may have folding boards of a round or slightly rounded shape. On a shortened or square base, you can install a round, square or oval tabletop. You can round the corners of the folding sections or make their outer edges curved.
Table drawing
Table drawing
Book table with rotating frame supports
Table-book with rotating frame supports
Table-book is the Russian name for a table with rotating frame supports, which are hinged to the frame-leg-leg assembly. The support post is connected to the rotating post by an upper and lower crossbar. The entire support can be rotated so that the raised folding section (board) can be placed on it. The swivel support became the predecessor of the swivel leg. It contains many structural elements that reflect the state of carpentry in the 16th century when it appeared. But like any well-made frame, it is structurally rigid and makes an excellent support for a folding board. Although the first such tables usually had two frame supports (one for each folding board), there were often tables with one folding board and one swivel support, and it happened the other way around - there were several leviathans with 12 swivel supports. When folded, tables were usually very narrow and saved significant space. A large table with two swivel legs on each folding board can be made so that the legs swivel both towards each other and away from each other. If they turn towards each other, then when the folding boards are lowered, the supporting posts of the frames will be located next to the main legs, visually making them more massive. When rotated away from each other, the support posts will be positioned side by side, creating the appearance of a table with six legs. The first tables were usually made in the Baroque style, with a complex turned profile of the legs. However, the example shown is completely modern in style.
Design options
A significant advantage of the book-table is the ability to support very large additional sections. Reliable support under the folding board makes the table very stable even with one section raised. Thus, it is difficult to make a very narrow table with wide folding boards. When folded, the table takes up very little space. When unfolded, it has a huge tabletop
Table drawing
Table drawing
Table drawing
Material used
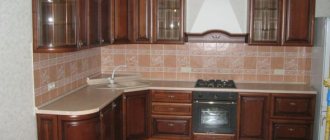
Often a person has a question: what can a kitchen table be made from? It all depends on financial capabilities. The following options are available:
Fiberboard and chipboard are easy to process and will allow you to make a budget option.
Natural pine wood is an excellent choice for a small investment. This material will allow you to create a high-quality product that, with proper care, will last a considerable time.
Using hard wood in the form of oak or beech will allow you to make a unique product that has an excellent aesthetic appearance and increased strength. You will have to put a little effort into processing this wood, but the result is worth it.Read here - Instructions on how to make a computer desk with your own hands: drawings, projects and ways to build a modern, functional and comfortable computer desk (125 photos and videos)
As you can see, there are quite a lot of options. For any financial budget, you can find a suitable option for yourself. In any case, a product made on your own will cost much less financially than one bought in a store.
Book table with swivel legs
Book table with swivel legs
This table can quite justifiably be called a table with folding boards, but the swivel leg sets it apart from others of its kind. The swivel leg is a descendant of the frame swivel support (see page 158). If the swivel support is attached to the table frame, consisting of a drawer, legs and a leg, then the swivel leg is attached only to the drawer. The result is a lighter appearance. It is the size rather than the assembly of the swivel leg that characterizes this table. The tabletop diameter of only 107 cm will be quite comfortable for four. The swivel leg is used in card tables with small folding tabletops. During the Queen Anne period, a smaller version of the table shown here was called a "breakfast table" and was used both for actual breakfast and for games and tea parties. Larger tables will likely need additional swivel legs to provide better support for the tip boards. A hinge joint—essentially a wooden hinge—makes a swivel leg feasible. A fancier version than shown here makes the connection look like a metal loop.
Design options
The design of a rotating table leg with folding boards appeared in the first half of the 18th century. Although we chose a Queen Anne style table as our “base”, the swivel leg has been used in many different styles of tables. The profile of the leg will generally be an indicator of style. Chippendale style swing leg tables often have cabriole designs, but always with a claw-and-ball finish. Square shaped legs are also used in Chippendale tables. During the Federal style, Hepplewhite tables were made with tapered legs, as shown here, and Sheraton style tables were made with turned, often raised, legs.
Folding boards fold out to transform a rectangular table into a square one
Table drawing
Table drawing
Table with extendable legs
Table with Extendable Legs
The advantage of a table with a frame swivel leg over a table with a swivel leg is the stability created by the additional legs. When the folding boards are raised, they are supported by additional legs. A table with swing legs also has this advantage over a table with swing legs, but also has one advantage over a table with frame swing legs. Like the swing leg table, this table has an additional leg for each folding board. But only a narrow crossbar connects the leg to the table. These crossbars are placed in a cage of two guides installed between the longitudinal drawers, and are pulled out through the cutouts in the drawers. The leg is attached to the crossbars. Raise the folding board, extend the leg and lower the board onto it. You have a leg under the folding board and still have four legs under the stationary table top. This structure can support very wide folding boards.
Design options
Here are two very different tables with extendable legs, each of which has excellent stability thanks to the additional leg (or legs) when unfolded. When the card table is folded and placed against the wall, the additional leg is not noticeable. By unfolding the gaming table and extending the additional leg, you will have support at each corner of the tabletop. Perfect. Extendable legs are also a great addition to a long table with folding boards. If you make two extendable legs for each board, the table will not lose stability when someone leans too hard on it.
Table drawing
Table drawing
Table-chair, Table-bench
Table-chair, Table-bench
Table-chair owes its appearance to medieval practicality. In the Middle Ages, dwellings were small and drafty. Any furniture was expensive, everything was made with hand tools. And if a piece of furniture could perform more than one function, well, so much the better. The table-chair is clearly universal. With the lid down, it's a table. With the lid raised there is a seat. And as with most universal things, its functionality is far from perfect. With the development of the furniture industry, the table-chair became more advanced in design and elegant in appearance. The product shown here has legs and armrests attached to the sides of the seat with tenon-to-socket joints. The pronounced end of the shoe-shaped legs makes the chair more stable and the armrests more comfortable. The chair even has an under-seat drawer for more sophisticated storage than a box with a lid. The table top is attached with a dovetail mortise.
Design options
The first American tables of this type date back to the 1600s. The earliest specimens have figured turned legs. Such tables continued to be made for the next couple of centuries, especially in rural areas, and along the way they lost most of their decoration. The two simple products shown below illustrate how easy it is to turn a “classic” bench into a table. The panel legs are simply extended above the seat. The appearance is purely functional, but the effect is nonetheless attractive. In addition, both samples can be made using only simple hand tools.
Tools for work
In order to make this piece of furniture, you need to prepare a large set of tools. Some electric tools can be asked from friends or rented.
- Electric jigsaw.
- Screwdriver.
- Electric planer.
- Set of drills and screwdrivers.
- Sander.
- Roulette, stylus, triangle.