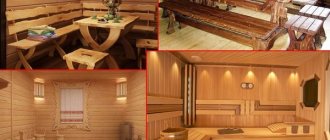
Choosing bath furniture
It is not advisable to move furniture that has served its purpose in living rooms. Practical and safe furniture is selected to equip the bathhouse.
The standard bath package usually includes:
- Shelves and sun beds;
- Benches and benches;
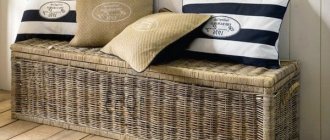
- Wardrobes and clothes hangers;
- Table, chairs, stools and armchairs.
The presented set is given for approximate interior planning. In each project you need to focus on the specific dimensions of the room. Excessive clutter will interfere, so you need to think through the need for a particular piece of furniture in advance.
In the bathhouse, the space is divided into several zones with different microclimates, therefore, the choice of furniture must correspond to this parameter.
Transformable sofa - its types
Types of transformable sofa
There are several types of transformable sofas:
Video: assembling a Eurobook on a plywood block
Video: making a Chester sofa
If you still decide to buy a sofa or have it made to order, then contact an online furniture store.
On the Internet you can find inexpensive options of various shapes: both straight and angular. Corner sofa made from pallets Comfortable homemade sofa
Dolphin sofa with drawers Accordion design For reception area
Eurobook
Sofa click-klyak Sofa lit On a metal support Pantograph sofa Puma Transformable Eurobook sofa design Island sofa Strict sofa book Corner sofa bed Corner sofa accordion
Pull-out sofa on wheels
Buy or make it yourself?
Bath equipment stores offer a huge selection of interior items. They are usually made from solid wood. If your financial capabilities allow you to purchase beautiful and expensive things, you can decide to buy.
But not every lover of a steam bath has such an opportunity. Then you can make simple, inexpensive and reliable furniture with your own hands. Detailed diagrams and instructions will be presented to everyone.
Coming from the East
In fact, to tell the truth, the divan is the legislative and executive body in a number of Islamic states, as well as its highest official. Who knows, perhaps the owners of furniture salons under the sonorous and popular name “Mr. Sofa” are very enlightened and erudite in all respects and are not as far from iron logic as it seems to us at first glance.
An indispensable attribute of any office are chairs; in the East, in the same legislative body, the function of such furniture was performed by benches with soft padding, so as not to particularly bother the users, or rather, their individual parts of the body. Actually, from there these important items went around the world, along the way, also acquiring a high back for greater comfort.
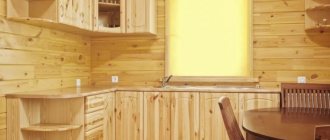
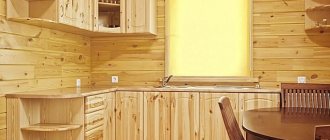
Materials for making furniture for the bathhouse
The best material for bath furniture is wood, but not every one meets the requirements of operating conditions.
Materials must be:
- With low thermal conductivity;
- With a dense structure;
- Safe and environmentally friendly;
- No resins;
- Easy to process.
For damp rooms with temperature changes, you can choose wood:
- Linden trees,
- Aspens,
- Oak,
- Exotic African tree - abashi.
It is possible to use coniferous trees in the recreation area and dressing room
- Pines,
- Cedar,
- Ate.
In a more humid and hot room, these materials do not meet the requirements for thermal conductivity due to the high resin content.
How to make a stool-chair for a bath: dimensions, drawing, device
To perform bath hygiene procedures and comfortable rest in the dressing room, all rooms must be equipped with the necessary furniture. A bath stool is a universal piece of furniture that is suitable for installation in different rooms. To save money, you can do it yourself; in this article, IVF Heart will tell you how to do it.
Tools and accessories
After drawing up diagrams for assembling pieces of furniture, you should prepare working tools. You will need for production:
- Grinder machine;
- Screwdriver;
- Jointer;
- Plane;
- Jigsaw;
- Screwdrivers, rulers, square, pencil.
Before assembly, use a grinder to remove any uneven surfaces from the surface of all boards and bars and round the corners.
The wood must first be treated with a protective antiseptic composition. The use of varnishes is unacceptable.
Scheme
The diagrams show various options for making a sofa:
Drawing for assembling a sofa Drawing for assembling an accordion sofa Scheme for a sofa click-clack
Measuring diagram Assembly of a Eurobook sofa
Source
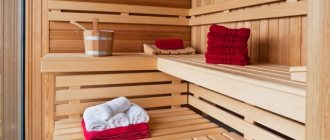
Making a shelf for a bathhouse
The main attribute of a paired room is a shelf that has several tiers, where the top shelf is 60 cm wide and located at least 1100 m from the ceiling. This place will be the hottest. The next lower tiers are located at a distance of 500 mm from each other and from the floor. The bottom shelf is usually made 400 mm wide.
The higher the ceiling in the room, the more tiers you can make for the shelf. The structure consists of a timber frame and decking. A beam with dimensions of 50x70 mm is the best option, since a thicker one will take a long time to dry.
All tiers, except the bottom, are attached to the general structure and to the floor. It is necessary to provide a ventilation gap of 100 mm from the shelves to the walls, lay the flooring boards with a gap of 10 mm.
Back
Frame corner sofa
No less important in this matter is the collection of a strong back for the sofa. Since this version of the sofa is quite simple and does not provide for a folding system, the backrest is made in the same way with a frame base. The backrest is fixed to the base using thick metal corners as tightly as possible. How much the back will be tilted is up to you to decide, based on your feelings.
Making a table for a bath
The rectangular table in the rest room is made with a plank tabletop on two supporting legs.
To work you need to purchase:
- Boards 50 x 10 x 120 mm 8 pieces - tabletop;
- Bars fixing the tabletop 50 x 100 x 700 mm 2 pieces;
- Bar 50 x 150 x 650 mm 4 pieces - legs.
- Crossbars 25 x 100 x 1050 mm 2 pieces;
- Crossbars 25 x 100 x 750 mm 2 pieces.
Assembly is performed in the following sequence:
- Lay out the boards and secure them at the ends.
- Fasten with connecting strips using self-tapping screws. Pre-cut rectangular slots for the planks, measuring 50 x 150 mm, and place them at the ends of the tabletop boards.
- Insert the legs into the slots and secure with strips.
- Sand the finished product clean and impregnate with a protective layer.
Sofa bed
The sofa can perform several functions. So, it can be used for short rest during the day and for full rest at night. Let's consider the sequence of work. Diagrams will be attached to the description, so you can clearly see the manufacturing process.
Sidewalls
Assembling the sidewalls
From boards 19 mm thick, cut two pieces 775 mm and 381 mm long. From these you assemble an A/B frame. Panel D is cut from plywood to the same size. First, the frame is glued together, and after the glue dries, it is screwed together with self-tapping screws. After this, cut out the bosses C. Thanks to them, the secure fastening of the bed ties will be ensured. The thickness of the boss is equal to the thickness of the frame. These parts are glued to the frame and set aside to dry.
Now it's time to cut out workpiece D (dimensions 381x775 mm).
Attach the cutter to the router collet. You will use it to make 3x6 mm folds around the entire perimeter of the workpiece, but only from the front side. After this, take 2 panels that will be located on the inside of the sides and connect them with double-sided tape face to face. On one of the panels, mark the places for making holes Ø19 mm, which will indicate the end and beginning of the slot. Then drill holes through both panels at the intended location. Making holes and chamfering
Next, draw lines between the holes.
After separating the panels, cut the slots with a jigsaw. To make sure the slots are even, run a Ø19 mm dowel inside them. If necessary, sandpaper can be used to refine areas where the size does not correspond to 19 mm. Finally, chamfer the edges of the slots, 3 mm wide, from the front side of the part. Paint the bottom of the folds with stain, this way you will emphasize the shadow gap that forms between the side panel edging and the edge of the panel. Manufacturing step by step
Now you can try on the made panels to the previously made frames. At the edges, both parts must completely match. After these manipulations, cut out the side and bottom/top edging parts E and F. They must be cut with an allowance of up to 25 mm in length. To join them, the edges are cut at an angle of 45°. The edging is connected to the frame using glue and screws. If necessary, the assembled parts are sanded with sandpaper.
Legs and armrests
To make the legs, cut the block parts G, leg ties I, spacers J and face panels H. Connect the blanks G and H together so that the sides and bottom sides of the parts meet. Then, using a clamp, fasten the workpieces to the ties I and make countersink holes.
The resulting hole is used to connect the ties and legs. Mill a 3mm chamfer around the bottom end of the legs. After this, sand the resulting element with sandpaper. If you want to give the workpieces a special tone or color, you can treat them with stain.
The J spacers need to be connected to the undersides of the sidewall. Make sure there are no protrusions on the sides. Next, the leg is attached and it also needs to be aligned with the edges of the workpiece F. Make a hole through the ties I, countersink it and connect the parts with self-tapping screws. On the opposite side it is necessary to make an armrest of the appropriate size. The armrest should extend beyond the edges at the front and back and be flush with the interior panels.
Back and seat
Back and seat
To make the back and seat, you should cut out several blanks: post M, top crossbar N, bottom crossbar O, side bars Q, lining R, back S and front seat crossbar T. For manufacturing, you can use a 50 mm board.
As for the seat panel U and backrest P, they can be done later. Racks
Now drill holes and counterbores in the side bars Q and the M stand, and attach the lining R to the side bars Q.
Countering is a countersinking process that involves cleaning the end surface. As a rule, counterboring is performed in the form of mounted heads that have end teeth. This process is performed under the washer, nuts or thrust rings.
Make grooves 38 mm wide in the racks.
Also make the folds at the end of the front crossbar T 76 mm wide, and at the end of the top crossbar N and the rear S - 38 mm. seat
Fastening the stops
Next, in parts M, N, O, Q, S and T, make tongues 6 mm deep.
To do this you need to use a router. Blank
A tongue means a longitudinal protrusion on the edge of a board or beam. It fits into a matching groove in another board with a similar shape. This connection method is known as tongue and groove.
After this, take the workpiece N and T and mill a rounding with a radius of 12 mm on them. Also make 15° bevels. At the ends of the part N, T and S, make counterbores with a depth of 8 mm, using a Forstner drill Ø10 mm, and make mounting holes in the center of the counterbore.
Forstner drill
At the next stage, it’s time to make the back and seat P and U. Having cut them to the specified dimensions along the perimeter of the part, you should mill a 10 mm wide fold along the entire perimeter. Ridges should be formed during this process. They should fit into the tongues of the workpieces T, S, Q, O, N and M. Next, you need to lubricate the tongues T, S, R/Q, O, M and N and, fixing them with a clamp, glue them to the panels U and P. After previously holes made on parts T, S, N and M, drill a hole in the panel and secure the parts with self-tapping screws. Afterwards you need to glue wooden plugs/plugs into the counterbores. Finally, these plugs should be sanded flush with the workpiece.
Now you need to make V stops at one end with a bevel. It must be pressed with a clamp to the seat in the designated place. Then drill the holes, countersink them and fasten them with a self-tapping screw. Grind a 3 mm chamfer around the end and cut a piece 57 mm long. As a result, you will need to make 4 such parts and secure them into the holes of the backrest posts. At this stage, you still need to make four wooden washers, 6 mm thick and Ø127 mm. Sand these spacers smooth.
Finishing and assembly
To connect the backs, you need to cut out the drawers L. Immediately before assembling the sofa bed, make sure that there are no sharp corners or chips. If necessary, they should be sanded with sandpaper. Finally, all that remains is the sheathing and final assembly. By closely adhering to the diagrams and the step-by-step instructions provided, you will be able to do all the work yourself.
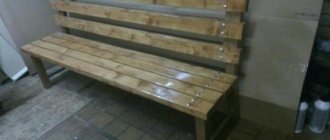
Making a bench for a bathhouse
For production you will need:
- Boards 50 x 100 x 1800 mm (seat) 3 pieces;
- Bars 50 x 70 x 110 mm 2 pieces;
- Sawn bars 35 x 50 x 100 mm 4 pieces;
- Bars for legs 50 x 10 x 400 mm 4 pieces
- Board sawn lengthwise 50 x 100 x 1400 mm – 1 piece.
Build process:
- Place the boards next to each other at a distance of 10 mm from each other and secure with two fastening bars. Maintain a distance between bars of 1400 mm.
- Attach the sawn block to the leg. Attach the leg itself to the seat board and to the end of the fastening bar.
- Repeat the previous procedure with the remaining three legs.
- Place the sawn board between the sawn beams and secure with special self-tapping screws.
Armor mesh
In the third step of the work, you will make a support grid on the sofa frame, necessary to support the seat cushions. This is done using a metal armored mesh from an old bed. By fixing the mesh on a wooden base with metal brackets, you will get the desired result. For greater reliability, glue several transverse ones onto the longitudinal frame beams.
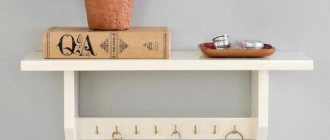
Clothes hanger in the bathhouse (step by step instructions)
The design of the hanger will consist of prefabricated elements connected to each other on two strips with wooden hooks.
You need to prepare:
- Top bar 25 x 50 x 708 mm;
- Bottom bar 25 x 50 x 567 mm;
- Rectangular elements 25 x 100 x 200 mm – 4 pieces;
- Square elements 25 x 90 x 90 mm – 7 pieces;
- Curly elements for hooks 25 x 100 mm - 10 pieces.
Round the edges of the wooden elements with a milling cutter to give them soft outlines.
- Arrange the squares and rectangles in a symmetrical order with a gap of 10 mm.
- Use fastening strips to fix their position, connect them along the pre-drilled holes with fasteners.
- In the front surfaces of square and rectangular elements, use a drill to make holes for fastening the hooks. Insert the lower parts of the hooks into the installation locations using glue.
After drying, sand and apply a coating.
Here are just a few options for making furniture yourself. As you can see, its design is simple, and the assembly process is not the most labor-intensive. The main thing is to do the work with soul, then the furniture will last for many years and will delight visitors.
Corner sofa
Corner design
To make a corner sofa, it is not necessary to use complex connections, for example, tenon products, or expensive materials. For work, we suggest using the following material, the volume and quantity of which depends on the size:
It is not recommended to use nails when connecting parts. They will quickly become loose, and the sofa will creak and, as a result, fall apart. Therefore, it is best to use self-tapping screws for connections.
As for the tool, the work will require:
Configurations and dimensions of corner sofa blocks
Each structural block is made of a frame, which is based on timber, chipboard and plywood.
The internal space in blocks 1 and 2 can be used rationally by making removable covers. To support them, a 20x30 mm beam is fixed around the perimeter of the frame. It is installed below the top cut to the thickness of the cover plate. To make it easier to lift the lid, you can drill holes in it for your fingers. Frame design block 1
Blocks 1 and 2 are the same in design. The only difference is their size. The first block is 100x60 cm in size, and the second is 60x60. It is the second block that will be located in the corner of the structure and connect the first and third blocks. As for the third block, you can make a drawer-seat in it. Due to this, the usable area of the sofa will increase. To do this, you can install a retractable or rotating mechanism.
The drawer will also be equipped with a chipboard lid. While assembling it is not difficult, difficulties may arise when making the legs. Why? When sliding the drawer into the body of the sofa, they will interfere. Therefore, instead of legs, it is necessary to increase the height of the front side of the drawer. When unfolding the corner sofa, it will serve as a support platform. To make the drawer easy to pull out, you can attach furniture wheels to the bottom.
Block 3
The cover for the third block (indicated in the diagram) can also be made removable. For example, you can fold bed linen inside.
The size of the seat cushion should be equal to the size of the drawer.
Therefore, when the drawer is pulled out, the pillow is removed from the back and placed on it instead of the mattress. Design of the back of the corner sofa
Now it's time to make the back for the corner sofa. The manufacturing process looks like this:
Finally, all that remains is to cover the entire sofa, including the backs, with the selected material.
Attaching the upholstery
Before doing this, take all the measurements, and then cut out the fabric with an allowance for the hem. You can fasten the material with a stapler. The mounting location should be on the invisible part of the panel end. Make sure that the fabric does not wrinkle at the corners. As for the manufacture of pillows for the back and seat, they can be made from foam rubber with a density of 140–170 g/day and a thickness of at least 10 cm. You will also need to sew a cover with a zipper. This will allow you to remove the cover and wash it if necessary.
Photo of homemade bath furniture
shelves
Bath shelf - diagram
of shelves for a small steam room
Before making shelves for a bathhouse, you need to take some measurements. The shelves should not cause inconvenience. Its device can be either single-tiered or three-tiered. It is believed that the heat is higher at the very top. The design resembles the shape of steps.
Once the required dimensions of the boards have been determined, you can begin to work:
- It is necessary to mount a frame of wooden posts. For this, a timber is taken.
- The racks are fastened together. You can even use metal screws here, because the body will not come into contact with this part of the shelf. The distance between the two posts should be about 50 cm.
- The frame must be attached to the walls of the bathhouse.
- Then the boards are attached to the frame. When installing them, you can no longer use metal. The distance between two adjacent boards should be about 1 cm. This is necessary so that the water can drain freely. In addition, this device allows the structure to dry faster.
Styles
Bath dresses made of terry can be decorated with embroidery and are most often made in one color; some styles are sewn with pockets. There are models with lace and bows or with ruffles at the top. Some bath towel dresses are sold complete with a turban, mitten or bath slippers. The choice of colors is very wide: pink, blue, red, green, yellow, olive and others, you can always choose according to your taste.
Pareos made of waffle fabric most often come not only in one color, but also with patterns, for example, on a bath theme or imitating a tartan check.
Some of the styles resemble the traditional pareo, whose homeland is the island of Tahiti. Other models look like dresses on the figure, since they are made with straps at the ends of the panel; the strap on the right side goes over the left shoulder and vice versa. In this case, the back remains practically open, and the bath dress becomes very similar to an elegant evening dress.
Pareos can also be seen as part of gift bath sets.
Bath dresses also vary in length: above the knee, to the knee and to the middle of the shin. For a dry bath (sauna) it is recommended to choose a longer pareo, and for a wet bath, on the contrary, a shorter one.
Handmade bath sundress is the squeak of fashion!
We will learn how to sew an incredibly comfortable and indescribably beautiful sundress! How to sew such a wonderful product? Very simple! For those whose hands grow out of place, we stock up on the following:
- a towel (size and color is a personal matter for each beauty);
- braid;
- material for decoration;
- rubber band;
- Velcro;
- needle and thread.
We take a towel and put it on the table. Sew an elastic band to the wide edge. We cut out strips of fabric and sew around the edges of the product (you can also make a pocket). We take Velcro, apply it to the inner front shelves of the sundress and secure it. Using braid or tape, we form the straps (you can, of course, do without them). Do you have any fabric left for decoration? We form a bow or flower from it and attach it to the bath sundress. Voila! The miracle dress is ready!
The simplest manipulations will allow you to create a real masterpiece. The right bath towel will give you a mind-blowing experience. At least the female half will definitely appreciate it!
How to choose a kilt
Today, many offers of various bath kilts can be found on the Internet. Manufacturers offer kilts of varying quality and design.
The most common type is a terry product made from 100% cotton. However, for those who prefer other fabrics, there are kilts made from bamboo, linen and other natural materials.
There is also a very wide selection of designs available. Children's drawings, feminine and masculine tones, decorative elements are present in almost every option.
The cheapest ones cost 300-500 rubles. And the most expensive ones are from 3 thousand rubles and above.
When choosing your kilt, it is important to understand that the primary purpose of this bath accessory is hygiene. The comfort with which a person will steam depends on what material is used when sewing a kilt. If the material is synthetic and does not absorb moisture well, then most likely a person runs the risk of developing a rash or skin irritation.
Waffle kilt for a bath
A bath kilt should be terry or waffle, preferably 100% cotton. Such a kilt will perfectly absorb droplets of water and keep a presentable appearance for a long time, which is important when going to the sauna with friends and colleagues.
Women are advised to pay less attention to the appearance of a kilt or pareo and choose based on quality.
In general, here are the main characteristics of a quality kilt:
- natural fabric;
- durable tailoring;
- moisture absorption;
- convenience and comfort.
Choose this hygiene item carefully. After all, the most important thing in a hygiene item is maximum harmlessness to the body.
Advantages
Many steam room lovers prefer a special kilt, as it has the following positive characteristics:
- easily converts into a sheet;
- does not restrict movement;
- absorbs moisture well;
- It is securely attached to the body and does not slip.
Depending on the length and design, bath kilts can be for women or men. Designed for women, the garments cover an area of the body from the chest to the knees and are usually secured with a wraparound closure by placing one piece of material over another. Velcro can significantly increase the reliability of fixation of clothing. Men's towels are wider and shorter in length.
Important! The design of a kilt can be quite varied. Men's items are distinguished by restrained and laconic embroidery decorations, while women's items are often complemented with bows and ribbons.
Wooden splendor
The wooden bath table continues to be an unfading classic of the genre of domestic bath interior. Wooden objects have many advantages:
- High ecological purity of the product, its naturalness and naturalness in the interior decoration;
- Low thermal conductivity and heat capacity, which is a very valuable quality in relation to the realities of a Russian bath;
- A wooden table for a bathhouse has the necessary margin of strength and natural durability with relatively simple and unpretentious maintenance;
- Wood is easy to process and to work with it you need a fairly small list of available tools.
To be fair, it is worth mentioning the use of other materials from which it is theoretically possible to make a bath table:
- Plywood and MDF are unique substitutes for solid natural wood, in the production of which various chemicals are used, including alkyd resins;
- Plastic - some of its types, manufactured to food grade tolerances, are suitable for the production of furniture and tables in particular. Products based on plastic masses are durable, lightweight and sufficiently strong. Caring for them is easy. However, the presence of plastic in the bathhouse interior negates the charm of the bathhouse itself;
- Metal - due to the characteristics of steel, cast iron and tables made of non-ferrous metals and their alloys, their presence in the bathhouse is appropriate in the form of individual elements, but not the structure as a whole.
Types of wood for making bath tables
A wooden table for a bath is made from certain types of industrial wood that have the necessary consumer qualities. These include the following:
Linden. A pleasant, easy-to-work wood with well-structured wood of uniform color and a pleasant aroma. Retains its original qualities for a long time; Alder. Wood of this species should also be classified as a priority. Easily and predictably processed, satisfactorily resistant to warping under conditions of frequent temperature changes
The texture of the wood has an attractive appearance with minimal decoration and processing. When choosing commercial raw materials, special attention should be paid to the degree and quality of its drying; for alder raw materials this is fundamental and important; Aspen. It is distinguished by good quality solid wood, in which knots and other serious defects are rarely found. Materials of this type are affordable and well processed
Among the disadvantages, it should be noted the tendency to warping and drying out. It is worth remembering that aspen tabletops do not withstand significant mechanical loads very well; Poplar. In terms of their characteristics, materials made from this type of wood are close to aspen. However, despite being cheap and accessible, poplar products are not particularly durable; Oak. It’s especially nice to make a table for a bathhouse with your own hands from this wood. Its noble color, deep original texture, and spicy oak aroma distinguish it from a host of other species. Excellent strength and record durability put oak furniture beyond competition. The disadvantages include the high cost of conditioned wood and the tendency to split when fastened with self-tapping screws.
It is worth mentioning separately about the use of coniferous wood in our carpentry practice. Spruce and pine are among the most affordable lumber on the domestic market. However, making a table for a bathhouse with your own hands from such raw materials is not always rational. Firstly, all conifers are quite resinous, secondly, it is unlikely to obtain a beautiful and bright texture without subsequent processing and, finally, using them in conditions of high humidity means dooming them to a short life. From coniferous wood, it is worth using cedar and larch, and the latter is more preferable in terms of the cost of raw materials.
To summarize this section, we present a table reflecting the hardness of various types of wood, which directly determines the durability of the countertop and the resistance of its surface to mechanical stress:
| Wood type | Compliance with its hardness class, according to current industry standards |
| Boxwood, dogwood, white acacia | I class, very hard |
| Hornbeam, pear, ash | II class, hard |
| Beech, English oak, European maple | III class, moderately hard |
| Birch, elm, larch | IV class, moderately soft |
| Pine, spruce, alder, chestnut | V class, soft |
| Linden, aspen, poplar | VI class, very soft |