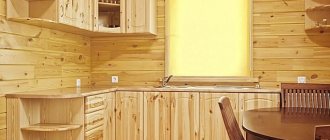
Buying a ready-made kitchen set today is not a problem. The industry offers consumers a huge selection of sets made from various materials - from cheap laminated OSB boards to expensive natural wood or artificial stone. But for several reasons, the purchased option cannot be considered optimal for everyone. Let's consider how to make a kitchen set yourself, which designs are the most convenient and reliable.
DIY kitchen set, drawings and diagrams. Step-by-step kitchen manufacturing technology
Design project and drawings
Having completed the drawing of the room, you can proceed to developing a design project for the kitchen unit. This is a very important stage, requiring simultaneous competent calculation and a creative approach. It’s easy to take a photo of your own kitchen as the basis for an individual project.
You will need to make an accurate drawing of a complete set of furniture, and then draw each item separately. This will help you think through the contents of the furniture, calculate the consumption of materials and the assembly diagram.
When calculating overall dimensions and planning placement, you need to take into account:
- the depth of the lower elements is usually 60 cm, the height with tabletop and legs is 83 cm;
- the depth of the cabinets for the upper tier is 30 cm;
- the distance between two tiers is within 60 cm;
- the sink is placed near communications;
- sockets are installed taking into account the placement of household appliances;
- If possible, the hood is placed next to the ventilation hole;
- the distance from the stove to the hood is 75 cm.
When thinking through a design project, you should take care of filling the furniture elements with various fittings: drawer guides, pull-out sections, and so on.
Any necessary accessories can be easily purchased at specialized retail outlets. The use of modern fittings makes the furniture very comfortable and functionally organizes the storage of kitchen utensils.
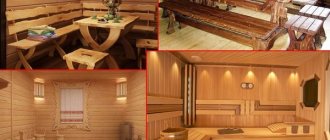
Without having much experience in this kind of work, it makes sense to start by making a couple of lockers for the dacha. A DIY summer kitchen is also a great way to try your hand at it.
What are the advantages of homemade headsets
Why are purchased options not suitable for everyone?
- There are kitchens of non-standard sizes; installing ready-made furniture in them is very difficult, and sometimes impossible. Remaking furniture to new sizes is a long and thankless task.
- Every housewife wants to have a unique set of furniture, tailored to her personal needs and desires. This is due not only to design preferences, but also to physiological characteristics, habits and traditions.
- Kitchen sets even in the cheapest segment are only relatively inexpensive. Not everyone can afford to buy them due to their difficult financial situation.
The factory-made set you like may not fit into the dimensions of the kitchen.
There is only one way out - to make a kitchen set with your own hands. The advantages of this solution are obvious: the dimensions of the product will exactly correspond to the parameters of the kitchen, and such pleasure will cost several times less. Let’s say right away that for this you need to have not only desire, but also professional skills, as well as a full set of special tools.
Selection of materials
The choice of materials for creating furniture depends on the skills of the craftsman and financial capabilities.
For the manufacture of kitchen furniture the following is used:
- solid wood;
- MDF;
- glued board;
- Chipboard.
When selecting materials, their characteristics and purpose should be taken into account.
Furniture elements consist of:
- housings;
- countertops;
- facade.
Layout
Decide on the list of necessary furniture elements. To do this, analyze your needs and desires. Ask your household what they want. The main and paramount thing is ease of use. Therefore, make your home comfortable based on this principle.
Here are the elements of the kitchen set that will interest you:
- floor cabinets;
- wall cabinets;
- open shelves;
- dinner table;
- chairs;
- poufs;
- benches;
- cabinets;
- stands;
- main table top;
- island type countertop;
- bar counter.
All these components will give the kitchen space sophistication, sophistication and extraordinary charm. The main thing is to choose the right design and furnish the room according to all the rules and regulations. First of all, the layout depends on the quadrature. The cooking workspace must be ergonomic, functional, and easy to use. After these parameters comes style and design.
The cooking workspace must be ergonomic, functional, and easy to use.
See alsoKitchen in the house: design for different layouts
Frame
The main load during operation is borne by the furniture body. Therefore, it should be made of durable materials that are resistant to steam and moisture.
Solid wood will require additional costs. Its use for the manufacture of a body is rational only if high-quality wood is used.
MDF is an inexpensive, durable and safe material.
Experts recommend using chipboard in laminated form. Sections formed during the manufacture of furniture should be treated with sealant or covered with a special film. Otherwise, the material will quickly deform under the influence of steam and water.
Glued laminated wood is cheaper than solid wood and has excellent performance qualities.
Benefits of working independently
Before proceeding with installation, it is necessary to prepare and harmonize the material. And even earlier, it’s worth understanding whether it’s profitable to make tables and chairs with your own hands.
Let's list the benefits.
1. You can do what you like. 2. You can eliminate the shortcomings yourself. 3. The ability to change the plan and layout during work without unnecessary hassle. 4. Wide range of decoration possibilities. 5.The quality of work is guaranteed by you. 6. Decent money savings.
The only downside here is that it takes a lot of time. That's all. But this is more likely not a disadvantage, but rather a repair cost. And if your family has children, working together will bring a lot of positive emotions. The main thing is to prepare well for the whole process. Prepare material for future use, select it first according to need, and much more. First things first.
The main thing is to prepare well for the whole process.
See also Beige kitchen interior: advantages and disadvantages
Tabletop
Both the service life of the furniture and the appearance of the set depend on it.
A popular and budget option is laminated chipboard or laminated wood.
A tabletop made of natural wood will require additional care. It is not resistant to moisture, hot dishes and steam.
An excellent alternative is countertops made of artificial or natural stone.
Installation of lower cabinets
As soon as you have received the kitchen furniture, you can begin to assemble it yourself, using the developer’s manual, which should be included in the kit. For installation, you may need various tools: a screwdriver or Phillips screwdriver, a drill and hammer drill, a jigsaw; wrench and hexagonal slot; level and square; pliers; clamps and, of course, a hammer.
Once the installation of the floor cabinets is completed, it is necessary to compare the dimensions of the assembled cabinets with their locations. After this, if the dimensions are suitable, you can begin arranging the headset. It is also necessary to measure the correctness of the upper and side parts with a level; the height can be adjusted by changing the height of the legs. It is believed that it is necessary to leave a distance between the floor and the bottom of the cabinet for better ventilation.
The first step is to prepare the back wall of the cabinet on which the sink will be located for connecting communications. It is advisable to mark and cut holes for the pipes to exit, and then place and fasten the furniture to the wall. They usually operate from the corner of the room, moving towards the middle. The next step is to install the doors on the cabinet.
When the installation of the lower parts of the set is completed, the cabinets need to be fastened together so that the kitchen looks neater and the cabinets stand level. Adjacent pedestals are connected with a vice and secured with screws or an intersection tie. After this, you can install shelves inside the cabinets and attach doors. If there are noticeable parts of the screws, they must be hidden using caps that match the color of the furniture.
It is imperative to make sure that the doors of adjacent cabinets are fully functional and do not block each other. If problems are detected, the sashes must be adjusted by tightening the screws.
Facade
It is the facade that has a decisive influence on the appearance of the furniture.
They are made from:
- MDF;
- laminated chipboard;
- natural wood;
- veneer panels;
- glued furniture panels.
A kitchen made of wood, created with your own hands at home, will require additional varnish treatment. Depending on the idea, the wood can be stained or painted. This will significantly extend the life of the furniture in the specific conditions of the kitchen.
It is not difficult to reduce the cost of furniture by using combined materials for its manufacture.
Step-by-step instruction
We will consider a simplified version of manufacturing the headset - all work on cutting the slabs will be done by specialized companies.
It is better to order cutting parts for the future headset from specialists
Their cost is affordable for the vast majority of customers; even professional furniture makers recommend using them. Why?
- The companies operate on modern equipment, cutting parts are of excellent quality. It is impossible to achieve it yourself using ordinary hand tools.
- The amount of waste is minimized. Professionals have special computer programs, with their help they create optimal cutting maps. Only by reducing the amount of unproductive waste can the costs of paying for services be fully repaid.
- Companies are responsible for the quality of parts, and in case of defects they compensate for damage.
- Work is much faster, and there is less garbage in the house. In addition, the work of woodworking tools creates a lot of noise; not all neighbors tolerate such inconvenience.
Using professional equipment, the cutting of parts is of the highest quality.
Taking into account all the listed factors, we strongly recommend that you do not do the cutting yourself, but entrust it to specialists.
Design and calculation of elements
Step 1. Draw a sketch of the kitchen set. Before this, you should choose the appropriate option, clarify the number and names of items and adjust them to the size of your kitchen. As mentioned above, it is necessary to adhere to the current size recommendations; they were developed by ergonomics - the science of adapting workplaces for the most efficient and safe work, taking into account the characteristics of the human body. And the kitchen is a workplace for housewives; the furniture should be comfortable.
When choosing a model, you need to take into account the ease of use of kitchen furniture
- The depth of the bottom drawers is 600 mm, the height without legs and tabletop is 700 mm. If you install legs and a tabletop, the height will increase to approximately 830 mm.
- The depth of the top drawers is 300 mm, the height is 700–800 mm. By reducing the depth of the top drawers, it is easier to use.
- The distance between the lower tabletop and the upper drawers is approximately 600 mm; it is not recommended to lower it lower - the working area is greatly reduced.
One of the design options for a homemade set Another simple diagram A common version of a corner set
The number of items and their width dimensions are selected taking into account the parameters of the room and the customer’s wishes.
Step 2. Make a sketch of each headset item (module). There should be a drawing as detailed as possible with details; it is necessary to indicate not only the dimensions, but also the quantity of all elements of the module. Do not rush, this is a very important operation, all errors will definitely appear during assembly, and it is quite difficult to solve problems that arise along the way.
Make a general sketch of the headset and each block separately
Important. The width of the drawers should be approximately 10 cm less than the width of the countertop. There should be a gap between them and the kitchen wall; all utilities existing in the room should be placed in it.
Above the front of the bedside tables, the tabletop should also extend approximately 4 cm and slightly close the doors. The dimensions of the box frame must take into account the width of the OSB or other material from which the walls and doors are planned to be made. Professionals recommend making shelves about 1–2 cm shorter than the depth of the box; this will speed up assembly, eliminate possible small errors during cutting and make closing/opening doors easier.
The tabletop should protrude above the frame
Step 3. Count the number of edges to be glued to the ends of the slabs. Take into account only the open ends; everything that closes does not need to be covered. This approach will reduce the amount of required materials and speed up the assembly process. Gluing the edges takes quite a lot of time, the technology requires the use of heating devices, etc. The dimensions of the facade doors along the entire perimeter are 6 mm smaller than the frame, a gap is required to prevent jamming when opening/closing.
Based on the sketch, the amount of edge tape is calculated and its thickness is determined.
Step 4. Using the same algorithm, design all models, draw up a specification and count the number of elements.
The size and number of parts are indicated on each sketch so that you don’t have to calculate it again later
Important. Remember that the width of the drawers should be approximately 26 mm less than the internal width of the bedside table. Specific values must be adjusted depending on the size of the fittings and guides. The facades also need to be reduced by 6 mm around the perimeter.
Step 5. Make a general list of parts, check all the dimensions and number of elements again. It is advisable to make a table indicating the name, quantity and size. Now you can go to a specialized company to conclude an agreement. They will draw up a cutting map, on which you need to indicate in which places the decorative edge is glued.
If you lack experience, it is better to entrust the drawing up of a cutting map to specialists
Assembly technology
For assembly you will need metal corners for quickly aligning the corners of parts, a confirmatory drill for drilling holes for special hardware (confirmations), clamps, a screwdriver or screwdriver, a set of hex keys, and measuring tools.
To assemble the headset, you need to prepare the tools in advance
Before starting work, arrange the delivered workpieces into separate piles according to the available detail. Re-check the availability of parts not only by quantity, but also by size. The boxes need to be assembled one at a time; if the workplace is in order, then the possibility of error is eliminated.
Step 1. Tighten the two sides of the bedside table with clamps, and install metal angles between them. It is very convenient to work with them; they not only control the right angle, but also allow you to fix the elements motionlessly. To be sure, it doesn’t hurt to check the corner with a construction square.
The two sides of the first module are fastened with clamps
Step 2. Use a confirmation drill to drill holes for the hardware. This special drill makes three holes at once: for the threaded part, for the body and for recessing the head. Make sure that the holes are strictly perpendicular to the plane of the walls, the distance between them should be symmetrical. It is recommended to retreat five centimeters from the top and bottom edges.
Drill holes and tighten the workpieces with fasteners
Practical advice. There is no need to immediately tighten the two sidewalls completely, even if they have a slight wobble. In this position, fix the remaining ones to them one by one, constantly check the angle, and only after installing all the parts can you tighten the hardware until it stops.
Assemble the frames of all kitchen cabinet drawers.
Step 3. On the front doors, make markings for fastening the hinges. Please note that after drilling the recess for the hinges, at least 5 mm remains from the edge of the doors; for all elements the dimensions must be strictly the same, otherwise the doors will warp and it is impossible to correct the problem. You will have to completely change the installation location of the element, and this breaks the symmetry. The problem is not critical, but it indicates the lack of professionalism of the technician.
The position of the hinges is marked on the inside of the doors.
The diameter of the seats for most hinges is standard and equal to 34 mm. The center of the technological hole should be located at a distance of 22 mm from the end of the door. To calculate, you need to add 5 mm to half the diameter of the drill (34:2 = 17 mm). It is recommended to center the center before drilling; this will eliminate the possibility of the tool moving during drilling.
Drill holes
Work very carefully, do not damage the front surface of the door, watch the drilling depth. It is much easier to control this parameter using the marks on the drill. To do this, measure the height of the part of the loop that will be fixed in the plate, make marks on the drill with a marker and do not lower the tool lower. One more thing. All wood drills have a sharp tip to improve drilling accuracy; measure its height and take this size into account when determining the depth of drilling the mounting hole.
For convenience, you can mark the depth of the hole on the drill so as not to drill through the material
Step 4. Start attaching the canopies to the sides of the boxes. This must be done in several stages.
- Set the door to the height of the drawer, remove the hinges.
- Align the position of the part vertically. As mentioned above, the door must have 5 mm gaps at the top and bottom, otherwise jamming may occur when closing/opening them. For the correct position, use pieces of fiberboard, the back walls are made from them, the thickness of the slabs is 5 mm. Place them on the floor and put the door on the door.
- Place the hinges tightly against the wall of the drawer and screw them in with self-tapping screws.
Screw the doors by placing a sheet of fiberboard.
This work is easier to do with an assistant. Let one firmly hold the door in the desired position, and the second tightens the screws.
Step 5. Attach wall-mounted bedside tables to the wall. This is much easier and more reliable with the help of a metal hanging bar and special adjustable hangers. They have two degrees of freedom: forward/backward and up/down. The hangers are very convenient to use and make it possible to accurately position the bedside tables both horizontally and vertically.
Mounted modules must be secured using special adjustable hangers
For hanging, you need to make holes in the rear side walls, the body is screwed to the bedside table with self-tapping screws. It is recommended to cut out the fixation points with an electric portable circular saw. Set the sawing depth to 5 mm, this is the thickness of the fiberboard, make two perpendicular cuts and remove the piece of board.
For suspensions, holes are cut in the rear wall of the module
Fix the metal strip with dowels; when choosing hardware, take into account the material used to make interior partitions and façade walls.
Using dowels, fix the plank to the wall and hang the cabinet
Important. It is strictly not recommended to hang kitchen cabinets on plasterboard partitions. Do not believe manufacturers' advertisements; drywall does not support loads. And no special dowels help.
Professionals know that in terms of strength there is no material worse than the currently quite fashionable gypsum boards. For foam blocks, use only special hardware. But they, as practice shows, do not always withstand heavy loads. If heavy objects are stored in hanging boxes, then it is much safer to use special chemical anchors. They adhere to the base material through adhesion. A special adhesive composition is introduced into the hole, and at the same time a metal pin is inserted into it. After polymerization, a very strong connection is ensured. Furniture makers advise using such anchors immediately; it is much simpler and cheaper than repairing a hanging bedside table after it falls.
Chemical anchor
All fastening elements are fixed level, constantly check the correct position.
Step 6: Reinstall the drawers. They move along metal guides; most manufacturers slightly adjust the dimensions, but the principle of operation remains unchanged. The fixed element is attached to the inner walls of the box. One edge is installed directly on the bottom, screwed with self-tapping screws. It is very important to ensure that the guides on both sides of the bedside table are located at the same horizontal level. The second part of the guides is fixed to the drawer.
Screw on the drawer slides
Practical advice. The drawer fronts should be screwed after installing the guides, this makes it possible to correct errors made during taking dimensions.
The fact is that we foresaw this at the stage of designing the kitchen units and specifically increased their sizes. The front doors can be lowered/raised slightly depending on the location of the drawer guides.
Step 7. Secure the gas lifts of the facade doors. These are modern designs that smoothly open doors automatically, reduce their physical wear, and increase the comfort of using furniture.
Advantages of gas lifts
Before starting work, carefully read the instructions from the manufacturer; the devices have several options and differ in the installation algorithm. But in all cases, the fixing axis of the fastener should be located at the recommended distance from the edge of the door.
Install gas lifts according to instructions
Hang the thick end of the gas rod onto it, and screw the other end to the bottom of the side wall of the bedside table. During hanging, the door should be as open as possible; this is an important nuance.
You need to screw the fasteners with the door open
Step 8. Glue a decorative edge to the end of the cut tabletop. This is done in the following sequence:
- cut the ribbon to the required length; Measure the tape along the length of the edge
- lean it against the edge of the tabletop, level the position; Carefully level the material
- Use a heated iron to press the edge along the entire length, check the strength of adhesion;
Iron the tape with a hot iron - Carefully cut off the excess with a sharp mounting knife. Carefully trim off excess
All that remains is to screw on the handles and legs, adjust the height and horizontality of the tabletop.
Practical advice. You should start installing the horizontal position with a gas or electric stove, and then fit all the fittings to it.
The assembly is completed by attaching the handles to the doors.
This completes the assembly of the kitchen set. All that remains is to attach the decorative plinth, which can be plastic, aluminum or stainless alloy. It is necessary to ensure that the lower horizontal plane of the plinth fits as tightly as possible to the tabletop, and the vertical plane to the wall: dirt accumulates in the smallest cracks, and it is very difficult to remove it from there. Some people try to use knives or metal brushes and scratch the front surface of the countertop.
After installing the set along the line where the table top meets the wall, you need to secure the baseboard
Manufacturing of parts
After selecting and purchasing materials, they must be cut in exact accordance with the dimensions and drawings. The work will require attention and concentration.
Often, when ordering MDF OR laminated chipboard, it is possible to order a service for cutting the material. This will help save time and reduce transportation costs for transporting parts.
Drawings of kitchen units
Fig.21.
Drawing of a kitchen with a corner sink.
Fig.22.
Drawings of kitchen modules.
Fig.23.
Drawings of kitchen sections.
Fig.24.
Drawing of a corner kitchen.
Assembly
It is recommended to follow a certain order when assembling finished parts.
First of all, you will need to drill holes for attaching shelf holders, drawer guides, as well as holes for connecting the parts themselves.
If necessary, the edges of the parts are smoothed using sandpaper.
Assembling furniture elements begins by connecting the side walls and base, then attaching the lid or tabletop. When assembling, it is necessary to control the process with a corner.
First of all, they work with the lower tier. After its assembly, connection and placement, they are taken for the cabinets of the top row.
Drawing on paper
A lot of work depends on a competent drawing. In practice, this is the most important stage. Maintain a clear sequence when depicting the typeface on a sheet of paper.
This is the work process.
1. Transfer the dimensions of the room onto a sheet of paper. Make several copies at once so that you have something to compare and operate with. 2. Apply utility lines, protruding water and sewer pipes, as well as heating radiators and window sills. 3. Indicate the main dimensions. 4. Start arranging the space by adding certain furnishing elements. 5. After drawing several drafts, transfer the final one to a blank sheet of paper.
These actions can be performed on a computer. If you have the skills to work in AutoCAD, you can easily draw a diagram on a given scale. This will eliminate possible miscalculations. In addition to AutoCAD, software such as Archicad, Corel Drow and other graphic editors are suitable.
If you have the skills to work in AutoCAD, you can easily draw a diagram on a given scale.
Pay special attention to the drawings of each individual furniture element of the interior decoration. Please note that you will have to draw out each cabinet, shelf, cabinet and stand on a separate sheet of paper. This is done in three projections:
- frontal;
- horizontal;
- view from above.
This method allows you to visualize your future bedside table or cabinet as clearly as possible. In addition, be sure to draw the internal dimensions of the functional space of the cabinet and its frame. The fact is that production will begin with the frame structure, and without its dimensions you will not be able to make patterns correctly. Be sure to leave allowances of 1-3 mm. This is necessary to fit the parts, since during the assembly process it may be necessary to lengthen the structure or adjust it to an existing defect.
Be sure to leave allowances of 1-3 mm. This is necessary to fit the parts, since during the assembly process it may be necessary to lengthen the structure or adjust it to an existing defect.
Label all numbers on the diagram legibly. It’s not for nothing that there are special GOSTs, according to which educational institutions require drawings. If suddenly, after drawing up a diagram and reading it incorrectly, you take into your head a different value for this or that part, all the work may go down the drain.
Label all numbers on the diagram legibly
See alsoFeatures of choosing a corner cabinet for a kitchen sink
Decorative finishing
Do-it-yourself kitchen decor is carried out according to an individual project, based on the original plan.
Decorative furniture fittings, adhesive PVC film, acrylic paint, furniture varnish, and decoupage techniques are often used as finishing elements.
When making furniture from natural wood, it is recommended to impregnate the parts with stain or a protective compound before assembly.
A creative approach will ultimately allow you to create not only functional, but also original furniture.
Kitchen furniture lighting
The lighting on the kitchen set is not only a decorative element, but also illumination of the work area, which directly affects fatigue, so it is important to make good and functional lighting.
Fig. 19.
Kitchen furniture lighting.
As can be seen from the infographic (Fig. 19), the most functional is the lighting under the kitchen cabinets. You can make lighting for your kitchen work area using LED strips. To do this, it is glued to the bottom wall of the top row of cabinets. Kitchen countertop lighting can be done using special boxes with a diffuser for ice strips.
Fig.20.
LED lighting for the kitchen.
Features of corner furniture
A popular option is the corner kitchen layout. When making your own furniture, there are several important points to take into account.
To form a corner, both trapezoidal elements and right angle connections are used.
A trapezoid-shaped model will require more space. For this reason, it is common to place two cabinets at a 90-degree angle in a corner.
In order to make maximum use of space, retractable or roll-out systems are often installed. Modern principles of kitchen arrangement and layout make it possible to effectively use hard-to-reach places in the formed corner to organize additional storage systems.
These nuances should be carefully calculated at the planning stage.
Where to start
You need to approach each job slowly and carefully think through all your actions.
Table. The procedure for making a headset
| Manufacturing stage | Brief description of actions and practical recommendations |
| Design selection | You should not do an independent project from scratch; this requires special education and a lot of experience. It is much easier to choose a ready-made one and adapt it to your conditions. Now there is a huge selection of different options for kitchen sets with detailed diagrams, stop at the one you like, adjust its size. You can increase or vice versa, reduce the number of items, supplement them with your own decorative elements, change the material of manufacture. If you have basic knowledge, then use special programs for 3D modeling. Take measurements of the room and, taking them into account, experiment with the elements of the set. It is recommended to take into account existing size recommendations that meet ergonomic requirements - the most convenient dimensions for work are height (≈ 85 cm), width (30–80 cm) and depth (45–50 cm). |
| A rather complex technical stage, the amount of waste depends on the correctness of its implementation. If you doubt your capabilities, we recommend contacting specialized companies. A more detailed justification for this decision will be given below. |
| Purchasing materials | Kitchen sets can be made from various materials. But you need to know that even the cheapest ones can be of high quality and last for many years, and vice versa, among the expensive ones there are often defective ones. Before purchasing, you need to have a calculation of the total quantity - standard slabs are purchased taking into account the compiled cutting map. For a kitchen set, additional and decorative elements, fittings, and special fixtures are immediately purchased. You should always make a margin of 5–10%; the specific dimensions depend on the complexity of the headset geometry and your professional skills. |
| This stage requires a lot of attention; errors will definitely be noticeable and will significantly worsen the appearance. What tools are needed, how all the fittings are assembled step by step can be read in this article a little lower. |
| At this stage, it is necessary to check the functionality of each element; it is not too late to correct errors. It is much easier to do this than to later repair fallen pieces of furniture; in addition, there are materials that cannot be repaired after mechanical damage. As long as the furniture is unloaded and all connections retain their original strength, troubleshooting is relatively easy and without much loss of time. |
If you decide to make a kitchen set yourself, then keep in mind that such work cannot be called easy; you will need maximum effort and patience.
Useful tips
To obtain the desired result when making kitchen furniture yourself, you will need care and a competent approach.
An important role is played by the preparatory stage with detailed development of drawings and thinking through the convenient content of individual modules.
When working with chipboard or MDF, special attention should be paid to the design of sections of parts. For decoration, it is reasonable to use adhesive-based furniture edges. This will significantly improve the appearance of the furniture and extend its service life.
Do-it-yourself kitchen renovation also often involves using furniture edges or replacing broken fittings.
Having finished making furniture for the kitchen, you can make a children's kitchen with your own hands from the leftover material. Complete with real furniture fittings, it will delight little housewives. Work on its manufacture should also begin with drawings.
Having shown a competent approach and having some experience in working with materials, creating your own kitchen furniture will not be difficult. Self-production makes it possible to create the ideal kitchen layout for yourself.
Conclusion
As can be seen from the brief instructions, the process of making a kitchen set requires a lot of attention and accuracy. You need to independently compile tables with detailed details and be able to use carpentry tools. Not all mistakes made can be corrected; in some cases, parts have to be completely changed. And this has an extremely negative impact on the cost of the set, not to mention the design characteristics.
Video - DIY kitchen set, drawings and diagrams. Step-by-step kitchen manufacturing technology
The kitchen set belongs to stationary furniture; in size it occupies a fairly large area of the room. Recently, very economical and efficient heated floors have been used to create a favorable microclimate, but they have a limited capacity per square meter. If the set is large, then the free space may not be enough to heat the room. Is it allowed to install systems under kitchen units, how can this be done practically? There are professional answers to these and other technical questions on the pages of our website.
DIY kitchen photo
Calculation of furniture sizes
This is the most important stage of the entire project, here you need to strain all your attention and concentrate on the details. You need to break down each drawer and cabinet and count them individually. According to the advice of experts, special attention should be paid to the cooking cabinet and oven; according to them, this is the element where beginners make the most mistakes when designing a kitchen that they make themselves. The drawing of this part must be approached with due care and concentration.
The main thing in furniture drawings is the ability to break down all the elements of furniture into parts, and then be able to correctly divide them into components. This example includes:
- Side walls.
- Back panel.
- Doors.
- Shelves.
If a drawer is being designed, then it also needs to be detailed, with special attention indicating the location of the furniture fittings. The main thing in this process is to indicate all drawings accurately, since error in this matter is unacceptable.
Kitchen measurements
On the drawing you need to indicate the dimensions of the kitchen: the width of all walls and their height. You can take measurements using a regular tape measure. Don't forget to mark the obtained data on the sketch; this will be useful for further modeling.
It is also important to include windows, doors, outlets, ledges and niches, corners and ventilation. If you want to add details, such as a podium or hood, mark this on the plan.
To avoid mistakes, it is very important to measure everything carefully.
Kitchen design examples
Looking for work inspiration? Take a look at the photos of the impressive designs:
Stylish kitchen project
To avoid sharp corners, the connection of the boxes was rounded
Classic style in kitchen design
Minimalistic placement of items
White colors and lots of light expand the space
Loft and minimalism styles have become very popular in recent years.
The refrigerator can be placed in a special cabinet: this way it will not stand out from the general background
Ideal arrangement of the refrigerator, sink and cooking area in the form of a triangle
Small corner kitchen that includes everything you need
The countertop can be made part of the kitchen, thereby expanding it
Corner kitchens are suitable for small spaces
Stylish design for a small room
Use any space to place items
Kitchen design for a summer residence
With the right layout, a small country house can include everything you need
Open storage of dishes can become part of the design
To save space, use walls to store dishes
Put items you rarely use on top of cabinets
You can build shelves or hang hooks into the sides of the cabinets
Unusual shapes in the interior
Errors and issues to consider during installation
One of the mistakes is to start assembly with large parts. A beginner should install small elements first and then move on to larger ones. It happens that the owner incorrectly calculates the height of the tabletop, forgetting about adjusting the legs and the floor covering, and the tabletop rests on the window sill. If this happens, part of it can be cut off. It also happens that power tools are used to assemble MDF elements. This is unnecessary because the fasteners are easily screwed into the sheets with a screwdriver.
Sometimes problems arise with the surfaces of the room. A fragile plasterboard wall can be partially dismantled and reinforced with timber. An uneven floor can also lead to difficulties, primarily in calculating the height of the tabletop and the distance to the top row, as well as creating unevenness. The problem is solved with the help of adjustable legs. Other important aspects:
- It is necessary to provide access to gas pipes in order to shut off the gas supply in case of emergency, as well as to meters to monitor indicators.
- Often, owners do not attach importance to the reliability of fastening the rear wall. If it lags behind the headset, it will cause a lot of inconvenience, and it is very difficult to correct such a defect.