Many apartments and houses do not have a permanent place to store keys. People spend a lot of time and nerves looking for their keys before going out. To increase comfort, a simple device can be used - a key holder. This article will talk about the types of key holders, as well as how to make them yourself.
Key holder for an athlete
You can make a key holder for the hallway with your own hands from any available materials. Anything that you can stick the keys into, hang it on, or magnetize it to is suitable for this. In an apartment where young people who love sports live, an extravagant key holder can be made from a tennis ball, cutting a slot in it into which it is convenient to stick keys. And if you decorate it with eyes, then a funny green “friend” will “settle” in the hallway.
Key holder as a work of art
You can make an interesting fantasy wall-mounted key holder with your own hands from a picture frame, a wooden base and various hooks. Such a key holder will decorate a hallway in an eclectic style, which allows for a mixture of different styles.
Construction stores have a wide range of hooks of different shapes and colors. Select a dozen hooks of different shapes, paint them in different colors if desired. Choose a baguette with a laconic or, conversely, elaborate design. As a base, you can cut a piece of plywood or use a ready-made wooden kitchen board. Attach the hooks to the base in a chaotic manner using small self-tapping screws. Attach the picture frame with special wood glue or nail it with thin nails.
Required materials and accessories
To make such a useful piece of furniture, you will need a number of different materials. Below is a sample list:
- wooden or cardboard structure as a base;
- leather or textiles;
- holder;
- key hooks;
- pendants;
- picture frame;
- branch of non-standard shape;
- acrylic lacquer.
You may also need:
- plywood sheet;
- branch of non-standard shape;
- cork;
- MDF or chipboard sheet;
- tree.
Tools worth preparing:
- drill;
- jigsaw;
- screwdriver;
Key holder for partygoers
Sometimes ideas for making key holders come out of nowhere. Wine bottle corks are an excellent decorative material. It’s such a shame to throw them away, and if you have accumulated enough of them, you can make interesting crafts.
Even if you have only a few wine corks, you can fix them on one surface, for example, on a narrow board vertically, nailing them with thin nails. Based on the principle of how a corkscrew enters a cork, special self-tapping screws with a half-ring instead of a head are screwed into the lower base of the corks (they are called a half-ring hook).
This way we get a number of hooks on which it is convenient to hang keys. To ensure that the keys do not get confused with each other, it makes sense to screw the hooks not into each plug, but through one.
Popular ideas
Nowadays, a large number of different ideas for making key holders have been invented. Let's look at the most popular models:
- Shelf. It is in greatest demand among the population and is suitable for standard housing.
- Box. Installed mainly in private buildings.
- Key holder for large farmsteads. Allows you to store keys in whole bunches.
- Organizer. Organizes other small items in addition to house keys.
Eco-style key holder
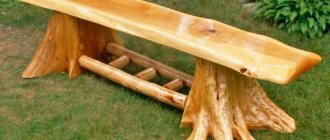
If you are a fan of eco-styles, country and rustic style are close to you, you will appreciate the following simple idea. You can make a wooden key holder with your own hands using sticks with knots. When going for a walk in the forest, collect and bring home knotty sticks. When you have enough of them, you can start working. Saw off equal sections of sticks, each of which has a Pinocchio knot.
Depending on your preference and the overall style of the entryway, you can remove the bark, leave them bare or paint them in bright colors, or use them as is with the bark. Screw all the sections to one surface with self-tapping screws. To prevent the wood from cracking, you should first drill holes with a thin drill.
Note!
DIY furniture made from pallets (140 photos) - step-by-step master class with diagrams and drawings, design ideas
DIY coffee table - manufacturing guide with a full description of the steps, choice of materials (120 photo ideas)
Do-it-yourself laundry basket (130 photo ideas): step-by-step master class for making it yourself, choice of materials, design options
Selection of design and construction solutions
The appearance of the accessory depends on where it will be used. For an office, the best solution would be a sleek steel cabinet with a lock.
For your home, the best option would be a model that fits harmoniously into the interior. It can be either luxuriously decorated or simple.
Note!
DIY feeder - step-by-step instructions for creating a feeder + detailed diagrams with photo reviewsDo-it-yourself rugs - TOP 120 simple patterns with master classes on how to make them yourself + photo reviews of finished rugs
Do-it-yourself dolls: a master class on making a beautiful doll. Simple instructions with photo examples of ready-made options
If you are not going to focus on such a product, you don’t need any particularly magnificent appearance from the key holder.
If you want to make the process of creating such a product as easy as possible, it can be made from an ordinary birch or oak branch.
No special skills are needed here. You just need to clear the tree of bark, drill the required number of holes and install hooks. The finished accessory should be varnished.
Key holder from the designer
If there are children in the house, you can make a key holder based on Lego. To do this, you need to attach a Lego plate to the wall next to the front door.
And turn several large parts into key rings by drilling small holes in them and putting them on a ring with keys. Each family member can have a piece of their own color, so in a hurry you won’t grab someone else’s keychain. And if the board is large enough, you can lay out a mosaic from a construction set on it, changing it according to your mood.
Step-by-step creation instructions from A to Z
Before you start making a key holder of a certain model, you need to purchase the necessary material. Let's take a closer look at one of the options for making a key holder.
Key holder in the shape of a house. At the first stage, it is necessary to prepare the workplace itself and the necessary tools:
- Hooks;
- Varnish;
- Masking tape;
- Paints;
- Scissors;
- Pencil;
- Wooden board;
- Jigsaw
- Sander.
At the first stage, you need to draw the house itself on paper and then transfer it to the board.
- Then we use a jigsaw to cut out the resulting pattern.
- The next stage is to remove all irregularities using sanding.
- We cover the product with a certain color.
- Drill holes and insert hooks.
- The final stage is coating the finished product with varnish.
Key house
Cute key holders in Provence style can be made in the form of a wall cabinet. If you have the tools and minimal skills, you can make it even without male help. To do this, we will need four narrow boards for the walls of the cabinet (the same size if we want to make it square, or two pairs of shorter ones and two pairs of longer ones for a rectangular one) and two wide boards for the back wall and door. For fastenings you will need self-tapping screws and hinged hinges.
After all the parts are cut to the required size, the boards need to be sanded first with coarse sandpaper and then with fine sandpaper until smooth. After this, we proceed to decorative processing of the wood. If we want to leave the natural structure of the wood, then we can cover the boards with stain, which will give the wood a noble shade, or burn the boards with a gas burner - this will reveal the texture of the wood, making it brighter. Final processing consists of covering all parts with several layers of varnish.
Note!
Do-it-yourself illuminated mirror - step-by-step master class on how to make it yourself, photos of types of lighting
- DIY flower stand - TOP 100 photos of stand options, detailed instructions, diagrams and drawings from the masters
Do-it-yourself furniture restoration: restoration methods, step-by-step master class, necessary tools and materials
When all the parts are ready, we begin assembly. On the reverse side, through the back wall, we attach the side walls with long self-tapping screws. Using small self-tapping screws, we attach the hinges to the cabinet door. We screw several hooks inside the “house”.
If we want to decorate a shelf using the decoupage technique, we can find interesting options by looking at similar photos of hand-made key holders. These key holders look very cute and feminine. Depending on the chosen theme, the key holder can be decorated in a gentle shabby chic style, or in the noble style of old England or romantic French Provence. If you use newspaper clippings or photographs of the city, you will get an interesting accessory in the industrial style. And if you already have some experience in the decoupage technique, you can print out a family photo and decorate it with a “house for keys.”
Sooner or later, any interior details become boring, the eye gets used to them and stops noticing them. But handmade products always evoke warm emotions, because they are made with love.
Model with shelf
This is a combined piece of furniture, since in addition to the key holder it includes a shelf for storing various small items. Most people are captivated by the simplicity of its creation. Need to:
Note!
DIY satin ribbon bows - step-by-step instructions for creating unusual bows + detailed diagrams with photosDo-it-yourself furniture restoration: step-by-step master classes on restoration at home (120 photo ideas)
Do-it-yourself rack: step-by-step instructions with photos and descriptions on how to make an unusual rack
- sand the prepared wooden block;
- fix the suspensions in its rear part, and make openings 10 mm deep in the front part;
- attach the block to the base board.
If necessary, you can connect a couple more bars to the structure and get several ergonomic shelves.