The question of making a kitchen set yourself often arises after renovations have been carried out in this room. It often happens that a set that seems to be suitable in price and design does not fit into the actual dimensions of the kitchen. There are a lot of offers these days for making custom-made headsets, but the cost is quite high. Having assessed the prices of furniture, as well as their financial capabilities, some owners come to the conclusion that they can save a decent amount if they build a kitchen (hereinafter we mean its furniture content) on their own.
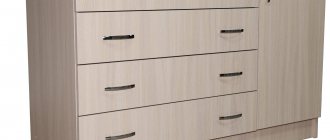
DIY kitchen
If you have at least minimal experience in working with carpentry tools and in processing wood-based materials, then installing the desired structure yourself according to your personal project is a completely realistic task. A DIY kitchen can be assembled from ready-made parts made in a workshop according to a specific drawing, or made from scratch from natural wood and various types of furniture panels.
Design project and drawings
Having completed the drawing of the room, you can proceed to developing a design project for the kitchen unit. This is a very important stage, requiring simultaneous competent calculation and a creative approach. It’s easy to take a photo of your own kitchen as the basis for an individual project.
You will need to make an accurate drawing of a complete set of furniture, and then draw each item separately. This will help you think through the contents of the furniture, calculate the consumption of materials and the assembly diagram.
When calculating overall dimensions and planning placement, you need to take into account:
- the depth of the lower elements is usually 60 cm, the height with tabletop and legs is 83 cm;
- the depth of the cabinets for the upper tier is 30 cm;
- the distance between two tiers is within 60 cm;
- the sink is placed near communications;
- sockets are installed taking into account the placement of household appliances;
- If possible, the hood is placed next to the ventilation hole;
- the distance from the stove to the hood is 75 cm.
When thinking through a design project, you should take care of filling the furniture elements with various fittings: drawer guides, pull-out sections, and so on.
Any necessary accessories can be easily purchased at specialized retail outlets. The use of modern fittings makes the furniture very comfortable and functionally organizes the storage of kitchen utensils.
Without having much experience in this kind of work, it makes sense to start by making a couple of lockers for the dacha. A DIY summer kitchen is also a great way to try your hand at it.
Cabinet doors do not close well (adjustment)
Quite a lot of effort will have to be spent on correcting such a defect as incomplete closing of cabinet doors. It can occur for a number of reasons, including due to banal unevenness of the floor in the apartment. If placing one or two coins under the cabinet does not improve the situation, and in addition it begins to sway, then you need to immediately disassemble it.
Most likely, mistakes were made when installing the hinges either on the inner surface of the headset or on the doors themselves. Most often, disassembling the hinges and reinstalling them, taking into account the detected distortion, can solve the problem. Otherwise, you will have to replace the doors with lighter ones and at the same time check for noticeable distortions in the vertical elements of the cabinet.
If the reason for the incomplete closing of the doors cannot be established, then it will be possible to solve this issue simply and ingeniously - by installing strong furniture magnets on the doors and walls of the cabinet. To find out exactly how to install magnetic latches, you need to watch videos on those YouTube channels that are dedicated to the manufacture and assembly of furniture.
Video instructions for adjusting the cabinet door in the kitchen
Selection of materials
The choice of materials for creating furniture depends on the skills of the craftsman and financial capabilities.
For the manufacture of kitchen furniture the following is used:
- solid wood;
- MDF;
- glued board;
- Chipboard.
When selecting materials, their characteristics and purpose should be taken into account.
Furniture elements consist of:
- housings;
- countertops;
- facade.
"Pros" and "cons" of handmade furniture
In addition to the aesthetic and spiritual (or, rather, spiritual) component, there are quite tangible advantages of handmade furniture:
- You make a model that you like;
- If desired, shortcomings that become obvious later can be eliminated independently;
- Even during the work process, it is possible to change the original layout, without unnecessary nerves, without proving anything to anyone;
- Decoration options depend only on your imagination and capabilities;
- The quality of work is in your hands;
- There is an opportunity to save money.
If you have certain knowledge and mastery of tool handling skills, this bold idea can be brought to life.
The disadvantages are very controversial: first of all, it costs time and effort. But, if you look from the other side, for some it becomes a pleasant pastime. And if there are children in the family, then making furniture can be a pleasant joint activity.
Creating a headset with your own hands allows you to get a non-standard design.
Frame
The main load during operation is borne by the furniture body. Therefore, it should be made of durable materials that are resistant to steam and moisture.
Solid wood will require additional costs. Its use for the manufacture of a body is rational only if high-quality wood is used.
MDF is an inexpensive, durable and safe material.
Experts recommend using chipboard in laminated form. Sections formed during the manufacture of furniture should be treated with sealant or covered with a special film. Otherwise, the material will quickly deform under the influence of steam and water.
Glued laminated wood is cheaper than solid wood and has excellent performance qualities.
Inexpensive and accessible material
Most of the load-bearing parts of the furniture will be hidden behind the facades. This is why walls, supports and posts can be made from inexpensive material. An excellent option in this case would be cheap and produced in large quantities laminated particle board.
It can be easily combined with any facades. If you wish, you can find laminated chipboard with an original decorative coating, which will be visible when opening cabinets and pencil cases.
Tabletop
Both the service life of the furniture and the appearance of the set depend on it.
A popular and budget option is laminated chipboard or laminated wood.
A tabletop made of natural wood will require additional care. It is not resistant to moisture, hot dishes and steam.
An excellent alternative is countertops made of artificial or natural stone.
Tools
The minimum set of tools looks like this:
- Hand and electric saws;
- Jigsaw;
- Screwdriver;
- Fraser;
- Drill;
- Sander;
- Plane;
- Hammers, cutters, chisels;
- Measuring instruments and instruments.
Facade
It is the facade that has a decisive influence on the appearance of the furniture.
They are made from:
- MDF;
- laminated chipboard;
- natural wood;
- veneer panels;
- glued furniture panels.
A kitchen made of wood, created with your own hands at home, will require additional varnish treatment. Depending on the idea, the wood can be stained or painted. This will significantly extend the life of the furniture in the specific conditions of the kitchen.
It is not difficult to reduce the cost of furniture by using combined materials for its manufacture.
In what form is wood sold for making cabinet furniture?
Pressed wood sheets are represented by MDF and chipboard panels
Boards of various thicknesses are made from wood, which are then used to assemble the body of a cabinet or cabinet. There are two types of shields:
- Solid. They are made from one piece of wood that has undergone special treatment.
- Pressed. Such a shield is assembled from several thinner shields, which are glued and tightly pressed, allowing you to obtain the desired thickness.
Which shields are stronger? Oddly enough, it is the glued ones that demonstrate the greatest strength and durability. Furniture of this type practically does not deform even after many years.
Manufacturing of parts
After selecting and purchasing materials, they must be cut in exact accordance with the dimensions and drawings. The work will require attention and concentration.
Often, when ordering MDF OR laminated chipboard, it is possible to order a service for cutting the material. This will help save time and reduce transportation costs for transporting parts.
Examples of a finished kitchen sketch
Before you start working on the diagram and drawings, you need to firmly decide on your taste, aesthetic and practical preferences.
In other words, you should carefully study photos of a DIY kitchen on the World Wide Web or in the specialized press and decide which set should appear in a particular apartment.
Assembly
It is recommended to follow a certain order when assembling finished parts.
First of all, you will need to drill holes for attaching shelf holders, drawer guides, as well as holes for connecting the parts themselves.
If necessary, the edges of the parts are smoothed using sandpaper.
Assembling furniture elements begins by connecting the side walls and base, then attaching the lid or tabletop. When assembling, it is necessary to control the process with a corner.
First of all, they work with the lower tier. After its assembly, connection and placement, they are taken for the cabinets of the top row.
Carrying out installation and assembly operations
Tools for work
To assemble the blanks into a single structure, you will need tools, some of them are in every home, others will have to be purchased. But they will definitely come in handy later for other repair or construction work.
Tools you can't do without when assembling furniture
So, the tools you need to prepare are:
- An electric drill and a set of wood drills, including confirmation ones for furniture screws.
- Screwdriver.
- Bits of different sizes for a screwdriver, including hexagons.
- Construction square.
- Level.
- Clamps, at least 4 pieces.
- Pliers and hammer.
- Scissors.
- A syringe gun for applying “liquid nails” glue and sealant.
- Iron for gluing edges.
Kitchen set assembly
The most difficult thing is to start the assembly process, because craftsmen who do not have experience in this work do not know where to start. Once the first steps are completed, the process will go faster. In fact, the blanks are a kind of “constructor” from which the kitchen must be assembled.
| Illustration | Brief description of the operations performed |
| The first thing to do is to sort out the blanks, arranging them by size, guided by the project drawing, which also shows all the parameters of the headset. After the parts are distributed into piles, it is recommended to sign them, indicating their belonging - walls, shelves, etc. Such preparatory measures will greatly simplify the work. | |
| After cutting, the ends of the panels facing the facade, as well as those intended for cabinet doors, must be covered with a special edge tape of a color that is in harmony with the main shade of the set. The tape is fixed using a heated iron. When the tape is heated, it should protrude slightly beyond the edges of the panel. After the material has cooled, this excess must be immediately carefully cut off with a sharp knife. An ordinary stationery knife with a new blade will be suitable for this purpose. | |
| The process begins with assembling the floor part of the headset. Therefore, it is necessary to take the lower panels of the structure and immediately attach adjustable legs to them, if they are provided for in the project. To do this, the panels mark the installation locations of such supports. Then the legs are applied to the marked points, and the points are marked on the panel with a pencil through the holes provided for fastening. Next, blind holes for fasteners are drilled along the marks. It is best to first place the legs on glue, and then additionally screw them with self-tapping screws. The legs can be attached in different ways - this depends on the selected model of the part. The legs should be secured to all bottom panels. | |
| The next step is to assemble the walls of one of the cabinets. To make them stand at right angles to each other, you can use perforated corners made of metal 2 mm thick, so the connection must have a certain rigidity. Of course, it is recommended to first check these corners to see how perpendicular their shelves are. You can come up with another “conductor” that will help align the two mating panels exactly at right angles. The corners are fixed at the top and bottom at the junction of the panels using clamps. | |
| Then, the fastened walls must be screwed together with screws, for which socket holes are drilled using a commercial drill. The drill is designed to form a hole that has different diameters at different levels required for this Euroscrew. Thanks to this configuration of the socket, the screw will tightly hold the two panels, and its head will fit into the chipboard flush with the wall surface. You can, of course, use ordinary drills, but you will have to constantly rearrange them, and the work will go much slower. A special drill is not so expensive, especially since it will have plenty of work to do when assembling the set. | |
| The panels must be fastened at three points by drilling sockets at a distance of 50 mm from the top and bottom edges, as well as in the middle of the joining pieces. To accurately mark the location of the hole, 8 mm should be retreated from the side edge, with a chipboard thickness of 16 mm and 9 mm, with a panel thickness of 18 mm. To screw a furniture screw, a hexagonal bit attachment is installed into the screwdriver. All chipboard panels are fastened together in a similar way. | |
| To make it clearer, the illustration shows the principle of connecting two perpendicular parts with confirmations. | |
| The bottom panel of the cabinet is also first fixed to the side walls with clamps, and then twisted with furniture screws. | |
| Another way to mutually fix the panels can be wooden choppers - dowels with a diameter of 8 mm. They are installed in sockets drilled in the end of one panel and along the edge of the other. The dowels are carefully driven into these holes, previously coated with glue. This installation method is more complex and requires perfectly precise marking of the drilling holes. | |
| In order for the marking to be accurate, after gluing the dowels into the lower end of the wall, it is laid with a shift on the bottom panel, leveled and tightened with clamps. After this, on the bottom panel, focusing on the already installed dowels, mark the points at which holes are drilled, with a diameter and depth corresponding to the size of the fasteners. Then, the holes are filled with glue and the side wall of the cabinet is joined. In order for the panels to be assembled exactly at right angles, the metal corners should be fixed to them in the same way as in the first option using clamps. They can be removed after the glue has dried. | |
| After the walls are fastened to the bottom panel, the back panel, made of fiberboard or thin plywood, is nailed with small nails, staplers, or screwed onto small self-tapping screws. | |
| In the upper part, the side walls are connected to each other by two narrow boards, which will give rigidity to the design of the cabinet and will be the basis for securing the tabletop. They are installed on the inside of the walls and are also screwed with confirmatory furniture screws. You will need 2 of them for each side to be secured. | |
| If a cabinet for drawers is being assembled, then before fastening the walls to the bottom panel, their internal surfaces are marked, and according to the markings, retractable mechanisms are installed on them (they can have different designs). It is clear that the installation of these guides on opposite walls must be strictly symmetrical. Of course, this process can be carried out in an already assembled closet, but it is inconvenient and quite difficult to do - it is both dark and cramped. | |
| If you plan to attach front doors to the cabinet, then before installing hinges you need to mark and arrange mounting slots for them in advance. To drill mounting holes, a special cutter of the required diameter is used. When marking, it is necessary to maintain a distance from the edge of the panel to the edge of the mounting socket - it should be 5 mm. | |
| To ensure that the hinges are installed evenly and the doors are not skewed, the wall and door are laid on a flat surface, and markings for arranging the mounting slots and mounting holes are made on them simultaneously. A socket of the required diameter is drilled on the side wall, and the corresponding part of the loop is installed into it. Then, focusing on it, the attachment points of the reciprocal mounting pad on the door are marked. Holes for self-tapping screws are drilled according to the markings. After this, the hinges are screwed on and their operation is checked. Further, they can be temporarily dismantled and installed permanently after assembling the cabinet. | |
| This photo shows the installation of the assembled cabinets into the overall structure. In this case, each of the floor cabinets has its own walls, but it is possible that the walls act as partitions in the overall structure. However, it must be taken into account that in the latter case, a higher load will fall on the partitions, so it is not recommended to have many shelves and drawers. The assembled structure is leveled, adjusting the height of the support legs if necessary. | |
| Next, the front doors can be finally fixed to the walls of the cabinets (cabinets). Installing them will not be difficult, since the necessary holes have already been prepared for their fastening. The door handles are screwed on. | |
| The next step is to install a worktop on the cabinets that are level and fastened together. It can be solid or have different connecting joints - straight or diagonal, depending on the layout of the kitchen unit. Having prepared and adjusted the parts of the countertop, mark the areas where the sink and hob will be embedded. | |
| The edges of the sink, depending on its model, can be installed on top of the countertop or flush with it. The illustration shows a variant of a built-in kitchen sink. It is best to mark the window for it using a pattern, which manufacturers often include with the sink. If there is no cutting diagram, then you should do it yourself: place the bowl on a sheet of cardboard and trace its outline with a pencil. | |
| The opening for the kitchen sink is cut using an electric jigsaw. First, a through hole is drilled on the marking line in the tabletop - it is necessary for inserting a jigsaw file. Some craftsmen prefer to attach masking tape to the outer marking line, which will prevent the edge from chipping and will be a good guide when carrying out work. In the same way, a hole for the hob is marked and cut. | |
| An important nuance. In a cut-out opening for a sink or hob, the end walls are completely defenseless against moisture penetration. And water that has leaked onto the chipboard and penetrated its structure can cause it to swell and deform. Therefore, experienced professionals strongly recommend performing another operation. A strip of silicone sealant is applied to the cut ends of the opening, and then distributed so that the entire cut is densely covered with this composition. After this, without waiting for the sealant to cool, you can proceed to installing the sink or hob. | |
| Attaching a kitchen sink to a countertop window can be done in different ways, depending on its model. Most often, such sinks are attached to the back of the countertop using special adjustable hook brackets, which are included in the delivery package. | |
| On the underside of the supporting sides of the sink, before installing it in the prepared opening, it is necessary to apply a layer of sealant that will close the gaps formed between the sink and the countertop and prevent water from leaking. | |
| Before the final installation of the tabletop, its cut ends must be covered with special aluminum overlays that exactly follow the shape of the cross-section of the panel. These pads are available left and right. Before installing the overlay, a strip of silicone sealant is applied to the end... | |
| ...which is then distributed over the entire surface in an even layer. This is easy to do with a finger dipped in soapy water. | |
| After this, the overlay is installed, aligned exactly along the edges and fixed with self-tapping screws - for this purpose there are holes on it. That's it, the end is protected. Similarly - on the other edge of the tabletop. | |
| Next, the tabletop is installed on the assembled floor structure of the set and fixed with self-tapping screws from their inside through the crossbars discussed above. | |
| Of course, they always try to make the countertop solid, that is, consisting of one piece. The length of standard panels (up to 4000 mm) usually allows this. On a straight section, it is best to do without joints. But if the set has a corner configuration, then you will have to make a perpendicular joint. The gaps between the individual parts of the tabletop are closed with a strip specially designed for this purpose. Installation of the strip is similar to the end strip. But in this case, this connecting part already has a somewhat named configuration, ensuring the joining of the rounded front side with the cut end. | |
| You can decorate the edge of the tabletop adjacent to the wall in different ways. Some people prefer to frame the work surface with a special plinth, while others prefer to frame it with a strip of the same material from which the table top is made (as shown in the illustration). Still others even install it as an apron; they fix an entire panel of the tabletop on the wall with the curly edge up, connecting it to a horizontal surface. | |
| To install wall-mounted cabinets, special adjustable hangers can be used, on which you can move the cabinet along the metal profile, as well as pull it closer to the wall, eliminating unnecessary gaps between surfaces. | |
| To secure the hangers to the cabinet, you need to cut slots for them in the back wall of the cabinet. Brackets are inserted into them and screwed from behind to its side wall. | |
| The brackets fixed to the cabinet are inserted into the profile, which is pre-fixed with dowels to the wall along the entire length of the set and, of course, is aligned strictly horizontally. Thanks to the profile, all cabinets will be located on the wall at the same level, and they can be moved slightly if the need arises during the final installation of the entire set. | |
| The assembly of table drawers follows the same principle as floor cabinets and wall cabinets. The difference is that the four walls of the structure are fastened together. To facilitate the process, it is recommended to mark the workpieces, that is, mark the area of their joint on the parts to be fastened, placing one of them end-to-end on the edge of the other, and then draw a line with a pencil. | |
| Next, in the marked area, using a thin drill, you need to mark two holes, exactly in the middle between the edge and the drawn line, departing from the upper and lower edges of the workpiece by 20÷25 mm. The same process must be performed with the other part of the box - these will be its front and back walls. | |
| Next, the parts with drilled holes are pressed against the end of the side walls, and through the drilled holes they are fastened together with furniture screws. | |
| When all four walls of the cabinet are connected to each other, the bottom of the structure, made of fiberboard or plywood, is nailed using nails 20 mm long. At the same time, the resulting box will be “automatically” aligned strictly according to the shape of the rectangle. If you plan to store fairly heavy kitchen utensils in a drawer, then the bottom can be screwed on with 3x20 mm self-tapping screws in increments of about 50 mm. | |
| Guides for drawer mechanisms are usually attached to the lower side edge of the drawer. But there are other designs of similar runners. In any case, they must be combined with the counterpart parts of the mechanism attached to the walls of the cabinet body. | |
| The lowest drawer is installed first. After the operation of the retractable mechanism has been checked, the drawer is removed from the body to install the front panel and handle on it. The width of the façade overlay must be equal to the width of the cabinet body. First, the location of the handle is marked, then the front is fixed on the front wall of the drawer using clamps, and through the markings, through holes are drilled through both panels. | |
| Next, two holes are drilled on the inside of the box, which should be located at a distance of 80÷100 mm from the side edges. The holes in the drawer wall should be through, and in the front panel they should be deepened by 8÷10 mm. The diameter of the holes should be 8 mm. Then glue is poured into the hole and wooden dowels are carefully driven in. The last step is to screw a handle onto the box from the inside, which will tighten the wall and the facade together. It is best to remove the clamps after the glue has dried. | |
| Once the bottom drawer is completely finished and installed, the same process is performed with the drawer that will be located above it. But the front panel, of course, is fixed on it taking into account the height of the front of the lower drawer. The rest of the retractable parts of the structure are installed in the same way. |
* * * * * * *
As can be seen from the description, when assembling the blanks into a single set, you will have to deal with quite a large number of small, difficult nuances. But, at the same time, this work is extremely interesting.
In addition, by making a kitchen yourself, you can significantly save your family budget. To make sure of this, it is necessary, just for fun, to find out the cost of everything necessary for independent work and calculate the purchase budget, compare it with the cost of the finished headset.
Find out how to make a kitchen corner with your own hands in a special article on our portal.
As a bonus, we offer you to watch an interesting video. It shows the process of self-manufacturing an original kitchen set, which is completely uncomplicated even for a novice craftsman, in which exclusively natural lumber is used.
Decorative finishing
Do-it-yourself kitchen decor is carried out according to an individual project, based on the original plan.
Decorative furniture fittings, adhesive PVC film, acrylic paint, furniture varnish, and decoupage techniques are often used as finishing elements.
When making furniture from natural wood, it is recommended to impregnate the parts with stain or a protective compound before assembly.
A creative approach will ultimately allow you to create not only functional, but also original furniture.
Why is wooden furniture valued?
A kitchen set made of solid wood has enough advantages that determine its high price:
- Environmental friendliness. Wood is a natural material used by humanity for thousands of years. In the 21st century, many people are happy to return to their roots, which is why products with the prefix “eco” are experiencing an incredible boom in sales.
- Attractiveness. Solid wood furniture looks much more beautiful and richer than furniture made from slabs.
- Durability. If the wood is correctly selected and properly processed, furniture made from it will last a very long time.
Popular wood species
To choose a tree, you need to know which species is best for the kitchen.
Features of corner furniture
A popular option is the corner kitchen layout. When making your own furniture, there are several important points to take into account.
To form a corner, both trapezoidal elements and right angle connections are used.
A trapezoid-shaped model will require more space. For this reason, it is common to place two cabinets at a 90-degree angle in a corner.
In order to make maximum use of space, retractable or roll-out systems are often installed. Modern principles of kitchen arrangement and layout make it possible to effectively use hard-to-reach places in the formed corner to organize additional storage systems.
These nuances should be carefully calculated at the planning stage.
Expanding the hole in the desired direction
To solve this problem, which is well known to beginning aircraft and ship modellers, you need to draw a small arc on the wall of one of the cabinets, indicating the actual position of the mounting hole.
To do this you will need a sharp pencil, a magnifying glass and a flashlight. Then the section with the incorrectly located hole must be disassembled and widened with a drill or a round file.
Useful tips
To obtain the desired result when making kitchen furniture yourself, you will need care and a competent approach.
An important role is played by the preparatory stage with detailed development of drawings and thinking through the convenient content of individual modules.
When working with chipboard or MDF, special attention should be paid to the design of sections of parts. For decoration, it is reasonable to use adhesive-based furniture edges. This will significantly improve the appearance of the furniture and extend its service life.
Do-it-yourself kitchen renovation also often involves using furniture edges or replacing broken fittings.
Having finished making furniture for the kitchen, you can make a children's kitchen with your own hands from the leftover material. Complete with real furniture fittings, it will delight little housewives. Work on its manufacture should also begin with drawings.
Having shown a competent approach and having some experience in working with materials, creating your own kitchen furniture will not be difficult. Self-production makes it possible to create the ideal kitchen layout for yourself.
Creating a future kitchen project
First step - sketch
You should start creating a kitchen set with a project, which is best done in the form of a sketch, and then an exact drawing. The sketch will help you visualize what the kitchen will look like, and the drawing with the dimensions taken from the location of the unit will become a guide both when ordering material for further work and for assembling parts into a single structure.
The first step is drawing up a sketch. It is necessary to depict how the future kitchen set is seen by its owners.
The sketch takes into account the features of the kitchen space and the possibilities of placing furniture in it. If a project is being developed for a standard kitchen in a multi-storey building, then the most popular options are a corner layout or a kitchen wall installed in one line.
Taking measurements and taking into account design features
In order to meet all the necessary requirements when creating a project, you should make careful measurements of the kitchen installation area. When conducting them, the following room parameters are taken into account:
The diagram shows the main measurements that are necessary for planning the arrangement of furniture and basic kitchen appliances
- The length and height of the walls along which it is planned to install the kitchen unit.
- The length of the wall from the entrance door to the corner of the room.
- Distance from window opening to wall.
- When taking measurements, it is necessary to separately indicate at what distance from adjacent walls the communications are located - sewer and water pipes, as well as the gas main.
Knowing these parameters, you can proceed to determining the size of furniture cabinets, which should both fit into the designated area and be convenient to use.
An example of a sketch project for a corner kitchen with dimensions
The following parameters are standard for a kitchen set:
- For floor cabinets:
— height — 850 mm;
— depth can vary from 500 to 600 mm;
— width — from 300 to 800 mm.
- Wall cabinets may vary slightly in size, as their parameters depend on the height of the ceiling and the preferences of the kitchen owners:
- their standard height is considered to be 850 mm, but it can be increased to 900 mm if you plan to raise them to the ceiling, or reduced to 800÷700 mm;
— cabinet depth — 300 mm;
- the width, as a rule, corresponds to the width of the floor cabinets planned under the wall cabinets - this way they look more beautiful in one “ensemble”. Although this requirement is optional.
In addition, when drawing up the drawing, the following factors must be taken into account:
- The location and size of the sink, as well as the fact that a separate cabinet or section of the countertop will have to be provided for it.
- On both sides of the sink there should be cabinets (free sections of the countertop) with a width of at least 300 mm. Their surface will add comfort when using the sink, and the cabinets themselves will serve for storing kitchen utensils. In addition, one of the cabinets can be used to install a washing machine or dishwasher.
- The upper part of the headset must include at least two sections.
- It is necessary to provide a place for a hood above the hob.
- When drawing up a plan, you should also immediately indicate the location of the refrigerator if it is installed in one of the headset lines.
Optimal distance between sink and stove
- It is very important to maintain the distance between the sink and the hob, since according to standards it should be at least 450÷500 mm.
The height of the hood above the hob must comply with established safety standards
- The distance between the hob and the hood should be 750 mm for a gas stove and 650 mm for an electric stove. This will ensure good removal of rising vapors and proper operational safety.
Studying all the requirements and recommended parameters, it seems that you can easily get confused. But if you apply them directly in the process of drawing up a project, everything will fall into place.
A sketch of the kitchen can be drawn by hand on a checkered sheet, which will help maintain the proportions of the actual dimensions of the area where the furniture will be placed. A more “advanced” option is to use one of the 3D modeling computer programs, for example, “PRO 100”. In the latter case, it will be possible to take into account every millimeter of the allotted area.
On the Internet you can find many interesting applications that allow you to plan the placement of furniture and get ready-made drawings of each of the parts
If the sketch will be drawn up manually, then it is additionally necessary to make drawings of the furniture. These graphic documents contain the exact dimensions of the structure, since all its components will be manufactured according to them.
The primary drawing, without too much detail yet, may look something like this...
If drawing up a drawing seems to be an impossible task due to inexperience, then you can use one of the options presented on the Internet. Surely, if you wish, you can find options both for standard kitchens of the main series of high-rise buildings, and for non-standard kitchen premises.
Project of a small set for a standard kitchen of limited size
When choosing a specific project, you must immediately take into account your capabilities for manufacturing individual structural elements. For example, shelves that have curved shapes, since this will require not only a special tool, but also sufficient skills to work with it.
Chipboard cutting map
Based on the compiled drawing, it is necessary to draw up a chipboard cutting map. It will help you determine the amount of material needed and will reflect the distribution on sheets of all the blanks necessary for the set.
To create this graphic document, you need to know the standard parameters of the chipboards on which the kitchen unit parts will be projected.
Today, chipboard slabs with a polished and laminated surface, having different thicknesses and linear dimensions, are on sale.
An example of a cutting card for chipboard sheets to fit the dimensions of furniture blanks
Chipboard boards can have standard thicknesses of 8,10,12,16, 18, 22, 25, 28, 32 and 38 mm. For the walls and shelves of the floor part of the set, a material with a thickness of 16÷20 mm is most often chosen, and for wall cabinets, 16 mm chipboard is suitable. If desired, you can choose a larger sheet thickness.
Chipboard sheets of various thicknesses
The linear dimensions of polished boards are usually 2440×1830 or 2750×1830 mm, and those of laminated material are 2800×2070 and 2620×1830 mm. The parameters of the slabs are designed for standard furniture blanks, so you can select options from them that will be cut with a minimum amount of waste.
Example of laminated chipboard worktops for a work desk
The worktop for the kitchen work area is purchased separately. The consumer has a choice of different models in terms of external design and thickness. The recommended thickness is 38 mm, especially in the area where you plan to insert a hob or sink. However, judging by the reviews of both craftsmen and kitchen owners, even cheaper high-quality countertops with a thickness of 28 mm serve quite successfully for years without requiring any replacement.
But making a decision (in a fit of unbridled savings) to make a tabletop simply from an ordinary sheet of chipboard, even if a large load is not planned on it, is unacceptable. The operating features of this area require a special wear-resistant coating and a special configuration of the front edge, which does not allow the accumulation of moisture from drops flowing from the table. A high-quality tabletop is completely closed on all sides, and only the end cuts remain unprotected, which must also receive the necessary processing, but only during furniture assembly.
You can draw up a drawing of the slab cutting map yourself or use a computer program for this purpose. Many companies involved in the sale of furniture chipboard (MDF) provide a free service for drawing up such maps, on the basis of which cutting is then carried out.
Both wall and floor cabinets can have separate or common walls, depending on how they are located in the set.
The lower part of the set, installed on the floor, most often uses common walls that divide the cabinets into sections. Thus, this part, after fastening the workpieces, becomes non-separable. However, if you plan to maintain the ability to rearrange the kitchen furniture, then each cabinet should be assembled separately. But in this case, of course, the cost of material for blanks will increase.
So, in the chipboard or MDF cutting chart, according to the developed drawing and dimensions of the structural parts, the following parts of the structure should be placed:
- Side walls of the headset.
- Separating walls that will separate the common floor and wall structure into separate cabinets.
- Blanks for shelves.
- Rear walls. They are best made from a lighter material - it can be fiberboard or thin 3÷4 mm plywood.
- Front doors.
On the cutting map, it is best to indicate, in addition to the dimensions of the parts, their numbering or names. This will make it easier to navigate when cutting slabs and during assembly.
One of the options for installing a sink into a countertop
The tabletop is selected separately. Its length should correspond to the length of the floor part of the set, since the hob and sink, as a rule, cut into its surface, and the washing machine and dishwasher are installed under it.
In addition to furniture blanks, you must purchase the following parts to assemble the structure:
- An edge of the corresponding chipboard color, which is used to decorate the front ends of the walls and shelves of the set before assembling it.
- Fittings: hinges and handles.
- Masking strip for the gap between two parts of the table top and end caps.
- Drawers will require slides (pull-out mechanisms).
Furniture fastening parts – their range is very wide.
- Furniture metal fasteners and wooden dowels.
- Metal or plastic corners for fixing perpendicularly located parts.
- Adjustable legs, with which you can set the floor part of the headset strictly horizontally.
If you plan to make doors that open in a special way, for example, by lifting up or folding, they will require special mechanisms - there is no shortage of such products in our time.
Now, knowing what parts and materials will be needed for the manufacture and assembly of a kitchen set, you can go to a specialized furniture materials store, where you can usually immediately order cutting of the slabs according to the cutting map provided. If you wish and have a special tool, you can cut and process the edges yourself. But you also need to be able to do this, have the appropriate quality tool. That is, it is better not to take risks and entrust this process to professionals working on high-precision equipment.
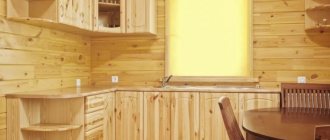
DIY kitchen photo
Wall decoration in the kitchen
To decorate the walls in the kitchen you can use: PVC, fiberboard or MDF panels, ceramic tiles, wallpaper or paint. There are two types of panels: sheet and typesetting.
- Sheet panels are attached with glue and are perfect for DIY finishing.
- When using stacked panels, you need to take into account that this reduces the kitchen space, since the panels are attached to a wooden frame.
Before painting the walls, they must be leveled using putty. The paint must be waterproof so that the walls do not lose their original appearance after washing.
A budget option is to cover the walls with vinyl wallpaper. You can use glass wallpaper or paintable wallpaper. 3D wallpaper perfectly hides uneven walls.
What you will need
Necessary tools for working with kitchen furniture
Before assembling your kitchen set, find in your toolbox or purchase:
- drill or hammer drill with a set of drills;
- hammer and chipper - for marking holes in concrete;
- screwdriver - for quickly tightening screws;
- jigsaw - for cutting holes;
- construction stapler.
- slotted key for screws with an internal hexagon head.
During assembly you may need the following materials:
- furniture nails;
- furniture corners and borders, edge tape;
- intersectional ties;
- mounting and wooden slats of the same thickness;
- screws and dowels;
- silicone sealant or water vapor barrier film;
- wood glue;
- acetone or white spirit.
Accessories for DIY kitchen furniture
IMPORTANT! Your main source of information is the kitchen set assembly instructions. Conscientious manufacturers include a printed copy in the package and post it on their official Internet sites.
Step-by-step instructions for assembling kitchen cabinets
Must be hung straight
Start assembling the kitchen set with wall cabinets. Before doing this, carefully select the details for each element of the headset.
Piece-by-piece assembly of a hanging cabinet
Installation of accessories and fasteners
Install door hinges, shelf supports, and drawer guides.
Assembly of the supporting structure
For assembly accuracy, holes for cotter pins are provided at the places where the parts meet. Connect the side and horizontal walls, make sure that the mating angle is 90 degrees.
FOR YOUR INFORMATION! To avoid damage, assemble them in a position where the holes are in a plane perpendicular to the surface of the assembly area.
Also join the second pair. Assemble the box from two halves and make sure there is no distortion - measure the diagonals.
Box tie
For this purpose, screws with a countersunk head with an internal hexagon or furniture corners can be used. Insert and loosely tighten all fastening screws. Make sure there is no distortion and perform the final screed.
Rear wall installation
In the designs of wall cabinets, two methods of installation are used. The first is to attach fiberboard or hardboard to the outside using a staple gun or small nails.
- Place the box face down on the assembly surface and place the fiberboard on top so that the edges do not extend beyond it.
- To avoid warping, secure it at the corners first.
- Fasten along the perimeter, maintaining an interval of 10 cm.
In the second method, the sheet is inserted into grooves machined along the rear edge of the racks.
We come down from heaven to earth
After admiring the creation of your own hands, hanging majestically on the walls of the kitchen, begin assembling the floor elements of the set.
We start dancing from the corner
We connect the lower cabinets - the corner one for the sink and the one next to it for the drawers
And there is a corner cabinet with a sink. Typically this is a design with a bottom consisting of two parts, a horizontal drawer that replaces the second back wall to provide access to plumbing, and two perpendicular to each other (large and small) under the tabletop. Build it according to the following plan:
- Screw the composite bottom to the rear post and secure the rear drawer with one of the ends;
- screw the side posts and tighten them with drawers;
- tighten them together with screws;
- install the legs to the bottom of the cabinet according to the markings;
- hang and adjust doors.
Insert sink
Installed sink in corner cabinet
The sink is often sold separately from the set. Please note a few important points during installation.
- The hole for it is cut out before assembly from the epigastric side.
- The edge of the sink has two perimeters. The outer one corresponds to its edge, and the inner one corresponds to special loops for fastening.
- When marking the hole, step back at least 10 cm from the edge of the workpiece. Outline the outer boundaries of the sink with a pencil.
- Measure the distance from the edge to the fastening loop with a ruler.
- Place this distance inside the outline of the mark. Draw a line through them that limits the inner perimeter.
- Drill several through holes for the jigsaw on it;
- Place several strips of tape on the underside, covering the outlined area - this will prevent damage to the front surface when the piece being cut sag.
- Use a jigsaw to cut a hole for the sink.
- Apply sealant to the space between the inner and outer perimeters and wait until it thickens.
- Insert and secure the sink with special clamps.
Assemble Base Cabinets
We mount the legs for our floor stand
The assembly of floor cabinets follows the same principle. But first, adjustable legs are attached to the bottom of the cabinet according to the holes made in it. After assembling the cabinets, be sure to carefully align the top edge and inter-sectional tie.
Assembly sequence of the lower kitchen cabinets
Start assembling the drawers by installing the guides on the sides. Fit them to the back wall, insert the bottom, install the front cover, check the diagonals for distortion, tighten the fasteners, screw on the handles.
Installing guides for the drawers of the lower cabinet
Install the countertop
Worktop for kitchen unit with cutout for sink
Most often it is made from laminated fiberboard. It is quickly installed, lightweight and easy to process. Assembly consists of the following steps.
- Mark the fiberboard with an allowance of at least 1 cm in all directions, taking into account a gap of up to 5 mm for the “apron” and the thickness of the metal strip applied to the ends.
- Cut the workpiece with a jigsaw or furniture saw.
- Apply sealant to the ends, press the strip tightly with self-tapping screws, and remove excess silicone with acetone.
- Place the countertop on the base cabinet racks and secure with self-tapping screws.
- Fill the gap between the edges adjacent to the apron with sealant and cover it with a furniture border.
IMPORTANT! Take waterproofing of ends and joining surfaces seriously and follow all manufacturer's requirements.
A corner tabletop consists of two or more parts connected using special ties. Assemble it according to the following scheme:
- Apply the special glue included in the kit, which has high adhesive properties, to the upper edge of the joint;
- carefully lubricate the rest of the joint with ordinary wood glue;
- insert the lamellas into a special slot cut along both sides of the joint;
- install the ties from the underside into mirror-matched grooves made perpendicular to the joint surface, tighten using a wrench;
- Remove any glue that has come out on the front surface using white spirit or acetone.
FOR YOUR INFORMATION! We recommend sticking masking tape onto the edges of the joints for careful application and quick removal of glue residues.
Congratulations! You have done it and assembled and installed a kitchen set with your own hands, which will last for many years and will be a source of pride for you.
Ready-made kitchen, assembled with your own hands
Hang your closet correctly
“Well, it's quite simple! - you might think, “Attached the awnings, installed dowels in the wall and screwed them with self-tapping screws.” Take your time! The obvious solution is not always the best.
IMPORTANT! Decide how you will hang - on mounting rails or using hanging eyes. Read on to learn how to prepare the back wall.
Prepare the wall
Eliminate unevenness, paint or wallpaper - you will not have this opportunity after installation is completed. Protect the space between the table and cabinets with an apron from splashes that occur when cooking and washing dishes. Read on to find out how to do this.
Make an “apron” from panels
Installation of kitchen skins
An important advantage of such protection is quick installation and low cost. The panels are mounted with glue or attached to a frame (if the kitchen is large or the surface is uneven). If you choose the first method, pay attention to the details:
- level and prime the wall;
- use “liquid nails”;
- control vertical distortion using a building level.
FOR YOUR INFORMATION! We recommend making the 'splash' with a 15mm allowance up and down before the cabinets are hung. This will allow you to avoid mismatch between its edges and the bottom border of the wall cabinets and the surface of the table.
Bright and juicy summer print for a kitchen apron
Choose a convenient height and location
Ergonomics of a kitchen set or how to conveniently and functionally arrange furniture in the kitchen
The installation height of wall cabinets is determined in accordance with the requirements:
- The space between the table and their lower border must be at least 0.50 m and provide a good view.
- The bottom shelf should be at eye level, and the top shelf should be within reach of your hand.
- If communications are laid along the wall, it is necessary to cut cutouts in the back of the box.
This is what a cabinet under the sink looks like with communications and wires inside
Make the correct markings
Use a spirit level (bubble level or laser level) to draw an accurate horizontal line to mark holes for fasteners.
Use “crabs” and mounting rails (slats)
Eyelet canopies are not the most successful method of fastening. Its disadvantages:
- rigid fixation - it is no longer possible to move the fastener sideways or upwards after installation;
- inaccuracy - when drilling, deviations from the horizontal line are possible;
- the walls must be perfectly smooth and thick;
- Fastening directly to fiberboard leads to its breaking and deformation.
Mounting rails for fastening kitchen furniture
Mounting rails and adjustable canopies (“crabs”) will give you the freedom you need and the following benefits:
- loads of up to 100 kg do not destroy the back wall;
- easy installation on lining, drywall and wall panels;
- insensitivity to wall unevenness;
- fine-tuning the position of the cabinet in the horizontal plane;
- the ability to level it when hanging on the “apron”.
Secure the rail with dowels and self-tapping screws. Please note that the distance from the rack groove to the top wall must be at least 40 mm.
Using a mounting strip allows you to achieve a tight and reliable fastening of the cabinet to the wall
Install adjustable awnings on the inside sides of the racks toward the top corners of the wall cabinet. Pre-cut holes for hooks in the back wall.
ATTENTION! The hook of the canopy must protrude from the body to a length sufficient to hook into the groove of the rail.
After hanging the cabinet on the rail, fine-tune the awnings using the two screws located on the outer end. The top screw adjusts the height of the cabinet above the floor, and the bottom screw adjusts its tilt forward or backward relative to the wall.
Adjustment screws on the mounting plate allow you to adjust the position of the kitchen cabinet
IMPORTANT! If the installation takes place on plasterboard or eurolining, install the fasteners in places where the metal guide ribs of the supporting structure are located. The load will be evenly distributed along the entire length of the rail.
Previously, we described two ways to attach the back wall. In the first case, the mounting plate pushes the top of the cabinet forward and creates a misalignment that can lead to a fall. To eliminate it, attach a strip of the same thickness under the bottom edge (or use a tiled “apron”). The option with inserting the wall into the groove is more preferable, since it does not require a second strip.
Install intersection ties
Intersectional furniture tie for additional support and protection against sagging
The tie screw is screwed into the sleeve, and the heads with wide caps provide fixation. Installation consists of a few simple steps.
| Step #1 | After adjusting the awnings, make sure that the front and bottom surfaces of the cabinets are in the same plane |
| Step #2 | Secure the vertical posts with clamps to prevent movement when drilling |
| Step #3 | Drill through holes of the required diameter and twist the tie halves together |
IMPORTANT! This technique creates additional support points and prevents uneven sagging of the sections, and also prepares a flat surface for the final stage.
Hang façade elements
We hang doors for kitchen furniture
Install doors and curbs last - this will speed up the installation process and reduce the risk of their breakage.
Sequence of work
Sequence of work:
- Clear the room of everything that is there;
- Carry out work to dismantle the old ceiling, walls and floor coverings;
- Remove construction waste;
- Prepare the walls, floor and ceiling for finishing;
- Ditch walls for electrical wiring;
- Carry out finishing work;
- Decorate the walls;
- Install lighting fixtures and sockets;
- Arrange furniture and household appliances.
Experts recommend carrying out repair work in the following sequence: first finishing the walls, then screeding the floor, and then finishing the ceiling.