how to make a table for a bathhouse
Everything with your own hands is the motto of a good owner. If you are one of those people and are planning to make a table for the bathhouse with your own hands , pay attention to this selection of interesting projects. In these articles you will find tips on how to make a wooden table for a bath in different versions, read instructions, see drawings, and watch a video. Why should the table be wooden, you ask? It’s just hard to imagine a high-tech bathhouse in a summer cottage. Today there are many different materials available. But for a bathhouse, wood invariably remains the most suitable. But to make a wooden bath table , it is important to choose the right wood; you will learn about this and much more from this collection of articles.
Choosing bath furniture
It is not advisable to move furniture that has served its purpose in living rooms. Practical and safe furniture is selected to equip the bathhouse.
The standard bath package usually includes:
- Shelves and sun beds;
- Benches and benches;
- Wardrobes and clothes hangers;
- Table, chairs, stools and armchairs.
The presented set is given for approximate interior planning. In each project you need to focus on the specific dimensions of the room. Excessive clutter will interfere, so you need to think through the need for a particular piece of furniture in advance.
In the bathhouse, the space is divided into several zones with different microclimates, therefore, the choice of furniture must correspond to this parameter.
Protective coatings
All that remains is to varnish or paint it. Since the first layer always only saturates the surface of the wood, after which all the fibers on it rise, it is recommended to sand everything before the second layer .
Since our table is intended for a bath, it will inevitably encounter high humidity .
If the wood species is not resistant to rot and pests, you can first treat the table with an antiseptic, then varnish or paint.
Since we are talking about a rest room, we are no longer considering options for water-repellent impregnations - the varnish looks better.
As for recommendations, we recommend time-tested ones: Pinotex, Tikkurila, Dulux, Neomid. They all offer water-based acrylic varnishes that can be used in baths and saunas.
Buy or make it yourself?
Bath equipment stores offer a huge selection of interior items. They are usually made from solid wood. If your financial capabilities allow you to purchase beautiful and expensive things, you can decide to buy.
But not every lover of a steam bath has such an opportunity. Then you can make simple, inexpensive and reliable furniture with your own hands. Detailed diagrams and instructions will be presented to everyone.
Care instructions
To prevent the tree from becoming damp and moldy, it is recommended:
- wipe the benches after the bath procedure with a dry towel;
- leave the door open for ventilation;
- treat the wood with oil once a year;
- wash benches with a solution of laundry soap (other substances must not be used, as they are toxic or abrasive);
- remove mold and rot by replacing the wooden part or product.
To protect wood from pests and mold, special compounds are used.
Materials for making furniture for the bathhouse
The best material for bath furniture is wood, but not every one meets the requirements of operating conditions.
Materials must be:
- With low thermal conductivity;
- With a dense structure;
- Safe and environmentally friendly;
- No resins;
- Easy to process.
For damp rooms with temperature changes, you can choose wood:
- Linden trees,
- Aspens,
- Oak,
- Exotic African tree - abashi.
It is possible to use coniferous trees in the recreation area and dressing room
- Pines,
- Cedar,
- Ate.
In a more humid and hot room, these materials do not meet the requirements for thermal conductivity due to the high resin content.
Wooden splendor
The wooden bath table continues to be an unfading classic of the genre of domestic bath interior. Wooden objects have many advantages:
- High ecological purity of the product, its naturalness and naturalness in the interior decoration;
- Low thermal conductivity and heat capacity, which is a very valuable quality in relation to the realities of a Russian bath;
- A wooden table for a bathhouse has the necessary margin of strength and natural durability with relatively simple and unpretentious maintenance;
- Wood is easy to process and to work with it you need a fairly small list of available tools.
To be fair, it is worth mentioning the use of other materials from which it is theoretically possible to make a bath table:
- Plywood and MDF are unique substitutes for solid natural wood, in the production of which various chemicals are used, including alkyd resins;
- Plastic - some of its types, manufactured to food grade tolerances, are suitable for the production of furniture and tables in particular. Products based on plastic masses are durable, lightweight and sufficiently strong. Caring for them is easy. However, the presence of plastic in the bathhouse interior negates the charm of the bathhouse itself;
- Metal - due to the characteristics of steel, cast iron and tables made of non-ferrous metals and their alloys, their presence in the bathhouse is appropriate in the form of individual elements, but not the structure as a whole.
Types of wood for making bath tables
A wooden table for a bath is made from certain types of industrial wood that have the necessary consumer qualities. These include the following:
- Linden. A pleasant, easy-to-work wood with well-structured wood of uniform color and a pleasant aroma. Retains its original qualities for a long time;
- Alder. Wood of this species should also be classified as a priority. It is easily and predictably processed, and is satisfactorily resistant to warping under conditions of frequent temperature changes. The wood texture has an attractive appearance with minimal decoration and processing. When choosing commercial raw materials, special attention should be paid to the degree and quality of drying; for alder raw materials this is fundamental and important;
- Aspen. It is distinguished by good quality solid wood, in which knots and other serious defects are rarely found. Materials of this type are affordable and well processed. Among the disadvantages, it should be noted the tendency to warping and drying out. It is worth remembering that aspen tabletops do not withstand significant mechanical loads very well;
- Poplar. In terms of their characteristics, materials made from this type of wood are close to aspen. However, despite being cheap and accessible, poplar products are not particularly durable;
- Oak. It’s especially nice to make a table for a bathhouse with your own hands from this wood. Its noble color, deep original texture, and spicy oak aroma distinguish it from a host of other species. Excellent strength and record durability put oak furniture beyond competition. The disadvantages include the high cost of conditioned wood and the tendency to split when fastened with self-tapping screws.
A word from Experienced! You can avoid chipping when fastening with self-tapping screws by pre-drilling. Drilling of the fastening channel is carried out with a tool whose diameter is 25% smaller than the diameter of the self-tapping screw used.
It is worth mentioning separately about the use of coniferous wood in our carpentry practice. Spruce and pine are among the most affordable lumber on the domestic market. However, making a table for a bathhouse with your own hands from such raw materials is not always rational. Firstly, all conifers are quite resinous, secondly, it is unlikely to obtain a beautiful and bright texture without subsequent processing and, finally, using them in conditions of high humidity means dooming them to a short life. From coniferous wood, it is worth using cedar and larch, and the latter is more preferable in terms of the cost of raw materials.
To summarize this section, we present a table reflecting the hardness of various types of wood, which directly determines the durability of the countertop and the resistance of its surface to mechanical stress:
| Wood type | Compliance with its hardness class, according to current industry standards |
| Boxwood, dogwood, white acacia | I class, very hard |
| Hornbeam, pear, ash | II class, hard |
| Beech, English oak, European maple | III class, moderately hard |
| Birch, elm, larch | IV class, moderately soft |
| Pine, spruce, alder, chestnut | V class, soft |
| Linden, aspen, poplar | VI class, very soft |
Tools and accessories
After drawing up diagrams for assembling pieces of furniture, you should prepare working tools. You will need for production:
- Grinder machine;
- Screwdriver;
- Jointer;
- Plane;
- Jigsaw;
- Screwdrivers, rulers, square, pencil.
Before assembly, use a grinder to remove any uneven surfaces from the surface of all boards and bars and round the corners.
The wood must first be treated with a protective antiseptic composition. The use of varnishes is unacceptable.
Means of protection
Many people believe that it is only necessary to protect the wood of a bench if it is not in a steam room. In fact, it is in the steam room that the tree needs protection most of all, but previously we had to abandon this idea, because at high temperatures any chemical tends to become volatile and poison the air that those steaming breathe.
But progress is progress - the Finns have plenty of compounds that are suitable even for their hot sauna , not to mention the much “cooler” Russian bath. Such impregnations can protect wood from water, darkening, rot, etc. In this case, the surface will not feel greasy to the touch.
IMPORTANT! Varnishes should not be used in a steam room - this is a fact.
But in all other rooms, except for the steam room, you are completely free to use any compositions that can protect the wood from the action of water, bacteria, fungi, insects and rodents. If desired, you can also coat it with fire retardants - compounds that make the wood non-flammable.
Why it is necessary to protect wood in a washing room - it’s clear, water flows there. But the rest of the bath rooms are not entirely dry either. Be that as it may, the humidity in the bathhouse is high everywhere. So saturate and varnish with whatever you see fit.
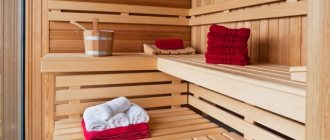
Making a shelf for a bathhouse
The main attribute of a paired room is a shelf that has several tiers, where the top shelf is 60 cm wide and located at least 1100 m from the ceiling. This place will be the hottest. The next lower tiers are located at a distance of 500 mm from each other and from the floor. The bottom shelf is usually made 400 mm wide.
The higher the ceiling in the room, the more tiers you can make for the shelf. The structure consists of a timber frame and decking. A beam with dimensions of 50x70 mm is the best option, since a thicker one will take a long time to dry.
All tiers, except the bottom, are attached to the general structure and to the floor. It is necessary to provide a ventilation gap of 100 mm from the shelves to the walls, lay the flooring boards with a gap of 10 mm.
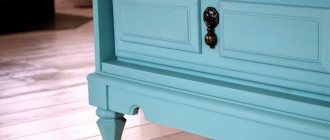
Colors
Do not be too zealous in painting wooden products. If you decide to enhance the natural color, then coffee tones are best for any breed. It is optimal to use water-based varnishes and paints. They are less toxic and interact well with wood.
It is perfectly acceptable to use undyed materials with natural colors. Cast iron without additional coating and wood of natural color will become an original decorative solution that does not require additional color shades.
But components made of iron, unless, of course, it is stainless steel, need to be painted in any case. Even if your table with iron legs will always be indoors, the metal must be coated with any coloring compound. Iron corrodes even in dry and warm rooms and requires painting.
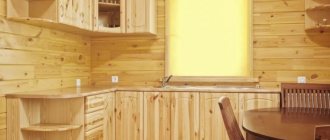
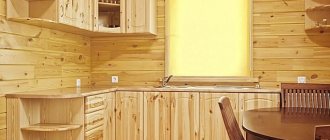
Making a table for a bath
The rectangular table in the rest room is made with a plank tabletop on two supporting legs.
To work you need to purchase:
- Boards 50 x 10 x 120 mm 8 pieces - tabletop;
- Bars fixing the tabletop 50 x 100 x 700 mm 2 pieces;
- Bar 50 x 150 x 650 mm 4 pieces - legs.
- Crossbars 25 x 100 x 1050 mm 2 pieces;
- Crossbars 25 x 100 x 750 mm 2 pieces.
Assembly is performed in the following sequence:
- Lay out the boards and secure them at the ends.
- Fasten with connecting strips using self-tapping screws. Pre-cut rectangular slots for the planks, measuring 50 x 150 mm, and place them at the ends of the tabletop boards.
- Insert the legs into the slots and secure with strips.
- Sand the finished product clean and impregnate with a protective layer.
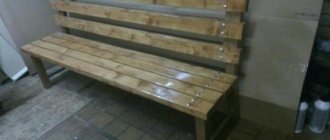
Making a bench for a bathhouse
For production you will need:
- Boards 50 x 100 x 1800 mm (seat) 3 pieces;
- Bars 50 x 70 x 110 mm 2 pieces;
- Sawn bars 35 x 50 x 100 mm 4 pieces;
- Bars for legs 50 x 10 x 400 mm 4 pieces
- Board sawn lengthwise 50 x 100 x 1400 mm – 1 piece.
Build process:
- Place the boards next to each other at a distance of 10 mm from each other and secure with two fastening bars. Maintain a distance between bars of 1400 mm.
- Attach the sawn block to the leg. Attach the leg itself to the seat board and to the end of the fastening bar.
- Repeat the previous procedure with the remaining three legs.
- Place the sawn board between the sawn beams and secure with special self-tapping screws.
How to make a garden table from wood with benches
For this table we used 38*89 mm boards (we unraveled them ourselves), but you can take standard sizes. A difference of millimeters will not greatly affect the results. In the photo below you can see what should happen.
Outdoor table for a summer residence with benches
To connect the parts, 16 cm long studs with washers and nuts (24 pieces) were used. All other connections are made with nails 80 mm long.
We connect the table parts together with studs, washers and nuts.
The parts are installed in place, a through hole is drilled with a drill. A stud is installed in it, washers are put on both sides and the nuts are tightened. Everything is tightened with a wrench. Why is this option convenient? For the winter you can disassemble it and take it to a barn or garage.
Making seats
Drawing of a bench with dimensions
According to the drawing, we cut the boards to the required size. Everything is needed in double quantities - for two seats
We sand the boards, pay special attention to the ends
The short sections that we use to fasten the three boards of the seat along the edges are cut at an angle of 45°. First, we assemble the structure that is attached to the seat from below. We take a board about 160 cm long, and attach two short boards sawn at an angle to the end of it. You need to attach it so that this board is in the middle.
Bottom seat support assembly
Then we attach the legs to the resulting structure (you can use nails). Then we add more boards cut at an angle and tighten everything with studs and bolts.
We attach the seat boards to the resulting structure. Since this is an outdoor table, there is no need to knock them together closely. Leave a gap between two adjacent ones of at least 5 mm. We nail it to the supports (which have been sawn down), two for each board.
Fastening the seats together
We fasten the finished seats using four boards 160 cm long. We fasten each leg with hairpins (if you walk, you can put two hairpins, installing them diagonally or one above the other).
We connect the legs to the boards using pins
Assembling the table
The table is assembled according to a different principle. Please note that for the tabletop, the transverse boards along the edges are cut at 52°. We attach them at such a distance that the legs fit in
2 nails for each board. You can use finishing ones, with small heads, or you can drive them deep and then mask the holes with putty.
How to make an outdoor table out of woodNow we need to assemble the cross legs. We take two boards, cross them so that the distance between their ends is 64.5 cm. We outline the intersection with a pencil. At this point you will need to remove the wood to half the thickness of the board.
This will have to be cut out
We make the same notch on the second board. If you fold them, they turn out to be in the same plane. We connect with four nails.
How to make X-shaped legs for a garden table
We make the second leg for the table in the same way. We are not assembling the table yet.
Installing the table
Now you need to attach the legs to the structure on which the benches are installed. We place them at an equal distance from the benches and fasten them with pins.
Installing the tableTable leg mounting assembly
Now we install the tabletop. We also fasten it with pins. The last stage is painting. Here everyone does as he pleases.
Outdoor table for a summer residence with benches
Variations on a theme
According to this drawing, you can make separate benches and a table for a summer house or garden. The design is reliable and simple to implement.
Separate benches and a table for the garden according to the same drawing
You can make the appearance more decorative by slightly changing the design of the seats and tabletops
Another option with separate benches
Painted white
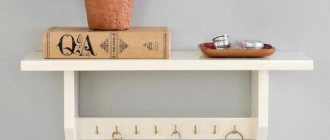
Clothes hanger in the bathhouse (step by step instructions)
The design of the hanger will consist of prefabricated elements connected to each other on two strips with wooden hooks.
You need to prepare:
- Top bar 25 x 50 x 708 mm;
- Bottom bar 25 x 50 x 567 mm;
- Rectangular elements 25 x 100 x 200 mm – 4 pieces;
- Square elements 25 x 90 x 90 mm – 7 pieces;
- Curly elements for hooks 25 x 100 mm - 10 pieces.
Round the edges of the wooden elements with a milling cutter to give them soft outlines.
- Arrange the squares and rectangles in a symmetrical order with a gap of 10 mm.
- Use fastening strips to fix their position, connect them along the pre-drilled holes with fasteners.
- In the front surfaces of square and rectangular elements, use a drill to make holes for fastening the hooks. Insert the lower parts of the hooks into the installation locations using glue.
After drying, sand and apply a coating.
Here are just a few options for making furniture yourself. As you can see, its design is simple, and the assembly process is not the most labor-intensive. The main thing is to do the work with soul, then the furniture will last for many years and will delight visitors.