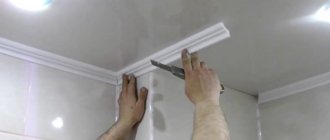
Ceramic tiles are regularly used to decorate walls and floors in the bathroom, toilet, and kitchen. It is necessary to securely fix the material so that the repair lasts a long time. In this case, you can choose liquid nails for ceramic tiles; the solution can be called new; for this reason, not many people know about the features of the product. The properties, advantages and rules for using glue will be discussed in detail below.
What are liquid nails
When choosing tile adhesive, craftsmen often give preference to liquid nails, because when using cement you cannot avoid a large amount of dust, and it will take a long time to clean the bathroom. Working with cement is quite labor-intensive: the solution must be mixed in small portions, which is quite difficult to do manually, and it is unrealistic to bring a concrete mixer into the house. In such a situation, liquid nails will be an excellent solution - with their help, the process of gluing tiles is greatly simplified.
Liquid nails mean an adhesive solution based on polymers with the addition of chalk, white clay, and other fillers that help level the porous surface of the base. The dense, thick adhesive mass is placed in special tubes that are easy to use and designed for filling into a gun.
Liquid nails are considered a universal tool - they allow you to glue different materials, including ceramics, glass, natural and artificial stone. After hardening, the composition becomes very durable and does not lose its properties for a long time. Nails are available in a variety of colors, but most often you can find the following shades on sale:
- white;
- grey;
- brown;
- transparent and translucent (whitish);
- yellow;
- black.
To work with ceramics, white liquid nails are usually used, and transparent compounds, due to their reduced strength, are mainly used as a sealant for plumbing fixtures.
Adviсe
The packaging always contains fairly detailed information about the specifics of use, manufacturers, shelf life and conditions, and safety precautions when working with the product.
There are special and universal adhesives on sale. The universal adhesive is made on neoprene.
This is interesting: How to glue tiles to drywall in the bathroom
In the instructions for use, you should pay close attention to the section on the reaction of the glue to the level of humidity at which it retains its basic properties. Store liquid nails in a dry place. Do not leave it outside, do not allow it to come into contact with water.
Types of glue
Liquid nails are sold in two varieties depending on the composition and properties:
- Acrylic. The base is acrylic in the form of a water emulsion. They are non-toxic, completely safe for humans, and can be used even indoors because they are odorless.
- Neoprene. It is based on polymer components and organic solvents that are harmful to health. When using, do not forget about personal protective equipment and thorough ventilation of the room.
The degree of adhesion of neoprene adhesives is much higher than that of acrylic adhesives. Solvent-based liquid nails quickly set on substrates, are durable, and are capable of gluing even smooth, glossy materials. Neoprene adhesives are more suitable for working with tiles in the bathroom, since they are the most resistant to humidity and do not deteriorate due to temperature changes.
Construction adhesive Neoprene in a white factory bottle
Advantages and disadvantages
Liquid nails are becoming increasingly popular for bathroom and kitchen renovations. They are excellent for gluing ceramic tiles because they have a number of advantages:
- water resistance - the polymers in the composition are not afraid of moisture, withstand even direct contact with water, and do not deteriorate if liquid gets into the tile joint;
- strength - as it dries, a solid layer of glue is formed, which tightly connects the tile to the base;
- preservation of properties - unlike cement and gypsum mixtures, liquid nails maintain their original qualities throughout the entire period of operation;
- high degree of adhesion - some brands of adhesives can easily withstand weights of up to 80 kg/sq.m. m and even more, so they are able to hold large tiles and porcelain stoneware on the wall;
- resistance to negative factors - adhesives are not afraid of mold, do not rot, do not collapse, and, compared to metal nails, are not at all susceptible to corrosion;
- ease of work - a special gun is used to squeeze out liquid nails, which greatly facilitates the process and makes the application very precise (the installation speed also increases);
- convenience - liquid nails are sold in finished form, they do not need to be kneaded, diluted, or taken out of the container, which reduces the cost of time and effort and eliminates the need to measure proportions;
- cleanliness - the room where you work with liquid nails will always be clean and dry, unlike the place where cement or gypsum mixtures are used.
Liquid nails have few disadvantages, but they do exist. For most compositions, the time for adjustment is quite short, so it is better to lay the tiles straight away or try to quickly level their position. After only 5-10 minutes the glue will set, and it will not be possible to tidy up large masonry without the proper experience.
Liquid nails are much more expensive than cement mixtures. If you want to renovate your entire bathroom, the costs will be significant. Glues of this type are sold in closed cartridges of 300–500 ml, no more, so you will have to overpay for packaging.
Rules to follow
Despite the fact that it would seem that there may be threats during ordinary tile laying, they still exist.
Learn the basic rules to follow:
- Protecting the skin of your hands and face – neoprene substances contain many chemical elements. When dry mixtures are mixed with water, alkali is formed. In case of contact with human skin, there is a risk of burns.
- Use a respirator - dust emanating from neoprene mixtures can enter the respiratory tract, which can also cause permanent harm to a person.
- Wear glasses - if dust and grains of chemical elements get on the mucous membranes of your eyes, they can cause burns.
If dust does get in somewhere, follow these instructions:
- Rinse the area where the pollen has landed. If you begin to develop deep injuries, seek medical help immediately.
If you swallow dust, you should immediately leave the room for fresh air and try to cough. Be sure to rinse your nose.
If you start to feel unwell or experience pain in your lungs, immediately call an ambulance and seek help from specialists.
Is it possible to glue tiles with liquid nails?
The scope of application of liquid nails is extensive, which is why they are considered a universal remedy. Adhesives are suitable for porous and smooth materials, although specialized compounds are often produced for tiles. Ceramics adheres well to nails, not only when finishing walls, but also when laying floors. Fine-grained fillers guarantee bonding of even loosely fitting parts of large and small weights.
Most often, liquid nails are used for partial repairs, because it is too expensive to completely cover a bathroom with them. It is undesirable to use glue in places that will be under water; for this purpose it is better to use special cement compositions with enhanced water resistance. Another option is to use liquid nails, but seal the seams with a special moisture-repellent grout.
Glue selection
When tiling a bathroom, you should choose an adhesive that can easily withstand high humidity. It is also important to consider the size of the tiles being attached: for porcelain tiles and large elements, it is worth buying liquid nails with enhanced adhesion. If you have to stick elements on concrete or brick, it is better to purchase neoprene-type liquid nails; for drywall, you can use acrylic compounds.
Also, when purchasing, you need to pay attention to the following indicators:
- drying speed;
- suitability for indoor or outdoor use;
- temperature regime;
- fire safety;
- smell.
How to properly glue tiles to a wall using liquid nails
Tiling walls or floors can be done using different methods:
- applying adhesive to the wall;
- applying glue to tiles;
- simultaneous treatment of tiles and adhesive with liquid nails.
Typically, the latter option is used when the tile is large or heavy. Before work, determine an approximate diagram, arranging the rows so that a minimum number of elements have to be cut.
Preparing the surface for work
First, prepare the base - clean it from grease, dust, and dirt. Any previous materials and their remains are also removed, and uneven areas are sealed with cement mixtures (a screed is poured onto the floor, otherwise the ceramics will lie crooked). Afterwards, the base is primed 1-2 times to improve adhesion to the tiles, and wait until it dries completely.
Gluing tiles
If the glue is toxic, install the tiles only while wearing a respirator and gloves. A container of liquid nails is placed in a gun, the tip is cut off, and a test squeeze of the composition is done. Then proceed like this:
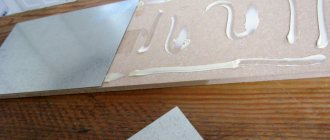
- apply glue to the tile or wall in a dotted, zigzag or mesh pattern;
- wait 20–30 seconds;
- lean the element against the wall, starting from the bottom;
- hold for several minutes (according to instructions);
- large tiles are carefully tapped with a rubber hammer to fix them evenly;
- After completing the installation, allow the glue to dry completely and gain proper strength (about a week), and only then begin to grout the joints.
To ensure that the distance between the elements is the same, dividing crosses are used. They can be removed 3 hours after finishing all the work.
Using glue when working with various tile materials
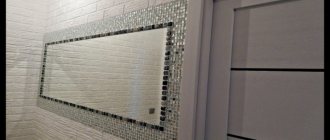
Liquid nails are suitable for laying tiles of different textures, shapes, and types. If the ceramic elements are small or medium in size, a spot application of glue around the perimeter is sufficient. Large elements can be processed with a snake, leveling the applied composition with a spatula. Using liquid nails, you can fix mirror tiles, plaster parts, stone or mosaic strips on walls and ceilings. The heavier the material, the more thorough the application must be.
Consumption of liquid nails
Consumption greatly depends on the specific type of product, as well as on other factors:
- degree of surface evenness;
- characteristics and weight of the tiles, the amount of glue applied;
- experience of the master, speed of installation.
If you squeeze glue out of a standard tube of liquid nails, the strip will be 30-35 meters long with a nozzle thickness of about 2 mm, although this joint width will not be enough to hold the tiles. The optimal thickness of the adhesive strip is 5–6 mm, for which you need to properly trim the cartridge nose. Usually, in this case, one package is enough for 10–15 linear meters of tiles of any size.
Preparing the surface for work
First, prepare the base - remove grease, dust, dirt, and other remnants of previous materials. Fill all uneven areas with cement mixture. For the floor, use a cement screed. Otherwise, the ceramic tiles will lie unevenly.
Next, prime the base at least 1-2 times to improve adhesion and wait until the surface is completely dry.
How to remove liquid nails
This type of glue sticks tightly to the surface and is quite difficult to get rid of. There are several methods for removing material:
- Solvents and cleaners. These products are sold in hardware stores. They moisten the base, and after 15 minutes they wipe off along with the dissolved composition.
- Scraper. Using a sharp metal or plastic scraper, you can remove dried glue mechanically. Instead of a scraper, a metal spatula will do.
- Screwdriver. By attaching a brush attachment to the device, you can quickly and effortlessly remove adhesive from tiles or walls.
- Burner. Glue stains are slightly heated with a small burner to about +60 degrees, and then easily removed with a spatula and a rag. Instead of a torch, professionals often use a hair dryer.
An effective product for cleaning surfaces from liquid glue
Rules for removing the mixture
Is it possible to remove the glue? The process of removing liquid nails is much more complicated than the application process. There are several methods:
- Using a special cleaner. Apply to the dried mixture, wash off after 10–15 minutes;
- Using a scraper, a screwdriver with a brush attachment or a drill;
- Heating the surface using a burner. The glue will become viscous and can be easily removed with a spatula. It is important to follow safety precautions (remove flammable substances).
The disadvantage of purifiers is their high price. But they are safer than the third method.
Service life: how to extend
Liquid nails are considered a fairly durable material; they can last for several years from the moment of application. To increase service life, you should use the following tips:
- correct the thickness, size, and other parameters of the seam immediately after completion, when the glue has not yet set;
- work at room temperature, since when it drops to +10 degrees or less, the properties of the composition may deteriorate;
- work only with glue that has a normal shelf life, has been stored in suitable conditions, and has not dried out.
Liquid nails for partial repairs
If you need to replace some of the tiles that have come loose or deteriorated in your bathroom, there is no better option than installing them on liquid nails. First, the base is cleaned of old glue, degreased, and all dirt is removed. The mold is destroyed and the wall is treated with an antifungal compound. The crumbling plaster is picked out and the area is leveled with cement mortar.
Eliminating unevenness is an important stage of work, because if it is ignored, the tile will protrude forward or sink in comparison with the rest of the surface. The glue is applied to the elements in the standard way, pressed against the wall, held for a couple of minutes and allowed to dry completely.
Laying
Cladding methods
If there is no need to do something unusual, it is better to choose horizontal installation. Tiles with right angles are laid horizontally on the floor using meter and 30 cm levels. If the design allows for the use of tiles and borders of different colors, transitional colors and tiles with patterns, all this will decorate any bathroom.
The vertical method is often used; laying rectangular tiles is suitable for this. If the room has a low ceiling, then this method will create the impression of an increase in the ceiling. Here, too, there is the opportunity to experiment with the use of different colors and shades. With the combined method, vertical and horizontal installation methods are combined. Both versions of tiles with right angles are used.
Checkerboard version of square tiles in contrasting colors. There are also fans of diagonal and other intricate plots.
Stages
- Both surfaces of the tiles must be dry, cleaned and degreased.
- Apply liquid nails to the tile using a snake. On lightweight tiles, glue can be applied in dots.
- Press the tile firmly against the wall and let it sit for a while.
- Liquid nails require up to 24 hours to pre-harden and about a week to fully harden.
- Grout the joints in a week.
- Do not use liquid nails for floor tiles.
See the video below for more details.
How to remove excess glue?
After hardening, liquid nails become very durable; removing excess glue will require a lot of effort, which is why they have such a name.
If you are unable to remove these excesses immediately, then try several removal methods:
Remove excess with a soft, clean cloth. But this must be done before the composition has hardened, when the liquid nails have dried, it is removed with cleaners (based on solvents that are included in the glue). You need to apply the cleaner to the hardened areas of the glue, give it time to soften, rinse and wipe these areas with a clean cloth.
Another option is to use a scraper, but this will take a lot of effort and time. You should not use abrasive materials, as scratches may remain that will ruin the entire look; it is better to use a heat source to heat up the glue; heat using a hair dryer.
When the excess heats up to 60 degrees, it softens and can be easily removed with a spatula.
Remember to take precautions - there should be no flammable substances (paint, solvents) nearby.
Use a trowel (scrape off any drips). Traces of glue can be dissolved with acetone. If you get it on your hands, remove the glue with a tampon using the pinch method after smearing it with Vaseline. Wash your hands thoroughly with warm water and laundry soap.
How long will it last?
If the glue is chosen correctly and all stages of working with tiles are followed, you can be sure that the results of your work will delight all family members for many years. To make the glue last longer, follow these rules:
In case of accidental mistakes, do not allow the glue to harden, correct the situation quickly
Maintain normal temperature conditions in the room where the tiles are laid. In this case, the connection of surfaces is more reliable and durable.
When storing the glue, do not allow it to overheat; it may dry out right in the can.
Manufacturers and cost
The price of a package of liquid nails can vary greatly depending on the brand and country of production. Typically, the cost of the products varies between 80–450 rubles, although there are more expensive formulations.
The most popular adhesives on the market are:
- Titebond Multi Purpose. Tightly connects any materials, the hardening time is increased (20–30 minutes), which allows even a beginner to work with glue. Frost-resistant and moisture-resistant composition, almost odorless.
- "Moment Installation Universal." A product based on synthetic resins is excellent for brick, metal, concrete, and ceramics. It has great joint strength and does not deteriorate when heated to +70 degrees and cooled to –40 degrees.
- LIQUID NAILS LN-901. Special liquid nails for stone and neoprene tiles based on artificial rubber. Can be used for outdoor use, durable and shock resistant.
- Tytan Ceramics and stone. Acrylic adhesive is odorless, does not contain solvents, and is environmentally friendly. It sets very quickly, is reliable, and can be painted after drying.
The main advantage of liquid nails is their strength, so the adhesives are suitable for almost any tile material. They do not require special care, and their operation will be long and trouble-free.
