Recommendations for covering the ceiling with foam tiles.
Lightweight foam tiles are the most popular ceiling covering. With its help, they transform space in kitchens, hallways, bedrooms and even in reception rooms. First of all, people choose this finishing material because, in comparison with stretch ceilings, it costs mere pennies.
And, of course, everyone, without exception, likes the fact that even a person who is making repairs with his own hands for the first time in his life can handle such sticking. For such beginners, we will tell you how to properly glue tiles to the ceiling and what methods can be used to do this.
How to properly and beautifully glue foam ceiling tiles: different methods
Scheme No. 1
Scheme No. 2
For those who don’t know, ceiling tiles are squares with perfectly straight sides that have a front and back side. In view of this, when carrying out finishing work, you must carefully check whether you are fixing them correctly on the ceiling.
After all, if you glue tiles without paying attention to this nuance, then in the end you will not be able to create the perfect pattern. Also, when planning such work, it is extremely important to decide in advance which method you will glue the tiles. This needs to be done in order to understand exactly how much material you may need.
Methods for gluing foam plastic to the ceiling:
- Parallel to the wall. This finishing method assumes that finishing work will begin at the wall, which is located opposite the window or door openings. The first tile will need to be smeared with glue and laid exactly parallel to the wall, stepping back a little from it.
- Diagonally. If you choose this particular method, then you will need to start finishing the ceiling exactly from the center of the room. In order to determine this place, you will need to stretch the thread through the corners located opposite each other. The place where they intersect will be the center of the room.
- Diamonds. I would like to say right away that this method is considered the most difficult, so it is better for beginners not to try it. In this case, you will also need to find the center of the room, set aside several squares from it, and then glue tiles diagonally from them. If you do everything correctly, the corner of the tile will point exactly to the center, and one side will coincide with the diagonal on the ceiling.
Calculation of the quantity of materials
When calculating the amount of tiles to renovate a square or rectangular room, take measurements of the walls and determine the ceiling area by multiplying the length by the width. If the room has a non-standard shape:
- take measurements of all walls;
- transfer the ceiling drawing onto paper, divide it into squares and rectangles, calculate the area of each component figure and add the resulting numbers together.
The area of a standard cladding element, measuring 500 x 500 mm, is 1/4 m2; 4 pieces are required to cover 1 m2. To accurately determine the required piece quantity, divide the total area of the base by the area of one tile.
If you are using decorative models of non-standard sizes:
- take measurements of the length and width of the ceiling;
- alternately divide the sides of the base into the sides of the tile (for example, the length of the wall by the length of the facing product, the width of the wall by the width of the tile), depending on the desired installation pattern, multiply the results - you will get the total number of required elements.
The glue consumption is indicated on the packaging; buy the composition in accordance with its consumption per 1 m2, regardless of the tile format.
If the base is made of wood, lay the material with a minimum gap - this will prevent the tiles from coming apart over time.
How to mark the ceiling for ceiling tiles?
Recommendations for applying markings
As mentioned a little above, in order for the ceiling tiles to look perfect, preliminary markings must be carried out before attaching them. Remember, if you don’t want to redo all your work from the very beginning, you must do it.
After all, only correctly applied markings on the ceiling will help you place the first tile as needed, and subsequently create the perfect pattern. If you attach the tiles to the ceiling in diamonds or diagonally, the markings will help you mask the seams as well as possible, thereby making the canvas visually even.
Recommendations for marking:
- To begin, use a measuring tape to measure the approximate distance (diagonally) from one corner of the room to the other.
- Next, cut two pieces of rope (their length should correspond to the data obtained)
- In the next step, you will need to stretch these two blanks from corner to corner so that they intersect in the center of the ceiling
- Next, take, for example, a level and a simple pencil and draw the resulting diagonals on the ceiling space, and be sure to mark the central point of the room
- Remove the ropes and draw a square near the center point that the ceiling tile will easily fit into. From this place you will continue finishing the entire ceiling covering.
Safety precautions
When carrying out decorative work on surface gluing, follow the safety rules:
- Choose a stepladder that is reliable and does not wobble.
- Turn off the power supply when working near exposed wires or near a chandelier.
- Cover your breathing system when working with toxic glue.
- Use gloves to equip and protect your hands from injury.
It is also necessary to protect the respiratory system with a mask when cleaning the ceiling from old coatings
Where to start gluing ceiling tiles?
You need to start finishing the flow from the central point.
If you carefully read our article, you probably realized that you can start gluing the slab to the ceiling from two places. If you are doing this for the first time, it will be better if you give preference to the method in which the tiles are glued parallel to the wall. In this case, you will not need to carry out any preliminary measurements, and you can literally immediately proceed to the main stage of work. All you have to do is find the ideal place on the ceiling and fix the first slab on it.
After fixing it, you will need to check whether you have placed it correctly, and you can proceed to fixing the rest of the decorative material. If you want to create a more complex pattern on the ceiling covering, then you will need to apply markings on it (we told you how to do this correctly above) and after that you can begin transforming the living space. In this case, the first tile will need to be placed in the center of the room being repaired.
Injection
The production process uses the method of sintering polystyrene in molds under the influence of steam and cooling under pressure. The finished tile is white, rectangular or square in format, has a thickness of 9-14 mm, a deep, clear pattern on the front surface (including 3D format), can be laminated or uncoated.
Advantages:
- using products you can create a surface without visible seams;
- strength;
- moisture resistance;
- sound and heat insulation;
- due to its significant thickness, LED lamps can be installed inside the volumetric panels;
- environmental friendliness;
- Possibility of painting the cladding if necessary.
The main disadvantage of this type of tile is the high cost relative to stamped products.
How to apply adhesive to ceiling tiles?
Scheme for applying glue
Most people who are making repairs for the first time in their lives think that applying glue to finishing materials does not require any special knowledge. But as practice shows, even such a seemingly simple process must be carried out correctly. If you apply the glue chaotically, then in the end the tile will not fix as it should and, what is most unpleasant, the resulting seams will not fit perfectly to the ceiling covering.
So, first, apply a small amount of glue to the very center of the tile, then place droplets diagonally from this point, and at the very end, apply a line along the entire perimeter of the finishing material. When applying glue to the tiles, make sure that the droplets are not very large. If there is a lot of glue, then when you press the tiles against the ceiling, it will begin to come out and, as a result, you will have to remove the excess, and this can damage the structure of the finishing material.
Yes, and remember, if you want the adhesive to fix the tiles on the ceiling as well as possible, you will need to hold them in the air for 1-3 minutes before fixing them. During this time, the glue will react with air and this will cause the substances responsible for adhesion to become more active.
Advantages and disadvantages
Ceiling tiles are produced using high-tech modern equipment, which allows us to ensure a high-quality structure and high performance indicators of the material. She has many advantages, including:
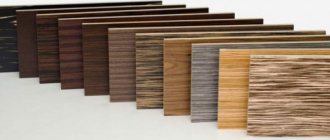
- wide variety - products vary in composition, shape, style, texture, patterns and colors. Can imitate wood, mirror, metal, fabric, leather;
- wide design possibilities - you can lay and combine the material in a variety of ways;
- variety of shapes - in addition to the standard one, there are many options for designer tiles, which allow you to create a unique finish in any style, taking into account the characteristics of the ceiling;
- light weight - allows the use of glue for fastening;
- ease of installation - even a non-professional can handle it, and it’s quite possible to do it alone;
- good thermal insulation ability - this is especially noticeable in winter;
- soundproofing properties are an excellent bonus for getting rid of extraneous noise;
- Possibility of painting in any color;
- a wide range of products can be found in any building materials store;
- low cost - accessible to most buyers;
- fits perfectly into the interior of any room in the house. It is quite appropriate in the living room, office, nursery, bedroom, kitchen, hallway, bathroom, toilet. The variety of products allows you to choose the best option for any room.
However, this type of finishing also has its disadvantages:
- the material often has to be calibrated because it may not be identical. As a result, the installation process may be delayed;
- Some types of tiles are highly fragile and may break. This leads to an increase in the percentage of defects and higher repair costs;
- To prevent the tile from deforming, it is necessary to carefully select the type of adhesive for each type of material;
- When glue gets on the front side, it is often impossible to remove it without leaving a trace without damaging the surface. We recommend that installation be carried out as carefully as possible;
- tiles from the porous category can shrink when adhesive is applied and allow it to leak out.
Which adhesive is best for ceiling tiles?
Glue for ceiling tiles
As a rule, people think that the more expensive the glue, the better quality it is. Of course, in most cases, an expensive product is much better than a cheap one. But still, in the case of ceiling tiles, you need to pay attention to other factors. The most important indicator of glue quality is adhesion strength. The higher this indicator, the more securely the decorative material will be fixed on the ceiling covering.
In addition, you should pay attention to how quickly the glue dries. The faster this happens, the better it will be for you. After all, if it sets not for 30 seconds, but for 2-3 minutes, then you will simply get tired of holding the tile for such a long time and, most importantly, you will definitely not be able to fix it correctly. Also, when purchasing, be sure to pay attention to the viscosity of the adhesive.
If the glue you choose is very liquid, then try to choose another option for finishing work. As practice shows, an adhesive base that is too thin will not allow you to securely fix the tiles to the ceiling and it is likely that after a while you will have to redo everything from the very beginning.
Types of adhesive for fixing ceiling tiles:
- Universal
- Titanium
- Adhesive compound (silicone based)
- Acrylic putty
- Liquid Nails
- Polyvinyl acetate glue
How to beautifully and correctly glue ceiling tiles diagonally, in a diamond shape: description, video
Before you start fixing the tiles, you must prepare the ceiling space. If you don’t do this, then in the end, even if you want, you won’t be able to properly fix the finishing material. For this reason, it will be better if you first carefully inspect the ceiling and repair all defects.
But keep in mind that in order for the tiles to lay perfectly, it is not enough to seal all the cracks and holes. If you want maximum adhesion between the ceiling and the decorative coating, then you will definitely need to sand the surface and then carefully prime it.
Recommendations for gluing tiles:
- First, measure the ceiling area and estimate how many tiles you might need. Please note that if you fix it with a diamond, you may need more of it than if you glue it diagonally.
- At the next stage, you will need to mark and mark the central point of the ceiling, as well as diagonal lines, aligned with which you will lay out diagonals and rhombuses.
- Once the markings are made, you will need to apply adhesive to the entire tile and fix it to the center point. If you want it to set instantly, do not forget that it must be kept for at least 1 minute.
- In order for the tile to fix, it must be pressed against the ceiling covering and held in this position for 30 seconds. Once you are sure that it does not move, you can begin to apply glue to the remaining decorative material.
- Initially, you will need to lay out the tiles along the diagonals that were drawn during marking, and when this is done, you can move on to filling the empty space.
- It is necessary to fix the tiles on the ceiling, moving from the central point to the corners, while trying to ensure that visually they form a perfectly straight line.
Kinds
Ceiling tiles have an unusual classification. The criteria are:
- mode of production;
- materials;
- form;
- type of edge;
- texture;
- dimensions;
- design;
- surface type;
- color.
Mode of production
Manufacturers use three fundamentally different tile manufacturing technologies:
- stamping (pressing);
- injection molding;
- extrusion (extrusion).
Pressing. In the process of making tiles using the stamping method, a mass of foamed polystyrene is compressed in a press to a thickness of 5-8 mm. The result is a square or rectangular sheet with a side length from 30 to 70 cm (the main size is 50x50 cm) and an extruded relief (pattern) on the surface. The slabs obtained using this technology have their pros and cons.
- simple manufacturing technology;
- light weight;
- budget price - the lowest in the class of ceiling tiles;
- Possibility of repeated painting with acrylic paints.
- fragility - when cutting with a knife or correcting the position on the ceiling, it cracks or breaks off in the corners;
- gets dirty quickly (dust, soot and grease get into the pores), but cannot be washed (painted ones can be wiped with a damp cloth);
- only sold in white;
- do not tolerate high humidity well. Therefore, it is not suitable for the bathroom. The toilet and kitchen must be painted;
- the relief pattern is fuzzy and blurry.
Injection casting. The injection production method is a combination of pressing and casting, during which plastic masses melt at high temperatures and then, under pressure of several atmospheres, are fed into molds where they take on the required dimensions and topography of the front part. The method has its strengths and weaknesses.
- the tiles have increased strength - they almost do not break during operation;
- the relief is expressive, clear;
- good sound insulation properties;
- low thermal conductivity coefficient. Thanks to its large thickness (10-14 mm), it perfectly insulates the ceiling space;
- hides minor floor defects;
- easy care - can be cleaned and washed;
- the surface can be white or painted, which increases the choice;
- have water-repellent properties - can be used in any room;
- Beautiful design;
- The joints, when carefully glued, are almost invisible.
- quite high price - it costs 3-4 times more than a pressed plate.
Extrusion. At first glance, it is impossible to produce ceiling tiles using the extrusion method. Those familiar with the technology know that this is a continuous extrusion of the melt (plastic or metal in a viscous state) through a head with the desired shape of holes. The classic version is “Rozhki” pasta. But if you extrude a continuous thin strip, and then apply a relief on it with a press or stick a decorative film, and then cut it into squares or rectangles, you get a ceiling finish. This complex technology makes it possible to obtain plastic with other performance characteristics:
- high strength with minimal thickness (about 3 mm);
- large operational resource;
- the ability to quickly return to its original shape after deformation.
- high density, as a result of which vaporous moisture is not absorbed;
- various textures - metal, wood, natural stone, etc. are imitated using decorative film;
- easy to clean and wash;
- repels dust, dirt, moisture. These properties allow the material to be used in places where hygiene must be maintained: hospitals, clinics, kindergartens, etc.;
- there is a choice between laminated tiles, paintable collections and white slabs that cannot be painted - paint does not stick to a dense, smooth surface;
- easy to glue.
- high price - due to complex technology;
- Translucent - you need white or colorless glue.
For information: colored products using this technology are obtained after adding coloring pigments to the melt.
To summarize: it is easier to glue and care for extruded tiles, but the price is high. Average in quality and price - injection plate. “Capricious” in care and gluing - pressed, but the shortcomings are compensated by the low cost.
Materials
For the manufacture of ceiling tiles use:
- expanded polystyrene (foam plastic). The most common finishing option. It is characterized by low weight, smooth or textured surface, resistance to temperature changes, and practicality. The texture resembles gypsum stucco;
- mineral fiber is a modern material with its own performance characteristics, strengths and weaknesses. The classic representative is Armstrong-type tiles (only collections with Board edges can be glued);
- plastic - represented by polyvinyl chloride (PVC). Thin material, difficult to install, demanding to maintain.
Form
Classic ceiling tiles have a square shape with straight edges. There are many advantages here: it’s easier to create a layout sketch, lay it out, especially in the corners, and it’s easy to combine joints. In addition, you need to take into account the visual perception of the finish - symmetry always looks aesthetically pleasing, the ceiling seems even even with a slight distortion.
To diversify the design, manufacturers offered rectangular slabs and tiles with shaped sides: wavy, concave, convex. After gluing, tiles with complex edge geometry create an attractive pattern that gives the room charm and uniqueness.
Edge type
Based on the type of edge, tiles are divided into 3 types:
- with an edging that forms a clearly visible seam;
- chamfer - the edges of the tile are cut at approximately 45o. After gluing the boards, a beautiful seam is formed. The presence of a bevel allows you to diversify the design due to the layout;
- seamless - the edges of the decorative elements have a perfect cut along the edges, which allows them to be pressed together so tightly during the gluing process that the connecting joint is practically invisible. The ceiling looks like a solid surface. To help in adjusting the pattern or relief, laying direction indicators are applied to the back of the tile.
Texture
The surface of the tile can be:
- smooth;
- smooth with perforation;
- embossed.
Dimensions
The format of the slabs depends on the material of manufacture:
- polystyrene - edge length from 30 to 70 cm in different combinations;
- metal - 30x40, 30x60, 40x40, 50x50, 30x70 cm;
- wood - squares with edge lengths of 30, 50 and 60 cm and rectangles 20x60 and 30x70 cm.
When making ceilings according to individual orders, the length of the rib can reach 1.2 m and the width - 0.6 m.
Design
According to the method of surface design, tiles can be:
- relief - the front side after pressing has protruding elements that form geometric patterns, natural motifs or imitate plaster stucco. There are a huge number of embossing options;
- colored - decorative elements are painted during the production process (dye is added to the molten mass) or after injection;
- volumetric - using embossing and special coloring methods, 3D tiles with a three-dimensional effect are obtained;
- with decorative inserts, most often mirrored. This design technique allows you to get a light, sophisticated coating.
Surface type
The front side of the panels can be:
- glossy - option is possible only after painting;
- matte - gives the natural color of the material;
- mirror - a thin layer of reflective material is applied;
- laminated - a special protective film with a pattern is glued.
Mirror tiles are used in public buildings, matte, glossy and laminated are intended mainly for residential premises.
Blossom
There are more and more alternatives to the standard white color. On sale you can find collections in white-blue, light pink, delicate milk, cream, sand, coffee and gray colors. Golden, silver, copper, brownish, marsh tones look original.
How to properly glue ceiling tiles without seams?
Gluing seamless tiles
In principle, seamless tiles are glued in the same way that we introduced you to a little higher. Therefore, in this case, you will need to initially measure the area of the ceiling in the room being renovated, apply markings on it, determine the central point, and only after that proceed to gluing the decorative material. But still, if you want to end up with a perfect ceiling covering, then glue the tiles either diagonally or parallel to the wall.
Yes, if you prefer the latter method of finishing the ceiling, then start fixing the tiles on the wall opposite the window. This little trick will help you make the gaps that form when finishing with such material less noticeable. And finally, I would like to say that, although some sources claim that in the case of seamless ceiling tiles, it is not necessary to apply glue along its entire perimeter, it still needs to be done.
As practice shows, if this is not done, then after drying the gap formed during installation will be quite noticeable. And, of course, do not forget that ceiling tiles are made of a very soft material, so you should hold and smooth them not with your hands, but with a foam sponge or soft rag.
How to properly glue ceiling tiles to an uneven ceiling?
Gluing ceiling tiles to an uneven ceiling
As a rule, in old houses and apartments the ceilings are far from ideal. Most often they are covered with cracks and small depressions that are very noticeable. If you live in a house with the same ceiling covering, then, if you wish, you can improve the appearance of your home with the help of ceiling tiles.
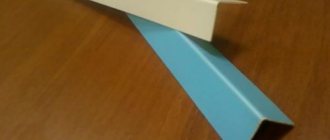
If you don't want to bother with leveling and sanding the ceiling, then just buy foam tiles and glue them parallel to the wall. True, you must remember that you can do this only if the defects on the ceiling are minimal. If they are too large, then you will need to either decide to completely tear out the surface or install a special frame.
Usually it is installed slightly below the ceiling itself and this makes it possible to hide even very prominent defects. True, in this case you will have to fix more expensive tiles on it, for example, wood, metal or ceramic.
Preparing the base
At this stage it is important to ensure good adhesion to the surface of the cladding.
Removing old coatings - you need to wash the whitewash and remove the wallpaper. You can use a spatula to scrape off the old coating.
Elimination of defects - cracks and potholes should be covered with repair mixtures.
Dust the surface and remove grease stains.
If gypsum plaster is used on a concrete base, then the surface should be treated with concrete contact; loose and loose ceilings can be treated with deep penetration soils.
How to seal the seams between ceiling tiles?
Recommendations for sealing the seams of ceiling tiles
As mentioned a little above, even the so-called seamless tiles require additional processing of the gaps that form after the ceiling sheet has completely dried. In view of this, when planning such finishing work, immediately include in their cost special means that will help you make the surface being repaired as smooth as possible.
As for how to do this, in this case it is best to give preference to acrylic sealant. If you want to seal the seams without any problems, then invest in a tube of sealant and a gun that will help you distribute it evenly.
Recommendations for sealing the seams of ceiling tiles:
- Secure the gun to the sealant tube
- Using scissors, cut the tip at a 45 degree angle
- Press the resulting hole to the beginning of the seam
- Gently press the gun handle and move it exactly along the seam
- After filling the seam, carefully move the gun away from the ceiling and allow the sealant time to cement.
Can ceiling tiles be painted?
You can paint ceiling tiles
Sooner or later, the desire to paint a ceiling decorated with tiles appears in all people. But as practice shows, only a small part of novice repairmen decide to take this step. Most of these people believe that the paint will simply ruin the ceiling tiles and they will have to spend money on expensive repairs again. In fact, not all tiles can be painted.
For example, under no circumstances should seamless tiles be treated with dyes as this will certainly make the seams darker and, as a result, they will stand out quite strongly against the general background of the room space. All other tiles can be painted easily, although keep in mind that in order for the color of the updated ceiling to be as saturated as possible, you will need to apply the paint in at least two layers.
How can I paint foam ceiling tiles?
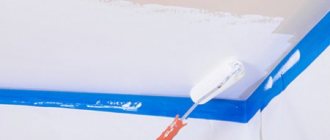
Ceiling painting scheme
As for the choice of paint for updating the ceiling, when purchasing it you need to pay attention not only to the color. If you want the ceiling to remain in perfect condition for a long time, you must choose the right colorant.
This means that it must prevent the growth of mold, be moisture resistant and have dust-repellent properties. In addition, it must have a moderate level of glossy effect. In view of all this, we can definitely say that it is best to paint ceiling tiles with water-based or acrylic paint.
Recommendations for further finishing
Many experts recommend immediately painting unpainted ceiling tiles after gluing or covering them with decorative protective film (do-it-yourself lamination). This allows you to solve several problems:
- protect the foam from mechanical damage;
- strengthen the surface structure;
- increase operational life;
- make cleaning easier, especially in the kitchen, where large amounts of grease settle on the ceiling;
- change the ceiling design.
Painted tiles are repainted after a few years, when the owners get tired of the old color scheme or the ceiling is dirty and cannot be washed.