Before starting whitewashing, of course, it is necessary to prepare the surface for further work. For example, you want to use lime whitewash, and your ceiling or walls are covered with chalk, in which case it would be logical to first remove the old chalk whitewash and only then apply lime.
How to properly wash off old whitewash from the ceiling? First of all, you need to moisten the entire surface of the ceiling with water, and then use a rag and a spatula to clean and wash off the whitewash with soapy water.
If you want to just slightly update the ceiling. those. to repair a whitewashed ceiling, then first carefully inspect the entire ceiling for cracks, and then using a spatula you can repair the flaws with cement-based putty.
The ceiling seams need to be taped with a special mesh-like tape and then puttied. When the ceiling is dry, it must be treated with sandpaper. Next, we apply the primer again, and after it dries (after 24 hours), you can proceed directly to whitewashing.
How to whitewash the ceiling (walls) with your own hands - whitewashing with lime, chalk and water-based paint
Whitewashing a wall with lime yourself
Repair work leads to inevitable waste of money. But there are some processes on which you can save money. For example, a way to quickly whitewash walls with lime yourself in a living or working space without the help of hired workers. Lime is a good base material.
Lime is a good base material.
Why is it better to use lime, advantages and disadvantages
This raw material has a number of advantages. But there are also several disadvantages. It is important to understand how to properly slak lime for whitewashing walls.
- Antiseptic properties - prevents and eliminates the possibility of mold appearing on the walls;
- Maintaining a budget - the availability of materials will pleasantly please you, especially if you do the work yourself;
- Easy to perform - no special knowledge is required on how to whitewash walls with lime. Even a non-professional can carry out the finishing;
- Lime for whitewashing walls is a white substance that is obtained by burning limestone. Therefore, this material is completely natural and environmentally friendly;
- Snow-white result – exceptional whiteness of surfaces after lime treatment;
- Lots of information on how to whitewash walls with lime.
- A health hazard is more of a warning about the dangers of working if you do not know how to dilute lime for whitewashing walls correctly. If it comes into contact with the skin or mucous membranes of a person, it leaves burns;
- A relic of the past - it is believed that this type of finishing is no longer relevant with the modern choice of building materials.
Before diluting slaked lime to whitewash walls, you must carefully read the recommendations for working with this material, and also purchase protective equipment in advance.
Re-dyeing
Move on to the 2nd layer after the first has dried. When a roller or brush is chosen for painting, it is better to apply it perpendicular to the previous one. Then the stains will not appear.
When working, you should not rush; if you have little experience, then acting quickly will make it difficult to avoid divorces.
When a roller or brush is chosen for painting, it is better to apply it perpendicular to the previous one.
Preparation for work
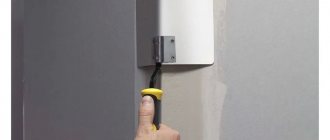
Before removing old whitewash from the walls and ceiling, you need to know what was previously used - chalk or lime. The check will not take much time. It is enough to moisten the surface with water. If lime was used, the wet area will darken. Or just run your finger along the wall. If the surface was whitened with chalk, the finger will turn white. After lime it will not color.
How to prepare a primer for whitewashing with lime
You can purchase a ready-made primer composition or prepare it yourself.
Stir slaked lime in warm tap water (water - half a portion).
Pour salt (coarse, rock) into the liquid.
Add the remaining water.
Separately, mix and grind a small amount of wood glue and sifted chalk powder. You should get a paste similar to cream.
Dissolve the chalk-glue mass in liquid with lime.
The primer composition is ready.
Proportions of ingredients for preparing the primer:
- slaked lime (paste) – 5 kg;
- water – 20 l;
- salt – 200-250 g;
- chalk – 400 g.
- carpenter's glue - about 200 g (we guide ourselves by adding it to the chalk in parts).
We cook wood glue in granules with the addition of water in a water bath.
Instead of wood glue, you can add PVA wood glue to the primer for lime whitewash. Sometimes a strong soap solution is added to it (rub a piece of laundry soap on a grater and dissolve the shavings in hot water). But a primer with soap is weaker than one that contains wood glue - the whitewash can get dirty and crumble.
Lime whitewash can be done with brushes
If you use a whitewash roller, the surface will be more neat and even.
Whitewashing houses: advantages and disadvantages
Whitewashing for walls involves diluting lime or chalk in water and applying the liquid mixture to certain areas of the building. It is this coating that will serve as protection for the structure.
In today's world, this method of decoration is not popular among the population. However, there are still summer residents who adhere to the traditions of the past generation.
The advantage of whitewashing buildings is as follows:
Before you whitewash a wall, you need to know the negative qualities.
It’s worth saying right away that almost any walls can be whitewashed. Even the adobe walls are whitewashed. But this is more complicated. After all, straw is a material that must be carefully prepared.
Safety precautions
Before work, it is necessary to wear protective clothing, goggles, a respirator and gloves, otherwise health problems cannot be avoided. After all, small fractions of chalk can get into the respiratory tract, and the eyes can also be easily damaged. The reliability of the device on which the master will stand must also be checked before work.
Before work, it is necessary to wear protective clothing, goggles, a respirator and gloves, otherwise health problems cannot be avoided.
White is not the only option
Adding ordinary blue will help to cope with the situation when the lime coating turns yellowish after application. 10-20 grams of material per liter of composition will be enough. After this, the whitewashed ceilings become snow-white.
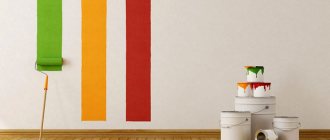
Sometimes it is necessary to obtain other colors. Not every dye will be suitable in this case, and the name whitewash will not be suitable for the technology. It is required to use pigments with maximum resistance to alkaline environments. Lime paints are combined with the following pigments:
- ultramarine for blue;
- lithopone for white;
- titanium dioxide for white;
- chromium oxide for green;
- mumiyo for red-brown;
- red lead for orange;
- umber for greenish brown;
- ocher for a yellow tint.
It is recommended not to add pigments in their original form, in powder form. You should first dilute everything with water until a paste appears. Then the dye is given time to infuse for 24 hours, only after which the pigment can be added to the lime mortar.
Cleaning the ceiling
This process is labor-intensive and dirty. We take out everything that can be taken out of the room, and cover the rest with plastic.
Note that chalk is easier to wash off than limestone.
To remove you will need: a scraper (spatula) and warm water to which vinegar or citric acid is added. Do not treat the entire area at once, it will dry out quickly and this will only complicate the work.
When moisture has been absorbed, carefully remove it with a spatula. You can hold (if convenient) a plastic tray in one hand, into which we will immediately collect the scraped pieces.
Remains of whitewash are removed with a wet sponge. We treat the cleaned surface with a special antifungal solution (to prevent the appearance of mold), putty and, if necessary, level it.
After this, we cover it with a primer. When the primer dries (in a day), you can start whitewashing.
How to whiten
There are two popular options. The first option is to whiten with chalk, and the second with lime. These options are hygienic and environmentally friendly. Lime can close small cracks and fix them, and also has bactericidal properties.
Video: Recipe for making lime whitewash
Chalk differs from other materials used for covering ceilings - it is deep white.
Note - if the ceiling (walls) have been whitewashed with lime, it is not recommended to use chalk, so that blurry spots (stains) do not appear on the ceiling.
Preparation of chalk solution
For whitewashing with chalk, take: 5 liters of warm water, dissolve 30 grams of wood glue in water, then add 3 kg of chalk (sifted) and 15 - 20 grams of blue.
Blue is added to avoid a yellow tint and enhance the whiteness of the coating. The prepared composition is enough for about 10 - 12 square meters.
In order to check the thickness of the solution, lower the blade of a knife into it. If it flows down exposing the blade, there is a lot of water in it.
Tool selection
You can use simple tools, such as a brush or roller, as well as “advanced” equipment - a spray gun and a household vacuum cleaner equipped with an air flow blowing option.
We recommend the following to beginners:
- A roller and brush are suitable for a small amount of work – whitewashing a garage or a small apartment.
- A roller is more convenient as a way to whitewash high ceilings if you equip it with a homemade long handle.
- Mechanical devices - a vacuum cleaner and a spray gun - are used when processing large areas: entrances, external walls, street fences.
It is better to choose a special brush with natural bristles. The desired width of the tool is 15–20 cm. If you carefully wash the bristles at the end of work, they will last a long time.
The roller is convenient when whitewashing is done in a single layer. By applying a secondary layer, you can remove the dried first one. But it is with its help that it is possible to give the surface a matte tint.
The sprayer allows you to quickly apply the composition in a thick layer, easily masking existing small defects. Please note that with this type of work, the solution consumption increases greatly.
A blow-out vacuum cleaner is equipped with a special polyethylene lid with a tube that allows the device to be used as a sprayer.
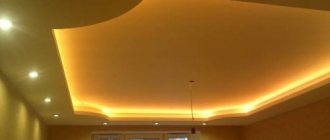
What is the best way to whitewash a ceiling?
Currently, two main types of environmentally friendly materials are used for whitewashing ceilings and walls - chalk and lime.
Whitewashing the ceiling with lime
Lime has the advantage that it has bactericidal properties and also has the ability to tighten cracks, as if closing them.
Whitewashing the ceiling with chalk
At the same time, lime can cause allergic reactions in some people; in this case, of course, it is better to use chalk, which gives an excellent white color when whitewashing (although lime is no worse).
Please note that if the ceiling was previously whitewashed with lime, it is recommended to use it in the future to avoid unsightly streaks and stains.
Why are the trunks of fruit-bearing trees whitened?
Whitewashing of trees is carried out in late autumn (November) and early spring (March). Gardeners do this not for beauty. Bark is a protective barrier for trees: it protects them from environmental influences. Therefore, it is the material that is primarily exposed to temperature changes: it dries out, flakes, cracks from the heat, freezes in the cold, and is damaged by bark beetles.
If it is not strengthened and taken care of, the wood becomes exposed and begins to deteriorate and rot. This greatly weakens the plants, which ultimately leads to their death. What does the whitewash layer protect against?
- White color has reflective properties, so it does not allow the sun's rays to overheat and burn the shell of the plant and its branches.
- Autumn whitewashing protects the trunk shell in winter from the formation of ice during the period of alternating thaws and frosts.
- The smell of lime repels animals gnawing on the bark of the trunk.
- A layer of white will protect the plant from insect pests crawling out of the soil and destroy those that have hidden in the cracks of the shell for the winter.
It is obvious that whitewashing plays the role of strong protection of the plant from external destructive factors.
It is necessary to whitewash trunks in spring and autumn in dry weather, otherwise the whitewash layer will be washed away by rain.
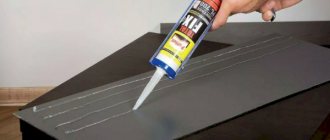
After drying, the lime layer will become more resistant to precipitation; some gardeners sometimes even add glue to the solution to make the paint more moisture-resistant.
How to dilute lime for whitewashing a house: current tips
How to dilute lime for whitewashing a house depends on the form of alkali; it can be prepared according to several recipes. The required ingredients in all formulations are water and table salt, so you should check their presence. And then we select a recipe, adapt it to the required volume and prepare a bleach solution, the approximate consumption of which is 0.5 liters per 1 m2 of surface.
Recipe 1. Fluff – 400 g, water – 600 ml, table salt – 5 g, drying oil – 0.3 tbsp. Mix all ingredients thoroughly and pass through a sieve to remove lumps. To give a bluish tint, ultramarine can be added to the resulting solution - 20–25 g.
Recipe 2. Dough – 3 kg, water – 10 l, table salt – 100 g. The dough is diluted in half the volume of water and lime milk is obtained. Salt is diluted separately in 1 liter of hot water, added to milk and stirred thoroughly. Coloring compounds are also soaked separately in water and gradually poured into the solution. Before use, the bleaching mass is brought to a volume of 10 liters by adding the required amount of water.
Now everything is ready for whitewashing, and you can proceed directly to the whitening process. This can be done with a sprayer or manually. A spray gun or vacuum cleaner is suitable as a sprayer. The manual version is carried out with a brush or roller, and using a roller is much easier. But regardless of the available tool, lime whitewashing of walls, ceilings, stoves and other surfaces consists of the following steps:
Lime consumption for whitewashing per 1 m2
Lime consumption depends on the type of surface being treated: porous, textured surfaces require more consumption to obtain a dense coating. So, for example, to whitewash brick walls you will need more lime than to treat smooth surfaces.
In addition, the consumption of raw materials depends on its type. Today, slaked and quicklime are available for sale. Slaked raw materials are sold in the form of powder and dough (lime paste). The fluff is diluted in a ratio of 1:3. So, from a 4 kg package you can get 12 liters of ready-to-use solution. This amount of whitewash is enough to process 24 square meters. m of smooth, level surface.
It is quite difficult to determine the exact consumption of the substance: in any case, you will need to walk around the place several times. But, the material itself is affordable and can be easily found in any hardware store. Therefore, if necessary, you can easily purchase a few more kg of lime.