Oven mitts are a useful and indispensable attribute in any kitchen. In addition to their immediate task (to protect hands from the hot surfaces of pots and pans), they also have another function - decorative. Of course, you can simply buy potholders, but many housewives prefer to make them with their own hands. The easiest option is to sew a simple square without worrying too much about its appearance. But if the requirements for potholders are not limited to simple functionality, and you want to make them an independent element of kitchen decor, the task becomes a little more complicated.
Knitted items are always more original and exclusive than sewn items. Crocheted potholders will become an interesting element of kitchen decor, add coziness to the room, and create a warm, homely atmosphere. We invite you to familiarize yourself with some models of crocheting potholders with diagrams and a description of the procedure for performing the work.
Preparation
Kitchen oven mitts must have a convenient shape suitable for use with any hot cookware. The appearance of such a product depends only on the imagination and skill of the creator. The grips come in the format of apples, lemons, chanterelles, sunflowers, chickens, etc.
The procedure is carried out step by step, according to a clear action plan, which we will consider in detail within the framework of this guide. It is worth thinking through all the nuances of the process in advance and approaching it responsibly. There are a large number of videos and master classes that will help you understand all the nuances.
Before crocheting a potholder, you need to decide on the material.
Attention! You can immediately “put an end to” the varieties of synthetic gimp.
When such threads come into contact with hot dishes, they will immediately burn, and the craft itself will melt over the entire surface. It is also not the right time to choose wool or skeins of thin yarn.
Simple and beautiful crochet grips should be high in density and thickness so that it can fulfill its main task - to help when working with hot frying pans. The following types of yarn are suitable:Potholder in the shape of a strawberry with a detailed description of the work
A potholder in the shape of a berry can become an original decoration for your kitchen interior. We will make it in the shape of a strawberry. Knitting of this type is so captivating that time flies unnoticed. Find a couple of hours of free time, study this master class and knit such beauty.
Clear sequence of work
To crochet a “Strawberry” potholder, you will need a hook No. 3.5, green and red wool, 50 g each.
Using green thread we knit a chain of 16 chain stitches. and close it in a ring.
1 row.
6 v.p. (3 lifting loops + 3 ch), 3 tbsp. s/n. in the second and third air loops of the base of the chain, arch of 8 vp, 3 tbsp. s/n. in the third and fourth ch. to the base of the chain from the edge of the hook, arch of 3 vp, 6 tbsp. s/n. in the fifth and eighth ch. at the base of the chain, arch of 3 c. p., 3 tbsp. s\n. in the ninth and tenth ch. the base of the chain from the hook, the arch from the 8th century. p., 3 tbsp. s\n. in the tenth and eleventh centuries. p. base of the chain from the hook, 3 in. p., 6 tbsp. s\n. remaining in. n. base of the chain. Finish the row with a connecting column. We continue knitting up to the 3rd row inclusive in accordance with the pattern shown in the next photo. Pattern:
At the beginning of the 4th row, we attach a red thread and knit according to the pattern up to the 17th row. Finish knitting. Fold the potholder in half and stitch.
Instead of red thread, you can use yellow, orange or pink. This handmade kitchen accessory will be an original and unique gift for a friend, sister or mother on her birthday or March 8th.
Bamboo
In terms of characteristics, such raw materials largely replicate flax. In addition, bamboo fiber is environmentally friendly and does not exhibit allergenic properties.
Please note: it is fashionable to use floss with a small percentage of synthetic or wool content. These types of material have increased elasticity, which will facilitate the selection of thickness.
Note!
- Patterns for knitting overalls for a newborn: step-by-step master class
How to crochet a mouse and a rat: video master class on crocheting the 2020 symbol
How to knit a warm hat with ears for a newborn boy and girl - video tutorials with patterns, instructions for beginners
Knitting potholders
The task of weaving a knitted kitchen potholder will definitely appeal to needlewomen who do not have much experience. It is important to choose high-quality instructions, which are accompanied by detailed photographs - then the trinket will definitely work out the first time.
Flower potholder
Probably the most popular type of tack, made using a hook and floss.
Configurations of flower patterns are quite common, it is very easy to find them on the Internet. Such popularity and popular love is explained by the fact that the floral motifs of beautiful potholders are in harmony with many types of design and interior solutions.
As a tool, it is best to take hook No. 2. You should also review the possible color combinations in advance and choose the tones that suit your taste: it is best to base it on the contrast of the two threads. In the example, red and white floss is used.
Knitted potholder in a circle
In the form of an orange
For such a potholder you need 50 grams of cotton yarn in white and yellow or orange colors and a 4.5 mm knitting needle.
After each row, the knitting needles must be turned over. All loops are facial:
1st row - knit 14 loops, leaving the 15th out of work;
Knit the 2nd and all subsequent rows from the wrong side with facial loops;
3, 5, 7, 9, 11 rows – decrease by 2 loops each time;
13th and 14th - knit all 15 loops.
The last 14 rows must be repeated 10 more times, and then duplicate rows 1-13. Use white thread to bind off all stitches in the purl row.
Potholders knitted in short rows.
Potholder with a leaf, knitted from the center
This potholder is very easy to knit.
The color of the yarn can be completely different.
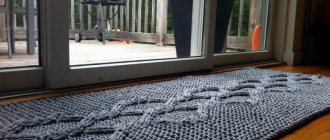
Potholders with shadow patterns
This pattern is created by moving the front stitch to the back and back. (29-31)
This potholder is very easy to knit according to the pattern.
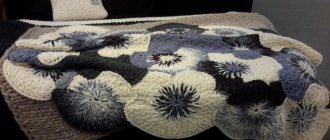
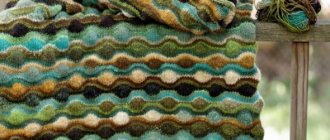
Enterlac technique
This method of knitting will allow you to create a product similar to patchwork.
Row 1 – knit 21 stitches with the wrong side.
Step by step guide
- The stage begins from the central section, from the burgundy gimp. The stage consists of creating air loops, after which the ring closes.
- The second row will require eighteen double crochets.
- The third stripe consists of a ratio of one slip stitch to twenty-three chain stitches. Next, the structure is connected to the same pillar. Afterwards you need to make one single stitch and exactly nine long buttonholes, with three stitches between each one.
- The fourth and fifth columns provide for the beginning of the procedure for tying the resulting loops using non-threaded columns. At the top point of each of them there should be three columns.
- The sixth and seventh stripes provide for a change in color. In the future, you need to move along the same configuration, and the eighth and ninth lines are again created using a different palette.
- Upon completion of the procedure, over the tenth row, which is knitted with a contrasting thread, the petal is wrapped on the right side. To do this, you should count 7 non-th pillars from the top, then make a turn and attach it to the eighth one. The remaining elements are created using the same model.
The resulting craft can be used both as a decorative element and for its direct mission - for activities with hot surfaces. Such a thing should be washed in cool water, lightly starching and ironing with several movements.
Note!
How to crochet a beautiful scarf: video master class on creating unusual, beautiful, simple scarves for boys, girls, men and women
- How to knit a hat with a lapel using knitting needles or an elastic band: step-by-step instructions for beginners
- How to crochet a winter hat: 95 photos of new models of warm, fashionable, original knitted hats with a lapel and a beautiful pattern
The structure and palette of hand-knitted potholders are preserved for a long time.
Sunflower potholder: how to crochet
Since the housewife wants the potholder to be not only a universal and practical element in the kitchen, but also pleasing to the eye, she chooses a beautiful and original design. These include a potholder in the shape of a sunflower.
You will need yarn of four colors: green, light green, yellow, brown.
We start knitting from the center with brown thread. Tie 8 VPs and close them into a ring.
Knit 18 double crochets into a ring.
Next row: on the stitch of the previous row, tie 1 loop from 23 VP, then 1 single crochet and get 9 additional loops with one stitch between them.
Tie the next two rows with the resulting loops. The top of each loop is completed with three single crochets.
In the next two rows, change the color of the thread, but continue to knit in the same way.
We knit two more rows, and in the next one, count 7 single crochets to wrap them into a petal and connect them to the eighth stitch.
There is another option for a sunflower napkin with a pattern
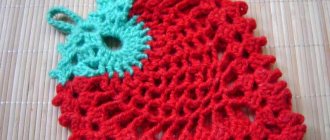
Strawberry potholder
As mentioned earlier, mostly decorative and household homemade kitchen trinkets are created using a floral or berry motif. Such works look good indoors at any time of the year: in winter they remind of warmth, in autumn they prolong summer, and in spring they give a premonition of a bright and easy time.
The most important symbol of all berries, the strawberry, is often used. Crocheting such a potholder is very simple. This is an interesting and beautiful shape that decorates the space and adds aesthetics to the home in which the berry potholder is located.
In the instrument format, it is most correct to resort to numbers 3 or 3.5. The material is consumed in a 2:1 ratio - burgundy fabric needs twice as much as green fabric.
Craftswomen who do not have impressive experience in making such things with their own hands are recommended to use the following motif:
Step by step:
- To begin, you need to take yarn of three different palettes: red, pink and green.
- The strawberry potholder itself and its branch are made separately from each other, and subsequently sewn together.
- All textile lines are made of loose columns, the number of which increases and decreases according to the configuration.
- As soon as you reach the third row from the bottom, or the second from the top, you need to start making six single columns, tying them together and with the base loop.
- When crocheting potholder leaves and strawberry edging, you need to carefully look at the table symbols. If the sections are attached in the lower area of the single crochet columns, then it is advisable to knit the buttonholes in the same base element.
The result will be a large berry, suitable both for decoration and for performing its direct task - contact with hot pans.
Note!
- How to knit a beanie hat correctly with knitting needles: video master classes, patterns, knitting patterns for fashionable models
- Light and beautiful crochet shawl: photos of chic openwork scarves with simple patterns
Turban hat with knitting needles: how to knit a turban with your own hands, patterns, video master class with step-by-step instructions
Potholders for the kitchen 2022: crochet new items
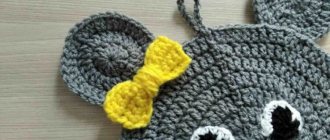
On the eve of the New Year, you can knit such a potholder as a souvenir for your friends or place a symbol of 2022 in your kitchen. Potholders - new crocheted items in the shape of a mouse or rat can be crocheted in different ways.
They can be single, or in the form of a mitten; you can make a square potholder with the image of a mouse, or initially knit a potholder in the shape of a New Year symbol.
Crochet Rat potholder: housewife of the year in the kitchen
An easy-to-use pot holder is a crocheted mitten.
Dial 5 VPs, connecting them into a ring. Tie 1 VP and tie 6 stitches into a ring
Rows 2-14: increase through one stitch.
Row 15: take a thread of a different color and add through 2 loops.
Rows 16-17: increase every 4 stitches
Row 18: increase through 2 loops
Rows 19-21: increase through each stitch.
We knit the upper parts of the potholder.
Dial 54 VP
Rows 1-4: single crochet, no decreases. Start each row with 1 VP lift.
Row 5: decrease 1 stitch at a time - at the beginning and at the end of the row.
Rows 6-9: no decreases.
Row 10: decrease 1 stitch at a time - at the beginning and at the end of the row.
Rows 11-12: do not decrease.
Row 13: decrease 1 stitch at a time - at the beginning and at the end of the row.
Row 14: no decreases.
Row 15: decrease 1 stitch at a time - at the beginning and at the end of the row.
Rows 16-17: no decreases.
Rows 18-22: decrease 1 stitch at a time - at the beginning and at the end of the row.
You need to knit two of these elements and connect all the parts, crocheting along the edge.
Let's tie the parts on both sides of the edge in this way: 3 double crochets, 3 double crochets, 3 single crochets, 1 half crochet.
We knit a muzzle. At the junction of the semicircles on one side in the middle along the edge, making an indent of 3 cm, make 10 single crochets.
The triangle is knitted like this: rows 1-5: in even rows, make additions along the edges; Row 6: 1 single crochet.
The nose needs to be knitted from dark yarn: 5 ch in a ring, into which knit 6 single crochets,
2nd row: knit 2 stitches in each loop,
3rd row: do not make increases;
Row 4: after 2 stitches, decrease by 1 stitch.
Fill the nose with cotton wool or synthetic fluff and pull it off.
Attach the spout
Making the ears:
Dial 10 VP
1st row: 10 single crochets;
Rows 2-4: increase 1 stitch on each edge;
Rows 5-7: no additions
Rows 8-10: increase 1 stitch on each edge.
You need two of these parts.
Eyes can be made from half beads or buttons
On the other side, make a tack loop
Sunflower
The sunflower flower has always been the warmest and sunniest pattern, bringing joy and light to the house. The flower potholder is usually used when performing work in a Mediterranean or country style. The colorful accessory has a prominent central part and an eye-pleasing edging.
This is a rather complex and time-consuming procedure for beginners, the reward for which will be a product of amazing beauty, with many details. In tool form, it is best to use a #2 or #3 hook. It is better to select the coloring of the yarn based on brightness and saturation: the colors should convey solar contrast.
The instructions will be a table for weaving a similar napkin.
Important: if you are going to knit a decorative item that is not used for its intended purpose, you should pay special attention to the openwork areas. Otherwise, it is preferable to choose a dense option.
Potholders with shadow patterns
Kitchen items with the so-called shadow pattern look very interesting.
By matching it to the color palette of your kitchen or home, you can get a very harmonious design. In addition, the same potholders can be made using a simple hosiery method by changing the color of the yarn to create a pattern.
Video: Shadow pattern “Sponges”
Bee
Crochet pot holders are new items for the kitchen that can update the condition of the room. It’s no secret that a bee is a symbol of hard work and caring for one’s own home.
These cheerful, sunny insects with variegated colors can fit perfectly into many interior solutions. The process of making potholders for the kitchen with a hook will also give you a lot of positive emotions.
For the work you will need to use hooks No. 3.5 and No. 1.5. The fabric used is gimp of three shades, with a density characteristic of 70m per 50g. It is also worth purchasing natural threads of the same tones.
You can create other insects and animals: a mouse, the pattern of which is on the Internet, a beetle, a tiger or an elephant. The external shape of the glove is limited only by your imagination!
Diagram and description
- The process of creating a bee begins with working with a tool of larger diameter. The main image is made with capped posts according to the configuration presented above.
- Please note: as soon as you change the shade, the outer buttonhole is knitted with the next color. The crossing of the gimp occurs on the inside.
- The increase is secured with cap stitches, and the final part of the line is knitted the other way around - not with cap stitches.
- The decrease at the base of the strip is skipped, and closer to the end it is not knitted.
We recommend knitting two bees at once so that they don’t get bored in your cozy kitchen. In the same style you can make a hot stand; the work is also done with crochet.
This article will help you learn how to create crocheted potholders, the patterns of which we also discussed in the guide. This is a very simple dilemma that even a novice craftswoman can cope with. Homemade household items can bring pleasure to you and your loved ones.
Pleasant emotions are obtained not only when using them, but also at the moment of knitting. Crochet New Year's potholders will be an excellent gift option for the main winter holiday. Good luck!
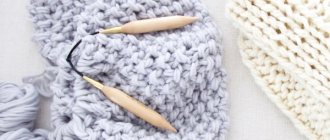
Enterlac technique
Simply amazing oven mitts are made if you knit them using the enterlac technique. They can be simply square in shape or knitted in the round with ring needles in the form of a thumbless mitten. In this case, you should take 2 shades of thread. The fabric ultimately resembles patchwork in appearance.
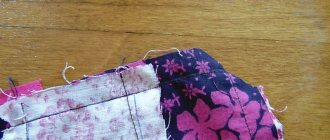
- For the sample, cast on 21 stitches with knitting needles. The beginning of knitting is considered the wrong side. There are no edge loops here.
- We knit 2 purl stitches, turn the knitting and knit them in the same direction, turn again and knit them as at the beginning, plus we knit another one from the left knitting needle.
- Adding the 1st stitch will be in each inner row. So we knit the first triangle until we move 7 loops.
- After they are knitted, turn the fabric and purl them, but without adding a loop, but start a new triangle in the same way. There are 3 triangles in total in the sample.
- Let's move on to the second row (2nd lane). It will be a different color. We change the thread from the outside, start with 2 knit stitches, turn to the other side and knit 2 from one loop: 1 for the front bow, and 2 for the back.
- Next, move 1 loop to another unknitted needle, knit the next one (which is the first shade) and pull it through the removed one.
- Turn it to the inside and knit everything purlwise.
- We return to the face and repeat all the manipulations.
- We work like this until we get 7 loops on a knitting needle of a different color, which we knit on the front surface for the last time without adding.
- Along the edge of the second triangle, we collect 7 elements (or as many as you have, if you chose a different number initially).
- From the inside we make them from the inside out. On the outer surface we knit the 6th, and the 7th together with an element of a different shade as described earlier.
- We work until the loops of the first shade run out and repeat everything again, using knitting needles along the edge of new 7 loops.
- There remains a side triangle, for which we again pick up new elements along the edge in the amount of 7. We knit them from the inside out, then knit them and from the next (inner) row we will decrease their number by knitting 2 loops together at the beginning until 1 remains.
- We change the thread and start a new row with a different color. In this row, the decreases will no longer be broaching, but ordinary knitting together, which will result in a tilt in the opposite direction.
- Having knitted to the end and started the last strip, in order to get a smooth edge, you need to knit 2 loops together at the end of not only the purl rows, but also the front rows.
We looked at simple and interesting knitted potholders, which can be an excellent decoration for any kitchen. All you need is to choose the right color and get a little creative.
Crochet potholders - photo master classes and new ideas for needlework
Please repost
0