To make the kitchen look cozy, women buy, or create with their own hands, all sorts of products that highlight the beauty of the room. Well-chosen accessories, towels, curtains and hot pots will improve the design of the kitchen and create the impression that there is a woman in the house - a real mistress. Next we will learn how to crochet a potholder.
Almost every kitchen has small hand-made little things, without which the room looks empty and uncomfortable. A woman is trying to somehow create comfort in this way. Previously, housewives were engaged in needlework and sewed curtains, knitted tulle, and napkins for beauty with their own hands. Next, we’ll look at how to crochet a potholder at home in various ways. Thanks to this accessory, you will not only have a nice kitchen design, but also a necessary item in your household.
Crochet Mouse potholder: step-by-step description of the 2020 symbol
You can knit a potholder for your own pleasure, as a practical activity, or as a gift. For connoisseurs of Chinese calendars and horoscopes, it will be symbolic to crochet a mouse potholder, diagrams of which can be seen in the article.
To knit a potholder that will be used for its intended purpose, use dense threads. And for decoration, you can take those that you like.
Materials:
- Gray yarn (50% acrylic and 50% wool, 100g/240m)
- Hook No. 2.5
Abbreviations:
- VP - air loop
- STBN – single crochet;
- PSTBN - half single crochet
- Dc - double crochets
- PSN - half double crochet
1st row : knit 6 SC into a slip stitch.
2nd row: two sc in each stitch.
3rd row: two sc in each stitch.
Rows 4 – 16: make additions in even rows, but not in odd rows.
Mark 36 stitches using a marker.
17th row: 36 STBN, 14 PSTBN, 8 SSN, 14 PSBN, 36 STBN.
Row 18: 8 DC, inc – repeat 5 times, 3 hdc, 4 dc, 2 dc in 1 loop, 4 dc, 3 hdc, inc, *8 dc, inc* – repeat 5 times.
19th row: we knit half a row with STBN, 3 STBN in 1 loop, then STBN
Knitting the tail: cast on a chain of 38 stitches with dark gray yarn. Tie a row of STBN and tie the mouse with the same thread from left to right to the middle.
Making a mouse nose for a crocheted potholder. To do this, insert the hook into the middle of the arch and tie it with a SC, repeating 5 times. Next, continue tying the mouse with STBN until the end of the row.
Make a loop from the tail by sewing the other end to the base.
Let's knit the ears. Cast on a chain of 6 VPs, turn the work over and start from the second loop. Work 4 dc and make 3 dc in the last stitch, and work another 4 dc.
2nd row: VP, turn over, 4 sc, 3 increases, 4 sc
Row 3: VP, turn over, 4 sc, *1 sc, increase* - 3 times, sc.
4th row: VP, turn over, 2 dc, 1 dc, 1 dc, 9 inc, 1 dc, 1 hdc, 2 sc
5th row: VP, turn over, 3 dc, 1 hdc, 1 dc, 9 inc, 1 dc, 1 hdc, 3 dc
Knit two such parts. Tie the ears with dark gray thread.
Let's make the eyes in the form of a circle using 6 VPs in a sliding loop, and in the second row we double the number of loops.
Assemble all tack pieces.
Model 4
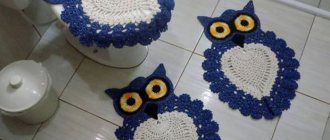
Crochet mitten - “black cat”.
This idea can be brought to life in a couple of evenings. And your girl can help you decorate. The pot mitten is crocheted quite quickly. Length – standard – 24 cm.
What do we need:
- Threads: black - 70 g (300 m) and white - 20 g;
- Hook No. 3.5 mm;
- Buttons for eyes (green) and noses (pink).
With black thread we collect 30 air loops and close them into a circle.
- Let's make 22 rows of columns. b/n in a circular manner, then proceed to the finger;
- We knit 9 chain stitches on the side and skip 9 stitches from the previous row. We strengthen with a single crochet stitch;
- Again we knit 22 rows in a circle, then we begin to evenly cut the loops in each row until there are 6 of them left. We pull them together and fasten them;
- Finger - we knit 19 single crochets along the edge, then 12 rows without decreasing. Then we begin to gradually reduce 4 columns. Pull the top;
- Eyelet - we collect 3 air loops and connect them into a circle. The first row is made in the center of 6 b/n columns, the second - we add 3 b/n columns to every second loop;
- Muzzle - knit 6 air loops with white threads. Using uncapped columns, we make 3 rows along the chain, adding 3 b/n columns at turns;
- We assemble the cat - glue or sew small elements to the body. We embroider the mustache with a chain stitch and sew on a loop of braid for hanging our craft.
Crochet potholders for beginners: beautiful patterns with descriptions
Round potholders are considered the simplest. This option will be successful for those who have only recently picked up a hook and are trying to make friends with simple posts.
You can crochet a round potholder for beginners according to the pattern. First, dial 3-4 VPs and connect them into a ring.
The next row is knitted with increases: add 1 loop after the three knitted. Continue this way until you get the product of the required size.
For variety, you can crochet the potholder with different threads or then tie it with a contrasting thread.
To ensure that the potholder keeps its shape, starch it after washing.
Using this simple pattern, you can crochet a beautiful potholder in the shape of a watermelon or fruit just by changing the colors of the yarn and using additional decor.
A simple pattern for crocheting a beautiful potholder for beginners:
You can use another pattern: in it the increases are located one above the other, but sometimes they will be noticeable (depending on the type of yarn).
Abbreviations:
- VP - air loop
- Dc - double crochet
- СС – connecting column.
Take the red thread and cast on 6 VPs, connecting them into a ring.
Row 1: 3 VP, 11 DC in the ring. At the end of the row SS.
2nd row: 3 VP, 1 Dc in 1 VP, *2 Dc in 1 loop* - repeat, SS
3rd row: 3 VP, 1 Dc in 1st VP, *2 Dc in one loop* - repeat, SS.
4th row: 3 VP, 1 Dc in the first loop, 2 Dc, *2 Dc in one loop* - repeat, SS.
5th row: 1 VP, RLS, SS at the end of the row.
Let's change the thread to white.
6th row: 3 VP, 1 Dc in the first VP, 3 Dc, *2 Dc in one loop, 3 Dc* - repeat, SS.
Change the thread to green.
Row 7: VP 1, sc, ss at end. Fasten the thread and cut.
This potholder will be two-layer, so tie two identical parts, but do not cut the thread at the end of the second one, but use it to fasten the parts.
Knitted potholder in a circle
In the form of an orange
For such a potholder you need 50 grams of cotton yarn in white and yellow or orange colors and a 4.5 mm knitting needle.
After each row, the knitting needles must be turned over. All loops are facial:
1st row - knit 14 loops, leaving the 15th out of work;
Knit the 2nd and all subsequent rows from the wrong side with facial loops;
3, 5, 7, 9, 11 rows – decrease by 2 loops each time;
13th and 14th - knit all 15 loops.
The last 14 rows must be repeated 10 more times, and then duplicate rows 1-13. Use white thread to bind off all stitches in the purl row.
Potholders knitted in short rows.
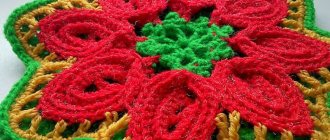
Potholder with a leaf, knitted from the center
This potholder is very easy to knit.
The color of the yarn can be completely different.
Potholders with shadow patterns
This pattern is created by moving the front stitch to the back and back. (29-31)
This potholder is very easy to knit according to the pattern.
Enterlac technique
This method of knitting will allow you to create a product similar to patchwork.
Row 1 – knit 21 stitches with the wrong side.
2nd – turn the knitting every two loops, alternating purl and knit stitches.
3rd - in each inner row we add one loop until we get the first triangle.
The product will consist of such triangles.
Simply amazing oven mitts are made if you knit them using the enterlac technique.
Simple crochet potholders: we knit a beautiful accessory for the kitchen
If you want to have something original in the kitchen, but have little time to invent decor, then simple crocheted oven mitts are suitable for decoration. These simple and at the same time beautiful accessories will add a bright accent to the kitchen.
Choose the right yarn - color and weight. You should not choose very thick yarn, as the product will look rough, and a potholder made from thin cotton will not be practical, as it will allow heat to pass through.
You can use synthetic and wool threads to crochet potholders. But keep in mind that a product made from cheap yarn can quickly lose its appearance.
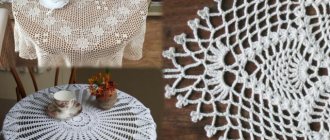
A round napkin can be decorated by tying it in a circle with a beautiful pattern.
The base of the napkin can be knitted from melange yarn.
Materials and tools for knitting potholders
Since the purpose of a potholder is not only aesthetic beauty, but also to protect your hands from burns, the choice of materials for its manufacture should be approached in a special way.
Important! Under no circumstances choose yarn made from viscose and silk. They will not prevent burns.
Cotton, acrylic and wool are best suited for these purposes. But they cannot be combined so as not to lose the shape of the product during operation.
When choosing thick yarn, you should avoid any thickening in its structure, since making patterns with such a thread will make it impossible to use it when working with hot surfaces.
Potholders for the kitchen 2022: crochet new items
On the eve of the New Year, you can knit such a potholder as a souvenir for your friends or place a symbol of 2022 in your kitchen. Potholders - new crocheted items in the shape of a mouse or rat can be crocheted in different ways.
They can be single, or in the form of a mitten; you can make a square potholder with the image of a mouse, or initially knit a potholder in the shape of a New Year symbol.
Crochet Rat potholder: housewife of the year in the kitchen
An easy-to-use pot holder is a crocheted mitten.
Dial 5 VPs, connecting them into a ring. Tie 1 VP and tie 6 stitches into a ring
Rows 2-14: increase through one stitch.
Row 15: take a thread of a different color and add through 2 loops.
Rows 16-17: increase every 4 stitches
Row 18: increase through 2 loops
Rows 19-21: increase through each stitch.
We knit the upper parts of the potholder.
Dial 54 VP
Rows 1-4: single crochet, no decreases. Start each row with 1 VP lift.
Row 5: decrease 1 stitch at a time - at the beginning and at the end of the row.
Rows 6-9: no decreases.
Row 10: decrease 1 stitch at a time - at the beginning and at the end of the row.
Rows 11-12: do not decrease.
Row 13: decrease 1 stitch at a time - at the beginning and at the end of the row.
Row 14: no decreases.
Row 15: decrease 1 stitch at a time - at the beginning and at the end of the row.
Rows 16-17: no decreases.
Rows 18-22: decrease 1 stitch at a time - at the beginning and at the end of the row.
You need to knit two of these elements and connect all the parts, crocheting along the edge.
Let's tie the parts on both sides of the edge in this way: 3 double crochets, 3 double crochets, 3 single crochets, 1 half crochet.
We knit a muzzle. At the junction of the semicircles on one side in the middle along the edge, making an indent of 3 cm, make 10 single crochets.
The triangle is knitted like this: rows 1-5: in even rows, make additions along the edges; Row 6: 1 single crochet.
The nose needs to be knitted from dark yarn: 5 ch in a ring, into which knit 6 single crochets,
2nd row: knit 2 stitches in each loop,
3rd row: do not make increases;
Row 4: after 2 stitches, decrease by 1 stitch.
Fill the nose with cotton wool or synthetic fluff and pull it off.
Attach the spout
Making the ears:
Dial 10 VP
1st row: 10 single crochets;
Rows 2-4: increase 1 stitch on each edge;
Rows 5-7: no additions
Rows 8-10: increase 1 stitch on each edge.
You need two of these parts.
Eyes can be made from half beads or buttons
On the other side, make a tack loop
Model 1
DIY mitten knitted with multi-colored rings.
The knitting should be tight to reliably protect the hand when it comes into contact with hot weather. The length of the mitten is 27 cm. We will need cotton yarn - 50 g (125 m) each in three different colors and a 4 mm hook. A mitten template can always be found on the Internet.
We will knit in 2 threads.
We cast on 4 chain loops and 1 single crochet, close them in a ring, knit single crochets in a circle in the following sequence:
- First circle – 8 air loops;
- Second and third - evenly add 5 loops on the circle (you get 18 single crochets);
- Fourth - add 4 loops (it turns out 22 single stitches);
- Fifth - we do not add anything;
- Sixth - add 5 loops (27 columns b/n);
- Seventh - plus 4 loops (31 columns b/n);
- Eighth - add 7 loops (38 double crochets);
- Ninth - add 6 loops (44 stitches in total);
- Knit 20 circles without adding anything.
This was the main part, now we knit the finger. We cast on 4 air loops, collect 1 semi-cable in a circle and knit semi-cables around the circumference in the following sequence:
- First round – we knit 8 stitches around the circumference;
- Second - add, evenly distributing, 5 stitches (13 stitches in total);
- Third - add 3 loops (16 columns without / n);
- We knit 8 rings without adding anything.
Place the mitten and finger next to each other and then knit a ring of all 60 stitches.
After 22 rings at the end, tie another 14 air loops (this will be a ring for hanging) and tie 18 posts. b/n.
Close the ring with a half single crochet.
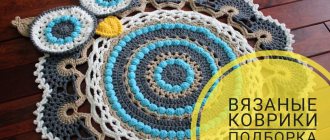
Beautiful crochet potholders: examples with diagrams
The kitchen is the place where the whole family gathers. Therefore, it should be cozy and bright. The housewife spends a lot of time in the kitchen and wants to see beautiful things in front of her. Therefore, it often comes to mind to decorate it with homemade accessories.
Knitting patterns for beautiful potholders
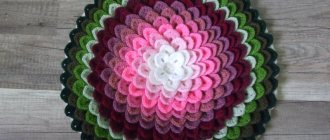
Spiral potholders can be knitted from different colors of thread to add originality to the product.
This version of the spiral tack consists of three parts, which are connected when ready.
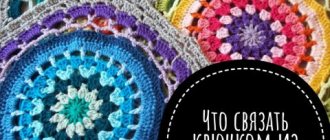
A beautiful, but not complicated model, it has more than one name - hexagon, or cookie.
Bright, beautiful potholders with flowers are more likely to be decorative, but how can they decorate the kitchen?
Crochet square potholders: how to crochet an accessory
Square potholders are very convenient to use. They are also quite simple to knit.
There is no need to calculate increases and decreases, because the fabric is knitted in a straight line, and they can be no less beautiful.
Any square motif can be used as a pattern for a square potholder
A square potholder can also be associated with a flower.
Using simple single crochet stitches according to the pattern, you can crochet original square potholders with patterns.
If you want to use potholders for their intended purpose, then it is better to knit the second side of each potholder, or sew a second layer of fabric.
Square crochet potholder with geometric pattern
Geometric patterns have become popular recently. In the kitchen we often use square tiles with patterns, so this option for potholders can be universal.
Materials:
- Yarn LanaGrossaCotone 100% cotton, 125m/50g: 50g green, 50g grey, 50g brown, 50g blue, 50g dark blue. Yarn colors can vary depending on your wishes.
- Hook No. 3.
We knit a chain of 4 VPs, connecting it into a ring. Make 2 dc, 2 ch, 2 dc into ring.
We continue to knit in straight and reverse rows of STBN behind the back wall. The row begins with 1 VP lifting.
To create a square shape, we make 1 STBN, 2 VP, 1 SC into the corner arch.
You need to knit 23 rows.
The color rotation goes like this:
- 8 rows in brown, 7 rows in gray, 8 rows in green.
- 8 rows in brown, 7 rows in blue, 8 rows in blue.
- 5 rows in brown, 6 rows in blue, 6 rows in light gray, 6 rows in dark blue.
- 5 rows in blue, 6 rows in brown, 6 rows in dark blue, 6 rows in gray.
To knit the first potholder, we need to make two squares alternating colors 1) and 2), for the second - 2 squares alternating 3) and 4)
Sew 4 squares according to the pattern. Tie the potholder in a crayfish step.
Sunflower potholder: how to crochet
Since the housewife wants the potholder to be not only a universal and practical element in the kitchen, but also pleasing to the eye, she chooses a beautiful and original design. These include a potholder in the shape of a sunflower.
You will need yarn of four colors: green, light green, yellow, brown.
We start knitting from the center with brown thread. Tie 8 VPs and close them into a ring.
Knit 18 double crochets into a ring.
Next row: on the stitch of the previous row, tie 1 loop from 23 VP, then 1 single crochet and get 9 additional loops with one stitch between them.
Tie the next two rows with the resulting loops. The top of each loop is completed with three single crochets.
In the next two rows, change the color of the thread, but continue to knit in the same way.
We knit two more rows, and in the next one, count 7 single crochets to wrap them into a petal and connect them to the eighth stitch.
There is another option for a sunflower napkin with a pattern
Potholder Sunflower video master class
This video is about how to crochet a napkin. But if you make a loop from air loops, the napkin will turn into a potholder.
Ladybug master class for beginners
The Ladybug potholder for the kitchen looks very funny. It only takes 1-2 hours to make it yourself.
You will need:
- black yarn and one more of your choice;
- hook corresponding to the thickness of the thread.
Description
Connect a chain of VP and close.
Knitting pattern 1 p. – 6 sc in the ring, SS. 2 r. – 2 RLS in 1 p., SS. 3 r. – 2 RLS in 1 p., 1 RLS, SS. 4 rub. – 2 RLS in 1 p., 2 RLS, SS. 5 rub. – 2 RLS in 1 p., 3 RLS, SS. 6 rub. – 2 RLS in 1 p., 4 RLS, SS.
We continue in the same spirit until we obtain the desired diameter. Next, use a black thread to sew a “back needle” stitch in the middle of the circle.
Now we knit the head. We start knitting from the edge of the circle. We knit 8 sc, turning over, we knit another 8 sc. Turn it over again and knit 6 sc, making one decrease on each side, turn it over and make 2 more decreases along the edges. The thread was secured.
Now we make the binding and loop. We start on the opposite side of the ladybug's head. We tie the sc in a circle, and, having knitted in a circle, we make a loop of 10-15 VP. Knit six spots, each of which has three circular rows (based on the principle of knitting the base of a potholder). Sew on circles and make eyes from either beads or white yarn. The Ladybug potholder is ready!
Source
Potholders in the shape of fruits: how to add freshness to the kitchen
Add a bright, juicy, summer accent to your kitchen with original fruit-shaped oven mitts. They are most often knitted in the round, and the resemblance to real berries and fruits is achieved by changing the color of the yarn and additional decorative elements.
You will also need a sheet of felt in a matching color to make the bottom layer. It is sewn on with a buttonhole stitch using matching threads. This will give us additional thermal insulation.
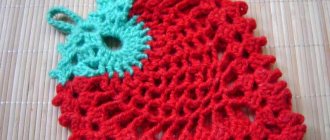
Crochet Strawberry potholder: diagram and description
To crochet a strawberry potholder, you will need three colors of thread - red, white, green. Everyone knows what a strawberry looks like - the berry itself is red, the grains will be embroidered with white thread, and the tail will be green.
Row diagram
Crochet Berry potholder: knit according to description
Watermelon is one of the most delicious and beloved berries. It can be knitted in different ways, it can be depicted in a round shape, or it can be shown as a slice.
Materials:
- Yarn: green, red, light beige, black.
- Hook
Knitting potholders
Knitting needles are chosen in the same way as a hook - in accordance with the width of the thread. The number of the knitting needle will be its size.
You can also knit patterns or ornaments using knitting needles, but it is better to start with the simplest knitting technique - multi-colored stripes.
Knitting for beginners
Additional information and tips:
- Alternating knit and purl stitches allows you to achieve a three-dimensional pattern.
- A secret technique for beginning craftsmen is embroidery. If you can’t knit a beautiful ornament with knitting needles, then you can resort to embroidery on top of an already knitted surface.
- A little secret for determining the size of the knitting needles: lightly twist the threads in half - the ideal thickness of the knitting needles is the thickness of the twisted threads.
Beginners should start with simple checkered or striped patterns.
To make a simple two-color potholder, you need to cast on 11 loops and knit 20 rows of each color, alternately with the front and back sides. (25, 26)
Potholders in the form of multi-colored squares.