Big choice
Size, color, shape, functionality, the presence of drawers and a changing table - all this and much more is taken into account in sleeping places for children. They are divided into several types:
Classic cribs remain the most popular. Universal in size, design and purpose, they fit into any interior, and therefore do not lose popularity.
A cradle for newborns is a cozy nest in which the baby will sleep for the first 6 months of his life.
The rocking bed is a comfortable and durable model. It has a beautiful design, will fit harmoniously into a child's room and will serve the baby reliably and for a long time as a comfortable sleeping place.
Cots and playpens are designed for newborns. The level of safety and comfort in them is at the highest level.
A crib with a pendulum system, unlike other models, is equipped with a mechanism for rocking the child to sleep. This function will be of great help to the parents of the newborn in the first months of his life.
“Classic” involves folding down the sides and adjusting the height of the bottom. The option is the most popular due to its relative affordability.
Detailed instructions on how to assemble a crib
In this article I want to talk about the existing design options for cribs, their features and how to assemble them correctly.
Types of crib designs
Buying a crib is a serious matter. Before purchasing, you should consider down to the smallest detail which one will suit your child better than the others and will become a harmonious piece of furniture.
There are several main types of cribs.
Cradle
The cradle is easy to move from one place to another due to its light weight.
The cradle is suitable for babies up to six months old
This model has a number of advantages:
- cozy, compact sleeping place;
- simple, mobile device that can be easily moved from one place to another;
- has a motion sickness function , which calms the baby and helps him fall asleep faster.
Among the disadvantages are the following:
- High price;
- Not all children like limited space;
- Short period of use , maximum – 6 months.
Classical
Classic model (hinged) - usually made of wood or metal.
The classic version is used until the child reaches three years of age
Has a number of advantages:
- are standard, so there are no problems with the selection of mattresses, blankets, bed linen;
- Long service life , up to three years;
- The bed can be rocked thanks to the runners;
- Affordable price;
- The simplicity of the bed design ensures that they rarely break down.
Transformer
“Transformer” is a multifunctional model that easily transforms from a small crib for a baby into a full-fledged sleeping place for an adult child 6-7 years old.
It can take the form of a desk, which is very convenient for a student. And for babies there is a changing table. There is also a drawer for linen.
The transformer combines a wardrobe, a table for work and a sleeping place
Among the advantages it is worth noting:
- Multifunctionality . Availability of additional functions: linen box, changing table, chest of drawers;
- Stylish design of the structure (there are even wooden versions with round and oval shapes);
- It is possible to purchase a transforming option with a motion sickness function;
- Long term of use (up to 12 years).
- High price;
- Suitable only in rooms with a large area, since the design has impressive dimensions;
- The bed itself is not wide enough (60 cm wide), which is clearly not enough for an adult child.
Manege
The playpen is a lightweight structure with sides on the sides. At the same time it is both a sleeping place and a playground.
The playpen can be for both infants and children up to 3 years old
The advantages of the playpen include:
- Simplicity and lightness of design;
- Mobility : the bed can be easily taken to any place, for example, on vacation;
- It's easy to keep an eye on your baby thanks to the transparent plastic sides;
- Attractive design with brightness.
- Single-level cribs are not high enough for mother and baby;
- Options with two levels have a side that is too low, so the child can easily get out of the playpen;
- The structure is not stable . There may be a risk of the structure overturning;
- No motion sickness function;
- It is difficult for the baby to stand on his feet due to the lack of slats.
Buy on credit (7)
| Company | Offer |
| Alfa-Bank credit card | application for a card |
Interest-free period - up to 100 days. Issuing a credit card is free
Loan amount - up to 300,000 rubles. Interest-free period - up to 55 days!
Up to 12 months - installment period for purchases from partners; 0% — interest on purchases in installments; Free – card registration and maintenance; 40,000 partner stores.
Up to 10% on account balance; Free cash withdrawal from any ATM in the world; Cashback up to 30% for purchases on special offers; For citizens of any country.
Cash loan to Sovcombank: Loan amount - from 5,000 to 100,000 rubles; Loan term - 12 months; Interest rate - from 12% per annum; Age - from 35 to 85 years.
LocoBank Consumer Loans: Loan up to 5,000,000 rubles; Rate from 9.4%; Duration up to 7 years;
Varieties
Different types of cribs differ from each other, first of all, in reliability and service life. You should take a responsible approach to choosing a crib so that it lasts as long as possible and does not endanger your children.
Cradle
A cradle is ideal for a newborn baby. Your baby will sleep more comfortably in a small cradle than in a large bed. This crib takes up little space and can be moved freely around the room. However, it is worth remembering that the cradle is suitable for a baby no older than six months, and when he begins to stand on his feet, the child will need a larger crib. Many parents use a stroller cradle instead of a cradle. The shape of the cradle resembles a mother's tummy, so a recently born baby will sleep peacefully and pleasantly in such a crib.
Spacious structures are not so well suited for a baby - it is still unusual and uncomfortable for him to be in them.
Among other things, the cradle can be easily placed right next to the parents’ bed so that the mother can hear the baby’s call at any time. In addition, thanks to its lightness, the cradle can be moved anywhere at any time without disturbing the baby’s sleep.
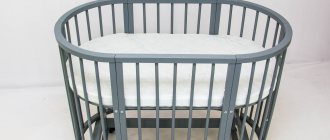
Classical
The classic design of a baby crib will fit into any room design. Such cribs are usually quite simple and functional. The sleeping area is fenced on all sides with lattice walls, one of which can be dismantled. Most classic cribs are designed for children under three years of age.
Transformer
The advantage of transformers is the ability to adjust the size of the bed depending on the height of the child. Therefore, this bed has an increased service life. Transformers also have shelves for diapers and bottles. Thanks to the sides, the baby will not fall out of the bed while sleeping. Most models have a built-in mattress and storage cabinets.
See also
Instructions on how to assemble a sofa and types of furniture with your own hands
The disadvantage of such models is their significant weight, which creates inconvenience when moving. In addition, their width cannot be changed - increasing the space is only possible along the length. The transformers have small shelves, so you won’t be able to put absolutely all of your baby’s things in them.
Manege
The playpen is a special folding structure. The playpens are suitable for children from six months to three years. As a rule, playpens are made of lightweight materials such as plastic, metal, fabric, due to which they are light in weight and can be moved from place to place without problems. Playpen models are equipped with a protective net that will protect the baby from midges and mosquitoes.
A playpen is a lightweight type of bed, so it is quite easy to move it from place to place. It is usually equipped with wheels for moving around the house. It will be easy for a young mother to move the crib with her baby without outside help, without distracting the child from sleep.
The playpen has a folding design, it can be easily folded so that it does not interfere with cleaning. The bottom of the structure is a stretched fabric, so you don’t have to purchase a separate mattress for it. The surface of the fabric is smooth and soft, which will have a beneficial effect on the child’s posture. Caring for the crib is very simple, since the fabric elements can be easily removed and replaced, and can be washed at any time.
Malyutka mechanism
The Malyutka mechanism is simple and easy to operate and has one swing speed, which can be set without remote control. In order to start the mechanism you need to rock the crib slightly. It also stops manually. Suitable for most cribs that have a pendulum mechanism.
Installation is easy and does not require any special skills. A magnet is fixed on the moving part, and a drive unit is installed on the stationary part of the crib. The device operates from the network.
Assembly diagram for a crib with a pendulum for a newborn
Our technical description of the assembly is suitable for many models of cribs. When assembling a crib strictly according to the manufacturer’s diagram, you may not notice your own mistakes due to design features when connecting parts. We will try to draw your attention to these points. The material from which cribs for newborns are made must comply with environmental standards; solid wood is often used, less often MDF and chipboard. Depending on the characteristics of the material, special furniture fittings are used.
The system of pendulum mechanisms uses four blocks, which are installed for longitudinal or transverse movement of the crib relative to the base. The block is an elongated part with two bearings at the edges. One bearing is connected to the crib frame, the other to the base.
When assembled, when you press the body of the crib, the mechanism of the blocks begins to move according to a certain amplitude, and the crib begins to swing. At the base of the crib, depending on the configuration, there is a drawer for linen. Wheels are installed on the box or the box slides along guides.
What tools are needed to assemble a crib with a pendulum mechanism?
This is a screwdriver with a set of bits, Phillips and hex bits. Hex key. Hammer. Screwdriver Set.
Assembly step by step:
- 1. Sequence of actions.
- 2. Connection accuracy.
- 3. The force applied in assembling the structural unit.
Assembling the crib body
We connect the back wall “1” of the crib with the sides “3”. In the figure, the number “8” marks the confirmation, which must be tightened using a hex key. There are two such connections in each sidewall; the confirmat connects the sidewall with the horizontal frame of the rear wall. You should not immediately delay confirmations for subsequent actions.
We install the bottom of the crib “4”. The installation height can vary depending on the age of the child; for this purpose, holes are provided in the sides. The slatted base is attached to the sides of the bed, the sleeve “12” is inserted into the hole in the frame and tightened with a screw through the sidewall. Next, we attract the untwisted confirmations for the back wall.
Having slightly unscrewed the front screws on the slatted base, insert the front wall of the crib “1” and tighten it with the sides. Re-tighten the screws on the slatted base.
We are installing the lifting bar “5”. We lower the spring into the plastic cylinder, place the button on the spring and clamp it, put these parts into the front hole of the bar on both sides. There are two through holes at the end of the plank along the edges; insert the pins into them. The pin passes through the cylinder and the button, thereby fixing the part; the recess on the pins should be at the top.
We place the lifting bar structure on the upper frame of the front wall of the crib. The lower part of the studs should plunge to a certain depth into the holes in the upper rail of the front wall. A fastening element is placed on the top of the stud, which is tightened with a screw through the sidewall.
Now the lifting bar moves along the studs and is fixed in the recess on the stud. To remove it from the lock, you need to press the button. The color illustration shows studs with cylinders and a fastening element. Attention, the cylinders must be installed in the bar initially!
Assembling the crib base
If there is a drawer on guides, install the runners on the inner sides. Longitudinal strips are attached to the sidewalls. A sheet of hardboard is placed on top and fixed. The legs are stuffed onto the bottom of the sides of the base.
Connecting the crib to the base, installing the pendulum mechanism
The fastening screw is inserted into the bearing from the side of the larger recess, thereby the screw head is completely immersed in the hole. A spacer tube is placed on the reverse side of the screw thread. The screw is screwed into the mounting sleeve on the base and leg of the crib. The spacer tube is adjacent to the inner ring of the bearing in the pendulum mechanism on one side, and on the other to the bed part.
When rocking the bed, the pendulum mechanism should move smoothly, the screw should not unwind, and the blocks should move without obstacles. There is a hole on the pendulum mechanism block for fixing the crib; a special screw is inserted into the hole in the block, which prevents the crib from swinging.
Assembling the box
In the picture, the front and back panel of the drawer are tightened through the side panels. The bottom of the box is nailed and the wheels are installed.
The crib with the pendulum mechanism is assembled.
Additionally, we check the tension of the units and the movement of the bearings in the blocks. If for some reason you are not ready to assemble the crib yourself, we will be happy to help – ]assembly of a crib[/anchor] from our organization. Our technical description of the assembly is suitable for many models of cribs. When assembling a crib strictly according to the manufacturer’s diagram, you may not notice your own mistakes due to design features when connecting parts. We will try to draw your attention to these points. 2018-03-11T00:06:02+04:00, Furniture Service Masters
Contraindications and side effects
Visana is made from natural ingredients, so it has few contraindications. The product is prohibited in the following cases:
- acute injury to the hearing organ;
- otitis in the acute phase with fever, suppuration;
- individual intolerance to components;
- severe diseases of the heart, kidneys, liver;
- age under 18 years;
- recent stroke;
- pregnancy and lactation;
- oncopathology;
- as an alternative to surgery.
Another contraindication for Visan is proven central deafness. That is, when the brain structures responsible for the perception and processing of sound vibrations are damaged.
The drug is well tolerated, no side effects were identified in clinical trials. But the manufacturer suggests that short-term disruption of bowel movements and allergic reactions are possible. They go away on their own and do not require discontinuation of the drug Visana.
Let's look at how to properly assemble a crib using a pendulum mechanism
- Connect the back and sides using screws,
- Attach the supporting part for the mattress to the guides located on the side walls,
- Assemble the pendulum - install guides between the upper and lower back of the pendulum; install the bottom between the upper guides; fix the lower back of the pendulum.
- Assemble the box (similar to assembling a box),
- Turn the structure over to install the mechanism itself,
- Insert all additional drawers and secure the pendulum with screws,
- Close all screws with plugs.
Important! You cannot confuse the back and front walls of the structure, they are almost the same, but the pendulum works
How to make a pendulum for a crib with your own hands?
Let's figure out how to make a pendulum for a crib with your own hands. For these purposes you will need:
Installation diagram of the pendulum mechanism.
- bearings, the outer diametrical size of which corresponds to 3.5 cm. The required quantity is 8 pieces;
- metal bushings with 6 threads. You will also need 8 of them. You can buy these at any market that specializes in selling furniture fittings;
- countersunk head screws. With their help the pendulum will be attached. Need 8 pieces;
- strips – 4 pieces. Elements of parquet made of oak (planks) are suitable;
- washers in the amount of 8 pieces. The most appropriate choice would be to use plastic copies. They will be needed in order to avoid friction of the bed legs when in contact with the supporting structure;
- In addition to purchased ready-made materials, you will need metal bushings (8 pieces), which should be pressed quite tightly into the bearings, or rather into their inner hole. Such bushings are made only to order.
What else could you need? For the crib, it will be necessary to make a special box (frame), the design of which will serve as the basis for hanging the crib.
And now about the prices. The approximate cost of one bearing is 35-45 rubles, factory-made bushings from 6 to 12 rubles, but the price of a custom-made bushing can reach 50 rubles or more. It all depends on the master’s requests. There is, of course, the option of placing the crib using ropes, but this is not entirely safe.
There is a possibility that the ropes may fray during the rocking process. And yet, using ropes as a hanging material can give significant play when swinging, which means that your crib with a pendulum will hit the supporting frame.