When a crib for a newborn has already been purchased, all that remains is to arrange it. Many people will think that this is quite easy to do. Yes, it's not difficult. But you should remember that everything needs to be done thoughtfully. After all, you need your child to not only sleep here, but also be protected from:
- room dust;
- drafts;
- mosquitoes and flying insects;
- direct sunlight;
- other irritants.
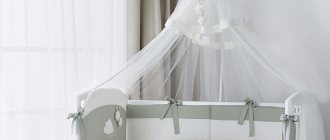
To do this, attach a canopy to the crib. It is made of lightweight material and mesh that protect babies while allowing plenty of fresh air into the crib. Despite the fact that many parents are in no hurry to buy this device, it is still quite useful.
If you don’t want to spend money on a ready-made version, you can sew it yourself, which is not difficult. You will only have to pay for the materials. Mounting hardware for this product is sold separately.
Having decided on the design and quality of the product, parents will have to figure out how to attach the canopy to the crib. This is a more difficult task. But you can also cope with it, guided by well-written instructions.
Photo from the site: Sosedi-online.ru
Assembly Recommendations
- Before purchasing a curtain holder for a playpen, be sure to read the instructions for assembling it.
- Choose a ceiling canopy only if you are confident in your abilities and skills. This is undoubtedly a beautiful and reliable option, because the folds of such a canopy will completely cover the playpen.
- If you doubt the first option, purchase a simpler tripod that is screwed to the side of the crib. Every young dad can easily assemble and disassemble such a structure without any problems. At your discretion, it can be installed on any of the four backrests of the playpen.
There are many options for mounting protective children's curtains: the canopy is tied to the holder with ribbons, thrown over the fastening ring and secured with special elastic bands. Children's goods stores offer a wide range of tripods and frames. You can mount and hang a children's canopy by following the pictures in the included instructions or by watching a video on the Internet.
Canopy beds in the interior: gallery of the best ideas
Beautiful and light tulle curtains are ideal for a children's room. The canopy can become the highlight of the interior, and the rest of the design will “dance” from this point. Original ideas in interior design in a small gallery from professional interior artists.
Colors and decor of a children's canopy
A small child spends most of his time in his crib, so it is so important that he is surrounded by harmony, beauty and comfort there. If there is a canopy, it is this object that the baby will most often observe, and children react very sensitively to any visual stimuli
A cape in soft pastel shades will help ensure your baby has a restful sleep and a good mood during the day. Traditionally, for girls they choose a veil in soft pink, peach, and lilac tones, for boys - blue and cool green tones. White, light yellow, light green, orange are universal.
You can add a variety of colors by using fabric with an ombre effect, a rainbow, smoothly grading colors as a canopy, as well as combining plain and printed elements.
To decorate the flowing canopy, you can use all kinds of bows, frills, lace, and ribbons. Artificial flowers, butterflies, soft hearts, stars or felt figures will add exclusivity to the canopy. A tasteful lambrequin would also be an interesting addition.
To entertain the baby, hang a musical carousel with toys (mobile) above the crib inside the canopy, and on the outside of the veil, an LED garland in the warm white spectrum would not hurt - scattering through the fabric, the flickering point light will look very cozy and soft.
Assembly and installation
Wall design
First you need to choose a place to mount a durable tripod. It is selected taking into account the location of the bed relative to the wall. Next, you should choose a method for attaching the canopy to the tripod (with a solid or detachable ring).
- In the first option, the canopy will be attached to the tripod thanks to special Velcro and ribbons, and the mounting location itself can be hidden behind the frills.
- Option with a detachable ring. The ring rod must be threaded into a special sleeve provided in the canopy. You will need to remove the loop from the tripod, then separate its edges. They are pulled out into a sleeve, and so the material is attached to a loop, forming beautiful folds. The edges of the loop that remain outside are connected to each other with an elastic band and they are lowered into the tripod.
Next, all parts of the base are fastened and carefully corrected. The entire installation is attached to the headboard with special screws. The screws are hidden under decorative plugs. You should definitely check the resulting device to see how durable it is, so that the product does not suddenly fall on the sleeping person if he suddenly accidentally touches the edge of the curtain with his hand in his sleep. One of the most interesting options for attaching a canopy is the use of forged products that are attached to the wall. The forged product in the form of a semicircle is carefully mounted into the wall, and the canopy itself is attached to it using ties. The fasteners must be as reliable as possible so that the large or small owner of the room cannot tear the device out of the wall.
Ceiling option
Step-by-step mounting instructions are as follows.
- First you need to clear the perimeter around the crib.
- Mark the place on the ceiling where the cornice will be installed. For this purpose, you can choose a metal strip that will be attached to the ceiling with self-tapping screws.
- Then you can attach the material to the cornice using ribbons and Velcro.
- The attachment point is hidden with another piece of drapery or a special lambrequin. The length of the canopy can be adjusted using stylish clamping elements or beautiful bows.
The method of attaching the product to the ceiling is suitable if the latter is durable. You can mount an improvised cornice on a concrete ceiling. But it is better not to use this option if you have plasterboard ceilings. The baby may accidentally pull on the canopy, hang on it, accidentally get caught on it, or simply touch it. The base of the cornice with part of the ceiling may fall, which can injure the baby and disrupt the appearance of the room.
Location methods and options
Before attaching the canopy to the crib, you need to choose the appropriate installation method. The determining factor in choosing a holder is the location of the bed relative to the walls and furniture.
First, you need to decide on the appropriate method of attaching the canopy.
Stationary
This type of fastening is optimal if there are no plans to rearrange the crib before the child grows out of the crib. The holder can be fixed to:
- side of the crib;
- headboard;
- ceiling;
- wall of the room;
- semi.
Stationary mounts can be attached to the crib itself. To mount it on the ceiling, you need to decide on the permanent location of the bed and, based on this, outline the boundaries of the holder. The fasteners are screwed according to the mark.
To attach the canopy to the ceiling, you need to accurately determine the exact location of the crib.
If there is no fastener, you can use a regular hoop. When using a hoop, they are fixed using a ceiling hook used for attaching chandeliers. Using tapes and Velcro, selected to match the fabric, the material is secured to the circle. If a bar is used, it can be placed either along the edge of the berth, or along, in the center. The fabric is attached using special hooks, evenly distributed along the length of the bed. It is worth taking extra material, as it should cover the sides of the crib. Take extra material so that it covers the sides of the bed. After the child grows up, the mount can be used as a decorative item. For example, for boys, a canopy can be converted into a sail, and for girls, into an airy resting place, complemented by a carpet and pillows. An old canopy can be used to decorate a room for an older child. When the canopy is mounted on the wall, it also acquires a decorative function, especially if the material fits into the interior design of the room
When choosing a holder, special attention is paid to the strength and reliability of the fastening. The main requirement for any fastening is reliability
Mobile
This mount looks like a tripod with a ring. It is often attached to the wall of the crib by putting the fabric on a ring. The holder can be made of metal or plastic and is attached using brackets, which makes it possible to adjust the height.
A portable mount is a tripod with a special ring.
There should be a small distance between the tripod and the floor. You can attach the mobile holder in the center of the side of the crib or at the head of the bed. It depends on the style of the room and personal wishes. After securing the holder, you need to pull the canopy onto the ring. This is done using special pockets or tapes and Velcro. If they are absent, the fabric is simply sewn on. Next, you should distribute the folds of the fabric evenly and in such a way that they do not interfere with access to the child.
The mount is usually installed on the wall or at the head of the bed.
On a stand
In this case, the holder takes the form of a free-standing structure consisting of a height-adjustable holder, a ring and a flat leg. The advantage of this installation method is the ability to transport the canopy outside the crib, for example, on a visit or outside, which allows you to maintain a familiar environment for the child. It also does not require installation into walls or ceilings, which means it does not leave any marks.
This holder looks like a free-standing structure. The disadvantage of this design is considered to be relatively low weight and, therefore, instability. Therefore, if there are animals in the house, this type of holder should be abandoned.
How to choose fabric for a canopy for a crib
The more environmentally friendly and natural the material, the better. You shouldn’t go to extremes and buy heavy velor fabrics; of course, they look impressive, but they are absolutely not suitable for our purposes. First of all, decide whether it will be a purely decorative canopy covering part of the bed, or whether you want to completely hide the sleeping area.
A comment
Irina Rosenstein
Designer of the studio "Cozy House"
Ask a Question
“Choose fabric based on two important principles: oxygen permeability and low electrostaticity. Fleecy fabrics must be removed immediately; they will accumulate dust.
Another point is the number of layers. Most often, parents prefer models with two types of fabric: a thinner one for daytime sleep and protection from mosquitoes and midges, and a night blanket made of denser fabric.
For the lower, thinner layer, tulle, veil, organza, tulle and chiffon are most often used. For external covering: silk, satin, chintz, linen and cotton
Do it yourself
Despite the availability of holders and their low cost, many parents decide to independently arrange a sleeping place for their children.
To do this, you will need a hollow tube (preferably white or chrome) and a rigid metal cord that holds its shape. It is inserted into the drawstring and bent. Then the top of the tube is determined and the connected tendrils of the cord are inserted into it. A homemade canopy frame is also suitable for an adult bed.
A canopy can be made from a camera tripod, an old floor lamp, or an LED ring light.
Purchasing a mounting bracket
When arranging a children's room, you need to decide on the method of attaching the canopy.
The most common options are:
- stationary mount (on the ceiling or on the wall above the bed);
- mobile design.
The first method is reliable, but at the same time not entirely practical. This method should be used if the crib will have a permanent place for a long time. However, we must not forget that when moving the crib, holes will remain in the mounting points, spoiling the interior of the room. Also, this option cannot be attached to a suspended or plasterboard ceiling. A child can pull or hang on it, which will lead to damage to the structure. In such a situation, you will have to mount the model on the wall or purchase a mobile holder.
The positive side of a stationary mount is its strength and reliability. It is difficult to bend, swing, or drop. In addition, with its help you can create a fairy-tale atmosphere for your baby by building a house or a balloon, a princess castle for a girl or a ship for a boy.
The most common method is a hanging bracket. It is a plastic or metal structure made of a ring or oval, fixed to a tripod (pipe) with screws.
The advantages of a portable design are: the lightness of the tripod itself, ease of mounting and mobility, as well as the ability to fix it at the desired height.
The downside of such a bracket is that it can fall if constantly moved. And as soon as the baby can reach the canvas, he will certainly want to pull it towards himself. In addition to the child himself, the curtain can be caught and dropped by pets. The fall of the canopy is unlikely to be dangerous, but in order not to cause severe fright, parents need to check the strength of the structure and monitor the baby’s actions.
A good way to make the structure more durable is to strengthen the base of the canopy with a self-tapping screw. To do this, you need to drill holes in one of the side surfaces of the bed.
Holders
This is an element consisting of a tripod (adjustable tube) and a ring on which, in fact, the canopy is held. The strength and reliability of the entire structure depends on it, so it is better not to choose cheap plastic elements - they are not very durable and break quickly.
The loop can be solid or separable. So, if it does not come apart, then the fabric is tied with ties - usually in this case Velcro is used, you can also take elegant ribbons and tie them with bows. Sometimes the ties are included in the kit, sometimes they are not, then you sew them on yourself. The ring can be disguised using various decorative elements. Sometimes they create entire fairy-tale decorations with hanging toys.
If the ring is separated, then the upper part of the canopy fabric is attached to its “antennae” - it has compartments or pockets. Then the ring is attached to a tripod tube and its ends are connected. After this, the holder is attached to the arena, which is what the screws are for. Plugs cover the mounting points.
The element that will hold the canopy can be made from scrap materials. Thick wire can be used as such an element. It must be twisted into a loop, that is, given a round shape, and then secured with a hook to the canopy wire at the headboard.
Canopy location
There are 3 main types of structure installation.
Around the entire perimeter of the crib
The most effective mounting option. It is usually called royal. The canopy fixed in this way looks lush and covers the crib completely. A significant drawback of this arrangement is the abundance of fasteners. Older children develop an interest in everything that surrounds them. There is a risk that a child may accidentally drop the structure while reaching for the holder.
The canopy can be secured around the entire perimeter of the crib.
At the head of the bed
A universal solution not only for the first months of life, but also later. With this arrangement, the fabric does not cover the entire cradle, so enough air flows to the baby. In addition, he can freely explore the world around him while lying in his crib.
A canopy attached to the headboard is the most popular option.
In the middle
This option is well suited for parents whose child sleeps a lot. It creates the most complete protection against external factors. Sleep becomes deep and comfortable. However, the room must be constantly ventilated to make it easier for the baby to breathe under the fabric cover.
You can install a canopy in the middle above the child’s sleeping place.
Types, purpose of canopies and features of their fastening
Kinds:
- On a pipe with a loop
- Wall mounted
- Ceiling
Purpose of the canopy:
- Protects baby from direct sunlight
- Allows him to sleep more soundly
- The sleeping place protects from insects
- Creates the illusion of limited space
All this makes the baby's stay in the crib more comfortable and safe. Performs a purely decorative function to decorate the room.
Canopy for a boy
Tips for choosing
The combination with the interior is one of the features that you should pay attention to when choosing a canopy. Here are some tips:
- Heavy material - velvet, tapestry, jacquard - is quite a popular material to use as a canopy. It adds luxury and aristocracy to the image of a children's bedroom.
- Satin and silk are an interesting option in combination with gilded furniture and bedroom paraphernalia.
- Oriental style - ideal in combination with flounces and tassels.
- High-tech - complemented by delicate curtains on the eaves.
- Duplicate the design of the protective fabric in other room accessories: curtains, bed linen, capes, bedspreads. This will create the necessary charming effect and sophistication of the interior.
- If you are trying to maintain restraint in the selection of material for the canopy, then the best variation would be shades of cool colors. For romance and sensuality, choose scarlet, purple or pink tones. You can also take a closer look at alternative golden options, which will always be in fashion.
- Translucent lightweight fabric allows you to visually expand the space and add lightness to the image of the room.
- A canopy is convenient for rooms with high ceilings: visually the ceiling is reduced, and people who previously felt discomfort in this room become calm and feel comfortable.
- For small rooms, a canopy can muffle extraneous sounds coming from neighboring rooms, but it must be made of dense natural fabric.
- When choosing a fabric component for a canopy, know that the final length needs to be increased by 15-20 cm. These centimeters are necessary for attaching the fabric.
- Do not forget that the material must be washed frequently, as it accumulates dust. The optimal choice would be organza, tulle and chintz. These materials are easy to care for: easy to wash, dry quickly and there is no need to iron. And materials such as tapestry and velvet require special care.
- Short canopies are a great choice for those who want to use them as a decorative tool, while for protective purposes, medium-length canopies are the best option.
- For warm rooms, materials such as tulle, organza or chintz are quite suitable, and for cold rooms, velvet or tapestry may be needed.
Users have different opinions about the presence of protective fibers in a children's room. For example, the following positions stand out from the positive aspects:
- The room receives an atmosphere of comfort and warmth. It’s pleasant to be in such a room and even lifts your spirits.
- The baby's crib becomes extraordinarily beautiful.
- The baby really becomes calmer and is less capricious.
- Protects from drafts, bright rays of the sun and mosquitoes.
Of the negative statements, it is worth noting the following points:
A canopy helps create a special cozy atmosphere, which is why it is often used in the decor of a children's room.
To learn how to make a canopy with your own hands, see the following videos.
All rights reserved, 14+
__________________________________________________
Beautiful protection
The technique of arranging a sleeping place with a light cape attached to the ceiling came to Europe from Ancient Persia. At some point, a person realized that on a hot summer night it was not very convenient and pleasant to protect himself from insects by covering the body directly with a cloth. This is how the first canopy was invented.
For centuries, this practical tool was used by both ordinary people and members of the nobility. At the same time, of course, the products placed in the royal bedchambers were distinguished by their beauty and luxury.
A canopy is one of those things that, in addition to an aesthetic component, also contains a purely functional component. Such things never go out of furniture fashion, they can be transformed, the demand for them may increase or decrease, but they have been and will be. Today, this interior element is returning to widespread use. However, it is intended primarily for cribs.
How to hang a canopy on a crib on a holder: instructions, design ideas
Nowadays there are a huge number of similar products on sale. Initially, you should decide how you want to mount the canopy and what kind of ceiling you have in your house. The most optimal models are canopies, which are sold with fastenings. They can also be purchased separately. They resemble a large diameter pipe with holes at the top.
The pipe itself is attached to the wall of the crib, and a canopy is placed on top of it, or rather on a loop.
Please note that it is best to choose cribs in which the fastenings are on the longest side, that is, in length. Many crib models have a hole approximately in the middle
This option will help to completely cover the entire area of the crib.
Instructions:
- The existing structure, which consists of a pipe, must be screwed onto the bed wall using a screw
- Place a loop on top of it. There are several features and designs of such a loop.
- It can be detachable and connected in the middle with a flexible elastic band. In this case, the canopy is simply inserted onto a thick wire, like a pin
- After this, everything is held together in the center with a soft tube, an elastic band
- Can also be hung with strings. In this case, the canopy is pre-tightened in the center with a ribbon in order to create beautiful folds and narrow the product upward
- After this, you need to check how firmly the canopy is attached, whether the loop can fall out of the tube if a child accidentally pulls on it
- Some well-known companies offer canopies, the loops of which are screwed to the pipe and there is no possibility of removing it from the mounting tube
- Therefore, the design is quite reliable
Canopy standClassic holder with loop
There are other canopies that are attached directly to the narrow part of the crib. In this case, it has more of a decorative purpose than a functional one. The most interesting thing is that such a structure can be built with your own hands from thick wire
Please note that pieces of wire should not stick out. So that if the child moves around the crib, he does not get hurt
Scheme for attaching a canopy to a loopScheme for attaching a canopyAttaching a canopy to a holderAttaching a canopy to a holderAttaching a canopy to a holderAttaching a canopy to a holderHow to decorate the place where a canopy is attached?How to decorate the place where a canopy is attached?
Choosing a style
Why is it important to choose a canopy style? Don’t think that they are all the same and that they are all equally convenient to use. Not really. There are a lot of styles
It is clear that each has its pros and cons, but you need one that will be convenient for you. The most important thing is that the fabric does not constantly move under your hands. There should be nothing stopping you from putting your baby in the crib and then taking it from there.
There are a lot of styles. It is clear that each has its pros and cons, but you need one that will be convenient for you. The most important thing is that the fabric does not constantly move under your hands. There should be nothing stopping you from putting your baby in the crib and then picking it up from there.
Also pay attention to the length of the free edge. It should reach the legs of the crib. This is necessary so that the product can perform its role well, that is, not allow midges and dust into the crib
This is necessary so that the product can perform its role well, that is, not allow midges and dust into the crib.
You can also match the color of the canopy to the design of your room. It's good if it matches other furniture. This way you will make the nursery very cozy.
If the child’s room is very sunny, then you can choose a canopy made of medium-strength fabric. It will protect the baby from scorching rays. In moderate lighting, it is better to use a product made of lightweight material.
Installation
Having chosen the mounting method, you need to decide how the canopy will be positioned. The placement of the canopy depends on the goals you are pursuing. There are three ways to properly attach a canopy.
- First option: on the wide side of the bed. Thus, the entire perimeter of the bed is covered with linen, protecting the baby from external irritants. In addition, this arrangement creates comfort and a fabulous atmosphere in the children's room. It should be noted that arrangement on the wide side of the bed is more suitable for newborn children.
- Second option: from the side of the child’s head. In this case, it must be taken into account that the canopy partially covers the crib, and its protection will only extend to one side.
- Third option: around the perimeter of the bed. To attach the canopy in this way, use a frame base. It can be either a continuation of the bed or a separate structure on which four sheets are hung. This is how the bedrooms of older children and adults are usually arranged.
The mobile canopy mount is quite easy to assemble. It consists of the following elements.
- A platform or curved tube that serves as a solid base.
- Straight tubes connected to each other. With their help you can adjust the height of the structure.
- A bended tube that serves as the supporting part of a tripod.
- An oval or circle located on the top. The canvas itself is hung on this element.
Assembling the structure will not take much time; it is an easy and straightforward process. First, we connect all the parts to each other: straight tubes must be placed in the holes of the platform, then combine the upper part of the structure and the bended tube.
To install the canopy, just follow the simple instructions.
- Assemble the parts into a single structure (as described above).
- Choose a place to attach the stick, taking into account the location of the bed in the room. It is preferable to install on the side closest to the wall.
- Select the desired tripod height.
- Screw the fasteners securely to the bed wall.
- Place the fabric on the ring. For a purchased canopy, instructions are usually included, following which you can complete the design without any problems. If the canopy is sewn by hand, use the following methods: sew special Velcro fasteners to the canopy; use tape or an elastic band to secure the fabric, throwing the fabric over a circle or oval of fastening; Sew ribbons or loops to the canopy, into which a circle or oval is subsequently threaded. It must first be opened.
- Test the fasteners for strength. It is necessary to make sure that the structure will not bend or break.
- It is good to straighten the fabric so that the canopy looks neat and harmonious in the room, without creating obstacles to access to the child.
When using the canopy, remember to keep it clean. It is necessary to wipe off dust on the structure itself in a timely manner, as well as to carry out timely washing of the fabric. Such simple recommendations will allow this piece of furniture to last as long as possible and bring benefit to the baby, joy and aesthetic pleasure to the parents.
To learn how to sew a canopy with your own hands, watch the following video.
Fixation
In this part of the article we have prepared for you instructions on how to assemble a canopy.
Bed attachment
In the variation, when the canopy and the baby’s crib are one, the fabric is mounted on a tripod. And to do this, you first need to install it.
This device is the following instrument: its lower part is straight, and its upper part is a curved aluminum tube with a loop made of the same material. The loop is intended for fastening fabric.
We decide on the choice of installation location. The long side is the best option, since in this case the canopy will be distributed evenly. If you do this at the head of the bed, it will turn out that the baby will be only partially covered.
The height of the canopy can be adjusted when attaching the bottom of the tripod to the bed.
A sewn canopy has drawstrings that are designed to allow the fabric to be pulled over. The antennae of the loop are inserted into them. Usually there are two of them and they are located at a certain distance from each other. Having performed the simple operation of making a loop in the drawstring, we get the incredible beauty of a flowing canopy. Now all this needs to be put on the holder, and attached to the crib body with a screw.
The following video shows how to attach this type of canopy to a crib.
Ceiling mount
Before you begin attaching the canopy to the ceiling, you must decide on the location of the bed. This shouldn't change anytime soon.
The first thing to do is make a mark on the ceiling to indicate the location of the cornice. A cornice is a metal strip attached with self-tapping screws to a marked point on the ceiling. The fabric is sewn to it or you can attach it with ribbons. To add decor to this fastening device, you can add it.
With this arrangement, the canopy will go down, thereby looking like the roof of a house. It is clear that this is the most elegant and beautiful option for sheltering a baby from external influences, however, turning this option into reality will take much more time than when attaching a canopy to the bed.
When choosing a holder, carefully read the installation instructions: this is a rather labor-intensive undertaking.
And lastly, such a design must withstand a large load, because a child can simply pull the canopy.
8 photos
Advantages and disadvantages of such designs
Some parents unanimously say that a canopy is simply a “dust collector” that collects everything that is dangerous for the baby: dust, bacteria, pollen, and animal hair settle on it. Actually this is not true. A canopy, especially if it is made of satin fabrics, does not retain dust, but rather rolls it off itself. The closer the fabric is to natural, the better this effect is visible. In addition, almost all models of curtains can be easily removed and unlaced, so that with regular washing, no germs are scary for the baby. On the contrary, such a barrier is necessary for the baby to protect his body from foreign bacteria. For convenience, we decided to present the pros and cons in the form of a table.
| Advantages | Flaws |
| Protection from light, noise, draft, dust and insects. | Incorrectly selected fabric or the absence of a special filtration window at the highest point of the canopy can reduce the access of fresh air to the baby. |
| Ability to regulate sleep and wake patterns. | Massive structures in small rooms will not look harmonious. |
| The canopy gives the space coziness and airiness. | The child will not always be within sight. |
| The child feels protected, he has a personal, familiar space. | If care requirements are not followed, the canopy can turn into a dust accumulator. |
Functions
Of course, a canopy is needed for a crib. Its necessity is due to some unique functions:
- Helps protect against drafts, dust and bright light.
- The ubiquitous mosquitoes and other insects will not constantly bother your baby.
- Protecting the child from prying eyes and external sounds.
- Decorative component. The baby's room will be transformed and will have a completely different look.
- Confronting your child's fears. Often the baby is afraid to fall asleep alone. In this case, the canopy will come to the rescue: it will create an atmosphere around the child that will calm him down, and the baby will fall asleep soundly, feeling safe.
With the help of some devices, which we will talk about later, the cover can be put on without any problems. Looking ahead a little, we will say that you can independently make a frame for attaching the material, but you can do without it by attaching the device, or as it is called a “holder,” to the wall of the bed. Thus, it can be placed nearby so that it can be used if necessary.
Making a canopy over a crib
The second step is to choose and make your own mount for the canopy on the crib. There are several practical and convenient options.
Regardless of the mounting method, to make a canopy you will need:
- screwdriver and drill;
- fastening fittings;
- roulette;
- pencil.
For manufacturing you will need fabric, fastening fittings and tools.
The canopy can be made from a single piece of fabric: in this case, you just need to process it along the edges (overlock or sew on ribbon), and sew on loops if necessary. Another option is a canopy made of several wedges. It is suitable for attaching a hoop.
Arched canopy
This type of canopy is used on cradles and cribs for babies.
An arc (metal or wood) is attached to the wall at the head of the crib. The fabric is thrown over it and secured. The lower part of the canopy can be attached to the bottom of the crib with loops or fall freely onto it.
The fabric is hung on an arc that is attached to the wall above the bed.
Canopy on frame
Traditionally, the canopy is attached to a rigid frame, which is an extension of the bed itself. You can make it yourself from metal pipes or wooden beams. The structure is attached to the base of the bed with self-tapping screws.
The classic way to attach a canopy is to a frame.
How to make a canopy:
- take 4 identical pieces of fabric (75-100 cm wide), the length of which will be equal to the distance from the top rod to the floor;
- process the cuts, sew loops to the upper edges;
- fasten with loops to the crossbar.
Cuts of fabric are fixed to the crossbars of the frame.
Canopy on a horizontal rod
To make such a canopy, you will need to make a rod from a metal pipe. Its size should match the width of the bed or be slightly larger. Suspended mounts are made on the ceiling, and a crossbar is mounted to them.
A rod is made from a metal pipe onto which the canopy is attached.
For the canopy, use the longest piece of fabric (can be sewn from 2 parts). Its size will be equal to the distance from the bottom of the end of the bed to the crossbar on the ceiling, multiplied by 2.
The lower ends can be taped to the corners of the bed or left free.
Hoop canopy
An easy way to make a canopy is to use a hoop. You need to select the center of the fabric cut, secure it in a hoop that can be separated. Two pieces of fabric with a drawstring are strung on the outer circle.
A canopy can even be made using a hoop.
The upper edge of the material is turned up 15 cm and hemmed so that the “crown” remains protruding.
A crown is formed on the upper edge of the canopy.
The base can be decorated with ribbons, artificial flowers, and flounces made of the same material.
The base can be masked in any way.
Several strong ropes (thin ropes or twine braided in three) are tied to the free areas of the base; the ends are tied and suspended from a ceiling hook.
A piece of fabric is attached to a circle and the entire structure is suspended from the ceiling.
Canopy with birds
The canopy over the crib can be secured with 4 invisible thread hangers. In this case, the lightest fabric possible is chosen for the product.
Four mounts need to be hung from the ceiling. It can be placed directly above the corners of the crib or at a short distance from them (20-40 cm).
The main charm of such a canopy is that the attachment points will be decorated with small toys, which come with 2 rings: a thread is attached to one, and the canopy is attached to the other.
To make the birds, you will need to download or draw a pattern yourself. The toy will consist of parts:
- wing – 4 pcs., cardboard frame between parts;
- back – 2 pcs. (sewn at the top);
- belly – 1 pc.;
- beak – 2 pcs.
All details of the bird must be applied to the pattern.
You will also need 2 beads to make the eyes. The parts of the bird are sewn together. First of all, the wings; a cardboard base is inserted into them. When stitching the back, the wings and beak are inserted and secured into the seam. The belly part is not sewn on completely: you need to leave a slit to turn it inside out and stuff the toy.
You can use beads for the bird's eyes.
After the body is sewn, you need to turn the bird inside out, stuff it, and sew up the slit. Send one ring to the back, next to the wings, and place another under the beak.
A ring is sewn to the body of the bird.
A canopy is attached to the ring, which is located under the beak, and then the birds are suspended with invisible threads from the ceiling mount.
You can use ready-made toys of birds or other animals.
What is a canopy?
A canopy is a structure with flowing fabric that is installed above a seating area (bed, sofa, armchair) to provide comfort and a sense of privacy.
What is it for?
Many parents do not want to install a canopy over their child’s crib, believing that it is an impractical design that collects dust. But in reality, such a canopy turns out to be not only beautiful, but also a practical element that helps provide a cozy sleeping environment.
Its main function is not aesthetic, but protective. It is a barrier from an intrusive environment, giving the child a feeling of comfort and security. Long and dense canopies do not allow the sun's rays to disturb children's sleep and protect against drafts, creating their own microclimate in the crib. The fabric of the canopy can protect a sleeping child from annoying insects, and if there are animals in the house, it can prevent hair from getting into the crib.
Location options
The canopy can be attached in 4 ways:
- Half-frame design in the form of a crown. It is a hoop with a fabric attached to it, which is mounted to the ceiling.
- A frameless canopy that is mounted on a wall or ceiling.
- A bed with a four-poster frame in the form of a 4-corner structure with supports at the corners.
- A canopy on a stand is included with the crib or can be made separately to order. The structure can be attached to the headboard or sides of the crib.
When choosing one or another option for the location of the canopy, you need to start not only from the interior and the preferences of the parents, but also pay attention to the fact that the canopy does not interfere with the child’s sleep and the mother’s care for him.
Color solutions
The most popular shade, of course, is white. It creates the effect of lightness and weightlessness, and also does not irritate visual perception. In addition, the classic white color is very versatile, so it will harmoniously fit into any interior. This shade is in harmony with all colors and it will not be difficult to choose the shade of additional accessories to match it.
Still, manufacturers provide a wide range of different shades, including everyone’s favorite pink and blue. There are also unusual variegated color combinations.
A canopy made of fabric with a print will add originality to the interior and will be no less interesting to the child than a mobile or ruffles.
7 photos
How to attach a canopy to a crib
Perhaps many parents are frightened by this very moment - the question of safely attaching the bracket and the entire structure. The fears here are unfounded. Absolutely all models of fasteners and holders, provided they are assembled correctly, are safe for both furniture and the baby.
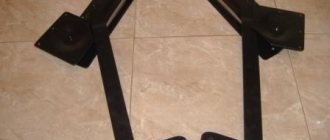
The simplest design of a canopy fastener consists of a metal hoop, a tube and a clamp, which most often looks like a vice. They are compressed by bolts on the side or side of the bed
The method of fastening primarily depends on the location of the bed.
Types of mounts for canopies on a crib
If it is a movable cradle on wheels, then, most likely, it will be suitable for fastening to the headboard. If it is a stationary bed, then it will be suitable for a canopy attached to the ceiling or wall. In the first case, a hook is attached to the ceiling, in the second, a bracket is fixed to the wall.
Attaching a canopy to a ceiling hook
Mounting a canopy on a wall using a bracket
The option we already talked about today is a canopy on a frame. The structure is similar to a cube and is assembled around the bed. It can be attached to the ceiling or stand on supports.
The fabric is attached directly to the frame, completely covering the entire bed
There are also designs of the so-called floor lamp type. When the holder is simply installed on the floor, it can be moved to any location.
An example of implementing this approach in an adult bedroom. If the canopy is not needed, it is simply removed
How to hang a crib canopy on the ceiling or mount it on a wall bracket
The mount on the bracket will forever fix the baby's sleeping place right behind this corner. Therefore, think in advance about all the pros and cons of placing the crib in this particular part of the room. But if the decision is made, then wall mounting is considered one of the most reliable. The option for fixing a canopy can be very different: from a homemade L-shaped canopy to an exquisite base crown, which itself is a headboard.
1 of 5
Mounting it to the ceiling is essentially the same as hanging a light bulb. A hook is attached to the ceiling on spacers, and a ring (sometimes also called a crown) of the head of the bed clings to it. Ceiling cornices are quite reliable, provided they are fastened well.
How to attach a crib canopy to a holder
The fabric base of the canopy is attached either to a beam, it usually protrudes in the shape of an “L”, or to an arc, it can be attached to both the wall and the side.
Can be mounted on a crown. This is a ring on which the woven fabric is attached: the method of fixation can be ribbons and ribbons, rings, as well as sewing twine or a regular elastic band for clothes.
Option for homemade ring fastening
Diagram of material fastening to the crown
This can be a frame base, when the fabric is gathered directly on the holder with a drawstring. Ceiling mounts use hinges. You can use Velcro.
A comment
Irina Rosenstein
Designer of the studio "Cozy House"
Ask a Question
“The fastening of the fabric to the holder must be such that the process of washing it does not turn into hard labor. All elements should be easy to unlace or unfasten.
Mounting location options
Canopies also differ in how they are installed.
- You can install a long canopy on a baby crib. This allows you to easily take your baby out of the playpen or put him back. The product will cover the entire playpen. This fastening method is more suitable for babies, since it protects them from the outside world as much as possible.
- By width. The product is attached to the headboard. The canopy is placed over only part of the arena. This is a lightweight version of the canopy for inquisitive and active toddlers who are already interested in what is happening outside their bedroom. This canopy looks light and elegant.
- Along the perimeter. Another mounting option for newborns. Assembly is convenient in cases where the baby has to be taken out and put down frequently. To attach the canopy around the perimeter, a frame is attached to the crib, and then the canopy itself is installed.
Assembly Tips
If you decide to install a canopy over the crib yourself, then you should take into account some useful tips from professionals that will allow you to avoid many incidents and mistakes during the work process.
- At the end of the installation of the canopy, it should be thoroughly straightened so that it neatly falls around the crib and does not wrinkle.
- If you decide to put on a canopy by attaching it to the wall, then you should proceed in the same way as in the case of the ceiling option. However, in this case, the bracket must be mounted at such a height that it is no lower than 1 meter from the side of the arena. It is necessary to follow this rule so that the child is as comfortable and comfortable as possible under the constructed shelter.
- Please note that the canopy mount should be as powerful and strong as possible. There should be no backlash or loose connections. Only then will the design be comfortable and safe for a small user.
- Canopies for cribs come in a wide variety, from long to very short. In a children's bedroom it is permissible to hang any options you like. The canopy can even fall from the ceiling to the floor, however, many parents give preference to products of medium length, since they perform their main function perfectly, but do not get in the way underfoot.
- It is recommended to additionally secure ceiling and wall brackets with screws. The use of these parts results in stronger structures.
- Place the canopy onto the holder carefully so as not to damage the fabric from which it is made.
- The color of the canopy should be selected in accordance with the palette in the interior of the room. It is not recommended to buy overly bright and colorful options, as they will interfere with the baby’s ability to quickly fall asleep.
- You should only consider the ceiling option if you are confident in your abilities, as it is quite difficult to install.
- Before purchasing the holder required for mounting the canopy, be sure to read the instructions for its assembly.
A visual demonstration of how to put a canopy on a holder is in the video below.
Design nuances for different types of furniture
Canopies are built over various pieces of furniture - single, single, double, bunk beds, sofa, house crib.
For a bunk bed
The canopy for a “two-story” structure, an attic, is usually attached to the sides of the upper tier. The drapery hides only the lower “floor”. Less common are canopies from the ceiling to the floor - then both the upper and lower bunks are covered with fabric.
Such canvases are distinguished by their tenderness, diffuse light well, but at the same time give a feeling of privacy.
For a double bed
For a double bed, a very voluminous canopy is made. Usually it is mounted on a frame that is integral with the bed. Options for a round or square ceiling cornice look good - the material seems to “flow” from the ceiling itself.
An elegant round bed with a transparent canopy looks especially gentle in the interior.
On a bed-house
A kind of “house” is obtained if you build a frame of the appropriate shape - when viewed from the end, it is pentagonal. Most often, the fabric is simply thrown over it or secured to the central crossbar. Less commonly, the upper part is sewn separately; four separate draperies are attached to its lower edge, tied with cords to the corner supports.
A canopy made of an airy veil will decorate the bedroom, but will not protect from sunlight.
The “tent” is different in that it is mounted on a round base located on top of the house. This is a solid frame, fixed to inclined posts leading to the corners of the bed, or the upper part is made suspended.
Above the sofa
The canopy, located above the sofa, is usually attached to the wall, along the long side of the folded structure. Ceiling options are used if the piece of furniture is folded forward. For modular sofas, which can be transformed in different ways, mobile mounts on folding ceiling hangers or narrow rails are suitable, where it is permissible not only to change the location of the canopy, but also the height relative to the floor level.
A well-chosen canopy decorates the bedroom and draws the eye to its central element.