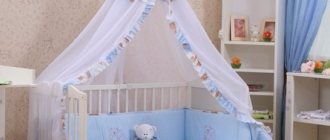
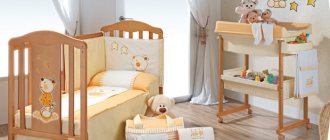
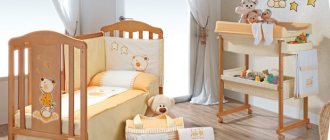
A canopy will make any bed or couch cozier and more psychologically comfortable and will allow you to create a place for privacy, which is so important for any person. Not to mention that it is an elegant decorative solution. Making a canopy with your own hands is as easy as shelling pears; for this you don’t have to buy a bed with a special frame, although it looks stylish.
We have put together master classes for you with different approaches to creating canopies: choose the one that suits you best, or focus on the materials that are at hand right now.
Canopy on a hoop
No, this canopy does not need to be embroidered - the hoop is used as a base. You will need a hoop that you can separate to remove the inner circle. Place two long curtains with a drawstring on the outer circle and close it again.
Tie two ropes to the circle with strong knots in the spaces between the curtains. Tie the ends of the ropes together, preferably even in a loop, and hang them on a hook mounted in the ceiling.
If desired, the circle can be additionally decorated with a wreath of artificial flowers or a contrasting fabric skirt. For a brighter option in an ethnic or boho style, take two pairs of curtains of different colors and patterns and add thread with wooden beads. For a canopy over a large bed, it makes sense to use a hula hoop instead of a hoop.
Materials and tools
Before you begin the process of making a canopy, you need to prepare all the necessary materials and tools.
Creating a canopy includes three stages: sewing the curtain, installing the fastener, and final design. To make the product you will need the following materials and tools:
- textile;
- finished pattern;
- measuring instruments;
- pencils or crayons;
- strong threads to match the color of the fabric;
- needles (can be sewn on a sewing machine);
- canopy holder (made independently or purchased ready-made);
- screwdriver;
- decorative elements: ribbons, frills, etc.
Hint of canopy
This option can be implemented if you have a suspended ceiling or a wooden one, for example, that is, made of material that can actually be pierced with buttons. You will need two lightweight wooden knitting needles or hard plastic tubes. Light curtains with a drawstring are put on them, and then the sticks are pinned to the ceiling with large buttons closer to the head of the bed. The curtains themselves can be left hanging freely or gathered with ribbons. The canopy turns out to be very unobtrusive and light, so it can be coordinated even with a man who considers this decoration appropriate only over the bed of a young princess.
Loose fabric
You will need two short rods. A curtain rod is also suitable - it usually already comes with fasteners. Mount the rods to the ceiling parallel to each other on either side of the bed above the headboard and throw a long piece of fabric over them. If you want to secure the canopy so that it hangs over the bed in a certain way, use pins.
Double suspension
If you have high ceilings, you may want to mount the canopy lower. In this case, take two short rods or wooden tubes, on which the fabric will hang in the manner of the previous master class. Tie ribbons to the rods at each end and then tie each of the ribbons to hooks mounted in the ceiling: it will be more secure if each of the four ribbons has its own hook.
The fabric around the rods can be stitched to help it hold better, or simply secured with discreet pins. To prevent fabric and ribbon knots from falling off the ends of the rod, install plugs. We found a tutorial where flat wooden circles were simply glued to the end of a rod, but in this case it is better to use pins rather than thread to secure the fabric itself, so that the fabric can be removed for washing. This idea can be implemented not across the bed, but along it
How to make a canopy with your own hands (for a children's or adult bed)
Bed canopies can be used for children from birth and older. Please note that if your child suffers from allergies, you should not use it in the children's room. In a children's room, a canopy not only plays the function of decoration, it protects the baby from the negative effects of the environment.
In a nursery, the presence of a canopy is especially important.
Interesting. For example, a newborn can be hidden from prying eyes. And thanks to accessories, you can create a fairy tale world for your child, where he will feel comfortable. Your teen will also be comfortable for a long time. Often parents hang curtains over the cradle. If you want to change the atmosphere in the room, just change the curtains; the texture will emphasize the fabulous atmosphere of the children's room.
A small master class on how to make a canopy with your own hands
In order to build a canopy yourself, you must follow the step-by-step instructions. To do this you will need the following tools: tape measure, pencil, drill, fasteners.
You can make a canopy with your own hands.
There is also a special holder that can be purchased at the store, or you can use a metal rod. And then, most importantly, choose the fabric for the base of the canopy so that it matches the interior of the room.
A light canopy will suit any interior.
Manufacturing process
- Mark the place where the curtain will be attached. You need to choose it according to the bed. You need to choose a space that makes you or your child feel cozy and comfortable.
- It is possible to construct a holder from canopy wire. It basically consists of a tripod and a ring. The support is installed at a certain height, which corresponds to your requirements and desires. Next, install the rings on which the curtain fabric is attached.
- Select material for the base. The holder can be selected according to your wishes: frame, crown, support, and others.
- Select fabric for the canopy (measure the width and length of the product). The canopy is sewn from the selected material according to the measurements. To do this, take a large piece of material, fold it in half, and pass an elastic band or lace through the middle. Don't forget about loops and hooks. The edges of the fabric need to be folded and hemmed.
- Attach the base to the selected location. Make sure that the base is held firmly and does not wobble. To do this, select screws and dowels to match your walls. It would be nice to use a drill and screwdriver.
- We put the fabric canopy on a frame that is pre-made. The sewn fabric canopy is placed on a previously made ring. Everything turns out quite beautiful and impressive, but at the same time simple and fast. It is better to use organza, chiffon, tulle, and other light fabrics as the basis for the canopy. Heavy material can bend the structure. The canopy often needs to be washed, shaken out, and cleaned, so it should be easy to remove, which cannot be said about thick fabric. And dust accumulation is not desirable.
- Decide on the mount.
- Hang a canopy.
Additional Information. If there is a canopy for a girl, you can use a kind of “skirt” at the bottom of the product and decorate it with a bow. And with the help of thick fabric you can make interesting cuffs.
The canopy will create an incredible feeling of peace and relaxation.
Canopies are so original and varied that it is sometimes difficult to make a final choice. But it would be nice to sew it yourself, for your room, so that it fits original into the interior of the apartment.
Make a canopy for your child yourself.
How to sew a canopy: in the style of Marie Antoinette
Here you will also need two curtain rods. Ideally, they will be the width of the bed. This time the idea is to put a curtain with a drawstring on one curtain rod and secure it to the ceiling across the width of the bed somewhere in the area above the pillows, and mount the second curtain rod on the wall above the headboard and simply throw the fabric over it. As a result, the curtain will create a wave above the headboard, and its remaining length will go along the wall behind the bed.
Depending on gender
Many parents decorate their children's rooms with beautiful canopies. Children of the same gender and age are often given the same canopies, different genders, but approximately the same age - different in color, but similar in design, so as not to disturb the overall room design.
For boy
The design in a boy's room often reminds of the sea and is made more austere than in a girl's room. Drapery is not decorated with lace, but ribbons and cords are acceptable. Suitable colors are sky blue, light gray, thistle, khaki, pistachio, moderate green, turquoise, snow blue.
Boys will like this design of a four-poster bed more.
For girl
The canopy over a girl's crib is usually replete with lace, frills, and is made in snow-white, lavender, apricot, soft pink, amaranth, lime, light yellow or fuchsia. Drapery is often associated with a doll's house or princess's palace, but more modest options are acceptable.
A girl over two years old will appreciate an original four-poster bed.
Neutral options
This design is suitable when two or more children of both sexes live in the bedroom. Excessive frill lace is inappropriate in this case; the colors are chosen to be the same for all canopies or overlap.
If there are no racks, then a frame placed under the ceiling can be used as a canopy.
Suitable options:
- ebony pink;
- light green;
- cornflower;
- beige;
- light yellow;
- pale coral;
- sand;
- pale purple;
- pale green;
- dandelion;
- pastel blue;
- olive;
- agate grey.
Curtains with fireflies
The bed can be decorated with fabric in the corners if overhanging fabrics confuse you. In the photo below, two curtains were hung on rings (the same hoops will do), which in turn were attached to hooks on the ceiling. This way you can decorate all four corners of the bed. The idea looks even better if you decorate the curtains with glowing garlands.
Copper corners
Here, as in the previous idea, the curtains are placed at the corners of the bed, but the fasteners are very interesting.
You will need copper water pipe angles (4 pcs.), T-shaped pipe pieces (4 pcs.), copper U-shaped fasteners (12 pcs.) and plugs (8 pcs.), as well as 8 narrow lightweight curtains and 8 wooden sticks of such a diameter that they fit tightly into the corners. If you can't find copper pipes, you can take regular pipes and paint them with copper paint.
Glue the copper pieces to the sticks as in the photo below.
Then put the curtains with a drawstring on the sticks and assemble the structure. Attach the resulting cornices to the ceiling using fasteners - the canopy is ready. The only negative: to wash the curtains, you have to unscrew the curtain rod. You can make cleaning easier by taking curtains with rings rather than drawstrings, but then it’s better to paint the wooden sticks copper so that they don’t stand out too much, or take pipes instead.
Selecting the color
A well-chosen color scheme and pattern on the bedspread will help to slightly correct the unfortunate shape of the room and diversify it. Cold, dark shades are used in spacious, well-lit rooms with windows facing southeast and south. Lighter, warmer ones are suitable for small bedrooms where the sun rarely penetrates, and the windows are “turned” to the north, northwest.
Stripes directed in the right direction can correct the disproportion of the room, but it is advisable to duplicate the print on other elements of the decor. If the wallpaper, carpets, curtains are colorful, the bedspread is selected in a single color and vice versa. Sometimes the drapery of the bed is made the only color accent of a monochrome interior. Two- or three-color models are most common; overly variegated ones are suitable only for interiors such as boho or oriental.
Most popular colors:
- purple-black;
- slate gray;
- beige;
- terracotta;
- silver brown;
- brilliant blue;
- mahogany;
- golden orange;
- pale pink;
- rich brown;
- creamy white;
- chrome green;
- orchid.

