Are you familiar with the situation when, after repair work, namely wallpapering, there is excess material left? Often wallpaper is purchased with a reserve so as not to make a mistake when gluing it. As a result, the material gathers dust on the shelves until it is simply thrown away. But, there is an option to use the leftovers in decoration. There are a lot of ideas, one of which is decorating furniture with wallpaper. This technology is called decoupage.
If you have old furniture that is long overdue for decoration or restoration, then you can use canvases to give the furniture a completely different look. In this article we will look at the process of decorating furniture with wallpaper, which products are suitable for this work, as well as tips for covering furniture with self-adhesive film.
Selection of material for gluing
What is decoupage? According to the Wikipedia encyclopedia, this is a special technique for decorating glass, wood, fabric or other materials, in which a design, painting or ornament is glued to the surface. The technology of decorating furniture comes down to 3 steps:
- Surface preparation.
- Pasting paper.
- Varnish treatment for protection.
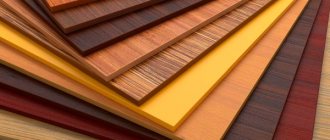
But the question arises, what wallpaper can be used for furniture? The good news is that almost all types of products are suitable for this purpose. The difference is vinyl sheets, which must be soaked in water and the paper backing removed before use. Decoupage of furniture with wallpaper can be done either as a whole canvas or as a separate fragment with an ornament. For work, you can use old canvases left over from repairs, or purchase your favorite options in the store.
What are the advantages of wallpapering furniture?
- Cheapness. To implement, you will need cheap tools and materials that are easy to find in the garage. And you won’t throw away the remaining materials after gluing.
- Rapidity. It will take several hours to process a cabinet or bedside table.
- Ease of operation. Even without specific skills, the task is easy to complete alone.
- Great appearance. Since wallpaper is sold in a huge assortment, the furniture made will be an original and beautiful addition to the interior. And if you use wallpaper that was used to cover the walls, then the design will turn out harmonious and organic.
- If the chest of drawers looked old and you were going to throw it away, wallpapering it will make it look like new. You just need to follow the instructions to remove all the flaws and breathe new life into it.
- Opened with varnish, furniture elements will not be afraid of moisture. In addition, caring for them will not be difficult.
All these factors point towards decorating old furniture with decoupage.
How to cover a closet with wallpaper and photo wallpaper: do-it-yourself decorating instructions, video and photo
To transform the decor in your home, you don’t have to buy new furniture. Instead, you can update old items by changing their appearance, for example, you can refinish an old cabinet. Moreover, this does not require any special knowledge or skills.
You can give your furniture a new look with wallpaper. The only thing is that you should familiarize yourself with some of the nuances of the work in order to complete it with the highest quality. Therefore, next we will look at how to decorate a closet with wallpaper.
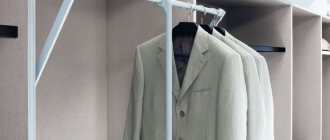
Wardrobe before and after wallpapering
Types of technology
Decoupage is multifaceted. There are a number of methods that can be used to achieve original results on furniture. Each option allows you to get your own style and effect. Types of decoupage:
- classic, in which the entire surface or a separate part of the furniture is covered with wallpaper and varnished on top;
- reverse, used for clear glass. Cabinets, tables or other furniture elements may have glass areas. In this case, the wallpaper is treated with glue from the front side. After which the sheet is glued to the glass from the inside;
- volumetric, in which relief decor is made. An excellent option for the Baroque style;
- artistic decoupage is special because it is part of the composition. The canvases are glued to a surface that has been previously painted or decorated;
- Decopatch involves processing furniture using scraps and colored paper.
You can use a specific decoration option or combine all types to create an original and beautiful room design.
Children's wallpaper: decor in decoupage of a toy box
When a baby arrives in the house, the apartment gradually becomes overgrown with many toys. And these are not only cute soft bear cubs and bunnies. These are construction kits, small parts, cars and a lot of little things that often fall under your feet, causing a lot of trouble. Nowadays there are many different plastic containers for storing small toys.
But making such a container with your own hands, and even together with your baby, is a useful and educational activity. Having a wooden box, adapting it as a place to store toys is not a difficult task. And decorating it, attracting a child, is a fascinating procedure.
What you will need:
- Wooden box with removable lid;
- PVA glue;
- Children's wallpaper;
- Water;
- Furniture glue;
- Sandpaper;
The process is similar to any decoration using decoupage technique. Prepare the box for gluing pictures: sand 4 sides of the box and the lid. Cut out pictures from the wallpaper - these can be heroes of fairy tales or cartoons that the baby likes. Or just bright flowers. Wet the cut out fragments with water and place them on a paper napkin to absorb the moisture. Apply PVA glue to the box, lid and wallpaper. Place the pictures in the right places, remove excess glue with a napkin or cloth. Then apply a thin layer of glue again. The box is ready. For gloss, you can varnish the box, although this procedure is not at all necessary.
Furniture decoration technology
Now we can dwell in more detail on the theory of furniture decoration. Even a beginner can do all the work with his own hands, since this requires the simplest tools and minimal skills. Gluing wallpaper to a closet, bed or table is as easy as decoupaging with other materials. The only difference is the use of special glue. It is not recommended to use simple PVA for work. The fact is that wallpaper is made of quite dense material. It's better to use wallpaper glue.
If this is your first time working, we recommend practicing on a table, cabinet doors or other surfaces. This decor is quite simple, since it is enough to paste a large piece of wallpaper without additional manipulations. Above we briefly mentioned how decoupage is performed. This includes surface preparation, wallpapering and varnishing. To make it easier for you, watch this instructional video on how to decoupage furniture with wallpaper with your own hands.
Now let’s proceed to a detailed consideration of all stages in order to do all the work correctly.
Stage 1 – prepare the surface
The final result will depend on the correct preparation. Therefore, it is important to pay special attention to work. Then the surface of the product will be perfectly smooth, the ornament and varnish will be held and will not fall off during use.
Here is a list of tools that will be needed for preparation:
- putty;
- medium- and fine-grained sandpaper;
- filler;
- roller and brush;
- primer.
Further manipulations are performed in the following sequence:
- The surface is cleaned and wiped. Advice! If the furniture has a layer of varnish, it must be removed. Otherwise, the adhesion to the wallpaper will be poor.
- The wood has cracks. They need to be filled with filler. If the cracks are large, then putty is used.
- All that remains is to wait for it to dry and bring the surface to perfection using sandpaper (medium-grained). After this, fine-grain paper will help make the wood smooth.
- At the end, you need to remove the dust and open the wood with a primer. For this you need a roller and a brush. Acrylic paint is used to change the color of furniture.
That's all, the preparatory stage is completed. Thanks to this, the wallpaper will lie perfectly on the furniture and will adhere firmly to it.
Stage 2 – wallpaper glue
The simplest option is to use a whole sheet of wallpaper to cover a large surface, for example, a cabinet door, table, etc. In any case, the first thing to do is try on the wallpaper and decide on the right size. The canvas must correspond to the size of the surface being treated, plus 5-7 cm on each side for reserve.
When the workpiece is ready, it, as well as the furniture being processed, is coated with glue. But you shouldn’t put up wallpaper right away. It is important to wait 5 minutes for the glue to soak in. The glue layer should not be thick. Now the sheet is carefully applied to the surface of one of the sides. For final fixation, the sheet is smoothed using a roller, moving from the middle to the edges. The process is somewhat reminiscent of the work of pasting walls.
Advice! After the wallpaper is impregnated with glue, it becomes soft and can easily tear. When working, you need to take this into account and be as careful as possible.
The furniture is covered. All you have to do is wait for the wallpaper to dry, cut off the excess pieces and sand the edges with sandpaper. You also need to work with cut pieces. The only thing you need to do after gluing is to dip the brush in the glue and run it along the edge of the fragment.
Stage 3 – open the product with varnish
The final stage is to varnish the furniture. In this case, the opening is done in two layers. Wood varnish or acrylic-based permanent varnish is suitable for this work. First, the surface is treated with the first layer of varnish. The packaging indicates how long it will take for the layer to dry.
When the first layer has dried, you can apply the second. The work is simple, so it does not require much explanation. Please note that items in contact with moisture or water are best treated with yacht varnish. It is more resistant to moisture and will protect furniture with decoupage for much longer.
The whole process can be seen in practice from the video we prepared.
You can also watch decoupage of furniture with wallpaper, a master class on processing a chest of drawers.
Preparatory work
If you have already purchased photo wallpaper for an old wardrobe, then do not forget about the building material. The list of necessities includes:
- pencil, tape measure, ruler;
- sandpaper;
- construction glue or PVA;
- roller or brush;
- cloths for smoothing wallpaper.
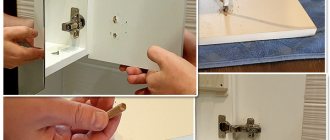
Updating a cabinet with your own hands is a fairly simple job, but it has its own nuances. For example, some parts of furniture may lose their original appearance, such as handles or hinges. In addition, this will interfere with further operation, so it would be wiser to replace them with new ones.
Before gluing, be sure to prepare the surface. Use sandpaper to remove the old coating. If the cabinet was varnished, then you can heat it up with a hair dryer and remove the paintwork from the surface with a scraper, but after that you can sand it thoroughly. After this, remove all dust from the surface with a damp cloth and allow the furniture to dry thoroughly.
In order for the pasting to be even, you can disassemble the cabinet fittings. This will allow you to better glue joints and other hard-to-reach places. Remember, assembly based on the results of the work should be done only when the product is completely dry; this may take from three hours to a day.
We simplify the task - use self-adhesive wallpaper
Adhesive wallpaper for furniture, or “self-adhesive” as they are called, will speed up the process of decorating furniture and save you from unnecessary work. The name itself speaks volumes about how they work. No glue is needed for decoration. Wallpaper is made in the form of a film consisting of two layers. The first layer is decorative. It is made of PVC, polypropylene and polyester. The second layer is paper-based, located below. It is covered with glue and has a protective film. Using self-adhesive wallpaper does not mean that the preparation stage is skipped. The surface of the furniture is still treated before pasting.
Only the part of the second stage associated with applying the glue is skipped. True, there are some points in working with self-adhesive wallpaper:
- Can only be used on flat surfaces. All defects and flaws under the wallpaper will be highlighted.
- The film on the doors may come off over time.
The good news is that the range of products is simply huge. On sale you can find a variety of ornaments, patterns and wallpaper designs. There are even those that imitate metal, wood or brickwork. Self-adhesive film can be cast, soft, flexible and low-plastic.
How is furniture decorated with such film? It is enough to repeat the first stage of surface preparation. Next, measure and cut out the desired piece of wallpaper, leaving approximately 3 cm of allowance on each side. The protective layer is removed from the film and it is applied to the surface. It is important that the film is slightly stretched so that wrinkles do not form. All that remains is to level and fix the film on the furniture. Sharp corners require special gluing. To do this, the film is heated using a hairdryer. The glue will warm up, and the material itself will be more plastic.
Note! There is another method of gluing - wet. To do this, the protective layer is removed from the film, after which the surface with the adhesive is wetted with a soap solution. This will allow you to adjust the position of the film. The wallpaper is glued into place, everything is trimmed, pressed and smoothed. The glue will dry in 10 or 20 hours.
You can also skip the varnishing step. Using film will make the work much cheaper and faster.
How to glue correctly
First of all, you should ensure that you have the necessary tools.
For convenient work you will need:
A utility knife; in extreme cases, you can use scissors
Pencil
Centimeter or tape measure
A scrap of clean cloth
Sandpaper
Spray bottle or damp cloth
Alcohol or other degreaser
Preparation for gluing
First of all, the film must be purchased with a reserve.
Before proceeding with the actual pasting you need to:
- Measure the area of the surface to be pasted.
- Mark the approximate layout on the back film.
- Wipe the surface from dust and wash with detergent.
If the surface is varnished, you can prime it for better adhesion.
Surface pasting
Step-by-step instructions for covering a surface with film:
- Spray the surface with a spray bottle or wipe with a damp cloth. Thanks to this action, the film will slide more easily over the surface and can be adjusted.
- Carefully align the film and cut it to size, trying to make as even cuts as possible. To do this, you can use a stationery knife with a sharp blade.
Rounded corners can be easily covered by simply using a hairdryer. By slightly warming the film with hot air, it will be easier to stretch it onto a curved surface. It will stretch and smooth out easily.
If any extra edges suddenly appear, you just need to trim them using a utility blade or scissors.
Pasting difficult places
In some cases problems may arise.
For example, when pasting:
- Table legs . Carefully wrap the sheet of film around the table leg. Next, note where the edges of the film meet. You need to draw a mark on the back of the film with a pencil so you know where to cut. Now you can cut a piece of film as wide as needed to cover the table leg without overlaps or gaps at the seams.
- Drawer . You will need to remove the handles from the front of the drawer. Next, you need to wrap the film around the covering area, and mark on the mesh the places where there will be holes for attaching the handle.
- Large flat surface . Some surfaces are longer than the length of a roll of film. In this case, you need to cover the surface with strips cut to length.
Let's sum it up
This simple method can bring any furniture back to life. The decoupage process itself is simple, and the result will make the furniture original and expensive. And the remains of wallpaper can be used rationally. And to make the furniture a work of art, it is additionally processed with interesting effects, such as craquelure, patination, abraded effect, gold leaf and tinting.
Recommended Posts
Wall shelves for TV and equipment
DIY curtains with eyelets
Design project for a small dressing room
How to design a niche in the wall
Sliding mirror doors for dressing room
White wallpaper with a black pattern in the interior
Conclusion
Wallpapering a closet requires, first of all, accuracy. However, as we found out, there is nothing complicated in this work. Therefore, every home craftsman can update furniture in this way; the main thing is to choose high-quality material and follow a certain sequence of actions.
From the video in this article you can find out additional information regarding decorating furniture with wallpaper.
1 Materials offered by the market 1.1 Traditional coatings 1.2 Environmentally friendly 2 Fashion trends 3 In conclusion If there is a question on the agenda.
1 Making a choice 1.1 Types of wallpaper 1.2 Choosing an ornament 2 Selection of an interior 3 Conclusion Today there is a huge assortment of wallpaper. Arriving at
1 Types of material 1.1 General characteristics 1.2 Paper products 1.3 Non-woven trellises 1.4 Fiberglass 2 Painting technique 3 Conclusion When finishing.
© "Lux Standard" Construction of houses
Cabinet restoration methods
At the moment, there are many suitable acrylic paints, adhesives and impregnations available, thanks to which you can decorate a cabinet with your own hands without any problems.
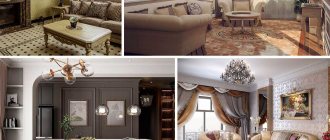
Beautiful country style wardrobe with lightly worn elements
There are several ways:
- Painting the front and side walls of the cabinet in different colors.
- Decoupage of facades followed by application of varnish.
- Pasting with paper or vinyl wallpaper (photo wallpaper).
- Matting glass cabinet surfaces. And when using patterned stencils, you can make unique patterns on glass.
- Do-it-yourself patination of the frames of the facades, as well as the internal open and side surfaces of the cabinet.
- Artificial aging of wood.
- The application was applied to glass facades.
- The use of decorative plaster or polyurethane foam to make patterns on cabinet facades.
For your information. Initially, patination (patina) was an independent process. A layer of patina formed on the metal parts of the furniture, as well as on wood and glass.
Painting is the simplest solution that gives a lot of visual options
Wallpapering the back wall and drawers of the cabinet
Decorating a closet with textile wallpaper
An alternative to wallpaper - self-adhesive film
The choice of method for restoring an old cabinet with your own hands depends on the personal preferences of the residents, as well as the interior style of the room where it is planned to be located. The material from which the cabinet is made is also of great importance. You will not be able to age chipboard facades.
Antique restoration
This method is more labor-intensive than the one described above. To decorate an old antique cabinet, only natural wooden materials are suitable. There is no need to completely disassemble the cabinet. But you will have to move it outside.
Attention. The aging process of wood is accompanied by a large amount of waste wood shavings and dust.
Rust must be removed from metal parts. Large wood defects are covered with putty
Decor for the back wall of shelving
A great way to decorate with wallpaper is to cover the back wall of open cabinets and shelving. Manufacturers of modern furniture almost never pay due attention to decorating interior surfaces. Agree, against such a background any souvenirs or dishes will seem festive and bright, and the furniture itself will sparkle with new colors. In this case, it is better to play with contrast and use wallpaper that differs from those with which the walls are covered. It is advisable to use wallpaper with patterns and patterns, especially for furniture with a light facade. By the way, you can take wallpaper that covers the walls in other rooms; this technique will help connect different rooms.
If the rack is divided into square or rectangular sections, then each can be covered with different wallpaper, again creating an analogue of patchwork.
Old and boring pieces of furniture will sparkle with new colors if you decorate them a little. For example, you can breathe life into a wardrobe, chest of drawers or wardrobe that has lost its former luster.
Decor of the facade, side walls and doors
You can wallpaper almost any surface of a closet, cabinet or chest of drawers. Most often, cabinet doors and drawer fronts are covered as the most important element of furniture, which is the center of attention. But you can do the opposite - wallpaper everything except drawers and doors.
Color and stylistic solutions may also vary. You can use the same wallpaper on all surfaces to be pasted, you can alternate different ones, or decorate using the patchwork technique, that is, paste them over with multi-colored squares. It is absolutely not necessary that the wallpaper on the furniture matches the wallpaper on the wall. Feel free to experiment with contrast, for example, for a room with pastel wallpaper, make a closet with bright colorful doors.
Features of restoration of a cabinet made of chipboard
A particleboard cabinet usually has a laminated surface. Before wallpapering, the laminated layer must be completely removed. This process is very labor-intensive, so it is better to use decoupage film.
The varnished layer must be cleaned in two stages, using sandpaper of different grain sizes.
With the help of decoupage film, any old Soviet wall will get the face of a European wardrobe. Before decoupage, the surfaces are treated with a degreasing compound, which is suitable for:
- gasoline or kerosene;
- acetone (White spirit);
- dishwashing detergent.
It is better to first vacuum the surfaces and then wipe them with a cloth with a degreasing compound.
After processing, the surface is painted with acrylic paint in several layers, each of which must dry well.
Carefully disperse the paint, avoiding streaks and smudges
The decoupage film is carefully applied to the panel (door), pre-lubricated with glue. Next, the folds are smoothed out with a sponge and the plane is equalized.
Cut out a design from a decoupage napkin and glue it onto the surface of the cabinet
You can additionally decorate the cabinet with ribbon strips
After the glue has completely dried, varnish is applied to the resulting surface.
Advice. A unique effect is obtained by applying crackle varnish, which cracks when dry. This restoration method is suitable for design in Provence and Country styles.
The photo shows an example of an artificially aged surface using crackle varnish
At the stage of painting furniture, before decoupage, you can patina the facade. This is achieved by using an absorbent sponge or an ordinary rag. When the paint has not yet completely dried, you need to blot the sponge in some places and remove a small layer of paint. The resulting effect is reminiscent of time-aged French furniture in the Provence style.
Patination of furniture is especially effective on shaped elements