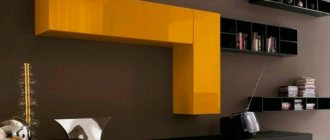
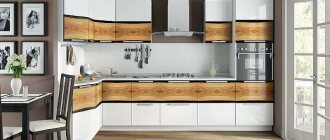
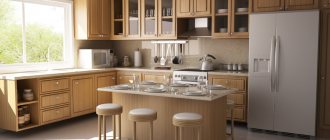
Wall cabinets are an important element of kitchen sets. Thanks to such furniture you will save space, at the same time it is spacious.
It is worth remembering that such furniture is often filled as much as possible with items that are different in weight, but so necessary for preparing food.
Therefore, the locking mechanisms of kitchen cabinets have to endure heavy loads. It is for this reason that the reliability and quality of fastening of each part of the headset to the wall is considered an important factor.
Hanging height
Before you start assembling the set into a single “wall”, you need to decide on the height at which the furniture will be hung. To correctly carry out these manipulations, preliminary calculations must be made.
In addition, it is worth deciding on the mechanism that will hold the row of kitchen cabinets.
It is necessary to correctly determine the gap from the tabletop to the bottom of the set. This primarily provides convenience to the owners of an apartment or house in using furniture.
Often, GOST is used to determine this factor and the main value is taken to be a distance of 45 cm, but this is not entirely correct.
The boxes should be located at eye level of the owner to create the most comfortable conditions for their use.
The main measure for determining height is often the height of the household.
For people with average height, this value varies from 55 to 65 cm. The optimal height is considered to be the one when a person, without third-party devices, reaches the highest shelf and takes the desired item without risking letting it go from his hands.
The most important thing is comfortable use of kitchen cabinets.
If you do not plan to install the lower part of the set or tabletop, then you should take into account the calculations presented in the table:
Human height/mount height (in centimeters)
- 155-165 / 175-180
- 165-175 / 185
- 175-190 /200
You need to remember: attaching wall cabinets is a serious procedure; due to incorrect calculations, all mistakes will be noticeable.
Let's take a closer look at some of the issues that we will have to face during the installation of wall-mounted furniture.
Mounting options
There are 2 methods by which fastenings for kitchen cabinets are made. Installation is carried out:
- One line, that is, the location of the fastener is equidistant from the ceiling;
It is considered the most common type of accommodation. This way you can easily secure the cabinets yourself. - Different levels are used for hanging, that is, objects are at different heights.
This method is used much less frequently, since its implementation is much more complicated than a linear fastening scheme.
The first method is popular because you can use only your own strength to attach kitchen cabinets, without turning to outside help.
The choice of option is determined by the number, size and depth of wall cabinets.
The second option for attaching fixation items is less common among ordinary people. This is because the roof of this furniture is used as an additional surface.
Any of the proposed variations is perfect for both a room with a small area and a large one.
And all because they do not have any effect on the fullness or compactness of the room.
When choosing a method, only the interior and design change.
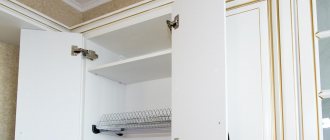
Possible nuances with adjusting furniture hinges
During the work, some problems may arise, the possibility of which can be foreseen in advance.
Vertical adjustment
There are several ways to hang a door, one of which is vertical. This method is most common, since opening a cabinet or cabinet to the right or left is easier than opening it from the top.
Prepare in advance for the fact that you will need to unscrew and tighten the screw in the mechanism body several times before you achieve the ideal location of the door leaf.
Installation in this way is carried out by tightening the holes in the shape of an oval. It is necessary to tighten the bolts regularly, as over time they begin to become loose. Do not neglect this, as problems may arise that cannot be corrected.
Adjustment for horizontal discrepancy
Another type of hanging is horizontal, which can often be found on kitchen cabinets. It is also necessary to regularly tighten the bolts. This design requires the most maintenance, since when the bolts become loose, the cabinet can open randomly.
Please note that too narrow a gap will make it impossible for the door to move along the axis of its hinge.
Door depth adjustment
The depth adjustment should be checked. To do this, you need to press the hinges to the body and facade. Loosen the fastener with a screwdriver, and then tighten it as much as possible. Ready.
Most often, façade adjustments are made in rooms with uneven floors, which can cause difficult door movement.
The answer to the question of how to properly install hinges on kitchen cabinets and other structures depends on the type of mechanism and the material from which the frame is made. Follow the basic rules and nuances of installation and carry out all work carefully, then no problems will arise.
It is possible to install swing hinges even in the absence of automated equipment such as a screwdriver, using a classic screwdriver.
Preparatory actions
To begin the process of installing kitchen cabinets, you need to follow these steps:
- Alignment of vertical walls, please note that for a corner kitchen the angle of the walls at 90 degrees is provided (most often this process is carried out using drywall, and thanks to this alignment occurs);
- Applying markings (this stage must be performed using a plumb line, pencil and level);
The points at which the kitchen cabinets will be fastened must indicate the required height. - Electrical installation (installation and connection of all sockets and lamps);
- Wallpapering or painting walls.
These points will be the basis for the work ahead.
The next step is to prepare tools and consumables.
Preparation
The stage begins with preparing the material and tools for work.
The table below shows everything you need:
| Materials | Tools |
|
|
Next steps in the preparation phase:
- Checking the condition of the walls . If the cabinets are going to be hung on drywall, you will need embedded parts, since the fragile material is not able to withstand heavy loads. For curved walls, it is better to use a putty mixture to level the surface or mount the cabinets on a sheet of chipboard or plywood. Also, do not forget about decorative finishing.
- Marking . Using a tape measure, measure the distance from the worktop and set the laser level. If you don’t have such a tool, you can use a pencil with a ruler or a tapping thread, checking the evenness of the line with a level. It is at this mark that the lower level of the modules will be aligned.
- Preparing the site. It is advisable to prepare the space for work by clearing the tabletop of foreign objects.
For your information. By the time you hang the kitchen cabinets, it is necessary to install all sockets and switches, and also check their functionality.
How to attach a kitchen set without much difficulty - below.
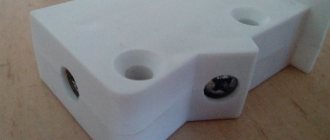
Installing the top of the furniture
The first priority is to fix the hooks in the middle position. For this, adjusting screws are used. After this, you need to fix them from the inside on the side walls so that the hook is on the outside by 2-3 mm and it is possible to fix them on the fastening bar.
The design of the hinge allows you to adjust the mount in height and depth.
The next stage is applying markings to the wall. But for this you must follow a number of rules.
- It is necessary to determine in advance how the drawers will be installed - tightly to the apron or overlapping.
- The location of the fastening strip is 3-4 cm below the upper edge of the section. To correctly calculate this distance, you need to attach the plank to the rear wall of the object in the same way as it will subsequently be attached to the wall.
This is done for clarity, so that you can see the number of centimeters that need to be taken into account when making the final marks.
The next step is to make holes in order to install the rail. Here are some useful tips that will come in handy:
- If the drill "jumps", make small notches using a nail or punch and hammer;
- If the wall crumbles during work, then first you should make a small hole, and then drill it out to an acceptable size;
- If you need to change the drilling depth, you need to use a prepared dowel;
- If you need to make a hole in a concrete wall, but there is no hammer drill, you can do it with a hammer and a punch.
Wiring locations require special attention.
Upon completion of all actions, the dowels are placed in the holes. Next, the mounting strip is installed on the fasteners. The cabinets are fixed to the mounting plate. To adjust their position, screws of mounted mechanisms are used.
To make the set look like a single “wall”, they need to be connected closely to each other.
The elements are fixed with clamps, starting from the corner, avoiding chipping (in accordance with the above instructions).
Thus, alignment of the overall ensemble of cabinets in one plane is achieved.
The next step is to drill holes between the tightly fitting parts of the headset to then fasten them with intersectional ties.
At the final stage, shelves are installed and doors are secured.
Step-by-step installation instructions
Attaching hangers and cabinets requires no preparation. When hanging on furniture hinges, you will have to practice your accuracy. In the case of mounting on a bar, everything happens easier and faster. Below are detailed installation instructions.
Tools
For installation you will need:
- level – preferably for the entire length of the cabinet;
- pencil;
- knife;
- roulette;
- hammer;
- hammer drill or drill - when hanging on a concrete or brick wall;
- screwdriver;
- screwdriver;
- when installing several cabinets, clamps are needed - clamps that allow you to create the appearance of a monolithic structure.
Already at the stage of collecting tools, think about which awnings to purchase. If you purchased a ready-made cabinet and a complete set of fasteners, then there will be no problems. When purchasing spare parts for hidden installation, check the presence of all bolts, screws, mechanisms, and plugs.
Preparatory work
Before installing suspended structures, calculate the height and draw boundaries. Draw a line along the level with a pencil. Installation of the DIN rail and wiring must be completed so that you do not have to remove the cabinet and redo the entire design.
Align the walls as much as possible at the fastening points, even if you plan to install the box on a plank. When installing furniture at an angle, it should be 90 degrees. Paint the walls, wallpaper or install an apron. After installing the cabinet, it is difficult to perform these operations.
Installation of awnings
The process is the following algorithm of actions:
- Markings for system installation. On the inside of the cabinet, measure 1.3 cm from the side panels and 2.5 cm from the top.
- Drilling with a drill or screwdriver with a pen attachment with a diameter of 25 mm.
- Cleaning chipboard from chips.
- Trying on the suspension - the fixing hook should be located in the center of the opening. This makes it possible to adjust the position of the cabinet.
The final stage is screwing the screws. Before attaching the hanger, check the alignment of the holes in the decorative plug and the side walls of the cabinet. First lean and screw, then screw. This is necessary so as not to damage the furniture.
Metal guide fastener
The material of the wall determines what you need to attach the plank to:
- a self-tapping screw screwed into a dowel - onto aerated concrete and into a foam block;
- screws with a diameter of 5-6 mm - into wood;
- anchor bolts – for brick, concrete.
The profile length varies. There are planks around 19 inches or 50 cm, but most manufacturers produce 2 or 3 meter products. Each tire is cut at a certain distance. They can be easily broken by hand without using a hacksaw if the guide is longer than the cabinet.
After choosing the fastening tool, attach the strip to the drawn line. Using a drill, hammer drill or screwdriver with an appropriate attachment, drill holes in the wall through the prepared holes in the profile. It is enough to make indentations at intervals of 10-30 cm. There is no need to attach screws every 1.5-2 cm.
Features of hanging on drywall
The main difficulty when fixing a headset to drywall is its inability to maintain strength under heavy loads. For this reason, the use of standard fasteners is not recommended. Even the small weight of a cabinet installed using a mounting anchor will easily damage the plasterboard lining.
Therefore, only decorative shelves and paintings are allowed to be hung on plasterboard walls.
If the set needs to be fixed on a plasterboard surface, then a wooden beam or a thick board, which is fixed to the wall thanks to anchor bolts, will come in handy.
Necessary materials and equipment
To perform installation work, you need to prepare the following tools:
- ruler;
- a simple pencil;
- construction corner;
- screwdriver;
- set of bits;
- screws;
- screwdriver;
- cutter for attached parts (Ø3.5 cm);
- drill;
- set of wood drills;
- building level.
It is also necessary to organize high-quality lighting. When working inside furniture, it is recommended to use a small headlamp.