Nowadays, most furniture, such as cabinets, bedside tables, kitchens, and so on, are made of chipboard. The material is good, quite flexible (there is one for every taste and color). However, it has a big disadvantage. Over time, especially if this is a frequently used door, the hinges can be pulled out by the roots (probably many have experienced this), and the hinge dangles... the sash sags, or even comes off altogether. In general, how can I fix this whole thing? Detailed instructions + video version...
The essence of the problem is that it will not be possible to screw the “screws” back into these torn fasteners. They simply won’t stay there. We need to fix it some other way. For me personally there are only three. I’ll tell you about each one separately.
Regular matches
Everything is simple here, if your broken holes are not large, say, a piece of chipboard has not fallen out, then you can use ordinary matches.
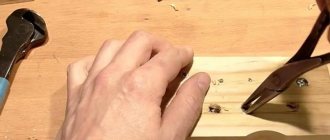
How it works? Just hammer a match into the hole (great if the diameter is not large). And then we screw the screw in there. The match is pressed against the wall and thus the fastening is restored.
However, it is not suitable for heavily loaded doors that you rarely use. If you constantly open or close the sash, it will not last long . BUT as a temporary solution, why not?
How to repair a broken screw hole
As Alexander Kolomietz , when a low-quality screw is wrapped in poor chipboard, there is every chance that it will not stand there for a long time, especially in such loaded places as door hinges.
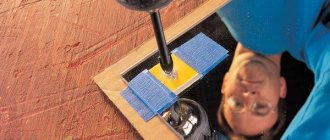
The most important thing in this matter is the correct drill. It is more reliable to use special wood drills, as they have sharper sharpening angles, which allows you to drill holes with better accuracy. And the more precise the hole, the more firmly the wooden insert will sit in it. However, if there is no special drill, then you can drill with a regular one. In this case, if possible, it is advisable to drill in several passes, gradually increasing the diameter of the drill.
Glue + sawdust
The solution is as old as time, and it should be noted that it works well. Perfect if you have a piece of chipboard torn out.
The idea is simple - we take sawdust (you can take it from a chipboard, a piece of which has been torn out), or find it near furniture factories, next to large construction supermarkets (usually there are pieces lying around that no one needs), crush them, mix them with glue (previously we used PVA) this Apply the mixture to the broken areas and let dry. And that’s it, tighten the “screws”. It's holding up well.
However, now there are a large number of adhesives; on the Internet I even saw a guy pouring a lot of glue from a glue gun into broken places. And everything seems to be holding up
I used to repair hinges in the kitchen a long time ago. BUT due to the fact that the sash was used often, it broke quite quickly.
So this is again an option for a while, for constant use (10 - 15 openings per day), this is not the best way.
The façade hinge has been torn out, what should I do?
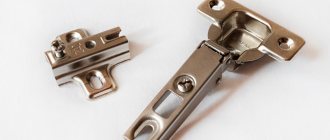
My phone rang, who's talking? No, of course, not an elephant, but a friend. And he got into trouble. The little daughters tore out the closet door once again. Previous methods of returning hinges to their place have exhausted themselves since the self-tapping screws no longer held in the laminated chipboard. Since this was not the first time that the hinges had been torn out, the base of the hinge had been screwed in different places many times already and the chipboard began to look like a sieve, but the problem had to be solved. After a little thought, I proposed several options for solving the problem with torn hinges:
The first option is extreme, expensive and tedious: make a copy of the side wall of the cabinet and replace it. But this option, as I already said, was the very last, when there will be no other options.
Option with glue and sawdust
An old and reliable option. The bottom line is that you need to find chipboard shavings. You can crush a piece that fell out, or find it near any wood/furniture production. The resulting shavings must be mixed with glue. Usually PVA was used. However, at the moment there are a large number of glue manufacturers. For each type of chipboard, you can choose the one that will be most suitable. The resulting mass of sawdust and glue must be applied to the resulting hole and allowed to harden. After this, you can screw the loop into place. This method is a little more reliable than the one described above.
A mixture of glue and sawdust. Source: delo-pol.ru
A quick way to screw a screw into a broken hole
If a screw in a door latch or hinge does not tighten and turns, then this means that the hole is broken and the screw cannot engage its threads in the material.
First, you can try using a screw that is larger in diameter or length. If this does not help or the diameter of the screw is limited by the size of the hole on the plate, then the following method will help: fill the hole for the screw with matches, steel wool or a piece of tin. After this, tighten the screw.
Do not use glue, otherwise it will be impossible to remove the screw later.
based on materials from familyhandyman.com
Furniture decoration
After restoration of furniture, it can be decorated. The following options are usually used:
- Drawings. Can be done manually or using a stencil. Acrylic paints are usually used. It is better to place the ornament around the perimeter, and large drawings - in the lower or central part.
- Decoupage. The most popular are plant or thematic designs.
- Applications made of fabric, wallpaper or self-adhesive film. They can be applied evenly over the entire surface or form a specific composition. For this method, it is necessary to choose a waterproof fabric so that it does not lose its aesthetics.
- Thread. This is done using a sharp chisel and sandpaper. It must be done with caution, since the slab is fragile if its integrity is damaged.
Expert opinion
Viktor Fedorovich Strebizh, leading construction foreman
It is also possible to grab the licked head of a stuck screw or broken off hardware that is spinning, using a drill chuck or screwdriver. If you want to clarify something, please contact me!
Do-it-yourself laminated chipboard additive
Adding or drilling parts also refers to the preparatory stage of assembling furniture with your own hands.
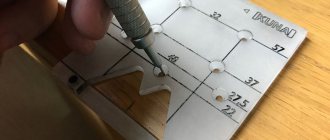
Through holes are drilled only for assembly with confirmations. It is better to use a special confirmation drill. You can do without it: drill from the front surface with an 8 mm thick drill, and from the end with a 5 mm drill. But in this case there will be no countersink for the confimat head. This means that “sinking” the fasteners neatly flush with the surface of the chipboard will be problematic.
For shelf holders, blind holes are drilled from the inside.
For guides, hinges, and lifting mechanisms, do not add laminated chipboard using a drill yourself; you just need to prick it with a self-tapping awl along the marking mark.
What to do when completely dismantling a cabinet door
- the working part of the tool, a screwdriver or a screwdriver bit, was not accurately installed in the head of the screw, and, as a result, it was licked off;
- the size of the screwdriver or bit does not match the screw head (disproportionately larger or smaller than the last);
- the head of the hardware was previously broken;
- the working part of the tool is worn out;
- the body of the screw is held too tightly in the material (the thread is rusty, it is covered in paint, it is screwed too tightly);
- access to the hardware head is limited and it is not possible to place the tool as it should;
- the direction of rotation was mixed up, that is, we tried to tighten the screw even more.
Varieties and sizes
The classification of types of self-tapping screws for concrete without drilling is carried out in accordance with:
- with material;
- coating;
- shape of the head and slot;
- thread design.
For anchor screws for concrete, GOST 1147-80 has been developed - an interstate standard for all types of such hardware.
Anchor bolts for concrete
Most often, for the manufacture of self-tapping screws, carbon steel wire of grades 08 kp, 10 kp, 10, 10 ps from a domestic manufacturer or S1010, S1018, S1022 is used. After turning the product from a blank, it is given surface strength by hardening.
For protective coating use:
- galvanization (silver or yellow color of products) - a layer of zinc is applied by galvanic method, this protects the self-tapping screw from corrosion in a humid environment;
- phosphating - a gray or black coating is formed when steel reacts with phosphates;
- oxidation (ferrous hardware) - the film on the surface is obtained by chemical interaction with oxidizing agents.
Self-tapping screws made of stainless alloy steel are used without coating. Chromium and nickel in its composition give the alloy anti-corrosion properties.
Brass screws are durable fasteners that are resistant to aggressive environments. Disadvantage: plasticity, tendency to deform.
The design of the head can be secret or protruding, in the form of a hexagon, cylinder, half-cone. The slot for self-tapping screws for concrete is usually cross-shaped, star-shaped Torx, hexagonal for a socket wrench or barrel-shaped for a socket. Direct is not used, since it does not provide the transfer of significant forces necessary to tighten the fastener into dense, heterogeneous material.
Self-tapping screws are threaded:
- Universal. Multifunctional fasteners are used with or without a dowel. Concrete screws are available in sizes up to 6 mm in diameter and up to 220 mm in length.
- In the shape of a Christmas tree. Inclined threads are formed by cones nested inside each other. The cross-section of the screw is increased to 8 mm, length - up to 200 mm. The hardware is hammered into the drilled hole or a dowel is used for fitting.
- With a variable pitch of turns. For more reliable fastening, the threads are given a variable pitch and additionally notches are made. This allows you to use hardware without an expansion dowel. Sometimes self-tapping screws for concrete without drilling are called turbo screws. Their protrusions and depressions are located throughout the rod. The outer diameter of the dowel is 7.5 mm, length - from 52 to 212 mm.
The table for the assortment of self-tapping screws for concrete shows the characteristics of the products and the weight of 1000 pieces.
Repairing the mounting location
It often happens that a hinge is torn out of the door or holes are drilled in the wrong place, and a new one needs to be drilled very close. In the first option, the defect is not too difficult to repair, but in the second situation, the problem may seem complicated to many - a thin bridge of material between two holes located too close to each other can break. In both situations, there is no reason to be upset - we’ll look at how to repair a hole in a chipboard door next. There are two ways to restore everything:
- If the furniture is old and the material simply does not hold the fasteners, the easiest way is to fill the damage with epoxy resin and immediately insert the fasteners into it in the right place. Once completely dry, everything will hold up.
- If it is necessary to move the mounting location or simply re-screw the screw into a broken hole, proceed differently. A wooden insert is used. Having drilled the hole a little wider than it was, a wooden insert is inserted into it using glue. Once the glue has dried, you can screw the screw back into place.
When deciding how to fill a hole in a chipboard for new fasteners, you should not choose a mixture with sawdust. It will hold the screw worse and it will most likely fall out again along with the patch you made. It is better to take a cork made of wood - it will be much more reliable. When moving a hole a short distance, first seal the old one and the jumper, which is too thin to hold the new screw, in this case there will be no obstacle to the normal fixation of the fastener.
Advantages and disadvantages of wood screws
Self-tapping screws appeared in Russia back in the sixties of the 20th century; the classic bolt was taken as the basis. However, if you look closely, its thread covers the entire surface of the rod, while the self-tapping screw does not. And the material used for the improved fasteners is more durable.
There are types of self-tapping screws that are used when working with materials of different densities, such as metal, plastic, and wood. Sometimes these fasteners are also called “hardware,” short for “metal product.” If we talk about the advantages of such fasteners, they are obvious: High strength and rigidity of the connection. Reusable. Adjustment of the required screw-in depth.
You can do without electricity, because you can screw in a self-tapping screw with a simple Phillips screwdriver. Versatility. There is no need to use additional elements (washers, gaskets). High speed of work completion. The only drawback is considered to be some fragility of the screws (hardened steel becomes brittle over time). The fastener, especially with a phosphated coating, can burst under even slight force. And this cannot be seen from the outside. Unlike self-tapping screws, nails do not have such a hidden defect.
Varieties
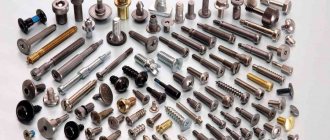
The more popular and popular samples used in the production, assembly, and installation of furniture include:
Also in the furniture industry, a number of characteristic screws are used that have blunt ends, large threads adapted for chipboard, and specific heads. One such product is a galvanized steel screw that allows you to attach chipboard sheets at a 90-degree angle.
Universal screw
The product is presented in the form of a cylinder-shaped rod with various types of heads and external threads. Its main task is to fasten individual assembly elements inside furniture structures. The upper part of this screw can have different shapes:
- the countersunk head of the product, which, after screwing, is completely recessed and does not protrude above the materials being fastened, its scope of application is the installation of shelves, handles, hinges, guide runners for drawers;
- the semi-countersunk head, due to the smooth transition from the rod to the thread, at the moment of twisting, goes into the material, as well as the mating part;
- semicircular head, the horizontal plane and the inner base of the surface of the semicircular head of which, during installation, additionally creates pressure on the material being fastened, increasing the strength of the structural unit, thereby eliminating its deformation.
The presence of a special thread makes it possible to easily attach the screw even to the hardest types of wood. Hardware splines can be simple or cross-shaped. Products with a cross-shaped slot have a number of irrefutable advantages:
- a screwdriver or drill is instantly fixed in the head;
- You only need one screwdriver;
- The installation process in hard-to-reach places is carried out without much effort.
When using universal screws, you must equip yourself with a screwdriver and screwdrivers with replaceable bits. To ensure a high-quality connection of materials, you should drill holes during the process of screwing in the screws, the diameter of which will be 70% of the thickness of the hardware, and also choose the right drill.
Confirmat
These products have another name - Euro-screws, which in modern furniture production are considered a more popular type of fastening and fixing devices, as they are among the most reliable, inexpensive furniture connections. Such products are resistant to mechanical stress and fracture.
Confirmat is used for joining structures made of materials such as wood, chipboard, multi-layer plywood, chipboard. In many cases, screws with dimensions of 5x50 mm and 7x50 mm are used. In addition to fastening parts, euroscrews replace a regular angle, performing a body-forming function, while withstanding all bending loads. To make cabinet furniture look aesthetically pleasing, confirmations are complemented with plugs made of plastic. They disguise a noticeable part of the hat to match the color of the furniture product.
| We’ll help you figure out the choice of routers for your home. Review of power tools for work and home, reviews of the tool on the website: OPilah.Ru |
Distinctive features of these fasteners are large threads, a blunt tip, a cylindrical head, and a hexagonal slot. When assembling structures, furniture hexagon screws do not require special skills or specialized equipment.
The screw tie is performed using a hex bit, a screwdriver, a special wrench, or a drill. Products designed to accommodate a Phillips screwdriver should not be used. This technology will not allow the connecting elements to be tightly tightened. As a result, the structure will become loose.
Wire
Take a piece of wire and wrap it around a self-tapping screw. Then screw it into the hole in the wood in the usual way. Since the screw will have an increased size, it will fit tightly into the expanded funnel and will not fall out during operation of the product.
Other methods can be used to compensate for the gap. For example, craftsmen often use wooden plugs, from which they cut out wedge-shaped inserts and fix them in funnels.
It’s even easier to take a larger self-tapping screw than was used before - it’s perfect for creating a new fastener. Finding a way out is not difficult: you need to choose any suitable method, show imagination and a little skill.
Welding to restore threads
In order to seal a hole on a damaged surface, welding can be used. Among the features we note the following points:
- A variety of cooking methods can be used.
- The restoration process can become more difficult if the hole is long.
- After welding the hole, cutting is carried out using a tap.
Read also: How to connect a breeze car
The process is quite simple, but the resulting turns will not be able to withstand high loads.
Fastening parts with screws
If a self-tapping screw is used to fasten two parts, pressing one part to another, then in the part (hereinafter we will call it the upper one), which will be on the side of the head, it is necessary to drill a hole of such a diameter that the screw being screwed in simply passes into it without rotation, but didn't hang out in it. We measure the diameter of the screw along with the thread using a caliper and drill a hole of that diameter. In addition, you can create a recess for the cap. Now we fold the parts the way they should be secured, and screw in the self-tapping screw in accordance with the following tips. Thus, the self-tapping screw, freely passing through one part and being fixed in another, will press the parts one to another. A common mistake is not drilling the top part or drilling with a very narrow drill. The self-tapping screw does not slide freely into such a hole. It is fixed in the upper part and cannot press one part onto another. There remains a gap between the parts, the strength and properties of the connection are greatly reduced.
Cheat sheet for the home handyman
The following tables will help you navigate when choosing the necessary fasteners.
We distinguish the product by the type of thread
Self-tapping screws vary in the frequency of turns. The small pitch allows the use of fasteners for metal parts. Screws with rare threads are designed for materials with low density. This includes: asbestos, gypsum, plastic, etc. Self-tapping screws can be classified according to their appearance as follows:
| Thread pitch | Special purpose |
| Universal screws. Designed for fastening objects made of any materials (they are the most common). | |
| Frequent, with double thread | Designed for attachment to metal profiles up to 0.9 mm thick without the use of dowels (preliminary preparation of the hole is required, they are produced with a drill at the tip, and are high cost). |
| Self-tapping screws for attaching parts made of soft materials (wood, gypsum plastic, asbestos, etc.) without the use of dowels. | |
| Medium, herringbone profile | Self-tapping screws for screwing into reinforced concrete or brick building objects by driving into a dowel. |
| Asymmetrical | Self-tapping screws for fastening elements of modern furniture made of wood, chipboard, plywood, etc. (pre-drilling a hole with a diameter of 4.5 or 7 mm, respectively, is required). |
| Alternating with notches | Self-tapping screws for attaching to reinforced concrete or brick parts of buildings without dowels (dowels), (screwed into a hole with a diameter of 6 mm and a depth of 15 mm greater than the submersible part of the screw). |
It's all in the hat
Based on the shape of the cap, you can determine the intended purpose of the self-tapping screw. The relationship between these parameters is shown in the table:
| Type of cap | Features and purpose |
| Secret | After screwing in, the cap is completely recessed into the object being fixed without a protrusion. |
| Profile - hemisphere | Firmly holds the attached part due to the increased area of the clamping cap. |
| Profile - hemisphere with a small press washer | It has a larger working surface area of the cap and a reduced height. Used when installing sheet materials. |
| Small secret | It has a small working area and a gentle transition from the cap to the threaded barrel. During installation, it is fixed both in a stationary object and in an attached part. Allows you to apply significantly more force during installation than with a conventional countersunk head. |
| Profile - hemisphere with a large press washer | It has a larger working clamping area and a lower head height. The intended purpose is to attach low-density sheet parts. |
| Hexagonal | The configuration of the head allows you to tighten the screws with less effort, achieving strong pressure on the objects being fastened. |
| Funnel-like secret with a thickening on the body of the rod | Allows you to mask the connection. Allows you to cover the cap with a decorative plastic lid. Screwed in with a specific key (4 mm). |
The fact that a lot of effort was spent on screwing it in does not indicate the titanic torment that will have to be endured if the need arises to unscrew the screw. Therefore, every time a “forever” method is recommended, it is worth thinking about the feasibility. Manufacturers offer a variety of self-tapping screws, differing in the metal from which they are made. The cost also varies. In order not to overpay, you need to give an objective assessment of the load to which the fastening unit will be subjected. If we are talking about a “nail” for a picture on a wooden wall, there is no point in spending money on expensive screws.
The screwing tool can be used both manually and electrically. Often a screwdriver is sufficient. This method will not allow you to achieve high labor productivity if we are talking about professional work and large volumes of fasteners. A familiar screwdriver is optimal for the job.
What can replace Chopik?
You can also use a wooden dowel instead of a plastic dowel. Chopik
(a dowel, visually this is not a large rod of wood) can be made independently from a piece of wood, the lead-in part is sharper, and the “body”
of the chopper
should be slightly larger than the diameter of the hole into which it is driven.
Interesting materials:
Teredo tunneling pseudo interface what is it? Teredo tunneling pseudo interface what is it? What is a resistance thermocouple? What is a thermal break in metal doors? What is a terrace? What is a liftback body type? What is catalytic cleaning type? What is the traditional type of cleaning? What type of SUV tire is it? What is the EC plug type?
Nuances of choice
When choosing a self-tapping screw for concrete, the main condition is the ability of the fastener to withstand heavy loads. To do this, you must first use special calculations already made by specialists. According to them, it is believed that for a structure whose weight exceeds 100 kilograms, dowels with a length of 150 millimeters are required. If the weight of the structure does not exceed 10 kilograms, then an element whose length is no more than 70 millimeters is suitable. Nevertheless, the selection should still be carried out taking into account the installation step of the dowels.
The weaker the material and the greater the weight taken, the longer the self-tapping screw should be. For example, for parts lighter than a kilogram, a dowel with dimensions of 3 by 16 millimeters is generally suitable. The design of the dowel head is selected depending on the appearance of the surface on which it is attached.
It is customary to leave either 70 or 100 millimeters between individual screws. This gap may vary depending on the material and specifics of the wall, as well as the size of the structure itself. It should be mentioned that the choice of hardware should also take into account the conditions of their operation. For example, a bathroom with high humidity and a dry living room require screws with different coatings. In the first case, galvanized rods or stainless steel parts will be required. In the second case, it is better to take either oxidized or phosphated black screws.
The cost of self-tapping screws for concrete is determined depending on the quality of the material used, the coating option and even the country of manufacture. For 100 pieces of dowels with dimensions of 3.5 by 16 millimeters you will need to pay from 120 to 200 rubles, and for elements measuring 4 by 25 millimeters - 170 rubles. A set of 100 hardware 7.5 by 202 millimeters will cost 1,200 rubles.
How much do wood screws cost - review of prices per 1 kg
The price for wood screws is indicated by suppliers both per piece and per kilogram. But if you need to purchase, for example, 2000 pieces of such fasteners, no one will count them. Either they will sell it in original, unopened packaging, or they will calculate it by weight. In any case, let's consider the cost according to several parameters.
| Type of self-tapping screw | Price per piece (as of June 2022), rub. | Price per kg (as of June 2022), rub. |
| Phosphated | from 1.8 | from 180 |
| Black oxidized | from 1.9 | from 195 |
| Galvanized | from 2 | from 200 |
| Yellow-passivated | from 2.1 | from 210 |
| With press washer | from 1 | from 8 |
| Galvanized capercaillie | from 4 | from 500 |
| Roofing | from 1.23 | from 220 |
| Confirmations | from 1.38 | from 150 |
As you can see, the price of such fasteners is not so high compared to the benefits and convenience that they bring when used. Moreover, even a beginner can work with them. All you have to do is choose the right one and you can get down to business!
Watch this video on YouTube
Previous Building materialsStrong flooring for every home: laminate or linoleum - which is better Next Building materialsWhat the walls of new buildings hide: modern technologies for constructing buildings made of porous brick
The screw is a self-tapping screw. Where does the confusion come from?
What is the difference between a screw and a self-tapping screw? I suggest you look into GOST 27017-86
, which gives the following definition of a screw:
As follows from a document dated 1986, the use of this type of fastener involved pre-drilling a hole and limited the material of the fastened elements to wood or plastic. For this type of screws, brass, low-carbon steels (St1, St2, St3, 10kp) or corrosion-resistant steels without galvanic coatings are used. As a fastener, the classic screw is not very popular, but even today it is still found as a cheap alternative to self-tapping screws.
The self-tapping screw is a new stage in the evolution of fasteners. Formally, it corresponds to the definition from GOST, which we cited above, but has significant design differences (shape of slot, coil, thread and tip) and is made of high-quality steels with corrosion-resistant coatings.
As the name suggests, the self-tapping screw can cut threads on its own and is used without pre-drilling holes. Self-tapping screws can handle not only wood and plastic, but also metals, concrete, brick, etc. Given the variety of fasteners, it is useful to know their sizes and classification. Below are convenient tables for each type.
Screw 1 - 4×25 GOST 1145-80
Screw with a diameter of 4 mm, a length of 25 mm, made of mild steel, without galvanic coating. The standardized marking looks like this, but in practice everything is much simpler. On the box that you take from the shelf, only the purpose of the screws and their sizes will be written.


