by Alexey | Crafts Decor Workshop Furniture Cheap Accessories | Saturday, September 23, 2017
| Follow Make-Self.net on Facebook and be the first to read our articles. |
Using the simplest tools and materials, you can give wood the most original texture of patterns and ornaments. Sometimes the most ordinary nails can turn a simple smooth board into a beautiful textured building and finishing material or piece of furniture. This list is by no means complete, but is just a starting point to start working with wood and transforming an ordinary board into an element of art. You need to pick up a hammer and a nail and use your imagination to start working with wood.
We always try to provide you with simple ways to transform your home. This material confirms this.
Now let’s look at specific examples with photos of 12 simple patterns on wood that you can make with your own hands using simple tools.
Imitation of a fresh cut of wood
This is the only way to decorate wood for which the master class participants needed a special tool - a rubber spatula with veins. Thanks to its pattern, it can erase part of the thick layer of paint applied to the item so that the pattern imitates the structure of wood. The pattern will be unique depending on how the master tilts the spatula while working.
Advice. You need to move the spatula in one uniform, confident movement. The slightest jerk will be noticeable and ruin the drawing.
“I’m delighted, I really liked everything: interesting and informative. I wanted to decorate a house in the shabby chic style, and now I know how to do it!”, one of the participants in the master class, Gulshat, admitted to us. The others were not disappointed either: the meeting really turned out to be productive and very sincere.
The next event of the “Quartblog Live” project will be a lecture by designer Olga Rozet “The use of color in interior decoration.” We invite everyone who wants to learn how to create harmonious interior solutions using knowledge about the nature of color and professional tools for working with it. You can find out more about the event here.
I wish you a creative mood and see you again!
Imitation of metal surface
Metallic paint and “contours” for applying a relief pattern are easy to find in art stores, but this is not enough to create the illusion of a metal surface. Mikhail shared a trick with the participants of the master class: the finishing touch should be the application of patina. To do this, acrylic paint of the required color (blue for gold, greenish for copper) is diluted in water, and the item is simply doused with this solution. The liquid lingers around the circuit and, when dried, leaves traces of “oxidation” on the “metallic” thing.
Tip: to make an imitation of blackened silver, paint the item black, then use a stencil and putty or thickened chalk paint to apply a pattern, paint it in a dark background color and, after everything has dried, go over the surface with a dry brush with silver or pearlescent paint. It will linger only on convex surfaces, creating the effect of old metal.
Features of working with floor coverings
Not only furniture elements, platbands and all kinds of decor can be brushed. This processing technique is often used to imitate the aging of parquet and parquet boards.
The main difficulty in working with wooden floors is the large amount of work involved. The drill is of little use here: uniformity of processing and productivity suffer. At such volumes, it is reasonable to purchase or temporarily use a brush sander. This will allow you to maintain a uniform scratch depth with the brush and then quickly sand over a large area.
For the floor, it is not recommended to show deep wood relief, otherwise the coating will get very dirty and difficult to wash. The optimal depth is 0.5–0.8 mm, so the wood on the floor will become warm and pleasantly rough, and the unnatural gloss will disappear.
How to paint wood bleached: advice from a paint shop technologist
Natural wood is again becoming in demand; it is increasingly found not only in private homes, but also in the interior of city apartments.
Wood is used to make durable, strong lumber, which perfectly helps maintain heat and optimal humidity levels in the room. But wood requires special care, which consists of processing the material and coating with paint and varnish products. In addition, painting will get rid of boring color and allow you to quickly change the design of the room. One of the trendy solutions is painting with the effect of “bleached oak” or “frost”. A specialist from our company, technologist Alexey, talks about how to paint wood bleached.
If bleached wood will be used in a Scandinavian or rustic style, then it is advisable during the staining process to create not a dense layer covering the wood, but to favorably emphasize the structure of the wood. The composition is applied twice, but in a very thin layer!
Photo 1. Bleached planken
For example, you can use Rammers Wohnraum lasur oil with wax or very good wood oils from GNature. With these products you will get a translucent finish, even if you apply two coats to achieve the whitest shade possible. You can coat it with oil-wax once, in which case the wood texture will be visible even more clearly.
Photo 2. Wohnraum-lasur
A very interesting fact about oil: absorbing well into soft layers of wood and poorly into hard ones, the oil creates a contrast of wood texture, which looks simply incredibly beautiful and natural.
Photo 3. White lining
If the task is how to paint bleached wood in a dense layer, then we recommend giving preference to water-based paint, for example, Remmers Deckfarbe. It will create a film on the material through which the structure of the wood will not be visible.
Photo 4. Deckfarbe Remmers
There is a “but” here, and we, as professionals in our field, are simply obliged to warn you about it. This “BUT” is that only knotless wood is suitable for painting in perfectly white COVERING tones, otherwise the knots will appear in a short time as ugly yellow spots.
Photo 5. Remmers insulating primer
Remember: NOT ONE INSULATING PRIMER protects against the appearance of yellow spots in the area of knots on white opaque paint.
Photo 6. Lining painted white
Is there a way out? Yes. Firstly, these are whitish glaze paints (which do not cover the texture), and secondly, these are various shades (ivory, etc.) in covering, light colors.
Photo 7. Covering white paint
Today you learned how to paint wood bleached. Do not forget that if you strive for standard quality of coating, it is better to turn to professionals. The quality of painting done manually on site is always much inferior to painting done in production using special equipment.
Photo 8. White glaze paint
In our paint shop, we work with industrial compounds from the Teknos line and give preference to an elite, varnish painting scheme. This is when the tone is set by a priming composition - a primer, and two layers of 5-10% tinted breathable varnish are applied on top, which can have different degrees of gloss, depending on your preferences.
Photo 9. White painting options
At lesobirzha.ru you can purchase a variety of paint and varnish products from well-known manufacturers at affordable prices, and at any convenient time!
Applying dyes to wood
We almost always prefer to work this way with water-soluble dyes. When the project or its parts are ready for finishing, we sand the wood as usual and wipe it with a damp cloth to raise the so-called pile. Let it dry for 24 hours and then lightly sand with 320 grit sandpaper. By removing the lint, we will prevent it from rising after applying the coloring solution. Then we dilute the dye, as shown in the photo.
Boil water, let it cool for a minute and add dye powder to obtain a concentration of 30 g/l. Let the solution cool to room temperature
Antiseptic
This material protects wood from various bacteria, fungi, mold, mosses, and lichens. Application of an antiseptic does not form a film on the surface of the wood. At the same time, the use of an antiseptic is a prerequisite for the primary processing of wood, even during interior work.
Naturally, before applying the composition, the wood must be thoroughly cleaned of old paint or varnish. Since the antiseptic has a liquid structure, it is convenient to apply it with a brush, carefully treating all the grooves.
Varnish
The most common type of wood coating. Creates the most durable high-shine finish. Disadvantage: scratches are more noticeable than on an oil-soaked surface. Easy to clean. Non-toxic, but not recommended for food preparation surfaces. It can withstand loads well not only on walls, but even on the floor. Wood under varnish can be tinted, or colored varnish can be used.
Three types of varnishes are available:
- oil based;
- water soluble;
- nitro varnishes.
A little more about varnish and stain.
Wood tinting
You can preserve the texture of wood by giving it a certain shade. This is done with various paints, including stain. Lighter woods are easier to stain, just like hardwoods.
To ensure that the paint is distributed evenly, you need to:
- sand the wood;
- wet it;
- remove lint;
- degrease.
Natural wood looks better than wood that has been stained. Exception: stain coating.
No. 2 Paint filling method
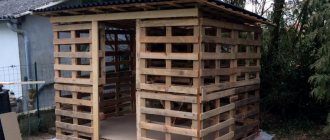
This method works best on unsanded wood with a slightly rough surface (such as a wooden fence). With its help, wood can be given a rustic look and an antique effect.
- Clean the wood with soapy water and a brush and leave to dry.
- If your paint is too rich, thin it with thinner.
- After this, pour some paint onto the wood surface, and then take a scraper and spread the paint over the wood.
On an unsanded, that is, not completely flat, wooden surface, the paint layer will not be the same everywhere. A little more paint will flow along the depressions and less on the bulges, that is, in some places the white color will be more saturated, and in others more transparent, which will create the effect of antiquity.
You can see the result of painting a wall using this method above.
Transparent finishing materials for wood
It is preferable to select transparent finishing materials for wood in order to preserve the decorative natural texture of the wood. Of course, in times of global shortages it was easier to make repairs - whatever materials were available in the store, they bought them. With the current variety of products, buyers' eyes run wild. In this article we will try to understand transparent finishing materials for wood.
Varnish is a material that forms a uniform transparent film. At the same time, the varnish itself will not necessarily be transparent; sometimes it looks like PVA glue. If the varnish is mixed with various miks (pigments), then this composition is called glaze. Oil varnishes are included in a separate group. They contain less resin and more oil, and this coating takes up to 4 days to dry.
You need to choose a varnish based on the load that the surface treated with it will experience. For flooring, it is better to buy a varnish with high wear resistance; for furniture, a varnish that can withstand medium or low loads is suitable.
Before applying varnish, the surface must be thoroughly sanded and sanded, then apply the coating along the grain with a wide brush. Usually the varnish is applied in 2-3 layers.
How to brush, stain, wax and patina wood (texturing)
Natural wood attracts the eye with its beautiful texture. The alternation of soft and hard growth rings creates an interesting pattern with bends, waves, fancy knots, cracks and wormholes. This truly creative texture was created by nature itself, and our task is only to emphasize it, reveal it, and make it tangible. all technical processes associated with this are called wood texturing.
Brushing, staining, patination and waxing techniques are used to texture wood.
Brushing , from English. Brush is a technique aimed at enhancing wood grain by combing out soft fibers. Wood has its own specific texture pattern due to the peculiarities of the growth of fibrous layers.
EVERYTHING YOU NEED FOR THIS ARTICLE IS HERE >>>
Soft fibers perfectly absorb water and coloring compounds and are easily amenable to mechanical action, in particular, combing, while hard fibers, on the contrary, protrude after combing with hard combs. Comb out soft fibers using special metal brushes.
The working part of such brushes consists of bundles of rigid corrugated wire, fixed in several rows on a wooden or plastic base with a handle (for manual combing) or clamped into a metal disk like attachments for power tools (drills, grinders, engravers) to mechanize the process.
You can buy such brushes at any construction or hardware store. After brushing, the wood pattern acquires a pronounced relief, but only to the touch. To visually emphasize the resulting texture, tinting with stains, waxes, paints and patinas is necessary.
Stain, stain or glaze is a special composition in the form of a liquid for impregnating and tinting wood.
Modern stains are mainly divided into aqueous and non-aqueous (based on organic solvents, alcohol or wax). The main difference is that water stain is easier to apply evenly to the surface and deal with smudges, but after drying it is still afraid of water.
Non-aqueous stain dries faster, but is also more difficult to apply evenly. Thanks to the presence of waxes and oils and other additives, it is able to withstand atmospheric conditions, but has a pronounced odor. For decorative interior work, water stain is the best choice.
Stains are applied to dust-free wood with a brush or cloth swab. At the same time, the composition does not form a surface film, but penetrates to a certain depth, being more intensively absorbed into the soft fibers, due to which the texture of the wood is emphasized even more.
For more intense coloring, you can successively apply several layers of stain with the obligatory drying of each layer.
Compositions for tinting wood (stains, stains, glazes) can be bought both in construction stores and in art stores.
I will give the highest quality examples of compositions (one might say my favorites)
Wood structuring equipment
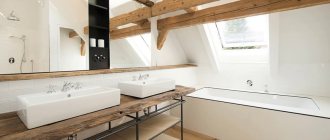
Brushed wood in a loft style bathroom interior
Brushing is the most accessible and easy-to-perform method, allowing you to quickly visually age natural material. This process can be carried out in a home workshop using a minimum of equipment.
Brushing wood with your own hands is not difficult
This is one of the few technologies that allows you to achieve excellent results using exclusively manual labor. For this you will need:
- metal brushes of varying hardness, which are used to roughly remove soft fibers from the surface of the workpiece
- sandpaper of various grits for rough sanding and final polishing
- stains and other means to give wood maximum decorativeness
- varnish for opening the product at the end of the brushing process
Strict desk with aged wood effect
Brushed wood floors look very interesting
To further simplify wood structuring work and make it significantly more productive, it can be mechanized. For this, variable speed drills or special brushing machines are used. They come with three types of flat or wide brushes: metal, polymer with abrasive, and sesal or hair brushes. By observing the order of work, with the use of mechanization, you can get impeccably executed work for various products.
Glaze
The glazing technique came into decoration from painting, and consists of applying paint in translucent layers. I didn’t have to look far for an example - a beautiful chest of drawers, painted in this style, stood right in the studio. Those gathered repeated this technique on tablets. The sequence of actions turned out to be simple: apply a base coat of paint to the item, dry it, and then work on top of it with a wet brush with a small amount of paint. Each layer should be allowed to dry so that the paint is applied in gentle layers without mixing.
Advice. Instead of water, use a special thinner - it will allow the paint to maintain its thickness and color saturation, the drawing will be transparent, but more clear.
Impregnation
This glazing composition gives the wood various properties. There are:
- antibacterial impregnation
- water-repellent composition
- impregnation providing protection against insects and rodents
- tinting impregnation
Impregnation of wood is carried out in two ways: in hot-cold baths or under pressure. At home, it is more convenient to use the first method. To do this, the wooden part is first dipped into a heated impregnation, then into a cold one. Thanks to the temperature difference, the unique properties of the material are ensured.
Brushing equipment
The procedure is considered the simplest and most accessible method of visual aging of wood at home.
It is enough to have a minimum of equipment. Even using only manual labor, you can achieve excellent results. To work you will need:
- Metal brushes of varying hardness. With their help, the primary (rough) removal of soft fibers from the treated wood is carried out.
- Sandpaper with different grain sizes. It is needed for rough cleaning after initial processing and final (final) polishing.
- To give the surface being treated maximum decorativeness, you need to prepare stain and other similar products.
- For final processing, you will need varnish, which is applied to the work surface after the brushing procedure is completed.
Power tools
All work on aging wood can be significantly simplified by mechanization. To do this, you can use either electric drills or angle grinders (grinders). To go with them, you will need to purchase wide or flat brushes of the following types - metal, polymer with an abrasive coating, sisal or hair.
Dyes for wood species: choosing options
Dyes are sold in the form of water or powder, and any dye can be dissolved in one or more solvents: water, denatured alcohol or oil (toluene or turpentine). When starting to work with dyes for the first time, buy a water-soluble extract or powder, which is characterized by ease of implementation, good penetrating properties and good resistance to fading.
Regardless of the tinting method, end grain always presents a problem because it absorbs more dye or pigment, becoming darker than the surfaces formed by the longitudinal fibers. To get the most uniform color, try using one of the 2 methods outlined below. Before tinting, sand the end grains with a lighter abrasive than other areas, or prime them with a 50:50 consistency of shellac and denatured alcohol and, after drying, lightly sand them with 220-grit sandpaper.