Wood is a favorite material among furniture makers.
After all, each piece of furniture made from natural solid wood is unique and inimitable in its own way. You don’t have to be a professional furniture maker to make a beautiful and practical chair for your home. The main thing is to choose the right materials and tools, show your imagination and stock up on free time and patience. By deciding to make chairs for your home from wood, you will fill the interior with a special atmosphere of warmth and comfort. This material combines harmoniously with glass, stone, textiles and even metal .
Current wood species
Wood is easy to machine. In particular, we are talking about sawing, drilling, planing, etc. But before you make a chair with a wooden back with your own hands, you need to decide on the type of wood from which each lumber will be made. For furniture it is recommended to use:
- Pine;
- Larch;
- Cedar;
- Oak;
- Hornbeam;
- Cedar;
- Maple;
- Ash;
- Nut;
- Pear;
- Apple tree.
Moreover, it is not necessary to choose expensive and durable oak, hornbeam, and walnut. They are luxurious for making something as humble as a chair. In addition, in addition to them, there are coniferous species that are resistant to moisture and convey a wonderful aroma. If only this breed did not have a tree with many knots. Birch and poplar should also be avoided - the first one turns black over time, and the second one quickly rots and turns into dust.
Types of chairs
There are many types of chairs. We will look at two of them: a kitchen chair for dining and a living room option. They both have a similar shape, but the dining chair has a narrower seat.
The following materials are used to produce chairs:
- Metal blanks;
- Wood;
- Polyamides;
- Composite materials.
There are special versions of chairs made of glass or rare stone. Such designs have, first of all, decorative value.
Of the above materials, the most practical is wood - it is easy to process, has high strength characteristics and looks aesthetically pleasing.
Emphasis on quality lumber
It is convenient to assemble chairs from ready-made parts. But if the latter are not available, then they have to be made from lumber in the form of bars and boards. The corresponding workpieces can be called high-quality if they lack:
- Knots;
- spots;
- Dents and holes;
- Roughness.
If unevenness can be smoothed out and dents can be repaired, then with knots things are more complicated. The fact is that they contribute to a break in the structure of the array. Therefore, when choosing furniture, the target audience should take a closer look at the legs and the supporting frame as a whole. The same applies to the choice of lumber for making thematic elements.
Assembly order
The chair is assembled in the following sequence:
- The front part of the chair is assembled from the front legs, transverse drawer and lower jumper (if any).
- The back is assembled from the rear legs and all transverse parts.
- Tsars and longitudinal jumpers are inserted into the grooves on the front surface of the backrest, and a part of the chair called the apron is assembled.
- The apron connects to the front.
- A seat is mounted to the finished frame.
The frame is first assembled dry, the correct joining of all elements is checked, oblique diagonals are measured, and the absence of distortions is checked. If necessary, the parts are adjusted, and only after that the assembly is carried out in the same sequence with the gluing of tenons, grooves or tongues. If you use a filler mill, which ensures the most precise fit of all parts, you can do without pre-assembly. All frame parts are connected without metal fasteners, and only the seat is fastened with self-tapping screws, which are screwed in from the drawer side.
Chair design: general idea
At first glance, a wooden chair seems like a simple piece of furniture. However, looking at the drawings of a wooden chair, a combination of different elements becomes clear:
- Seat – allows you to sit down;
- Backrest – allows you to lean back and fix your back in a comfortable position;
- Rear crossbar - strengthens the load-bearing parts of the backrest and prevents the back from falling back;
- Tsargi - strengthen the fastening of the supporting legs on the sides;
- Side crossbars – help secure the load-bearing legs from above;
- Legs – raise the product above the floor to a certain level.
For more comfortable sitting, the finished product can be upholstered and filled with filling. Moreover, the upholstery, depending on its composition, definitely contributes to the style of the chair. The upholstery is made of textile or leather. The filler is foam rubber, synthetic fluff, and fabric scraps.
The back may have one or more crossbars. In this case, the crossbars are arranged lengthwise or crosswise.
It is recommended to supplement the legs with soft liners at the bottom. The latter prevent the formation of dents on the flooring from the load of the legs and chair, respectively.
Note!
- DIY furniture made from pallets (140 photos) - step-by-step master class with diagrams and drawings, design ideas
- DIY coffee table - manufacturing guide with a full description of the steps, choice of materials (120 photo ideas)
Do-it-yourself laundry basket (130 photo ideas): step-by-step master class for making it yourself, choice of materials, design options
Let's sum it up
Despite the apparent massiveness of the structure, making a chair with armrests is not difficult, even in the absence of special equipment. The manufacturing technology of the structure is very simple - just read the instructions carefully, look at photographs of the finished products and understand how the parts are connected to each other. Please note that it is important to make the strongest possible connections so that the recliner is reliable and will delight you and your guests for a long time.
Lately, you can often see homemade interior items made from pallets when visiting someone. These are structures used to transport goods. It turns out that it is not so difficult to make a sofa from pallets (pallets) with your own hands, and in terms of its quality it can be even better than what you can buy in a store.
Type of chair design
Chairs differ from chair to chair, even if thematic products are made from the same type of lumber. The variety of designs contributes to the corresponding assortment. The problem of how to make a chair out of wood with your own hands must be solved, guided by the characteristics of the future project, as well as the factors that allow the chair to be special:
- Strength - type of wood, number of crossbars, quality of fastening, thickness of lumber;
- Functionality – the form of the model and its ability to be transformed (specifically, folding products should be highlighted);
- Convenience – product dimensions, back height, upholstery;
- Style – breed, upholstery, painting, shape.
Low, high, soft, dark - a wooden chair can be made in different types. The main thing is that the corresponding event welcomes an independent approach (without the help of joiners and carpenters).
Advantages and disadvantages of a semi-chair
Chairs with armrests are not as widespread as standard products - this is due to some disadvantages in their use. But such furniture has plenty of advantages - from an unusual aesthetic appearance to the ability to sit comfortably. Let's take a closer look at the pros and cons.
The main advantages of chairs with armrests:
- they have an unusual, noble appearance, and in any type of room, the semi-chairs will look much more respectable than any standard chairs;
- comfortable seat - these chairs are best suited for events where you have to spend several hours in a sitting position.
It is worth noting that half-chairs are best suited for spacious rooms of any type. This could be a living room or a children's room, a dining room or a spacious kitchen. But, even trying to provide comfort for yourself and your household, you should not put such furniture in a small room. A large design takes up more free space, and the inconvenience of cluttering furniture will be much greater than the pleasure of using it.
Half chairs are perfect for large rooms
However, even if the size of the room allows you to put chairs with armrests in it, you should understand that these pieces of furniture are not ideal for everyone. Among the design disadvantages, the following can be noted:
- a half-chair chair cannot be appreciated by people with a large weight, because it is designed in such a way that the armrests limit the seat area (if one of your guests is curvy, it would not be entirely ethical to offer such a chair to the person);
- both when purchasing and when making it yourself, the cost of the chair will be slightly higher - this is explained by the fact that you will have to spend more materials, especially when making a soft seat.
Making a wooden chair with comfortable armrests
Optimal sizes
The normal height of a chair seat is 75-80 cm above floor level. The seat itself has an area of about 30x30 cm.
The height of the backrest is calculated depending on the height of the user. However, it should only support 1/2 or 2/3 of the back length.
If you need to make a children's chair with your own hands, then the height of the product is increased so that the child can freely hold his elbows above the table top. The exception is the youngest children. A transformable high chair with an integrated seat will suit them. The latter should be located above the floor at a height of 45-50 cm. Moreover, crossbars for the back and legs are required.
Preparing the circuit
First you need to decide on the type of chairs that will need to be made. It is desirable that they be the same. It's more beautiful, more convenient and simpler. Then it is recommended to draw several sketches from which to choose the best one. Then you can proceed to drawing up drawings.
It is necessary to take into account a number of points related to size and shape. The optimal parameters for the seat are a platform of 40x40 cm. The distance from the ground should be about 40-42 cm. The back is straight, 45 cm high, but can be raised up to 70 cm. In this case, you will have to equip an orthopedic headrest.
It is better to connect individual parts using the tongue-and-groove system, but this is quite difficult, so it is better to use corners.
For a solid base, the support can be made in the form of legs with transverse strapping. For use on the ground, it is better to make a platform, frame or runners. In this case, the contact areas should be covered with sleeves, steel or plastic overlays.
Required Tools
One copy of a real wooden chair, i.e. seats made from solid wood are relatively expensive - 6,000-20,000 rubles. The cost is affected by the brand and the complexity of manufacturing the structure.
Note!
Do-it-yourself illuminated mirror - step-by-step master class on how to make it yourself, photos of types of lighting
- DIY flower stand - TOP 100 photos of stand options, detailed instructions, diagrams and drawings from the masters
Do-it-yourself furniture restoration: restoration methods, step-by-step master class, necessary tools and materials
It is easier for the target audience to make a wooden chair themselves than to pay an average salary for the entire furniture set. The question is whether the creator has the necessary tools:
- Measuring objects - ruler, square, meter, level;
- Fixation items – vices, clamps;
- Impact devices – hammer, mallet;
- Items for cutting – jigsaw, hand saw for wood;
- Smoothing accessories – electric planer, grinder, emery machine;
- Devices for drilling and fastening – drill, screwdriver;
- Painting accessories – brushes, roller, containers.
Additionally, you will need a workbench and consumables - sandpaper, screws, choppers, wood glue.
Preparing for work
There may be a lot of improvised items on the farm, left over after construction, renovation, donated by neighbors and relatives. You can make a garden chair from the following base:
Tree. The material is always on sale, it is easy to process with household tools and give it a wide variety of shapes. With regular technological treatment, wooden garden chairs can last for decades.
Metal. The materials used are profile and round pipes made of coated black iron, aluminum and stainless steel. The metal frame is highly durable, but working with such material is much more difficult.
You should prepare the following tools:
- level, tape measure, pencil;
- plane, chisel, hammer, saw;
- scissors;
- screwdrivers, wrenches;
- paint brush.
List of required materials:
- timber and boards, waterproof plywood;
- self-tapping screws, bolts and nuts;
- wood glue;
- paint and varnish compositions, impregnation, antiseptic;
- sandpaper.
To work, you need a flat area and good weather. The best place is in the gazebo, on the terrace or under a canopy. If you have to work indoors, you need to cover the interior elements with dust film and put cardboard on the floor. For your own protection, you should prepare a respirator, gloves, mounting goggles or a visor.
Relevance of painting
Many people are in a hurry to paint a wooden chair, but this is not necessary. The fact is that the chemical composition only spoils the naturalness of the forest. The latter ceases to emit a pleasant aroma.
Another thing is a worn-out model. It can definitely be painted with quick-drying and hygienic water-based silicone paint marked “For wood”.
Decoration
A folding chair can be beautifully decorated to give it a personalized look. Upholstery fabric is suitable as finishing. To make the seat and/or back soft, use foam rubber of small height (4-5 cm) for filling, and stretch the facing fabric on top. A tapestry or any other dense material will do. Fold the fabric along the edges and carefully secure with staples using a stapler.
If you plan to use the folding chair regularly, you can make the seat and back with soft upholstery.
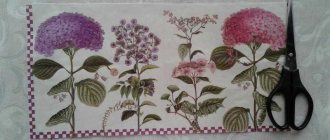
A chair you made yourself can be decorated using the decoupage technique. Take old wallpaper or pieces of tapestry and paste them onto the slats of the seat and backrest. The plant (floral) pattern in fairly bright shades looks interesting. The legs and supports around the perimeter can be painted in a single color, similar in shade to the decor.
A folding chair can be made with either a rectangular or a rounded back.
The easiest way to decorate is to apply a pattern to the surface of the seat and backrest. To do this, use durable paints that do not wash off with water.
For variety, you can decorate the back with carvings if you choose the option with a solid board. A chair coated with matte varnish with a woody tint looks good.
For manufacturing, it is best to prepare a drawing with accurate calculations.
Photo of a homemade wooden chair
Cut out the blanks for the back parts
1. Saw out the bottom crossbar from the back (Fig. 4), but do not make bevels on its upper edge yet. Mark the positions of the four sockets.
2. Cut out the top crossbar D of the backrest (Fig. 5) with an allowance of 10 mm in length. Make two copies of the top rail template. Glue one copy to the bottom edge, but don't cut out the curved shape yet.
3. For the middle board E and the side bars F of the backrest, make a blank measuring 13 x 178 x 533 mm (Fig. 6). You will saw off the side pieces later after cutting the tenons.