Scraps and remnants of various fabrics are not garbage, but a real treasure in the hands of a needlewoman, which can be turned into amazingly beautiful and useful things, for example, rugs for a nursery, hallway or bathroom. There are so many ways to make rugs and rugs that you don’t even need to know how to sew and knit, you just need to choose the most convenient option for yourself.
DIY rugs made from scraps of fabric
After getting acquainted with the methods of making chair covers and sewing rugs, think about whether it is worth throwing away old T-shirts, jeans, towels, woolen sweaters and scarves. After all, all these things, even if they are shabby, with holes, faded in the sun, can be given a second life.
Patchwork fantasies
Bright rainbow rug
Benefits of homemade rugs
Firstly, it saves money, which can be spent later on more useful or pleasant purchases.
Secondly, this is the release of rag debris from apartments and attics, from things that the owners definitely won’t need, and the Russian tradition of “what if it comes in handy” doesn’t allow throwing it all away.
Thirdly, this calm activity will help calm the nerves of yourself and those around you.
Fourthly, this is the creation of a charming view of the room, the pleasure of the completed task and the praise of relatives.
Woven carpets
Such carpets look more solid, reminiscent of durable mats. Making them will be a little more difficult, but only at first. They are made from thick threads or the same strips of fabric.
First you will have to make a small loom to create a masterpiece. And it’s not at all necessary to order it in stores. The machine for creating a woven carpet will be a wooden frame, along the top and bottom of which nails are nailed. The size of the frame will determine the dimensions of the future creation. If desired, several parts can be combined into one large carpet.
The technology for creating floor decorations is quite simple and does not require much time. Strips of fabric are attached to nails at the top and bottom, creating a rag fabric. The closer the nails are placed, the stronger the final creation will be.
All that remains is to thread horizontal stripes in the form of a braid between the vertical ribbons, as they did in labor lessons in elementary school, and secure them to the outer strips.
When the carpet is ready, carefully remove the nails and place the rug in the chosen place.
Step-by-step instructions for various techniques
In order to create a beautiful rug that you won’t be ashamed to show to guests, you need to accurately follow the instructions corresponding to each of the implementation methods.
Soft volumetric rug
To make a product that is perfect for a children's room, you must first prepare the following materials and tools:
- Small scraps cut from outdated clothing.
- Scissors.
- Special rubber mat with ordered holes.
- A hook or small tweezers.
Step-by-step production:
- The prepared fabric is cut into strips of equal width and short length.
- Using a hook (tweezers), the strips must be inserted into the holes.
- Tie them in a simple single knot.
- Using the same scheme, close all existing holes with fabric strips.
Everything is very simple and fast!
"Granny's rug"
This option is more popular than others. It can be found in many village houses. But many people want to give city apartments a little zest and real comfort. This product can be made without the help of your grandmother. To do this you will need:
- Crochet hook in volume from 7 to 10 mm.
- Scissors.
- Waste fabric in various colors.
Manufacturing:
- The fabric is cut into thin strips. In this case, efforts are not necessary, since evenness does not play a special role. Thanks to some unevenness in the cuts, the rug will acquire a peculiar volume.
- The strips are tied alternately into one continuous rope. The sequence of colors depends on the idea of the future product. Tying is done using a regular double knot, which is pulled as tight as possible to make it easier to hide.
- At the end point of the finished rope, a small loop is made, and from it five loops are knitted in the form of a chain. The very last loop must be connected to the very first. This is how the initial row is formed.
- The second row is done a little differently. From the first row, a convex loop remains, into which the working tool is inserted and then also grabs the one closest to it in a counterclockwise direction.
- So there are two loops on the hook, to which the free thread is also captured using the hook. The thread must be pulled through these loops. This creates the next loop.
- The entire row is knitted according to the same pattern until the very end.
- This pattern should be repeated from the very beginning until the entire rug is completed.
- A circular connection is made as needed to introduce a specific color. The result should be a product with multi-colored even circles.
- Sequential is performed by preliminary fastening of a homogeneous knitting thread. Each type of fabric is attached in the sequence intended by the manufacturer. The result is a rug with a constantly repeating pattern.
- A chaotic connection occurs with the introduction of various tissues at random. The result is a bright product with absolutely illegible rows of knitting.
Rug made of braids
If it is impossible to use a knitting tool such as a crochet hook, you can use a simpler method of making a product from scraps. To do this you will need:
- Fabric in three colors.
- Needle and thread or glue.
Work progress:
- The fabric is carefully cut into strips of the same size.
- Stripes of three colors are woven into a standard braid.
- The braids must be glued or sewn together.
- A solid long braid is curled in a circular direction. Here the braid should also be secured with a needle and thread. You can also use glue for these purposes.
Braided rug
A rather original way of weaving is to make products using a hula hoop. This technique is quite simple. You must first prepare some elements that will be needed during the work process:
- Hula Hup.
- Many multi-colored thin strips of fabric.
- Scissors.
The weaving technology is incredibly simple:
- First of all, with the help of stripes, a kind of web is created on the hoop.
- Next, the strips are threaded into this web in the center of the circle with a snake.
- When one of the stripes goes through a full circle, you need to tie it with a neat knot.
- All other rows are performed according to the same pattern, gradually rising to the edges of the hoop.
You can create a beautiful rug using various methods and many different materials at hand.
What else to read on the topic?
Woven round carpets
Unusual round mats can be made using a regular gymnastics hoop. To begin with, the opposite parts of the hoop are connected with strips of fabric, trying to place them as close to each other as possible. Then, from the center of the circle, they begin to weave a braid, passing ribbons first along the top of the strips, then under them. If necessary, add vertical stripes.
The resulting round carpets can be combined into one whole or used individually.
Preparation of flaps
Depending on the chosen technique for making the rug, scraps of fabric of different sizes and shapes may be required. It is better to select and cut the required amount in advance so as not to be distracted while working.
Preparing long strips of fabric for knitting or weaving a product can cause some difficulties: sewing them together is a long and tedious job. And if you tie them in knots, the rug will turn out rough and sloppy. But there are ways to avoid this.
Cutting continuous tape
This method is used when preparing fabric strips from old clothes: T-shirts, turtlenecks, T-shirts and even tights.
Step 1.
We cut off the rough bottom seam, the cuff of the sleeve or the toe part of the tights.
For a T-shirt or turtleneck, cut off the top part right below the armholes. Trimming seams
Step 2.
Place the product on a flat surface with the side seam facing you and cut it into strips of the required width, without cutting a couple of centimeters to the opposite seam.
Cutting strips
Step 3.
Thus, we cut the entire workpiece into fringe.
Cutting the workpiece
Step 4.
We straighten the workpiece so that we can see the entire uncut part, and cut it not in a straight line, but at an angle, directing the scissors from one slot to the adjacent one on the other side of the product.
Cutting through the fabric
As a result, we get a closed ring, which to obtain a tape you just need to cut across one of the seams.
Blank for making a rug Blanks can be wound into balls
Connection without node
If the length of the tape is not enough or you need to connect many short pieces with each other, the simple technique shown below will help you do this.
| Image | Description |
| Step 1 | We cut small holes at the ends of adjacent strips that need to be connected. |
| Place the strips on top of each other, aligning the slots. |
| Step 3 | Pass the second end of the top strip through the slot from below and pull the entire strip through it. |
| Step 4 | Tighten the connection. If necessary, repeat these steps to further lengthen the tape. |
Advice. If scraps of fabrics of different thicknesses and densities are used, then thinner ones should be cut into strips of greater width to even out the thickness of the weaving.
Braided carpets
Even a novice needlewoman can weave a braid from three strips of fabric. Terry fabrics are best suited for creating such a rug. They will be able to maintain their comfort and softness even when folded.
To create a pleasant creation to decorate the floor, you will need ribbons from bathrobes, towels, and sheets. The individual pieces are connected into long ribbons, which are then used to weave a regular braid.
You can lay the resulting long braid in a circle, oval, rectangle or square. To add density, individual turns are joined together by hand or using a sewing machine.
Basic manufacturing technologies
Electric floor heating mat
On the Internet you can see a huge number of products, which ultimately makes the choice very difficult. In order to simplify the search, it is worth dividing all products according to the main manufacturing methods:
- Sewing. The simplest method, but when using it, there is a need for additional tools, such as a sewing machine. With the help of such a very ordinary home device, you can produce a very beautiful and high-quality rug in a short period of time.
- Weaving. It will require perseverance, time and patience. But the result is amazing. To bring it to reality you will need the simplest loom.
- Crocheted. Knitting needles are generally not used for weaving such products, since they cannot bear such a load. But the hook is ideal because the structure is solid and durable.
- Knitting on a special basis. Rugs knitted using this technique will look perfect in any interior, as the result is soft and has an aesthetic appearance. This option will require the purchase of a special base, but it is worth noting that it is inexpensive.
You can clearly see the work process in the following video:
Pompom carpet
If you have a lot of yarn lying around the house, you can make a soft and fluffy rug from pompoms. To do this, you will need a construction mesh or a piece of fabric as a base and many pom-poms of one or more colors.
You can make whole pictures out of pompoms that kids will love. Plain rugs are more suitable for the bedroom.
Simple schemes, complex schemes - how not to get confused
There are many patterns and instructions for making rugs, both simple and complex, designed for craftswomen of any level. The rug can be knitted or wicker, round or square, colorful or plain - it all depends on your imagination.
Knitted rugs are especially beautiful. Even if you are far from a crochet expert, your skills will probably be enough. All you need is a large hook, and, of course, a knitting pattern. The simplest pattern is round, when you start knitting from the center, gradually increasing the size of the future rug.
If you want to get a unique product, then combine the prepared yarn by color. The more colors you use, the brighter your rug will become. And also remember - there are never too many air loops, and do not neglect them in order to achieve openwork and airiness. If something goes wrong during the knitting process, you can always correct the shape of the rug with simple stitches. And double crochets should be knitted when you increase the size of your creation.
Making a crocheted rug from old things is a very exciting activity, and most importantly, you can be sure that your rug will undoubtedly be unique and exclusive.
Patchwork carpets
The technique of using scraps has also found its application in home carpet weaving. Only you will have to select more patchwork scraps.
Cute rugs can consist of one piece or have several parts separated by a decorative cord. Large patches can be sewn in the most unusual way, imitating even tiles, and rugs in the shape of flowers will beautifully fill a child’s room, reminiscent of summer.
Experienced craftswomen even manage to sew entire puzzles that children will definitely enjoy putting together. To add volume, you can put a layer of padding polyester or cotton wool inside.
What interior elements can be made using the patchwork technique?
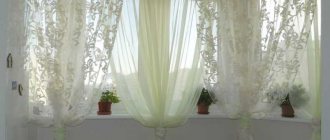
Almost anything: these are blankets, bedspreads, pillows, curtains, upholstery for upholstered furniture, wall panels, wallpaper, rugs and even tiles in the bathroom, which may also not be quite ordinary.
Decorative pillows in patchwork style in the interior
Patchwork style day bed
Bathroom tiles in patchwork style
Bathroom tiles in patchwork style
Patchwork products in the bedroom interior
It should be noted here that this style is characterized by an abundance of bright colors and colorful patterns, so such furniture itself immediately becomes the center of attention in the room. This leads to one small rule: there should not be too much decor made in the patchwork style in the interior, otherwise the result will be complete bad taste, colorful and intrusive, looking like a dressed-up gypsy. Let it be just a few elements, for example, a sofa and a rug in patches, and nothing more.
Furniture and other interior items in patchwork style
Patchwork style chair
There are times when people are embarrassed to decorate the living room with shreds, expecting ridicule or disapproval from loved ones and household members. But if this style is close to your spirit, then start small, make it yourself or order from the craftsmen a pot holder, curtains for the kitchen, a tablecloth, a pillow for the kitchen seating area, cover the walls with wallpaper in the patchwork style or simply lay tiles on the working kitchen apron in the same style.
Patchwork in the interior photo
Patchwork in the interior photo
Patchwork in the interior photo
Wallpaper in patchwork style
Let the cheerful patchwork please the eye and lift the mood of the residents of the house. And if you like the execution of this wonderful style, then you can move to other rooms, for example, to the bedroom.
There is generally a place for both experienced and novice designers to roam. A bedroom in a patchwork style looks great and, most importantly, cozy. Judge for yourself: there is a patchwork rug on the floor, a blanket or blanket made of scraps on the sofa, as well as carelessly scattered pillows made of scraps. If this is not enough, then you can hang a patchwork panel on the wall or make a partition from fabric made in patchwork style. The main thing is to maintain a single color direction, but otherwise there are no restrictions.
Patchwork style blanket in the bedroom interior
Patchwork style bed linen in the bedroom interior
Patchwork style bedroom
Patchwork corners
Charming patchwork corners will help create the most unusual flower on the floor. To do this, the fabric is folded into corners, which are attached to each other in an expanding circle. It is better to sew such a rug on a machine; manually such an undertaking will take too much time, and you can easily skew the whole work.
In addition to right angles, the fabric can be folded into a soft semicircle or light folds, as for kanzashi flowers. True, you won’t even want to get up on the last mat. He's very handsome.
Required tools and materials
Each technique requires specific tools. These can be knitting needles, a crochet hook, very thick cardboard, and so on. Scissors are a tool that should always be present
It is important that they are of high quality and sharp, as this will make the work much easier.
When choosing a material, you should follow several rules:
- The width of the fabric strips used to weave one carpet can be different, it all depends on the desired result.
- It is desirable that the mass of the fabric be approximately the same. If there are significant differences, you can compensate for this by the size of the stripes.
- You should not combine cotton and wool in one carpet, as this will not lead to a decent result. Too different structure.
- It is most convenient to weave rugs from knitted products.
"Stone" rug
Despite its name, this flooring is striking in its softness. To create a custom carpet, you will need to make many knots with soft filling inside. The knots are sewn to the base, creating a unique carpet, most reminiscent of sea pebbles or a garden path.
This was only part of the ideas for making a home carpet. Photos of handmade rugs will show a variety of options for making this essential item in any home.
Patchwork floor in the interior
A colorful patchwork rug or bedside rug will enliven even the most drab and featureless interior. To create a patchwork style carpet, it is better to use thick fabric or sew light patches onto a fabric base. You can use old clothes - coats, jeans and woolen items. By the way, if you collect old rugs and carpets from friends and acquaintances, you can use the cut-up scraps to sew a new carpet using the patchwork technique!
Manufacturers of ceramic floor tiles also often use the patchwork theme in their collections. You can even create a patchwork-like pattern yourself from assorted tiles or pieces of multi-colored linoleum.